Author: Jim Stephenson

  • Single Channel vs. Dual Channel vs. Quad Channel Memory

    Single Channel vs. Dual Channel vs. Quad Channel Memory

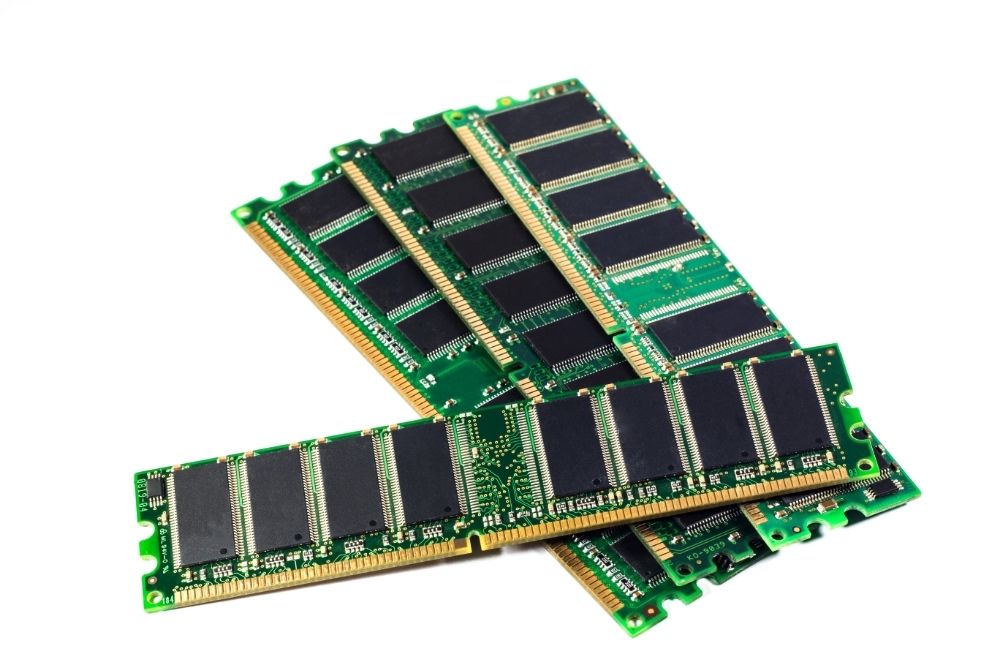
    When it comes to building your PC for the first time, you need to decide whether you are opting for a single stick of RAM or two sticks of RAM with the same capacity as one stick.

    It’s a choice that leaves many first-time builders and gamers scratching their heads, unsure what they should do and which is the better option. 

    And there’s much debate about this. Most users will say two sticks of RAM is best, allowing you to utilize the benefits of dual channel memory, but are they right? And how does it relate to gaming? Are you going to notice a big difference in performance? And what on earth is quad channel configurations?

    Are these just some of the questions that keep you up at night, wondering how you should approach your PC build?

    Well, you aren’t alone! And we know just how hard these questions can be to answer, which is why we are here today to lend a helping hand! 

    We took to the games, ran some tests, and here with results that can help you make your decision! Keep reading to find out all you need to know about single and dual channel memory to help make your decision today!

    What does Single, Dual, and Quad Channel Mean?

    For those new to the PC world or just a little unsure, let’s have a quick recap! If your PC has one stick of RAM, then it’s a single channel configuration.

    Two stocks of RAM are dual-channel configurations, allowing you to double your RAM in some cases or split the capacity over two spaces.

    Four sticks of memory is a quad channel configuration, depending on if your CPU and motherboard can support quad channel memory (you can check the product specification of your CPU and motherboard for this information). 

    You can also run three sticks of memory, but it’s hard to come by a motherboard with a triple channel configuration.

    In most cases, installing three RAM sticks allows you to utilize two of the sticks as a dual channel and the remaining stick as a single channel configuration. 

    So what should you choose? Running two or four lower capacity memory sticks as dual or quad channel configurations (if your computer build supports this) offers the same capacity as a larger stick of RAM but doubles or quadruples the amount of memory bandwidth available. 

    Adding a second or fourth stick of RAM provides you with a parallel channel that can be accessed simultaneously as the first stick of RAM.

    Commonly, people think adding this and increasing the available memory bandwidth; your system will perform better. 

    But is that true? Let’s find out! 

    Single Channel vs. Dual Channel Memory 

    To find out which configuration offered the best performance, we took two kits of DDR4 3200MHz RAM and tested them on a range of common memory configurations available.

    One kit was a 4x4GB kit and the other 4x8GB, which we were able to test in the following configurations: 

    1. 8GB Single Channel configuration
    2. 8GB Dual Channel configuration
    3. 16GB Dual Channel (two sticks) 
    4. 16GB Dual Channel (four sticks)

    We ran some of the most popular games, such as Grand Theft Auto V, Dirt 4, Middle Earth: Shadow of War, and Battlefront II. We used an i7 processor, a GTX 1060, and a 1920 x1200 monitor to run our tests too. Check out our results below! 

    It’s worth noting that the i7 processor we used does not support quad-channel memory; instead, it only allows for dual channel configurations.

    The slight error we made here means our results aren’t entirely accurate when comparing dual channel and quad channel memory. We know, we are just as annoyed as you are! 

    But that doesn’t mean our results aren’t helpful. Instead, use them to look at single channel vs. dual channels performance and the differences between running four sticks of RAM as dual channel and two sticks of the same capacity as dual channel. 

    The Test Results and Analysis 

    So, what did we find? Well, across all games tested, there was no significant difference between single and dual channel memory and how they performed.

    As we mentioned earlier, we made a slight boo-boo, meaning that the 16GB quad and 16GB dual results should make no difference.

    There didn’t appear to be a performance boost when running four sticks of 4GB RAM compared to two sticks of 8GB of RAM. 

    We saw that single channel memory configuration had a far higher CPU usage than dual channel configurations. In some tests, it was between 10-25% higher than dual channel configurations! Why does this happen?

    We concluded that the extra memory bus available in dual and quad channel configurations takes some of the workloads and pressure from the CPU.

    We might not be right, but from our results and assessing our PC, it’s the conclusion that we have come to. 

    So if there is a little difference in performance, what does it mean for the budget-friendly PCs? There could be a noticeable performance drop when running a single channel compared to dual or quad channel configurations.

    But we assume that the performance difference would be minimal, especially for first-time builders and gamers. 

    What can we take from these results, then? It’s clear that there is little difference between single channel and dual channel configurations in terms of gaming performance.

    There was a difference in CPU usage, which could put your PC under some pressure if you were to run high-performance games frequently.

    When your CPU is under this kind of pressure, and its usage is upped, you might notice more noise or heat, and you should consider your cooling system and upgrading this where necessary to combat it. 

    However, we would say that’s only essential for high-performance games or noticing that your PC is running louder and hotter than normal.

    While there is slightly more performance from the dual channel and quad channel setups, it’s not entirely necessary; from our results and what others seem to say online, there’s little gaming performance difference between these RAM configurations. 

    Should I stick with Single Channel Memory?

    After those results, you might be wondering, should I not just stick with single channel memory? After all, if there is little performance difference, will you feel the benefits of dual or quad channel memory?

    Well, in terms of gaming, you don’t necessarily need a dual or quad channel configuration. You can use a single stick of RAM and enjoy your games without any noticeable performance difference. 

    But that doesn’t mean you should rule out dual channel configurations! There are some instances where it makes sense to opt for a dual channel configuration. Let’s look at some of those cases now to help you decide if a dual channel configuration is the best option for you. 

    Dual kits can be cheaper. 

    Sometimes, especially when shopping in the sales. Dual kits of RAM can be cheaper than a single stick! In these cases, it’s best to save yourself some money and have the dual kit of RAM!

    It’s not often that we see dual kits cheaper than single kits, but when there are so many sales that run across the year, you never know when you are going to pick up a bargain. If you’re on a tight budget and still want to acquire monitors under $100, then go for dual kits.

    It’s best to keep your eye out for any sales or offers and check them frequently to see if there’s an offer that interests you, especially if you are building your first PC or updating one.

    When looking for RAM (or any PC component), always consider your budget, and remember to stick to it as best as possible. Different PC cases can also affect your decision on how big your RAM kits can be.

    Along with your budget, consider how many slots your motherboard has to accommodate the RAM. You should also consider the size of the RAM when looking at your budget.

    If you can only afford 8GB of RAM, for example, and your motherboard only has two memory slots, it might be best to opt for a single 8GB stick of RAm compared to two 4GB sticks of RAM.

    Why? Well, when the time comes for you to upgrade your system to 16GB of RAM, all you need to do is grab another 8GB stick of RAM.

    Had you opted for two 4GB sticks, then you would need to buy an entirely new set of RAM, costing you more money later down the line!

    If you’re going to choose 4 sticks of RAM vs 2 sticks, then be ready to shell out a lot of money to upgrade.

    What about aesthetic purposes? 

    If the aesthetics and appearance of your PC are important to you, then you might want to grab a dual or quad kit instead of a single stick of RAM. A single stick of RAM on a motherboard with four DIMM slots won’t look as clean as two or four sticks of RAM. 

    How your PC looks isn’t important to everyone, but if you can see your ports or have a PC case with a glass panel, then you might want a cleaner and more appealing look than you currently have. In these cases, if the price is right, a dual or quad kit could be a good option to consider. 

    If the price is right or the difference between kits is minimal and offers the same capacity of RAM, then filling up your DIMM slots with RAM could be a good idea.

    Remember, not everyone considers the appearance of their PC to be of importance, so don’t feel like you need to do this if it doesn’t matter to you. 

    What about in professional settings? 

    While we didn’t run those tests today, they are certain factors that should be considered! Other tests we have seen show a larger performance difference between single channel and dual channel memory when used in professional applications.

    Design, editing, and tasks that use a great deal of CPU power will benefit from more RAM or dual channel configurations where possible. 

    If your gaming PC is also using similar programs, you might want to consider a multi-channel memory configuration. It should give you the boost in performance that you need, without causing too much trouble for your CPU and its performance! 

    Final Thoughts 

    And just like that, we have come to the end of our memory journey today! As you can see, there is little difference between single channel and dual channel RAM configurations.

    While a dual channel configuration can boost your performance, the slight boost doesn’t always mean that it’s worth the higher cost or taking up additional slots on your PC. 

    If your PC is just for gaming, then you are unlikely to notice a difference between a single and dual channel configuration, and we recommend that you go for the one that’s best for your budget.

    Remember that your CPU usage might be a little higher, and you should consider any implications of this before making your decision. 

    There are, of course, other reasons to choose dual or quad channel RAM, as we mentioned earlier, and it’s worth considering these too before making your final decision.

    Weigh up all your options and the factors we have mentioned today before making your final decision. 

    Remember to set your budget and stick to it where possible to find the best RAM configuration for you! Before you go today, be sure to check our FAQ section out below to get any remaining questions answered! 

    Frequently Asked Questions 

    Get your last-minute queries answered here!

    Are there more memory channels than 4? 

    Yes! You can have six or eight memory channels available, depending on the PC build, offering you plenty of space to add as much RAM as you need!

    However, these setups aren’t very common.You usually can’t just purchase them, and they need to be specifically ordered for use. In most cases, you won’t need the extra memory channels unless you need a lot of RAM to run certain programs. 

    It’s best to strongly consider all your options before specially ordering these extra memory channels, as they can be expensive! 

    What does RAM do? 

    RAM refers to memory and the amount of data that can be quickly accessed when your PC is being used. It’s different from the storage space on your computer, where files, photos, and programs are stored. So what’s the difference? 

    Your RAM’s job is to take care of data that needs to be accessed quickly. Think about playing an online game like World of Warcraft.

    There’s a rapid interchange of data when you play between your computer and the game’s server. Your RAM takes care of this, storing the data that needs to be accessed quickly and allows you to play the game with no hiccups. 

    RAM also aids your computer outside of gaming too. It helps keep several programs running at the same time and multiple applications!

    A bigger RAM will allow you to do this with ease, making your PC run smoothly and should prevent any lagging or crashes.

    If your PC is struggling to run multiple programs, or you find that it crashes a lot, you might not have enough RAM to support your PC and its needs. 

    How much RAM do I need?

    The short answer is: it depends. In most cases, 8GB of RAM will suffice and offer plenty of space and power for gaming.

    However, light gamers or first-time PC builders might be able to get away with 4GB of RAM. You might find that 4GB is more than enough initially, especially if you are on a budget and it’s all you can afford. 

    Remember that RAM isn’t responsible for everything, and the power of your CPU and motherboard will also determine the performance of your PC.

    For more serious gamers or those looking to run more powerful programs and applications, you might want to consider 16GB of RAM. This doesn’t need to be done initially if your budget doesn’t allow it. 

    We recommend starting with a single stick of 8GB of RAM, leaving you with space to double your RAM easily if need be, or your budget allows for an upgrade! 

  • Best $400 Gaming PC Build in Jul 2026: POWERFUL Budget PC

    Best $400 Gaming PC Build in Jul 2026: POWERFUL Budget PC

    When you are building a PC, one of the main concerns on your mind will undoubtedly be how much money it costs.

    If you have ever bought a pre-built PC in the past, then you know how expensive they can be. However, if you know where to look, you can get a really decent gaming PC for less than $400.

    That’s right, you heard us correctly. Sometimes a company will charge you simply to put all the pieces together.

    It is quite easy to build your own PC if you follow the right instructions to the letter. It might be stressful, but if you are willing to put yourself through that then you might make a substantial saving on your PC.

    All you’ll need to do is make sure that everything that you have is high performance and will give you everything that you need for a ferocious speed.

    You’ll need a high-end graphics card and a motherboard that will be able to support the whole thing without any major lagging issues.

    So where can you find the best $400 gaming devices for your needs? Where can you find all the components that will give your games that optimal performance? What is the best CPU for gaming? What superior motherboard do you need to get for this device? How much will the entire package cost you exactly?

    Well, if you want answers to these questions and a whole lot more, then we would suggest that you keep reading.

    We have compiled a list of some of the best gaming PCs that money can buy, as well as parts that will fit well together and are easy to install. If you thought you could never buy a gaming PC for less than $400, then you can think again.


    Best $400 Gaming PC Build in 2021

    iBUYPOWER Pro Gaming PC Computer

    First off, we’ll start with the prebuild. This pretty incredible-looking unit will give you everything you need for solid gaming performance, with a motherboard that will be able to easily process all the graphics and give you a pristine HD output at the end of it – introducing the iBUYPOWER Pro Gaming PC Computer.

    This beast is simply amazing and is marketed at people at the lower end of the budget spectrum. It comes in a tall, durable case that won’t get worn down or damaged.

    Coming with an AMD Ryzen 5 3600, you can be sure that it will be able to process your fast graphics with ease.

    Pros

    • This comes with a dedicated NVIDIA graphics card that will be able to render even the most intense games. This will certainly appeal to online players who need that smooth and latency-free playing situation.
    • This comes with tempered glass, which is great for durability, but also for cooling the inside of your PC down. This also makes it a very cool PC to look at – almost something akin to a jet engine fighter.
    • This has plenty of storage space, with an SSD card that will be able to store lots of information and run it back at very high speeds.
    • The case comes with plenty of adaptable USB ports, which are perfect for hooking up a USB mouse or a wireless keyboard.
    • Just purchase a decent monitor and you’re all set.

    Cons

    • Having a pre-built option will always be more pricey than getting all the components and putting the thing together yourself. If you are looking to save some serious cash, then we would certainly recommend that you buy your graphics card and CPU separately.

    Intel CPU BX8070110100F Core i3-10100F

    Okay, now we’ll move on to the individual components, starting with the most important of all: the CPU.

    Intel is one of the best manufacturers of CPUs out there, so you won’t have to worry about your processor handling even the graphics-heavy computer games. We would certainly recommend this one as a solid running unit – introducing the Intel CPU BX8070110100F Core i1-10100F.

    This Intel processor comes extremely highly rated and is often included in a lot of pre-built PC kits.

    With a two-fan setup, you can be sure that you won’t have any lagging issues with this computer, although we would suggest that you include at least 3 fans for optimum running time.

    Pros

    • The price – because this has been on the market for quite some time, it comes at a very reasonable price. This will be able to handle multiple processes such as high-end graphics and sound cards.
    • This is a standard core that is used in a lot of units, which means that it is tried and tested. It also comes very highly rated on Amazon, so you won’t have to worry about that.
    • This core was specifically built for running many processes at once, so whether you want a CPU for gaming or a CPU for graphics design, this is the choice.
    • Intel has made this processor very easy to install, all you have to do is follow the instructions and you should have your processor set up in no time at all.

    Cons

    • You’ll need to make sure that there is plenty of airflow getting into this processor, as it will often overheat and succumb to lag if you are operating it in a warm environment.

    GIGABYTE H410M Motherboard

    Next, we have another essential component for your computer: the motherboard. This is another tried and tested board that you can use to plug in your processor, your graphics card and your sound device.

    This has a very durable construction and you can expect it to last you for many years after installation – introducing Gigabyte H410M Motherboard.

    This is built especially to support dual Intel processors. It comes with easy-to-use ports that you can slot in your graphics cards.

    It also comes with USB 2.0 and 3.0 ports, which will be great for hooking up any state-of-the-art wireless mouses and keyboards that you happen to be using.

    Pros

    • This is very easy to install, making it great for anyone who might not be that technologically minded. You can rig this one up to your hub very quickly, so you won’t have to worry about delays when it comes to gaming.
    • This is a great motherboard for playing games. It has a solid setup and circuit board that will offer you a very fast transfer of information.
    • This is one of the best motherboards for self-built computers. It has plenty of USB ports, so you can upgrade your computer whenever you see fit. This will not only help you with your gaming, but will also keep the price of your unit low.
    • You can also plug in speakers, a monitor, a webcam and a microphone. If you are thinking of streaming, this is the perfect setup for you.

    Cons

    • This is not a top-end motherboard, although it will provide you with all the basics that you need. We would certainly recommend this one for upping your gaming capabilities.

    XFX Radeon RX 550 4GB DDR5 Double Dissipation Graphics Card

    Next up, we have a very powerful dual fan graphics card. This comes at a decent price and will pretty much enable fast gameplay and intense frame rate on most fast-paced action games.

    This is a popular model amongst gamers, who have all described this variously as one of the best graphics cards for first-person shooters – introducing XFX Radeon RX 550 4GB DDR5 Double Dissipation Graphics Card.

    One of the first things that you might notice about this graphics card will be the dual fans.

    This will help you keep your graphics card nice and cool, allowing it to run your graphics at super speed, clocking it up to the maximum settings. We would certainly recommend this one for high-speed gaming.

    Pros

    • This is very easy to install – all you have to do is click it into your motherboard and install the software that comes with it.
    • The dual fan system will make sure that you have everything that you need for optimal cooling. If you are clocking your computer to its maximum settings, then you can’t go far wrong with this hefty device.
    • This is a very durable device, made from solid steel, you can rest assured that it won’t get damaged in the post.
    • The price – one of the main reasons that you might want to buy this one is the amazing price. You won’t find yourself breaking the bank with this one, making it ideal for students or a family on a budget. One of the best budget graphics cards you’ll ever get your hands on. Period.

    Cons

    • This might not be suitable for people who really enjoy their high-end gaming. Some games like Call Of Duty and Warzone, when placed on the highest settings, will certainly need a lot more power from their graphics card.

    PNY CS900 240GB 3D NAND 2.5″ SATA III Internal Solid State Drive 

    Next, we have a solid-state drive that will really help you when it comes to giving your computer that top-level memory boost that will be important for your high-end gaming options.

    With no internal moving components, this is a fast, smooth and very high performing device – introducing PNY CS900 240GB 3D NAND 2.5-inches SATA III Internal Solid State Drive.

    This will be an effective substitute for a lot of laptop and computer hard drives. You can even operate this in tandem with your existing hard drive.

    If you have two running at once, you can expect a high operation, which is especially important for fast-paced action computer games.

    Pros

    • This will boost the speeds of your operating system, you’ll notice straight away that your device will be running smoothly and efficiently.
    • This is one of the hard drives for large amounts of information. You can use it to install your OS and then have a secondary hard drive for all your other applications and software.
    • This solid-state drive comes with very few working components, so you won’t need to worry about any of them coming loose and having issues with your device.
    • This can be installed onto your computer very easily, with a simple connector, you can be sure that you’ll have consistent and reliable access to your Windows OS.

    Cons

    • This SSD can be quite hard to navigate for anyone who has not used one of these devices before. We would certainly recommend that you read up on these first before going out and buying them.

    Zalman T6 ATX Mid Tower Computer PC Case

    When it comes to building your PC, one thing that you’ll definitely need is a decent hub. This one is one of the best on the market, coming in a solid steel design that is easy for you to open and install all of your components.

    This comes with various fans, which can be connected to keep your machine cool and in optimal performance – introducing the Zalman T6 ATX Mid Tower Computer PC Case. If size is an issue, mini ITX builds are also something to consider.

    This is made from solid alloy with a wire mesh on the side that will encourage ventilation. This is one of the most important aspects of having a PC case.

    You’ll need to make sure that plenty of air is circulating through to make sure that it stays cool and does not overheat. This is especially important for powerful machines where the processor is always maxing out.

    Pros

    • This has a very sturdy case, made from alloy steel, you can be sure that you’ll have everything that you need in case you drop it or it gets dinged in the post.
    • This has a great versatile layout in the center, so you can set up your components in whatever way you want. It also has plenty of room if you want to adapt it at a later date.
    • This comes with powder-coated steel, so you can be sure that it will not succumb to any magnetic interference.
    • This is one of the best units to have for optimal cooling. It comes with hairline gaps in the design, which encourages air transfer and will give you everything that you need for optimal internal temperature.

    Cons

    • This unit is very heavy, which might put off games that do not want to put their back out putting it together.

    Buyer’s Guide

    When you are putting together your computer, you’ll need to make sure that you have everything that you need for optimal performance. You’ll need to consider speed, running power and construction. You’ll also want something that can be well ventilated.

    Here are a few things you’ll want to consider for your PC:

    How Fast Is It?

    You’ll need to make sure that your CPU is capable of running all these high-end components such as graphics cards and solid-state drives. If you have a motherboard that is not equipped at adapting to your components, then you will experience a lot of inefficiency in your device.

    Can It Be Upgraded?

    One of the most important things that you’ll need from your computer is the ability to update it.

    Often new graphics cards and hard drives will become available, so you’ll want the option of being able to add them to your computer as and when. This will certainly help you when it comes to increasing the performance of your computer.

    You’ll also need to consider just how big your budget should be for PC cases, as they can limit your choices for GPUs and motherboards.

    How Much Does It Cost?

    The point of this article is to keep the cost low. You can do this by buying your components separately and then putting them together by following various Youtube tutorials. This process can be very stressful and time-consuming, but you’ll save yourself a few hundred dollars by doing so.

    Frequently Asked Questions

    How Can You Save Money On Your Gaming PC?

    Buying all the components separately and putting your PC together yourself is a great way of saving yourself some money. This is because most companies charge for putting this stuff together, so you are cutting out the costs for labor.

    Budget gaming PC builds aren’t a bad idea either if you just want to get the ball rolling. You can always upgrade down the line.

    Another way of saving is by getting lower-end graphics cards, as well as cheaper keyboards and mouses. You can slowly upgrade these elements over a year or so as you come into more money.

  • Best Monitors Under $100 (Jul 2026) 6 Best Cheap 1080P Monitors

    Best Monitors Under $100 (Jul 2026) 6 Best Cheap 1080P Monitors

    1080P monitors are all the rave these days, whether it’s for gaming, office, or home use. While people are rushing to get the best ultra high-definition monitors, majority are scrambling to get the standard 1080P monitors which keep getting more affordable every time a new kind of ultra HD monitor comes out.

    We’ve done hours and hours of research to curate the best monitors under $100 so you don’t have to. Each of the monitors on this list will meet your needs for crisp images, great picture quality, decent aspect ratio and dynamic contrast ratio.

    What Are The Best Gaming Monitors Under $100

    We’ve narrowed down this list to five of the best monitors under $100. For what you’re paying, you’re already getting high resolution monitors with decent color quality, reduced motion blur, may or may not have VESA mount, ambient light, and maybe even anti glare coating.

    [affiliatable id=’115902′]

    Sceptre E248W-19203R 24″

    Best Monitor Under $100

    Sceptre E248W-19203R 24 Best Monitor Under 100

    Specs At A Glance:

    • 1920 x 1080 Resolution
    • 75Hz Refresh Rate
    • 6ms Response Time
    • 2x HDMI Ports

    Here we have the best monitor under $100: Sceptre E248W-19203. It comes with a 24″ display and sports an 1080P HD resolution. The monitor sports a thin bezel design with built-in external speakers. That’s not a bad deal!

    It’s a great monitor for gaming and for professionals looking to upgrade their workstation. Honestly, who needs high-end gaming monitors or workstation monitors? The Sceptre E248W-19203 is an affordable option that gives you impressive color accuracy and rich colors.

    Need we also remind you that the Sceptre E248W-19203 also hits a 75Hz refresh rate? It’s not everyday you see monitors under $100 hitting this kind of refresh rate. This is probably the best overall monitor for both gaming and productivity tasks. You’ll have enough money left in your wallet to acquire other paraphernalia to complete your build, such as affordable PC cases.

    Acer SB220Q 22″

    Affordable Freesync Monitor

    Acer SB220Q 22 Best Monitor Under 100

    Specs at a Glance:

    • 1920 x 1080 Resolution
    • 75Hz Refresh Rate
    • IPS Panel
    • AMD FreeSync

    Second on our list of the best monitors under $100 is the Acer SB220Q 22″. This is considered to be the best monitor for gamers because of the full HD resolution, AMD FreeSync technology, and the 75Hz refresh rate. AMD FreeSync Technology allows you to take advantage of AMD’s adaptive sync technology that reduces screen stutter and tearing.

    Like the Sceptre monitor, the Acer SB220Q 22″ comes with an IPS panel, 4ms response time, and sports a thin bezel design. All in all, you’re getting good value for the money you’re paying.

    Sceptre might have the bigger screen space, but the Acer SB220Q 22″ is a lot better for gaming and provides better value all in all. Whether you want to upgrade to a bigger monitor or get a second monitor for gaming, the Acer SB220Q 22″ holds the title as best overall monitor (for gaming, at least).

    Planar PLL2410W 24″

    Ultra Affordable 24″ Monitor under $100

    Planar PLL2410W 24 Best Monitor Under 100

    Specs at a Glance:

    • 1920 x 1080 Resolution
    • 60Hz Refresh Rate
    • 5ms Response Time
    • DVI & VGA

    The Planar PLL2140W is the second monitor on this list with a 24″ display, similar to the Sceptre monitor listed above. We’d consider this a good monitor under $100 for a couple of reasons.

    First, the screen size. No one’s ever going to talk bad about the screen size. Whether it’s for gaming or for office work, the Planar PLL2140W gives you all the display space that you need. Granted, the Planar PLL2140W’s refresh rate is 60Hz with a 5ms response time, but that’s still considered impressive for the price you’re paying.

    It’s not exactly a bad option for gaming, but it’s not exactly the best gaming monitor on this list too. You’re still better off with the Acer SB220Q for gaming.

    The downside for this monitor is that it does not have one HDMI port. Rather, you’re getting one VGA port and one DVI D port. Still, there’s no issue here with pixel density and the monitor’s wide viewing angles are decent enough. You’re still getting vibrant colors on this monitor, and image quality is not really terrible here. The Planar PLL2140W is only a couple of bucks cheaper than the Sceptre, so you’re still better off with the previous two monitors on this list if you prefer HDMI and VGA ports.

    Acer G226HQL 22″

    Budget Friendly 1080P Monitor Under $100

    Acer G226HQL 22 Best Monitor Under 100

    Specs at a Glance:

    • 1920 x 1080 Resolution
    • 60Hz Refresh Rate
    • 5ms Response Time
    • DVI & VGA

    Price should never be an issue with the Acer G226HQL, one of the best monitors under $100 because it’s a budget friendly 1080P monitor. Second to the Acer AB220Q, the Acer G226HQL is by no means to be underestimated.

    The market price for this monitor hovers somewhere between $80 and $90 but don’t let the price fool you. If you just want to have a monitor with decent image quality and doesn’t take up much desk space, consider the Acer G226HQL. The Acer G226HQL isn’t a thin bezel monitor, nor does its 60Hz refresh rate and 5ms response time blow any of its competitors away, but it’s still one of the best monitors under $100.

    It doesn’t have an HDMI port but you do get DVI port. Honestly, you can get a DVI D to HDMI converter cable from any tech store and just go from there. There’s no VESA mount, but you can purchase extended monitor mounts that clamp down on the screen.

    Another downside of the G226HQL is that it doesn’t come with VESA mounting holes. There is a mount you can purchase for the monitor, but it will cost extra. All in all, the lack of HDMI ports doesn’t hinder the Acer G226HQL from giving you rich colors and great image quality still.

    The bottom line is that Acer G226HQL is not to be underestimated. If you’re looking for an affordable second monitor without the extra features (i.e. built in speakers, AMD FreeSync technology, blue light shift, and so on), this is a solid choice. It’s already a 22″ monitor under $100 that gives you 1080P resolution. You can’t ask for more.

    BenQ GW2280 22″

    Thin and Sleek 1080P HD Monitor

    BenQ GW2280 22 Best Monitor Under 100

    Specs at a Glance

    • 1920 x 1080 Resolution
    • 60Hz Refresh Rate
    • 5ms Response Time
    • DVI & VGA

    Much like the Acer G226HQL, you have another barebones 1080P monitor: the BenQ GW2280. It’s also not to be underestimated because the price may be that of a portable monitor, but its size is anything but portable. We say barebones because there are no added features. There is no built-in speakers, no adaptive sync technology, no VESA mount, no HDCP support, or any of the added feature. There’s not even one HDMI port on here.

    You’re looking at a 22″ 1080P monitor with a standard refresh rate of 60Hz and 5ms response time. Unfortunately, you don’t get any HDMI ports but instead you get a DVI port and VGA port. Again, you can purchase a separate converter from VGA to HDMI or DVI to HDMI, along with an HDMI cable, and you’ll be good to go. It’s about $10 more expensive than the Acer G226HQL, and puts it at the same price as the Acer SB220Q. Honestly, just go for the Acer SB220Q if budget allows it.

    Minus all the extra features, the BenQ GW2280 is still a top contender on this list because it has everything you need for a secondary monitor or for a large monitor for your workstation. The aspect ratio is still top-notch and competitive, image quality is more than decent enough, and as long as you can ignore the thick bezels, the BenQ GW2280 is a solid choice.

    Are 1080P Monitors Decent When Cheap?

    1080P monitors shouldn’t be judged based on their price. You could get an expensive ASUS monitor and still have it compete against any of the monitors listed on this article. 1080p monitors are becoming more affordable now because the higher-end monitors are dominating the market.

    We’re talking about those monitors with IPS panels, 144Hz refresh rates, and maybe even curved display features. But these monitors don’t really shine if the underlying PC hardware doesn’t have the power to do so. Much like how a 120Hz gaming laptop wouldn’t be as impressive if it didn’t have the hardware to give you the graphics quality you need.

    A budget-friendly monitor under $100 may not be as vivid as the higher-end models, but honestly, who can tell the difference right? Besides, these monitors are good enough for budget gaming PC builds under $600.

    Things To Consider

    When you’re purchasing any of the best monitors under $100, you have to know what you’re looking for to get some good value.

    Let’s take a look at some of the key factors that will help you pick the best gaming monitor under $100. You might even land an ultra thin full HD monitor with an IPS panel if you know where to look.

    Panel Types

    For modern monitors, you’re looking at different types of panel technologies. Most of the modern monitors we see today are manufactured using TFT-LCD (thin-film transistor-liquid crystal display). Each panel type has its own pros and cons, and used for different scenarios.

    There are panel types that are more responsive, while there are others that have better and wider viewing angles and color production.

    The main panel types are IPS (in-plane switching), VA (vertical alignment), and TN (twisted nematic).

    IPS Panels are widely used for video/photo editors and content creators. These panels have the highest color accuracy but the response time is slower than TN and faster than VA. It’s quite rare to find IPS panels that have high refresh rates.

    VA panels are meant for everyday use. These monitors have the lowest refresh rates, but you’ll find a handful that are higher than what they have to offer. They’re more expensive than the TN display but cheaper than IPS.

    TN panels provide you with the highest response times and best overall performance for gaming. It does have terrible viewing angles and the color accuracy is the worst among the other panel types.

    Refresh Rates

    For gamers, there’s nothing more important than refresh rate. This is the rate where in how fast a monitor can refresh images on the screen. The higher the hertz, the higher the refresh rate.

    Refresh rates hover between 60Hz at the lowest and 240Hz at the highest. If you’re looking for a budget gaming monitor, you’ll find a lot of monitors to be running at 60Hz or so. You won’t be ending up with a 144Hz unless you purchase a refurbished monitor.

    For gaming and for everyday use, 60Hz is decent enough (you could even go for 75hz refresh rate), but not a lot of gamers appreciate this refresh rate. It’s fine for competitive gaming, but professional players actually prefer something higher (at about 144Hz or so).

    Screen Resolution

    Another factor that affects your PC’s performance is your screen resolution. When you’re hovering on a budget of $100 or less, you’re ending up with 1080p monitors. In rare instances, you’ll get 1080p full HD monitors, and these are already the top of the line for the price range.

    Unfortunately, curved monitors, 1440p resolution and 4K options are out of reach, unless you purchase refurbished brands. Extending your budget to about $150 and up to $200 can broaden your options. The brand of GPU you have also plays a role in determining what screen resolution you can use.

    Should You Even Consider Refurbished Monitors?

    Just because we’re talking about best monitors under $100 doesn’t necessarily mean you’re going to get a brand new one. A refurbished monitor, or second hand monitor, is a good option if you’re looking to save more money on higher-end models.

    It’s not a widely embraced idea for a lot of people to buy second-hand monitors, mostly because monitors degrade over time and with usage. But as long as you know what you’re looking for in a refurbished model, you should be fine.

    Here’s what you need to know.

    Where To Buy Refurbished Monitors?

    Amazon may sell refurbished monitors from time to time, but you can check out other sites as well such as Microcenter and BenQDirect. These are outlets that will give you the best prices on refurbished monitors, and they even come with a warranty.

    What To Look For In A Refurbished Monitor?

    When you’re shopping for refurbished monitor, might as well go big or go home. We’re talking about Full HD monitors with 144Hz refresh rate and 1440p resolution. You might also throw in there a 1ms response time.

    All of these specs you can find in a typical refurbished monitor under $100, give or take a few bucks.

    What Issues Should You Keep an Eye Out For?

    For refurbished monitors, you can’t always avoid certain issues. Most refurbs are covered by warranty, depending on where you bought them. In most cases, you might get personal warranty from the buyer for a period of time. But still, here’s what you need to look for:

    • Dead Pixels – A dead pixel doesn’t necessarily mean dead screen. It refers to one pixel on the screen that’s stuck to one color, like white or black. You’ll know it’s a dead pixel because it doesn’t change together with the rest of the screen. Normally, you should only see one or two dead pixels because this is sometimes a manufacturer defect. It can be ignored most of the time, but it might drive you crazy if you pay attention to it more than you should. Again, refurb might not be for you if you’re particular about what you’re looking at.
    • Flickering – Flickering was a common problem in CRT monitors, but not so much with LCD monitors. Flickering is annoying and might be problematic for people who’re sensitive to light.
    • Mild Cosmetic Damage – Cosmetic damages such as mild scratches to the screen or bezels are negligible for most of the time. They don’t affect performance overall, but if you’re particular about how your screen should look, perhaps a refurb may not be the best option for you.
    • Backlight Bleed – Backlight bleed happens when backlight is too powerful or when parts of the monitor fail. This might result in different brightness levels across different sections of the monitor, and it might be negligible in well-lit areas but you’ll notice them in dark rooms. This is more serious and happens quite a lot for ultra thin monitors, or those who’ve gone past their prime.
    • Burn-In – Burn-In is when an image is burned into the screen, which looks like an afterimage. You’ll often see this for images that are permanent on screen, or frequently present on screen. A good example is a taskbar.
    • Major Damage – Major damage in a refurbished monitor includes cracks, loose power cable, and more. If it greatly affects the quality of the display, it’s considered a major damage and you shouldn’t even think about buying it.
  • 7 Best Motherboards For Ryzen 5 3600 (Jul 2026)

    7 Best Motherboards For Ryzen 5 3600 (Jul 2026)

    If you are the kind of person who spends a lot of time on the computer, then chances are you have probably experienced your PC crashing or overheating.

    Sometimes computers can’t meet your high demands, which can make the overall process stressful and time-consuming. But luckily, there are now processors such as those produced by AMD to help combat these issues. 

    In recent years, AMD’s Ryzen processors have worked to completely transform the PC hardware industry, with a large part of their success being due to how powerful and efficient their processors are.

    Currently, the Ryzen 5 3600 CPU is arguably one of the best processors on the market, especially when you take into consideration its affordable price and overall efficiency. 

    This central processor features 6 cores and 12 threads and it is ideal for gaming and high-end CPU-intensive applications, making it a popular choice among tech enthusiasts and dedicated PC gamers.

    However, because Ryzen 5 3600 is compatible with various chipsets, it can be difficult to find a motherboard that perfectly pairs with this innovative piece of technology. 

    Of course, there are currently hundreds of compatible motherboards available for online purchase, with each one offering a unique and layered performance.

    So to aid you in your search, we have compiled a selection of the 7 best motherboards for Ryzen 5 3600 currently available on the market. 

    So if you are looking for a motherboard for your Ryzen processor, then why not take a look at our picks and see which one fits your needs! 

    What Is A Motherboard?

    A motherboard, otherwise known as a main board or logic board, is a printed circuit board that provides connectivity between the hardware components of your computer, such as the processor (CPU), memory (RAM) and hard drive.

    Currently, there are numerous types of motherboards available on the market, with each one being designed to fit different computers and processors. 

    Because each motherboard is designed for specific processors and memory, they don’t work with every other processor.

    However, most hard drives are universal and will work with the majority of motherboards, regardless of their type or manufacturer.

    If you ever need to locate your computer’s motherboard, they can usually be found inside the computer case, where the computer peripherals are connected. 


    7 Best Motherboards For Ryzen 5 3600

    Now let’s take a look at our picks for the 7 best motherboards for Ryzen 5 3600!

    ASUS Prime X570-P

    If you are the kind of person who often overclocks your Ryzen 5 3600, then you could be at risk of overheating and damaging your computer.

    So to combat this issue, there are two products that you can purchase to ensure your PC’s well-being. One is a higher-end CPU cooler and the other is a motherboard capable of handling superior overclocking. 

    Currently, one of the best products for overclocking your Ryzen third-generation processor is this motherboard by ASUS Prime, which is known for its durable performance and X570 chipset.

    Unlike other motherboards on the market, X570 chipsets are considered very expensive, especially compared to lower-priced motherboards, such as those that operate by using B550 chipsets. 

    However, the ASUS Prime X570-P is now available for an affordable price and can be found on various online platforms. But if the price still concerns you, you need to consider the number of special features that this motherboard can provide.

    Overall, the motherboard has an attractive design, standard-ATX form-factor, and supports up to 128GB of DDR4 RAM. 

    Beyond this, the motherboard also comes with RGB lighting features, USB 3.2 technology and PCle 4.0.

    In conclusion, this motherboard provides excellent support for overclocking and is available for a moderate price. So if you intend to use your Ryzen 5 3600 to its fullest potential, then this is the motherboard you need. 

    Notable Features

    • X570 Chipset
    • Standard-ATX
    • PCle 4.0
    • 128GB DDR4 RAM

    ASRock B550 PRO4

    If you are not interested in subjecting your Ryzen third-generation processor to extreme overclocking, then you should consider purchasing this B550 PRO4 motherboard by ASRock.

    Although the B550 PRO4 won’t provide the same overclocking potential as the ASUS Prime X570-P, the motherboard does come with the same special features and high performance. 

    Capable of supporting up to 128GB of DDR4 memory, this motherboard also features PCle 4.0, standard-ATX form-factor and USB 3.2 support.

    However, because the B550 PRO4 is only slightly cheaper than the ASUS Prime X570-P, there is no reason why you should choose the former over the latter.

    Because if you do find yourself overclocking your processor in the future, then you will be in a better position with the X570. 

    However, this does not mean that the B550 PRO4 is incapable of supporting excessive overclocking, as the motherboard can provide this service when it is paired with a decent CPU cooler.

    Overall, this is a motherboard that we would highly recommend, even though the ASUS Prime X570-P is the better product and will provide your PC with a more varied performance. 

    Notable Features

    • B550 Chipset
    • Standard-ATX
    • PCle 4.0
    • 128GB DDR4 RAM

    ASRock B550M-ITX

    If you are looking for a semi-affordable way to construct your own mini gaming PC, then you should consider investing in this B550M-ITX by ASRock.

    Currently, there aren’t many affordable mini-ITX AM4 socket motherboards available on the market. However, when it comes to affordable mini-ITX AMD motherboards, the ASRock B550M-ITX is one of the cheapest. 

    Capable of supporting up to 64GB of DDR4 memory, this mini motherboard can reach memory clock speeds of up to 4733MHz and has the potential to support some decent overclocking.

    The ASRock B550M-ITX also comes complete with a single PCle 4.0 lane and is arguably the best mini-ITX form-factor system for your Ryzen 5 3600 processor. 

    Notable Features

    • B550 Chipset
    • Mini-ITX
    • PCle 4.0
    • 64GB DDR4 RAM

    MSI B450M PRO-M2 MAX

    When the Ryzen 5 3600 was first released to the public, many tech enthusiasts noticed that the processor did not have any affordable motherboard options, for the B550 had not yet been invented and the B450 was not always compatible with the processor.

    So the only option was to spend a large sum of money on a premium motherboard. 

    However, with the invention of the B550 chipset and with older B450 chipset motherboards becoming compatible with BIOS technology, purchasing affordable motherboards became far easier and more convenient.

    So if you are looking for a cheap motherboard that is compatible with your Ryzen 5 3600, then we have the perfect product for you. 

    Currently, one of the cheapest motherboards for your Ryzen processor is the MSI B450M Pro-M2 Max.

    Although this particular motherboard is not considered a high-end product, it is still considered the perfect option for budget-conscious gamers, especially those looking for an efficient motherboard for their computer. 

    Distinguished by its small size, the MSI B450M Pro-M2 Max is capable of supporting up to 64GB of DDR4 memory and comes complete with PCle 3.0 technology and overclocking support.

    Overall, we would recommend this motherboard as one of the most affordable options on our list and as the perfect motherboard for any gamer looking to build a gaming PC with their Ryzen 5 3600 processor. 

    Notable Features

    • B450 Chipset
    • Micro-ATX
    • PCle 3.0
    • 64GB DDR4 RAM

    GIGABYTE B550 AORUS Elite

    Beyond the motherboards we have already outlined, we have some honourable mentions that we think you should consider whenever it comes to using your Ryzen 5 3600 processor.

    Our first pick is this B550 AORUS Elite By Gigabyte, which although may be more expensive than the ASUS Prime X570-P, does not offer the same overclocking support.

    However, the motherboard does feature a more attractive design and is perfect for any aesthetically conscious gamers who do not intend to overclock their PC. 

    Sporting a standard-ATX form-factor, this motherboard is also capable of supporting up to 128GB of DDR4 memory and comes complete with RGB lighting features, PCle 4.0 and USB 3.2 technology.

    Overall, we consider this motherboard to be an efficient product, although it would be more beneficial in the long term to purchase the cheaper ASUS Prime X570-P instead. 

    Notable Features

    • B550 Chipset
    • Standard-ATX
    • PCle 4.0
    • 128GB DDR4 RAM

    MSI MPG B550I

    If you are interested in what other mini-ITX motherboards are available for your Ryzen 5 3600, then we recommend checking out this MPG B550I motherboard by MSI.

    Although the overall product is more expensive than the ASRock mini-ITX motherboard we discussed above, the motherboard does come with a sleeker design and more special features.

    Sporting a pre-installed I/O shield, this motherboard also comes with an M.2 fan and extended heatsinks for a better cooling performance. 

    Unfortunately, because of the motherboard’s expensive price, it may not be the most feasible choice for some PC users and is probably better suited to those people who have no budget and are capable of affording an upgraded Ryzen CPU, such as the Ryzen 3700X. 

    Notable Features

    • B550 Chipset
    • Mini-ITX
    • PCle 4.0
    • 64GB DDR4 RAM

    MSI B450-A PRO MAX

    For our final entry, we have chosen a Ryzen 5 3600 compatible motherboard that is very similar to the MSI B450M PRO-M2 Max. Although the motherboard does differ in terms of its price and form factor.

    The MSI B450-A Pro Max is the standard ATX version of the Pro-M2 Max and is available for a slightly higher price than its micro-ATX counterpart. 

    However, when it comes to using an ATX motherboard to construct your gaming PC, this particular product is the more affordable option that is compatible with the Ryzen 5 3600 processor.

    So if you prefer using smaller motherboards and saving money, then this motherboard is the ideal choice for your needs and preferences. 

    Notable Features

    • B450 Chipset
    • Standard-ATX
    • PCle 3.0
    • 64GB DDR4 RAM

    What Motherboard Is The Best One For You?

    As you can see, there are numerous motherboard options available that are compatible with the Ryzen 5 3600 processor, so which one you choose does depend on the budget you are working with and your personal preferences. 

    For example, if you know that you will be subjecting your Ryzen processor to heavy overclocking, then you should consider purchasing a motherboard that utilizes an X570 chipset, as these motherboards are known to be more durable and capable of withstanding overclocking.

    On the other hand, if you are the kind of gamer who prefers to save their money, then you will want to invest in a motherboard that features a B450 chipset, as these are considered the most cost-effective option.

    However, you do need to make sure that your B450 motherboard is compatible with your Ryzen 5 3600 processor. 

    If you are interested in constructing your mini gaming PC, then you will want to consider any of the mini-ITX AM4 motherboards we have suggested, or any others you may encounter as long as they support third-generation Ryzen CPUs. 

  • 7 Best Budget PC Cases Under $50 (Jul 2026)

    7 Best Budget PC Cases Under $50 (Jul 2026)

    If you’re building a PC it’s really important to invest your budget wisely. Despite the importance of a good PC case to an overall build, this is often a place that custom builders opt to save some money to be able to invest in a better CPU, GPU or other important components that deliver better performance or features.

    That being said, there are some very well specced and quality PC cases that are still very much on the budget side of the scale, and these often come in a range of sizes and aesthetics with some features that put them in fierce competition with more expensive and premium PC cases and designs.

    To help you find a quality budget PC case, we’ve compiled a list of 7 of the very best available, taking into account their various features as well as their price and size to make sure no matter what your requirements are, you’re able to find a case that suits your budget and specifications, while looking good at the same time.

    We’ve also included a small FAQ and buyers guide to give a little extra information and direction for newer builders and to help even experienced builders get a few reminders of what to look for in a quality PC case.

    But first, let’s take a look at the cases themselves and what they have to offer.


    Best Budget PC Cases Under $50 for 2021

    Cooler Master MasterBox Q300L

    Cooler Master is one of the most popular brands in the PC world, and their case designs in particular are both innovative and well thought out with many excellent features.

    The MasterBox in particular is a very popular Micro ATX case that offers excellent space saving size and good portability, while still allowing you to accommodate a range of the best internal components available including space for a full ATX size power supply. It’s also one of the most popular choices when it comes to building a gaming PC on a budget.

    The case has a large window to view your completed internals and a very sleek aesthetic that will suit almost any environment.

    The finishing is high quality and there are plenty of other excellent features such as a great magnetic dust cover, decent cable management behind the motherboard standoffs, and a well positioned I/O panel that can be adjusted to suit your needs.

    It isn’t a particularly heavy or large case, and it has decent airflow however being a smaller size case, it doesn’t offer quite the same amount of airflow or cable management as you’d get from a larger Mid-tower or ATX sized case, and of course, this will limit your options a little in terms of componentry and cooling options.

    It is a very good case however especially for those who don’t have a lot of space for a larger PC or for those who want to place their PC on carpets.

    Pros

    • Large Window
    • Well-positioned I/O Panel
    • Micro ATX Size capable of fitting a full ATX power supply
    • Good cable management
    • Good dust cover

    Cons

    • Relatively small

    MSI MAG Series FORGE

    MSI is another household name in the PC industry, and their recent foray into case design with the MAG Series FORCE is a great start, thanks to a range of excellent features including a tempered glass side panel, excellent airflow, good cooling options, and a larger mid-tower profile that can accommodate a range of components and accessories.

    There are large standoffs on the base to help with lower airflow, and there are mounts for liquid cooling that allow the installation of a 240mm radiator which could provide astonishing cooling performance in such a reasonably sized PC case.

    The tempered glass side panel is a real highlight as most side panels at this price point are acrylic or plastic, and this shows how high performance this case is despite its price.

    The cable management is very good with a shrouded PSU slot that can also house most of the cables and keeps the core components such as the GPU and CPU free of dust and blockages that may be caused by cables being open in the base compartment of the case.

    The design is asymmetrical and this may not be to everyone’s taste, but this case is one of the very best-specced at this price and offers excellent all-around performance for its size also. Fun fact, the fans can be controlled via fan control software.

    Pros

    • Tempered glass window
    • Good airflow
    • Great cable management
    • Good standoffs
    • Included case fan

    Cons

    • Asymmetric design may not suit everyone

    DEEPCOOL MATREXX 50 Mid-Tower

    The Deepcool MATREXX is another mid tower solution with a range of great features and excellent cable management, however, the cooling may leave a little to be desired.

    The case features a tempered glass window which is very nice and a 210mm compartment that can fit most mainstream components with plenty of space to spare.

    There are decently sized intakes at the front edges of the case, and a magnetic dust proof mesh at the top and bottom of the case to prevent dust ingress while the fans work.

    The cable management on this system is again superb with a shrouded lower and rerouted PSU cabling for improved GPU accessibility.

    Pros

    • Glass Window
    • Great cable management
    • Good dust proofing
    • Sleek aesthetic

    Cons

    • Cooling could be better at the front

    AeroCool Cylon RGB Mid Tower

    This option from AeroCool has some nice features at a competitive price, including RGB front panel lighting and a very sleek and good looking matte finish.

    The side window is acrylic which is a small letdown compared to some other glass designs, and this may make it more prone to scratching and smudging compared to glass.

    The cable management is excellent however and the cooling is also fair, with the ability for the case to mount a 240mm liquid cooling radiator and several 120mm fans around the case.

    The RGB front panel and LED lights are a very nice touch and are easy to control, with several lighting options depending on the mood you want to create.

    The floor standoffs are sturdy and provide good clearance, and the i/o panel is well located.

    As a mid tower the case can accommodate most components quite comfortably, and offers an excellent compromise between internal size and the space it takes up in the room. From a personal experience, I transitioned to an AeroCool Cylon Mid Tower after upgrading my stock prebuilt gaming PC‘s case.

    Pros

    • RGB lighting
    • Side window
    • Nice matte finish
    • Good cable management
    • Decent cooling

    Cons

    • Side window is plastic and may be prone to scratching

    Zalman S4 ATX Mid

    Zalman have made some excellent cases in recent years, and the S series are some of the most popular, particularly the S4 with its very reasonable price and minimalist aesthetic that suits more professional and nondescript builders who aren’t keen on the RGB craze or asymmetric designs many brands are currently obsessed with.

    The S4 has some excellent features including a side window, good floor standoffs, and pretty good air cooling and flow.

    The cable management is great thanks to the shroud system that covers the PSU and lower area of the case internals, however, there is also plenty of space for large components such as graphics cards and CPU coolers, as well as liquid cooling systems.

    The only downside is the plastic window which is prone to scratching.

    Pros

    • Side window
    • Good standoffs
    • Minimalist design
    • Good air cooling
    • Great management

    Cons

    • Less eye-catching than some designs

    ROSEWILL Micro ATX

    If space is the main concern for you, the ROSEWILL Micro ATX case may be a good option for you as it’s very small and portable but still offers you capacity for some decent components and offers ok cable management despite its small size.

    Air flow is a bit of a concern, however, there are some other great features including a side window and an included case fan.

    The case may not be as refined or attractive as some others, but it will fit almost anywhere and has decent performance at a very good price.

    Pros

    • Micro ATX Case
    • Ok cable management
    • Light
    • Portable
    • Side window

    Cons

    • Poor airflow
    • Can’t accommodate larger components

    Raidmax Blazar ATX

    The Raidmax Blazar ATX is another great option featuring burnished metal panels and a smoked plastic side window, as well as RGB lighting on the front panel.

    The cable management is fairly good thanks to the lower shroud and routing arrangement, while the cooling is ok despite a sealed front panel.

    The main drawback is the plastic side window which may be prone to scratching and is smoked which obscures some of the internal views of the case.

    Pros

    • Burnished metal effect
    • Smoked plastic side window
    • RGB Front panel
    • Good cable management
    • Decent airflow

    Cons

    • Side window is plastic and prone to damage and scratches

    Buyers Guide

    In this buyer’s guide, we’re going to look at some of the most important features to consider when looking for a good PC case if it’s a budget option or a more premium choice.

    Cable Management

    Good cable management is key to a decent case, as you need somewhere to keep your system’s various wires and connectors organized and out of the way of the main componentry.

    Disorganized cabling can cause a host of issues, causing your computer to run hotter, blocking airflow, causing dust build-up, and making it more difficult to maintain and preserve your PC in the long term.

    Airflow

    Good airflow is essential to keep your PC healthy, and even the most rudimentary cases should have openings for pressure management and options to mount case fans, particularly if you’re planning to use your PC for gaming or other intensive uses.

    Aesthetics

    While this may not be important to everyone, good aesthetic choices can make even budget cases look presentable and neat.

    While many of the best features will be the reserve of premium cases it is possible to find some entry-level or budget cases that offer a range of good features from windows to RGB lighting.

    Frequently Asked Questions

    Should you use a budget PC case?

    Budget PC cases can be a great way to save money for the cash strapped builder, and if the budget is tight this is one of the best ways to find a few extra dollars to invest in more important components such as the CPU, graphics card, or even other things such as peripherals.

    Budget PC cases may lack some of the flagship features of more advanced and expensive designs, and lack nice touches such as windows, tempered glass or even plastic versions, as well as in case lighting, fans, and quality construction.

    Budget cases will also have simpler, more basic cable management making your build a little less ‘pretty’. If you’re going for a budget gaming PC, then you’ll have to settle for a budget PC case.

    However, budget cases are great at one thing, getting your build put together for a great price, and offering a platform on which you can start putting together a build.

    There are also some admirably specced budget cases nowadays, meaning you can actually get some nice features if you know where to look.

    If looks aren’t important to you, or you need to scrape as many dollars together as possible then a budget case is a great option for you, and they can always be swapped out at a later date.

    If however, you do want a rig that looks visually stunning and offers the latest innovations in airflow design, cable management and features, a more expensive case may be the option for you and will make it much easier for you to use your PC over the long term.

    What size case should you use?

    When building a PC, the PC case is one of the most important components, after all it’s what will house your expensive and sensitive computer parts and keep them safe, as well as help to keep them organized and cool.

    There is a range of PC case sizes, from mini-ITX cases to full towers and everything in between.

    If you’re short on space, the smaller cases will naturally be a good choice for you, however, this will severely limit the amount of space you will have inside the case and have a bad effect on the airflow of the case and what components you can fit inside of it. You can also consider these mini-ITX builds if you’re ever planning to use these small cases.

    While there are many great small form factor components and admirable performance is possible, full towers offer the very best in cooling potential and the biggest most powerful components.

    Naturally, these come at a cost in space, and these machines can be quite large and require plenty of room for the tower, the peripheral and to allow proper airflow around the case which many people simply can’t squeeze into their office or home.

    You’ll need to weigh up all these needs and try to find the best version for you.

    https://www.youtube.com/watch?v=35p7bM3m0vI
  • Best Fan Control Software for Windows (Jul 2026)

    Best Fan Control Software for Windows (Jul 2026)

    One of the worst things that could ever happen to any gamer is when their computer’s fans suddenly go awry. You’re probably thinking that you only need to restart the game and the PC to resolve this issue, but it doesn’t. Every time you play a game or open Chrome, the fans go crazy and the next thing you know, your PC starts to overheat unnecessarily, resulting in a sheer drop of performance.

    Luckily, there’s a fix for this and you don’t need to replace your fans just yet. This article will cover the best fan control software that controls fans speeds without any difficulty. Some of the software listed will also allow you to monitor your system, overclock CPU and GPU, on top of letting you adjust fan speeds.

    Why Are PC Fans Loud?

    The darkFlash L6 CPU Cooler sports a beautiful RGB-lit fan and a sic-copper-pipe array.

    Gamers will know what it’s like to deal with the constant noises of a PC fan, even when they’re at minimum fan speed setting. Granted, you’re not hearing the sound of a sedan in your room whenever you boot the PC, but the whirring noises may be too much for certain people.

    CPU and GPU fans emit noises because both hardware are expending lots of energy to carry out their corresponding processing tasks. In this case, whenever someone is rendering a video, CPU fans will work harder than the GPU fans. But if someone is doing heavy-duty gaming, the GPU fans will work their butts off.

    When CPUs and GPUs are operating, they will generate large amounts of heat, which is not good for these sensitive components. And so, to dissipate this heat, fans will keep the system cool by turning up the RPM (revolutions per minute). By reducing heat, your CPU and GPU will continue to operate at their optimal levels. But when CPU and GPU temperature get too high, both hardware will reduce their performance to gradually dissipate heat.

    Simply put, you know when your fan’s speed for your CPU or GPU is slowing down when you’re noticing FPS drops while playing a game or your entire system unit slows down. Now, you’re probably thinking: why can’t you just control fan speeds on your own?

    Because this feature isn’t exactly available right off the bat when you build your own PC or purchase a prebuilt gaming PC. You would have to download and install a CPU fan controller software that would allow you to do that.

    What Are These Software That Provide Manual Fan Control?

    There are a good number of fan control software out there that will let you manage and control PC fan speed even if you don’t have the technical know-how. These software are easy to run and operate, so much so that it’s similar to adjusting the speed of your electric fan.

    Here’s a short list of our best fan control software, both free and paid. These are not arranged in any particular order and are great for both Windows and Mac users alike.

    FAN CONTROL

    FanControl Best Fan Control Software

    Fan Control is the best fan control software out there, according to a lot of its users. It’s free and it’s an open course fan control software, so you’re going to get all the upgrades and versions on it without spending money on it.

    Fan Control allows you monitor each controllable fan with individual cards, and you’ll data such as their fan speed, sensors, and custom fan curves.

    Fan Control also has an assisted setup option which you can access by clicking on the Wrench icon at the upper left portion of the app. This is great for first time users of a fan control software who don’t know what they’re looking at.

    Going through this assisted setup will allow users to boot up important data and have it displayed on the Fan Control panel. You’ll be able to see your different temperature sensors and match them with your correct CPU and GPU fans. This will then build the foundation for any future tweaks for PC fan speed.

    Corsair iCUE

    Corsair iCUE Best Fan Control Software

    Corsair iCUE lets you manage all Corsair products installed on your PC. It also allows you to monitor your CPU’s temperature in real time, create lighting effects for when temperatures get too high, and allow you to control computer fans.

    You get three modes with iCUE: Quiet, Game, and Movie. What this means is that each profile will allow you to set the GPU and CPU fan speed for when you’re doing something. You want to use the Quiet Mode for work so the CPU fan speed doesn’t get too fast and too noisy (unless your work involves video editing). Game Mode allows you to control CPU cooling fan speed and GPU fan speed to help guarantee optimal performance. Movie Mode is for when you want the computer to put in more work, but don’t want it to be noisy.

    All in all, this is a nifty software that lets provides CPU and GPU fan control. It’s straightforward, and a reliable and light program that controls any Corsair CPU fan, and other paraphernalia from the same brand.

    Macs Fan Control (For Mac)

    Macs Fan Control Best Fan Control Software

    Don’t get us wrong, but even Macbook’s fans become too noisy when they overheat. For this problem, you want Macs Fan Control software, which is a free and also the best Mac fan control software that controls fan speeds for Apple computers. This is similar to the PC Fan Control software that we listed right above.

    The program is easy to use and allows you to easily optimize your fan speed for efficient cooling. Once you open the app, you’ll see all the fans on one side of the panel and components on the other side. To control your computer fan speed, just go to the Custom tab and adjust the CPU fan speed or intake fan speed using the slider. You can also go to Preference to see other users’ preferred settings.

    This Mac fan speed controller software is intuitive and straightforward to use. You’ll be able to monitor all the important data for your computer’s components, such as CPU temperature and adjust fan speed using your own preference or from other users who installed this fan speed controller software on their Macbooks. This is the solution for the unnecessarily high CPU fan noise, and the only Mac fan control software you’ll ever need for your Apple computer.

    MSI Afterburner

    MSI Afterburner Best Fan Control Software

    MSI Afterburner is the fan control software that you want to use if you want to tweak or control your GPU’s fan speeds and settings. The primary purpose of the MSI Afterburner is to let you overclock the GPU without difficulty. You have full control over your memory clock speed along with GPU clock speed, GPU voltage, and power limit. You also have control over your fan speed for when you do want to overclock.

    There are two types of fan control provided by MSI Afterburner. First, you have the conventional fixed fan speed, which you can freely access from the program’s main window. You can also set a custom fan curve through the program’s config menu. You’ll be able to draw your preferred fan hysteresis, how often you want fan speeds to be updated, and set preferred fan curves.

    This MSI fan control software is considered as one of the best fan control software out there because of its straightforward system that optimizes fan speed for the graphics card. If you want your GPU fans to completely quiet while gaming, this is the fan control software for that.

    Take note that MSI Afterburner is only a fan control software for the GPU and does not provide any control for CPU fan speeds.

    Argus Monitor

    Argus Monitor Best Fan Control Software

    This fan PC fan controller software allows you to control the fan speed for all case fans attached to the motherboard. You can also adjust and create your own fan curve config. Argus Monitor also has its own SMART Sensors, so you can see your current SSD and HDD temperatures along with real time data for GPU and CPU temperatures.

    This PC fan control software also has a sidebar widget that shows you pertinent hardware information like temperature, frequency, fan speed, CPU power, and CPU usage. These are all color-coded and visible at the bottom right part of the screen where you see your tray icons.

    The downside to this fan speed control software is that you cannot overclock your system.

    Speed Fan

    SpeedFan Best Fan Control Software

    Fan Control is great for when you want to control fan speed, but it’s only available to Windows 10 and 11 operating systems. Gamers running on an older right will want to use another PC fan controller software called SpeedFan.

    This PC Fan controller software can work for older OS as far back as Windows 95, which is great for those who have retro gaming rigs but still want to control CPU fan speed.

    There are two ways for fan speed control. First, there’s the traditional fixed fan speed preference and can be accessed when you boot the program. The fan speed control software will show you the percentage figures for CPU, Sys, and Aux, which indicate your PC fan speed. You can lower and increase these as you see fit.

    The second option is an Auto Fan control option, but it’s a lot more complicated than the traditional fixed fan speed option. Auto Fan Control allows you to increase or decrease your fan speed based on current CPU temperature automatically. But you’ll have to set this up using the Configure sub menu and then set the temperatures for each fan speed sensor. These sensors will then speed up or slow down the fans automatically to keep up with your ideal temperatures.

    For those running on older operating systems who want a fan control software for their CPU fan, SpeedFan is the go-to program. You can control CPU fan speed even if you’re running on Windows 95 or Windows 98.

    Zotac Firestorm

    Zotac Firestorm Best Fan Control Software

    Much like the Corsair iCUE that allows you to control fan speed for Corsair fans and monitor other components, the Zotac Firestorm is the app that gives you full control over Zotac components installed in your PC. On top of managing RGB colors and fan speed control features, you can also use the software to overclock your graphics card.

    There are three settings: Auto, Advanced, and Manual. If you want the default setting of the software, choose Auto. Manual allows you increase and decrease fan speed based on your needs. The fan speed is set to run at the set speed regardless of the GPU temperature. Advanced settings will allow you to set computer fans’ curves based on what you need.

    This CPU fan control software is a set-it and forget-it type of software, unless you’re running on Advanced settings. However, a huge disadvantage to the Zotac Firestorm is that it can’t control the fan speed of the case fans.

    ASUS AI Suite 3

    Asus AI Suite Best Fan Control Software

    Similar to Zotac and Corsair, the ASUS AI Suite 3 lets you control all ASUS hardware installed on your motherboard. Just like any other fan speed control software, you can see all important data such as voltage, CPU and GPU temperature, and frequency. There’s also added support for Ryzen processors, but you can’t overclock said processors using the ASUS AI Suite 3.

    Because it’s a brand specific CPU fan control software, you can only control PC fan speed for ASUS graphics cards and other fans attached to the motherboard. This is made possible with ASUS’ Fan Xpert 4, which allows you expertly manage all case fans. But to access this feature, your motherboard needs to be of ASUS brand.

    MSI Dragon Center

    MSI Afterburner Best Fan Control Software

    The MSI Dragon center is another fan controller software for Windows and allows you to customize all MSI products connected to the motherboard. You have complete control over all stats, including PC fan speed, CPU and GPU temperature, frequency, and voltage. It’s a free application and is preinstalled in MSI gaming laptops.

    The Dragon Center comes with three modes: Battery Life, Acoustic, and Performance. If you want to monitor laptop fan speed, you’ll find the Cooler Booster Mode, but note that as the CPU fans and GPU fans go up in speed, the noisier they get.

    The MSI Dragon Center is another set-it and forget-it type of PC fan speed control software. You just toggle through different modes to increase and decrease laptop fan speed, or PC fan speed, and the rest is done by the softare.

    EasyTune 5

    EasyTune5 has other features other than letting you monitor your CPU fans’ speeds This fan speed controller software has a Smart-Fan Control Feature that gives you full control over your computer’s CPU fan speed. It comes with Easy Mode so you just set it and forget it.

    This fan speed controller software also allows you to control fan speeds based on CPU temperature, but just don’t set it at a high threshold that you completely restrict the airflow to and from the CPU.

    You can also overclock your CPU with the EasyTune5 through its CPU Intelligent Accelerator (CIA) and Memory Intelligent Booster 2 features. Both of which are found in the EasyTune5’s advanced configuration modes.

    HWMonitor

    Last but definitely not the least, we have the HWMonitor. This fan speed controller software has been around for some time now, and it’s a favorite amongst fan controller software users.

    This fan speed controller software can help you monitor your system’s temperatures, voltages, and of course, fan speed monitor. You can also view your drive’s SMART vital stats and even monitor your graphics card. You can also track your PC power usage, motherboard voltage, and CPU voltage.

    Just like the other PC fan control software on this list, HWMonitor is a straightforward program and is a decent fan speed controller with other features apart from just controlling computer fan speed.

    If you’re not bothered by the clunkly UI, then the HWMonitor should help you monitor all your fans. If you just want something that adjusts fan speed without too much tinkering, HWMonitor is worth considering.

    Final Thoughts

    There you have it, some of the best fan control software out there for CPU, GPU, or both. It goes without saying that keeping an eye out if your fans are working is important. You want all the fans to function as intended, or you could end up damaging your hardware severely.

    Getting any of the Windows-based of Mac fan control software on this list will not only help you control fan speeds, but also let you know when and which fans are not functioning properly.

  • Best Prebuilt Gaming PC – Budget to Extreme (Jul 2026)

    Best Prebuilt Gaming PC – Budget to Extreme (Jul 2026)

    These days a lot of people like to buy their computers already built for them. This cuts out a lot of time shopping for parts and can be quite handy if you don’t know a motherboard from a graphics card. However, you might be still a little confused about which one to buy.

    There are plenty of machines out there that will help you with your gaming. If you want a really good machine, you’ll ultimately be looking for a powerful graphics card that will be able to render the high frame rate of a super-speed graphics card with ease. You’ll also want something with a decent fan.

    But where can you find the fastest pre-built gaming machines? What features do they need to have to give you the best performance? What materials should a good gaming PC be made out of? How much will you have to spend on a luxury unit and how much for a budget unit?

    Well, if you are keen to get yourselves the best computer for a fast-paced online game, then you should keep reading.

    We’ve combed through the internet and found you some of the best prebuilt gaming machines that you can find on the market, along with some pros and cons that will certainly help you when it comes to shopping for one of these more difficult items.

    Best Prebuilt Gaming PCs for 2021

    Prebuilt Gaming PCSpecsPrice
    CUK Continuum Micro Gamer PCAMD Ryzen 9 5900X Twelve Core Processor
    64GB DDR4 3200MHz
    1TB NVMe Solid State Drive + 2TB 7200rpm Hard Disk Drive
    NVIDIA GeForce RTX 3090 24GB GDDR6X
    Check Price on Amazon
    CUK Mantis Gaming DesktopIntel Core i9-11900KF Eight Core Processor
    64GB DDR4 2933MHz
    NVIDIA GeForce RTX 3080 10GB GDDR6
    Check Price on Amazon
    Skytech Chronos Gaming PC6GB DDR4 3000 Gaming Memory
    NVIDIA GeForce RTX 2060 6GB
    1TB SSD
    Microsoft Windows 10 Home 64-bit
    Check Price on Amazon
    iBUYPOWER Pro Gaming PCAMD Ryzen 5 3600 3.6GHz (4.2GHz Max Turbo)
    16GB DDR4 RAM
    240GB SSD + 1TB HDD
    Genuine Windows 10 Home 64-bit
    Check Price on Amazon
    MSI MEG Trident X 10-1282US Small Form Factor Gaming DesktopIntel Core i7-10700K 8C/16T 3.8-5.1 GHz 16MB Cache
    NVIDIA GeForce RTX 3070 8GB GDDR6 256-bit
    32GB DDR4 (2 x 16GB) 3000 MHz; 2 x DDR4 2933MHz U-DIMM, up to 64GB
    1TB M.2 NVMe
    Check Price on Amazon
    Skytech Prism II Gaming PC DesktopAMD Ryzen 7 5800X 8-core 3.8 GHz (4.7 GHz Turbo) CPU Processor
    G. Skill 32GB DDR4 3600 TridentZ NEO RGB Gaming Memory
    NVIDIA GeForce RTX 3090 24GB GDDR6X
    1TB Gen4 NVMe SSD
    Check Price on Amazon
    OMEN 30L Gaming Desktop PCIntel Core i9-10850K, 10-Core, 3.60 GHz
    NVIDIA GeForce RTX 3080 (10 GB GDDR6X)
    HyperX 32 GB DDR4-3200 SDRAM memory (expandable to 64 GB)
    1 TB PCIe NVMe M.2 SSD & 2 TB 7200RPM SATA hard drive
    Check Price on Amazon

    Best Extreme Unit – CUK Continuum Micro Gamer PC

    This first computer we have chosen for one of our more extreme options, coming with a powerful graphics card and a twelve-core CPU that will allow you to render graphics at an extremely high frame rate.

    This is very important if you are a fan of first-person shooting games – introducing the CUK Continuum Micro Gamer PC.

    This will not struggle to play 4K games, which is very important when it comes to high-end, crystal clear gaming.

    It comes with a very powerful 24GB graphics card with 64GB of RAM, which is probably one of the meatier options that you can get for a computer. However, you will have to pay more for something of this caliber.

    Pros

    • This comes with a very powerful graphics card, with a 1080p monitor that will render your graphics with crystal clear quality. You can also easily adapt this unit for VR gaming.
    • This has a very impressive CPU which is great for not only gaming, but video editing and music production. You can have many CPU-draining programs operating at the same time with this one.
    •  This has all the top-rated features that you’ll need for your computer, including a high-end graphics card as well as a cooler that will keep everything very cold, which is important for high performance.
    • This comes made from stainless steel and other very durable materials, so you won’t have to worry about dropping or damaging it.
    • This has a very powerful voltage supply, offering you plenty of support and will make sure that your power will not cut out at any point.

    Cons

    • The price – this is not a cheap model, if you want quality then you’ll have to pay for it. However, you can expect this machine to last you for a very long time if you do decide to spend money on it.

    Best High-End Unit – CUK Mantis Gaming Desktop

    Next up, we have a unit that saves you a few more dollars on the wallet. It comes with a 240Hz monitor that will really help you with your gaming, with an Intel processor and a 10GB graphics card.

    You can play some 4K games with a very high graphics bit rate, which will really help those fans who enjoy first-person shooters – introducing CUK Mantis Gaming Desktop.

    This is another beast of a machine that won’t set you back too much in terms of your finances.

    This comes with 64GB of RAM and DDR4 memory, both of which are very important when it comes to coping with layered graphics and incredibly high frame rates. It also has a solid-state drive that has 1TB of space.

    Pros

    • This is a high-end unit that comes at just under $1,500, so you won’t have to worry about breaking the bank on this unit. We would certainly recommend that you buy this one if the top PC is slightly out of your price range.
    • This has 1TB SSD space, which is great for storing plenty of video files and programs. We would definitely recommend this if you have a small amount of space.
    • This has a very stable construction, which is very important if you are going to be carrying this from one location to another. This will also be important if you are getting this delivered and you want it to arrive at your home in one piece.
    • You can play this one for hours at a time, making sure that you have everything that you need for solid gameplay without audio latency issues, which can often plague online gamers with slow machines.

    Cons

    • This might be a high-end machine, but some users have still complained about certain latency issues and lagging when they are running their games at full pelt.

    Best Budget Unit – Skytech Chronos Gaming PC

    This is a great budget unit, with plenty of processing power that you can be sure will give you everything that you need for smooth gameplay.

    This comes with a powerful Intel Core i7-9700KF processor with an RTX 2060 6GB GPU and DDR4 memory. This is perfect for 4K gaming, rendering your graphics quickly and effectively – introducing Skytech Chronos Gaming PC.

    Pros

    • This computer comes with a lot of technology that will give you everything that you need for a very special gaming experience.
    • It has a 1TB solid-state drive, which is great for storing information very quickly with very little interruption or data corruption.
    • You’ll be able to crank your games up to their full spec with this device, so you won’t have to worry about it lagging and stuttering issues.
    • This has a glass PC case, which will not only help with cooling, but it will look really cool with all the LED lights and green backlighting.

    Cons

    • Some users have complained that the NVIDIA graphics card struggles when you try and crank it up to the higher levels of your games.

    iBUYPOWER Pro Gaming PC

    This next computer is one of the less expensive options, with an AMD Radeon RX 5500 XT 6GB graphics card, which will have no problem at all with processing some of the fastest games on the market such as Call of Duty and Warzone.

    This is great for pumping up the display so that you get clear 4K gaming – introducing iBUYPOWER Pro Gaming PC.

    Pros

    • This allows you to operate at 1080p gaming, which is great for high-speed online gaming where seeing every part of the screen clearly is very important for gaining that advantage on the field.
    • This comes with lights on the inside of your CPU, which will not only look really cool, but will help you find any buttons you need to press if you are playing in the dark.
    • The price – this is an amazing budget machine, matching some of the performance speeds of some of the top-level machines.
    • This comes with 16GB of DDR4 RAM, which will really boost your performance and reduce the amount of lag and stuttering that you would normally get on a game.

    Cons

    • Although it is a great budget unit, this lacks some of the high-end punch that you get with the more expensive machines.

    MSI MEG Trident X 10-1282US Small Form Factor Gaming Desktop

    Next up, we have a machine that comes in a slightly smaller size, which will definitely appeal to gamers who want to save space in their apartment.

    It comes with a very solid 10th Generation Intel Core processor, which will help you to max out any game on a 1440p monitor – introducing the MSI MEG Trident X 10-1282US Small Form Factor Gaming Desktop.

    Pros

    • This comes with a very powerful GPU, which is very important for getting smooth graphics that don’t look too pixellated. This is also boosted with a very powerful processor.
    • This comes with a 1TB solid-state drive, which is very important for running programs at a high bit rate with very little stuttering or latency issues.
    • This will run pretty well off a 1440p monitor, which is great for first-person shooter games where you’ll need that completely fluid motion and seamless loading times.
    • This has many top-notch assets that you can be sure will give you everything you need for a smooth running. This is very important if you are going to be running many programs at one time.

    Cons

    • This computer does have a slightly smaller construction, which will really limit its options. You might also find it struggling to run the fast games at the highest settings.

    Skytech Prism II Gaming PC Desktop

    This next computer comes with a slightly less effective AMD Ryzen 7 5800 CPU, which makes it one of the less powerful units, on the other hand, it does come at a reduced price, which will certainly appeal to people who are on a strict budget.

    If you are using your computer purely for gaming, then this is a great machine to have – introducing the Skytech Prism II Gaming PC Desktop.

    Pros

    • This might not have the CPU performance of some of these computers, but in terms of budgeting, then you can’t go far wrong with this CPU.
    • This is a great budget computer for gaming and you can be looking to shave off a few hundred dollars by choosing a less powerful CPU.
    • This comes with 32GB of memory, so you can be sure that this PC will be able to handle most games. You can also make sure that you have everything that you need for some of the more basic games.
    • This has a very solid body that you can be sure will not get damaged or dented in the process of shipping from one place to another.

    Cons

    • The glass panel will certainly compromise the overall housing of your PC, although if you treat it gently, then you won’t have to worry about any breakages.

    OMEN 30L Gaming Desktop PC

    This is another high-end computer that really won’t cost you that much. This has a powerful 10th generation processor, so you’ll be able to run most games at a very high speed.

    Not only will you have everything that you need for solid gameplay, but it comes with plenty of RAM that will allow you to run multiple programs at once – introducing the Omen 30L Gaming Desktop PC.

    Pros

    • This PC not only performs incredibly well, but it looks pretty amazing, with a red panel glass that will make you the envy of all your gaming buddies.
    • This comes with a 1TB SSD, which is all the room that you’ll need for your games and any software that you are intending to use. This will run high-end editing software for both music and video.
    • This machine is very cheap, which will certainly appeal to students on a limited budget who still want to game in their off-study period.
    • If you are willing to trade off some great performances for a decent price, then this is certainly the machine for you.

    Cons

    • This machine doesn’t reach the peak performance of a lot of these machines, so if you are thinking of clocking your computer as high as it can go, then we would recommend going with another model.

    Buyer’s Guide

    When you are buying a prebuilt computer for gaming, there will be a lot of options that you’ll want to consider. Firstly, you’ll want something that runs very quickly and won’t be too much of a drain on your resources. Also, you’ll want decent CPU power, graphics, and sound quality.

    Here are some of the things that you’ll need to consider when buying a computer that is purely for gaming:

    How Fast Is The CPU?

    A lot of these computers have an Intel system, which is very important when it comes to running high-level programs. Having multiple apps and software processing at one time can also guzzle a lot of CPU power.

    If you are wanting to stream your games, then you’ll definitely want to have decent performance with your CPU. If you are running a webcam with your first-person shooter then you’ll need to make sure that you have the power to process all the graphics.

    How Sturdy Is The Machine?

    You’ll want to make sure that your computer is durable enough to take any drops or knocks that might be thrown its way. If you are a particularly passionate gamer, you might be prone to knocking lumps out of your CPU if you haven’t reached the requisite number of kills that you’re looking for.

    A computer with a decent cooling system is also a must-have if you are clocking your computer to the higher end of the graphics spectrum. Make sure that you have a few fans in your hub and that they are fast enough to keep everything cool, especially during a hot day.

    How Good Is The Graphics Card?

    Graphics are very important for gaming, that goes without saying. We would recommend that your computer have a high-end NVIDIA or AMD card, as both will be able to process a large number of pixels.

    However, make sure that you couple this with a good CPU, as the two will work in tandem to give you that crystal clear definition and rendering speeds. This goes double for 4K games.

    Frequently Asked Questions

    How Many Fans Should Be In Your CPU?

    You should have at least 2 fans in your CPU to give you the optimum level of cooling. We would also recommend that you have a clear panel on the side of your hub, as this will also help to keep everything inside at a decent temperature.

    What Is A Solid State Drive?

    This is a type of hard drive, but it has no moving internal parts. This means that it will run a lot faster and be less prone to breaking than a normal hard drive.

    These SSD drives have a much higher capacity and running speed than most other hard drives and often come as standard with most PCs now.

  • How to Use a Laptop as a Monitor (SIMPLE Process)

    How to Use a Laptop as a Monitor (SIMPLE Process)

    If your job requires you to consistently multi-task such as doing emails, being on skype business calls, taking notes, and carrying out your day-to-day tasks all at the same time, then you’ve probably come accustomed to yet tired of switching between endless tabs and application windows on your computer. 

    Believe it or not, whilst you may think you’re excelling at multitasking (kudos to you because you are), the time wasted whilst opening, closing, and trying to find your necessary window or tab can add up at the end of the day and result in you doing slightly less work than you’re capable of.

    What if we told you that you can boost your productivity and maintain better focus when doing your tasks by only tweaking a couple of things, well we’re about to tell you how.

    Using your laptop as a monitor (or a second monitor) will allow you to have one task open on one screen, whilst carrying out another task on a secondary screen creating a seamless combination of productivity, communication, and creativity. 

    One way many people facilitate a laptop as a monitor is by taking their meetings or calls on one laptop and then using a desktop computer to take their meeting notes or to create a collaboration of ideas with everyone else on the call. 

    You may even just want to use your laptop as a monitor to create a dope gaming set-up in your home that will boost your gaming experiences. 

    So if this sounds like something that would benefit you, then keep on reading to find out the process of how to use a laptop as a monitor. 

    How to Use Your Laptop as a Monitor (For Two Windows Devices)

    If both devices you’re going to be using for your dual monitors are Windows then you’ll need to follow these instructions, however, if the primary device you’re using is a Windows but the laptop you’re going to use is a Mac you’ll want to skip to the next set of instructions. 

    Ideally, you should have the latest version of Windows on both your devices.

    Enabling the Laptop You Want to Use as a Screen

    1. Open the Settings app on the laptop you want to use as a monitor
    2. Select System
    3. Then select Projecting to This PC
    4. Then you’ll be able to pick the options on the window that suits your needs best

    Here are what the options mean below:

    • ‘Windows, PCs, and phones can project to this PC when you say it’s ok’ – The setting is on ‘Always Off’ by default but you can change it to ‘Available Everywhere’ or ‘Available Everywhere on Secured Networks’ depending on where you’ll primarily be using the dual monitors from
    • ‘Ask to project this to PC’ Choose between ‘First Time Only’ or ‘Every Time a connection is requested’ based on whether you’d like to be asked every time you’re going to use your laptop as a dual monitor with another desktop
    • Require PIN for pairing – If you work in a public or office space then we’d recommend creating a PIN that must be entered when a device is trying to project to your laptop screen
    • This PC can only be discovered for projection when it’s plugged in – This is a good option to select if you’ll be working from home a lot and want to save the battery life of your laptop

    TIP: If you’re working in an office or public space, make a note of your PC/device name that is displayed at the bottom of the settings window as you’ll need to choose this name later when connecting your device to your primary monitor.

    Connecting Your Primary Monitor to Your Laptop 

    Now you’ve done the first step of enabling your laptop, it’s time to move on to connecting it to your primary monitor (desktop or laptop).

    1. Go to the desktop/laptop you want to use as your main monitor and press Windows Key+P on your keyboard
    2. Then select how you want the screen to be displayed (Orientation & Resolution)
    3. Select Extend if you would like the laptop to be a second monitor so you have more screen space for your tasks or select Duplicate if you’d like the monitors to display the same thing (good if you’re working in a group)
    4. Your laptop/device’s name should now have come up as an option for you to choose from
    5. Approve the connection of your laptop to your main device and then you can continue to use both screens
    6. You’re now finished. When you’re finished using your laptop as a second monitor, make sure to select Disconnect otherwise it’ll continue sharing the display

    TIP: When connecting your main desktop to your laptop for dual monitor use, click ‘Allow Input’ to give access for the laptop to use the touchpad, keyboard, and any touchscreen functionality so you can work with another person simultaneously. 

    How to Use Your Laptop as a Monitor (Windows & Mac)

    If your main desktop/laptop is a Windows but the laptop you’re using is a Mac, then follow our instructions below to use your laptop as a second monitor. 

    1. Press the Windows Key+P to open projection display settings 
    2. Select Settings
    3. Two screens should come up on your display. Select the off-centered screen and drag it next to the screen in the middle by your main monitor
    4. Then select Yes to enable the new monitor (your laptop)
    5. Check that the ‘Extend my Windows desktop onto this monitor’ option is enabled
    6. Apply changes and get to work

    How to Use Your Laptop as a Monitor (For Macs Only)

    There are a handful of ways you can connect a Mac laptop to another Mac monitor (desktop or laptop) but we’ll be showing you one of the easiest methods to do so.

    You will need the updated versions of Mac OS on both your devices and also a Mini DisplayPort, Thunderbolt, or Thunderbolt 2 or a Thunderbolt 3 (USB-C). 

    If your Mac is from any time after 2011, then it should have a Thunderbolt port instead of a Mini DisplayPort, however, these two ports are compatible. 

    If you’re going to be connected an iMac or MacBook that has a Thunderbolt 2 to a newer MacBook that has a Thunderbolt 3 (which comes on the newer MacBook Pros) then you’ll need an adapter that converts Thunderbolt 3 to Thunderbolt 2 which you can buy directly from Apple or Amazon.

    1. Identify what connector/adapter you’ll need to connect your iMac or MacBook with your MacBook laptop
    2. Plug them both in
    3. Open System Preferences and then go to Displays
    4. Click on the Arrangement tab in the open window
    5. Select the Mirror Displays tick box if you want the laptop monitor to show the same content as your original monitor (however you don’t want to mirror the displays as you’ll be using one device as a secondary monitor)
    6. Drag the display boxes to where you want them and drag the white menu bar on the screen to which screen you’d prefer to be dominant (if you’re using your laptop as a second screen then you’ll want the menu bar on the primary monitor)

    TIP: If your Mac won’t detect a connected display then try putting both your Mac devices to sleep and then wake them back up to try again.

    Controlling Your Desktop From Your Computer

    On the other hand, you may be seeking to use your current laptop to control another computer in your home, maybe you prefer using the trackpad and smaller keyboard compared to a big bulky monitor, mouse, and large keyboard of your computer.

    So instead of your laptop being used as just a monitor, you’ll have complete control over your PC but just by using your laptop instead.

    One of the easiest ways to do this is by downloading a third-party software called TeamViewer which simplifies the process instead of going through a long procedure of trying to do it directly through your computers.

    You can download TeamViewer by going to the TeamViewer website on both your laptop and your computer and download it to both devices.

    Once it’s all downloaded on both devices, you’ll need to install it and go through the short installation steps (it shouldn’t take too long).

    Then follow these steps to begin controlling your desktop from your laptop:

    1. Open the TeamViewer software on both your laptop and desktop
    2. Find the TeamViewer ID for your desktop computer
    3. Type in the ID number of your desktop computer into the Partner ID field
    4. Click Connect
    5. Enter in your computer’s password

    To find your TeamViewer ID for your laptop, you’ll need to open up the TeamViewer software and then click Show TeamViewer or Show Status Dialog and then a nine-digit number should come up which is the one you’ll need to enter into your laptop to connect them. 

    Your computer’s password is not the personal password you use to sign in to your account on your computer, it’ll be the randomized password listed under the TeamViewer ID.

    You’ll now have free will to control your desktop computer directly from the comfort of a mobile laptop. 

    Using Steam In-Home Streaming to Stream Games From Your Desktop to Your Computer

    If you’re a true gamer, you’ll know the importance of having a good set-up to be the best of the best.

    However, you don’t need to buy additional monitors just to do this, you can make your laptop an additional laptop and make the most of what you already have. 

    This will also allow you to play games from the comfort of your bed if you don’t want to sit up in your gaming chair at a desk.

    You won’t need to have an ultra-fast mega gaming laptop to do this as you’ll be connected to your main desktop but just displaying it on your lightweight laptop. 

    All you need to do is use Steam’s In-Home Streaming option (if you’re a true gamer, you should already have Steam downloaded on your system).

    Here’s how you start up Steam’s In-Home Streaming from your desktop to your laptop:

    1. Open up Steam on your laptop and desktop devices
    2. Log in using the same account and enable in-home streaming on both devices
    3. Instead of clicking Play, click the drop-down menu and choose the option Stream From
    4. As In-Home Streaming is enabled on both devices, it should automatically find your laptop device
    5. Select your laptop device from the home screen 
    6. Then press Stream

    You should now be able to stream your games from your desktop computer but instead, use the keyboard and mouse on your laptop to control and play the game. 

    To enable in-home streaming on your devices, you’ll need to go to the top left corner of the and click the Settings option, then click In-Home Streaming in the window and tick the box that says enable streaming. 

    You can also change the settings for your laptop to go between Fast, Beautiful or Balanced, which will suit your current gaming needs.

    If your network connection is slow, then we’d recommend using ‘Fast’ as you won’t experience as much lag in your game, however, if this is your first time playing a new game that has some fantastic graphics, then you may want to play it in Beautiful to get the full effect. 

    Streaming games is a very heavy task for your computers and the wireless connection may struggle to keep up which may alter your gaming experience.

    To get the quickest and fluid gaming experience when streaming from your computer to your laptop, we recommend hardwiring your computers and routers with ethernet cables. 

  • Every World of Warcraft Expansion Pack Since The Beginning – In Order

    Every World of Warcraft Expansion Pack Since The Beginning – In Order

    World of Warcraft is a game that needs no introduction. It’s possibly one of the biggest MMORPGs (massively multiplayer online roleplaying game) in the world. The game has literally changed the way other MMOs have been approached. The incredible level designs, the questing system, the gameplay, and the community itself are all what makes World of Warcraft the biggest MMO giant.

    But what most people don’t know is that the characters of World of Warcraft are all based from the Warcraft universe, and the lore simply expanded from the RTS (real-time strategy) games from Warcraft I to Warcraft III up to the current WoW expansion. From the initial base game all the way up to the latest WoW expansion, there’s roughly thousands of hours of content that players both new and old can undertake.

    With news of an up and coming expansion pack in the works, let’s go back in time and see what the Warcraft franchise has to offer with this World of Warcraft expansions list:

    World of Warcraft

    Date of Release: 2004

    World of Warcraft Base Game World of Warcraft Expansion Pack

    This Warcraft expansions list wouldn’t be complete without tackling the base game. This is the game that started it all, and has it roots coming from the vast Warcraft universe.

    Back in 2004, players simply purchased the base game pack and maintain a monthly subscription to access all the gaming content. While the game could be purchased online via their website, players also had the option of buying a physical copy.

    World of Warcraft takes place in the world of Azeroth and set as a sequel to the RTS games that Blizzard Entertainment released years back. The difference between the World of Warcraft franchise and the Warcraft RTS series was the gameplay. WoW belonged to the MMORPG genre and Warcraft was an RTS. World of Warcraft had players making their characters, doing quests, and create their own personal gaming experience as a solo player or as a member of a community or guild.

    But physical copies for the games, and the next expansion moving forward, were no longer available. Blizzard changed the pay model back in 2018. Warcraft players no longer needed to purchase individual expansion packs and the base game, but instead, they can play all existing expansions with their monthly subscription. Any expansion pack introduced moving forward will simply need to be purchased by the player for a minimal fee (which is priced between $25 to $60, depending on expansion pack). In simpler terms, you simply need to subscribe to World of Warcraft and purchase access to the new expansion’s content, which is sold separately.

    Every World of Warcraft Expansion Pack

    World of Warcraft: Burning Crusade

    Date of Release: 2007

    Burning Crusade World of Warcraft Expansion Pack

    Three years after the first game was released, the first World of Warcraft expansion was introduced: Burning Crusade.

    This was the first official WoW expansion that brought new elements into the game, incentivizing new and old Warcraft players to spend more time in the game. First, the expansion pack introduced two new races: Blood Elves for the Horde and Draenei for the Alliance side.

    Players were immediately introduced into new cultures that were part of the game’s lore, including access to class-related advantages. Both Draenei and Blood Elves had access to Paladins. This was a class that was only restricted to the Alliance. Likewise, Draenei had access to the Shaman class, which was only restricted to Horde.

    There were also new additions to the Player vs Player (PVP) system. The introduction of the new battleground Eye of the Storm, along with the new death-match battle system, motivated Warcraft players to delve into PVP.

    Lastly, there was also a new mechanic introduced into the game: flying mounts. Unlike the latest expansion, Burning Crusade only had you flying in Outland, but that didn’t really stop players. Regular mounts and store mounts were made cheaper and accessible. All in all, Burning Crusade would later lay the foundation for the up coming Lich King expansion.

    For endgame content, Illidan Stormrage was the last raid boss that people fought in Black Temple.

    World of Warcraft: Wrath of the Lich King

    Date of Release: 2008

    Wrath of the Lich King World of Warcraft Expansion Pack

    Following the success of Burning Crusade, Blizzard Entertainment saw it fit to add another WoW expansion pack: Wrath of the Lich King. The expansion pack was introduced a year after the release of Burning Crusade, and followed the story of Arthas, the anti-hero who was crowned the Lich King at the end of the The Frozen Throne (the third game of the RTS franchise).

    Burning Crusade introduced Outland and Wrath of the Lich King introduced Northrend, a snowy wasteland that was familiar to the RTS players.

    Unfortunately, the expansion did not add any new races, but they introduced the first “Hero” class: the Death Knight. The Death Knight could only be accessed once you had a toon that reached level 55. Death Knights started at a higher level of 55 and in their own starting zone in Eastern Lordaeron. They even had a class-specific profession called Runeforging, which was crucial to the roles that players wanted to take.

    Wrath of the Lich King saw the level cap increased from 70 (Burning Crusade) to 80, as well as the addition of new abilities, reworking of the talent system, new dungeons, and zones. There was also more PVP content added into the game with two new arenas and battlegrounds as well as the first world PVP zone called Wintergrasp.

    For all players and classes, a new profession was introduced called Inscription. This was a profession that allowed players to create special glyphs that would alter or improve certain abilities. This profession also covered the creation of scrolls that gave out temporary buffs and vellums, which was used to store enchantments. Endgame content had players killing Arthas himself in Icecrown Citadel.

    World of Warcraft: Cataclysm

    Date of Release: 2010

    Cataclysm World of Warcraft Expansion Pack

    The third expansion added into World of Warcraft was Cataclysm, introduced two years after Wrath of the Lich King. This expansion literally changed the face of Azeroth and affected the game and community as a whole. By this time, two important characters from Warcraft classic were already killed off, namely Illidan and Arthas. Next up on the list for players to kill is Deathwing.

    World of Warcraft Cataclysm introduced two new faction-specific races: Worgens and Goblins. They both have their own unique starting zones in Azeroth, but these were simply the cherry on top of the expansion sundae.

    The once familiar landscapes that players were changed drastically after Deathwing’s destruction. What were once luscious and green were now barren and empty. Cataclysm introduced a new PVP area called Tol Barad and two new battlegrounds.

    For in-game mechanics, the level cap was increased to 85 and all existing classes were rebalanced and redesigned. There were also new race-class combinations added. Lastly, the talent system was revamped once again.

    Two major mechanics were introduced in Cataclym. First major mechanic that was introduced in Cataclysm is guild leveling. Members of a guild could access extra perks as their guild leader leveled the guild up. The second major mechanic introduced was flying could now be done in all of Azeroth. Cataclysm also introduced new dungeons and raids, with the endgame content having new players and other players taking on Deathwing himself.

    World of Warcraft: Mists of Pandaria

    Date of Release: 2012

    Mists of Pandaria World of Warcraft Expansion Pack

    Two years after Cataclysm, World of Warcraft reveals their fourth expansion: Mists of Pandaria. This wasn’t as widely received as the first three expansions, mostly because the new race introduced by the expansion was first revealed as an April Fools joke. Needless to say, players were highly suspicious.

    But Blizzard Entertainment was true to its word, and we saw the Pandaren introduced as the first neutral race that could be accessed by Horde and Alliance players. Pandarens start out as neutral, but players could decide on which faction they’d join.

    The level cap for Mists of Pandaria was raised by five, from 85 to 90. There was also the introduction of a new class called Monk, a hybrid class that could take on Healer, Tank, and DPS roles.

    The talent system was also revamped once more. Old passive bonuses that made up most of the old talent trees were removed. Instead, players can now choose between three specific abilities once every fifteen levels.

    Mists of Pandaria also introduced Scenarios, which were small dungeons that could be overcome by three players (instead of the five players that a normal dungeon needed). Challenge modes were also introduced to the existing 5-man dungeons. PvP combat was expanded further with the introduction of three new battlegrounds.

    Lastly, a new mechanic was introduced albeit not exactly as game-changing. This was the Pet Battle System, which was a turn-based combat similar to how Pokemon played out.

    Both the Alliance and Horde players weren’t tackling or killing major characters from the Warcraft III franchise, but there was enough PVE content to go around.

    World of Warcraft: Warlords of Draenor (2014)

    Date of Release: 2014

    Warlords of Draenor World of Warcraft Expansion Pack

    Two years after Mists of Pandaria, WoW reveals their fifth expansion pack: Warlords of Draenor. Unfortunately, the expansion pack does not tie in with the current events that took place in the previous game.

    While new players saw the expansion pack as a breath of fresh air, other players thought otherwise. You see, the latest World of Warcraft expansion was a time travel storyline. This was a way for Blizzard Entertainment to creatively retcon existing lore without suffering a lot of major backlash. Granted, Warlords of Draenor never retconned anything, but it does border close to resetting everything the Warcraft universe. This almost drove the WoW community insane because of the way the story was developed.

    WoD’s story revolves around an alternate timeline during the pivotal moment that determined the fate of the Orcs when Draenor was still whole. The plot focuses on “what could have been” if the Orcs did not pledge with the big bad Pit Lord Mannoroth, with Garrosh Hellscream influencing the entire decision.

    The fifth expansion increased the level cap by ten, which made 100 the new level cap. The overall goal of World of Warcraft’s Warlord of Draenor was the streamlining of game mechanics as opposed to introducing new ones. For starters, WoD removed secondary stats and introduced Group Finder, which was a streamlined group-finding tool for players who didn’t belong to a guild or community, or those who just wanted to run things with random players. The Group Finder system covered both PVP and PVE content, so no players were left behind.

    The battleground gameplay was also refined. Inventory and quest logs were now more manageable than compared to the previous expansions.

    The game had significant changes made with the introduction of WoD. First, there was the Garrisons. Second was the graphics update. Garrisons were customizable fortresses where players could develop and participate in various activities and missions made available to them. These activities and missions gave them items, equipment, and even reputation points.

    On the game graphics side of things, there were updated character models along with other minor graphic improvements that helped keep WoW up to date (at least from a graphics’ point of view). After all, WoW couldn’t run on a 10-year old graphics setting forever.

    From a lore point of view, World of Warcraft’s Warlords of Draenor never really affected the main lore. Rather, this was something that would’ve been considered an alternate universe. This meant that whatever happened in this WoW expansion never affected the lore from the previous expansions and future expansions moving forward, except for one.

    World of Warcraft: Legion

    Date of Release: 2016

    Legion World of Warcraft Expansion Pack

    WoW’s sixth expansion pack followed the events from Warlords of Draenor. Yes, here we have another “what-if” scenario that doesn’t really affect the lore of both either the Alliance and Horde side.

    Originally Gul’dan died in the Tomb of Sargeras, but Legion had other plans for him. Instead of Gul’dan dying, he instead reopened the Tomb of Sargeras in the “Main Reality”. And just like that, we went back to the time of the Burning Legion, and Illidan is once again brought on as the big bad focal point of the story, along with Sargeras.

    Legion also brought new zones to Azeroth, including the Broken Isles. This was only accessible to the Night Elves back in the Frozen Throne campaign. The level cap was increased from 100 to 110 and Legion also introduced the second hero class called the Demon Hunter. That’s right, players were now able to get a feel of what Illidan would’ve been like.

    The Demon Hunter class was a hybrid hero class that could either take on DPS or Tank roles, but unlike the Death Knights, only Night Elves and Blood Elves could become Demon Hunters. This restriction applied in the next expansion and the future ones. Demon Hunters start out at level 98 and had their own specific class quests moving forward for leveling and progressing.

    Legion also brought Class Orders, which were class-specific quests that offered cosmetic rewards and access to class-specific campaigns. There was also the introduction of heavily customizable artifact weapons that scaled with player level. These were used as the primary weapons throughout the events in Legion.

    The PVP system was streamlined in this expansion pack. PvP gear was removed and the honor system was revamped. Through the new honor system, players obtained new abilities using honor points instead of gear. This heavily reduced the significance of gear in PvP combat.

    For the most part, WoW Legion was received positively by players even if it did give us a sneak peek of what might’ve been if decisions were made differently.

    World of Warcraft: Battle for Azeroth

    Date of Release: 2018

    Battle for Azeroth World of Warcraft Expansion Pack

    Both Warlords of Draenor and Legion were focused too much on PVP, so it wasn’t a complete surprise when other players left the game. Some of them just didn’t want to do PvP when they login and play. But the latest expansion, Battle for Azeroth, was PVE oriented just like the Lich King expansion.

    Unlike the previous game expansions where players had to play their way through world-ending events, World of Warcraft’s Battle for Azeroth focused on the Horde and Alliance War, all covered in the multi-chapter War Campaign.

    The expansion also introduced eight new races, four for either Alliance and Horde factions. But these races were simply like reskins of previous races as opposed to being new ones.

    Alliance faction got the Lightforged Draenei and Void Elves, while the Horde got Highmountain Tauren and Nightborne Elves. These were all added during the Legion expansion when players pre-ordered the Battle for Azeroth expansion. Later on, Dark Iron Dwarves and Kul Tiran Humans were added for Alliance, and Mag’har Orcs and Zandalari Trolls for the Horde.

    Each of these new races offered different racial passives and abilities, making some of them ideal choices for certain classes. For example, Dark Iron Dwarves and Zandalari Trolls were ideal choices for people who wanted to roll Paladins.

    But these new classes weren’t made available to players from the get-go. You needed to complete certain parts of the War Campaign, and other storylines, as well as earn Honored or Revered reputation for some of them. Acquiring these new classes were tedious because of the many backtracking that players needed to do. Thankfully, you didn’t need to use any of the new class to enjoy and play BFA content.

    The level cap in BFA was raised from 110 to 120, and saw the addition of a new mechanic called Warfronts. These were massive PvE scenarios combined with RTS elements of the classic Warcraft games. Weekly rewards were offered every now and then for completing these scenarios. For the most part, BFA felt very rewarding in small doses, and gave players a sense of achievement even for only a few hours of play. But what really separated these casual players from the hardcore players was how the future content of BFA was introduced into WoW.

    Island Expeditions was also new PvE content introduced in BFA that allowed players to farm for Azerite, a new resource that would allow them to upgrade their items (introduced later on in the game).

    From a PvP standpoint, two new arenas were added and players were given the chance to toggle PVP on and off regardless of the realm they are in. Island Expeditions also had PvP scenarios that pitted two teams of three players against one another.

    Heading further into the expansion, a new mode was introduced and allowed players to farm for items with Corruption affixes. These affixes affected the way the game ran up until the end of the expansion pack. Unfortunately, not a lot of players appreciated this alternate way to gain power within the game. It was at this time when WoW spent a lot of time revamping, reworking, nerfing, buffing, and even negating some of the efforts that a lot of players made during the last run of the expansion.

    At the end of Battle for Azeroth, players had a sneak peek of what was to come with the future expansion.

    Battle For Azeroth also had some upgrades to the system requirements, but still Blizzard Entertainment made it possible for budget gaming PCs to handle most of the game content without major FPS drops.

    World of Warcraft: Shadowlands

    Date of Release: 2020

    Shadowlands World of Warcraft Expansion Pack

    When Blizzard announced Shadowlands, which was the latest of the long line of expansion packs, people were hyped up. This time, the expansion pack revisits some of the interactions of the franchise’s recognizable characters. The game also saw one of its biggest overhauls since Cataclysm.

    Following after the events of BFA, Shadowlands has players chasing Sylvanas through the Shadowlands, which is the equivalent of the afterlife. Sylvanas finds herself working with the Jailer, a powerful entity that rules all of Shadowlands. The latest raid content of this WoW expansion follows a systematic progress, having you go through the ropes of fighting your way up to Sylvanas and Jailer.

    Blizzard announced a lot of the big changes for WoW prior to the actual release. One of them being the level squish. Instead of increasing the level cap, the level was brought down to the original 60. The leveling experience was now relatively shorter compared to the other expansions. Low level players could catch up on their levels with the Timewalking campaigns, which was introduced later on in WoW FA.

    Another important addition to the Shadowlands content was the rework of the Flying system. Previously, BFA had WoW players grinding for reputation to unlock flying in Zandalar and the new regions outside of Azeroth. This was a major waste of time, especially for players who didn’t grind out their reputations during the entirety of the BFA storyline. Shadowlands content removed the reputation aspect of Flying in the Shadowlands. Instead, you gain Flying across the four regions of Shadowlands when you unlock it via Renown levels.

    The talent and class systems were revamped once more, but to reinforce the new Covenant system. Players aligned themselves with one of four factions in the Shadowlands: Necrolord, Night Fae, Kyrian, or Venthyr. Each covenant had their own campaign and storyline progress that affected the main expansion’s lore, as well as their own bonuses and abilities provided to those who swore allegiance.

    Jailer World of Warcraft Expansion Pack

    The main storyline, along with your Covenant campaigns, tied in together with the Renown system. This was a new system not seen or introduced from the other WoW expansions. Renown levels were acquired when you completed parts of the storyline, did side quests, or farmed items that boosted Renown experience.

    Leveling your Renown gave various rewards, as well as allowing you to access new content and campaign progress. While it’s a grindfest for a lot of players, it was still new content that was welcomed by the majority.

    Lastly, Shadowlands content introduced the concept of Soulbinding, allowing players to customize their gaming experience further than what the previous game iterations had to offer. This mechanic ties in with the expansion pack’s future content.

    What’s Next For World of Warcraft?

    We’ve seen World of Warcraft Classic, which was announced together with the release of Shadowlands, and now they’re bringing back Burning Crusade and Wrath of the Lich King. Opening up World of Warcraft Classic gave old players a sense of nostalgia, while allowing players to experience Vanilla from a fresh point of view.

    The latest WoW expansion announced a month ago was Dragonflight, which follows a lot like Warlords of Draenor (in terms of alternate universe or what-if scenarios). Not a lot of info has been posted about the new World of Warcraft expansion, but from the YouTube announcement videos, major changes will be implemented for leveling, professions, and access to certain zones. New characters, or possibly a new mode for PvE and PvP, might be introduced but one can only assume. A sneak peek of a new mobile game also made the rounds in social media, but it wasn’t directly tied to the actual World of Warcraft game.

    With Warlords of Draenor and Legion being the expansions that started the “what-if” storylines, we wouldn’t be surprised if World of Warcraft reveals more and more “what-if” scenarios that don’t exactly retcon the entire lore, but could come close to giving us an alternate reality, so to speak.

    Conclusion

    There you have it, a brief overview of the different World of Warcraft expansions from the first game all the way up to the current. The future of World of Warcraft is still relatively bright. Possibilities for future content are endless, and the next expansion might be more exciting than Shadowlands or BFA. But only time will tell.

  • Best Gaming PC Build for Jul 2026: Build Your High-End Gaming PC Now!

    Best Gaming PC Build for Jul 2026: Build Your High-End Gaming PC Now!

    Best gaming pc build

    It’s one thing to take up PC gaming as a hobby, but it’s another level when you’re building your own gaming PC from scratch. For the handful of PC gamers out there, a gaming PC build goes way beyond what a prebuilt gaming PC has to offer.

    These gamers who build their own gaming PC from the ground up aren’t satisfied with the sheer power of the hardware itself. These are people who are particular about how good their PC looks aesthetically. Maximum performance is the name of the game here, but there is a minority of gamers out there who are thematic about the way they build a new gaming PC.

    If you want to venture into the world of gaming PC builds, there are tons of resources out there to help you get started. And we’re one of the groups out there who can help you achieve the best gaming PC build possible.

    By the time you’ve gone through the entirety of this article, not only will you have your own PC build, but you’ll also have enough information to proceed with the next gaming PC build.

    What Do You Need To Build a Gaming PC from Scratch?

    If you’re going to build your own gaming PC, you’ll need the following components along with some tools. You’ll need to make sure that the parts you pick out are compatible with one another.

    The first biggest mistake that novice builders make is thinking that all PC parts go together. This assumption is mostly true, to some extent. The internal functionality of the PC hardware will determine whether or not parts are actually compatible with one another. And when compatibility is an issue, you often encounter what’s called bottlenecking.

    Bottlenecking happens when there’s not enough power from one hardware to complement another hardware’s power. For example, having a powerful GPU or graphics card but a mediocre processor will result in a bottleneck. This is because the processor will find it difficult to keep up with the graphics card, and so the graphics card has to slow down to match the processor’s performance. Bottlenecking is also a common issue in PC gaming, especially with a prebuilt gaming PC.

    For this section, we’ll already go over the recommended hardware that you can use as a template for your first gaming PC. These are all the high-end gaming hardware and peripherals that you can get from local stores and online.

    Here Are The Parts You Need To Build a Gaming PC

    1. Processor (CPU)
    2. Motherboard (MOBO)
    3. Graphic Card (GPU)
    4. Memory (RAM)
    5. Storage (SSD or HDD)
    6. Power Supply Unit (PSU)
    7. PC Case

    Build #1 – A Powerful Gaming PC Built Using AMD

    The first build that we’re about to show you is a gaming computer built using an AMD processor. We chose this processor because it’s a lot more capable of handling multi-threading tasks such as video editing and rendering. If you’re looking for a gaming computer that can do what a high end workstation can do, this is the build for you.

    CPU – AMD Ryzen 5 5600X

    AMD Ryzen 5 5600X Best Gaming PC Build

    For a high end gaming pc, you need a powerful processor. And for this build, we have the AMD Ryzen 5 5600X.

    But you’re asking “why aren’t you recommending the 5900X processor for this build?”. While it’s true that the 5900X is a lot more powerful, there’s no significant discrepancy in gaming performance in any of the Ryzen 5000 chips.

    In other words, the Ryzen 5 5600X is just as good as the 5900X for gaming. On top of that, the 5600X is a lot more affordable but still more powerful. The core count of the 5600X may be half as that of the 5900X, but you’re still heading into it with 6 cores and 12 threads, which is sufficient for heavy editing workloads and even for intense gaming. We’re convinced that the next generation consoles, or even the current gen consoles, are powered by anything higher than 8-cores and 16-threads.

    The AMD Ryzen 5 5600X comes with the Wraith Stealth Cooler, so you don’t have to purchase a third-party cooler. You don’t really need to purchase a third-party cooler, or improve your current one, if you don’t have any plans on overclocking the CPU.

    Motherboard – Asus ROG Strix B550-E Gaming

    Asus ROG Strix B550-E Gaming Best Gaming PC Build

    Unlike the Ryzen 5 5600X chip, we’re not cutting corners with the motherboard. Here, you’re getting the best one there is in the market, and that’s the Asus ROG Strix B550-E. Here’s a future proof motherboard that’s going to last you for at least 5 years or so without having to upgrade to a newer one.

    As expected from the Asus Republic of Gamers’ line of gaming peripherals and hardware, you’re getting premium specs from the Asus ROG Strix B550-E. You’re getting 14+2 power stage, pre-installed backplates, and M.2 heatsinks. It also comes with Wi-Fi 6 wireless network and an Intel 2.5GB Ethernet. Of course, we can never say NO to RGB led lights.

    As with any Asus ROG motherboards, the Asus ROG Strix B550-E is capable of matching all the other high end motherboards out there today.

    GPU – Nvidia GeForce RTX 3060 Ti

    Nvidia GeForce RTX 3060 Ti Best Gaming PC Build

    Let’s set aside the fact that you’re never going to find the RTX 3060 Ti right now at any of the stores online and locally due to the global shortage and hoarding of crypto miners. The Nvidia GeForce RTX 3060 Ti easily outperforms the RTX 2080, though not by a lot. If you’re really eager to build this gaming PC, the Nvidia GeForce RTX 2080Ti is a solid alternative.

    But going back to the Nvidia GeForce RTX 3060 Ti, its performance levels is unmatched compared to the RTX 2000 series. You can easily hit 1080p and 1440p resolution gaming at about 60fps or so. You could even hit 4k at 60FPS without making this powerful gaming PC work up a sweat.

    It’s also worth mentioning that the Nvidia GeForce RTX 3060 Ti is a lot cheaper than the RTX 2080 Super or 2080 Ti, so that’s also something to incentivize you. If you can find one, that is.

    Memory – Corsair Vengeance LPX 16GB (2x8GB) DDR4-3200

    Corsair Vengeance LPX 16GB Best Gaming PC Build

    In our articles concerning the best gaming PC builds, we’ve always settled for just 16GB of RAM. It’s a straightforward decision when it comes to PC builds, mostly because you don’t need anything higher than 16GB unless you’re planning on running your own Minecraft server.

    The prices for RAM sticks aren’t that crazy, unlike the prices for graphics cards. Corsair and other future brands of RAMs offer 16GB of RAM for less than $100. You can choose between Gigabyte, Crucial, Ballistix, Adata, HyperX, PNY, Team, and XPG as far as we’re concerned.

    Regardless of the brand you want for the RAM installed in your gaming PC builds, the rAM should be at least DDR4-3000 or higher with a low CAS frequency.

    Primary Storage – WD Black SN770 1TB

    WD Black SN770 1TB Best Gaming PC Build

    While you could spend more money to get a high end PCIe 4.0 SSD, the WD Black SN 770 will actually get you high end performance that a PCIe 4.0 SSD gives you, at a more affordable price. And the gold standard for gaming PCs is to have an SSD for your primary storage. When we say primary storage, this is where everything is hosted – from your operating system to your games to your applications. With an SSD, you significantly increase load times and boot times, so you can start playing games and just spend a few seconds on the loading screen.

    The SN770 is an NVMe M.2 SSD that offers you enough space for all your programs and games, and storage for your video and audio files even without forcing you to delete them to make room. What’s even interesting here is that you can expand further up to 2TB SSD if you really want more storage, or cut down to 512GB if you feel like you don’t need much for the best gaming PC.

    Additional Storage – WD Black 1TB (Optional)

    While the SSD provides a far more superior performance in terms of storage compared to the HDD, it doesn’t really hurt to have additional storage for your gaming PC. Most games you find on Steam and Battle.Net are about close to 100GB in size, which is why you probably need 1TB of SSD storage just to be sure.

    For your additional files such as work files, video files, and other files, you can work with a standard 1TB HDD, which the motherboard can accommodate. On our end, we prefer an external storage so we can bring it around.

    If you want external storage, we recommend the WD Black due to its 7,200RPM drive and a 32GB cache. At 1TB, you’ll spend about $70 or less than that. Cheaper alternatives are the Seagate Barracuda or the WD Blue.

    PSU – Corsair TX650M 650W

    Corsair TX650M 650W Best Gaming PC Build

    There’s nothing more boring than talking about a power supply unit for a gaming PC build. But like having the birds and bees talk with your children, this is an unavoidable topic of conversation. For any gaming PC, you don’t want to be cheap when it comes to buying a PSU. And for this PC build, we have the Corsair TX650M. It comes at an affordable price and dons an 80+ Gold Efficiency.

    Power supply units from other future brands are just as good as the Corsair TX650M, but we wouldn’t recommend anything less than a rating of 80+ Gold (Bronze if you want to skimp). The $10 or $20 saved up on buying a power supply unit is not worth it, to be honest. If you end up with a terrible PSU, you could end up damaging your graphics cards, processors, or the entire system.

    For the Corsair TX650M, we have a modular PSU so you’ll deal with less cable management inside the tasks. You only use wires when you actually have to use them.

    Case – NZXT H510

    NZXT H510 Best Gaming PC Build

    As a future gaming PC builder/enthusiast, you’re going to want to pay attention to PC casing. Some of the best gaming PCs out there have RGB lighting, tempered glass side panel, and a sleek black/white coloring.

    For this build, we want your gaming PC to be as sleek as it can get with the NZXT H510. It’s an affordable casing with premium features and aesthetics, so if you’re going for that clean and minimalistic look, this is the case for you.

    Ultimately, a gaming PC case is personal preference and doesn’t really affect the overall performance. It does, however, restrict you with motherboard choices, cable management, and even radiator sizing (if you plan on building a liquid cooling system or AIO cooling). Where you put your gaming PC also matters in terms of cooling solutions. For example, PCs tend to get hotter when you put your PC on the carpet.

    Build #2 – An Extreme Gaming PC Powered By Intel Core CPU

    The second gaming PC build that we’re about to feature showcases a gaming computer with all the high end hardware you could ever get. These specs are what you’d usually find in PC builds that can run 4k gaming at 60FPS easily or something you’d find in a pre built system (like a high-end gaming laptop).

    If you are considering this build, you’re expected to spend a lot of money just to get the parts. This gaming PC doesn’t shy away from the costs, but we’ll provide you with the best gaming hardware alternatives as well.

    CPU – Intel Core i9 12900K

    Intel Core i9-12900K Best Gaming PC Build

    If you want the best of the best, look no further than the Intel Core i9-12900K processor. This is the top of the line Intel Core processor and is the fastest chip in the market right now. But AMD still gives the Intel Core i9-12900K a good competition with the AMD Ryzen 7 5800X3D.

    The Intel Core i9-12900K is a 12th generation unit with hybrid core architecture, characterized by a combination of Performance Cores and Efficient Cores (P-Cores and E-Cores, respectively). The P-Cores give the Intel Core i9-12900K all the power it needs for gaming at high resolution.

    The Intel Core i9-12900K is also the latest hardware from the Intel Core lineup and provides the best performance in their product roster. With that said, expect to pay a couple more hundred dollars than the other Intel Core processors, namely the Intel Core i5 and Intel Core i7.

    If you do decide to run with the Intel Core i9-12900K, you’ll need a good motherboard, a powerful cooling fan, and a very sturdy PSU.

    Motherboard – Gigabyte Z690 Aorus Pro

    Gigabyte Z690 Aorus Pro Best Gaming PC Build

    You’re running an Intel Core i9 processor, so it’s only fair that you get a compatible motherboard for it. And when we say compatible, we actually mean something that can withstand and house the awesome processing power of the Intel Core i9 and the graphics card (which we’ll feature below).

    Here, we have the Gigabyte Z690 Aorus Pro for this extreme build of a gaming computer. This is an all-specced out motherboard with 13-rear USB ports and strong VRM, capable of delivering consistent and clean power to all of your hardware.

    And yes, you’ll have the Wi-Fi 6 connectivity and 2.5GB Ethernet connections. Unfortunately, you don’t have Thunderbolt 4 or another M.2 slot, which are unnecessary for this gaming PC.

    Graphics Card – Nvidia GeForce RTX 3080 Ti

    Nvidia GeForce RTX 3080 Ti Best Gaming PC Build

    Why isn’t this an Nvidia GeForce RTX 3090? That’s probably the first thing that came to your mind when you got to this part. For this extreme PC gaming build, we wanted something robust and powerful. Something that could make 4K gaming at 60FPS even for the most demanding AAA games. And the GeForce RTX 3090 would fit that tab, but there’s also one more: the Nvidia GeForce RTX 3080 Ti.

    The Nvidia GeForce RTX 3080 Ti has one of the best prices for graphics cards in the market right now, and is about $300 cheaper than the RTX 3090 (of course, if you can afford the Nvidia GeForce RTX 3090, go for it). At the $1,200 price tag, it’s not a budget option but this build is anything but budget-friendly. Compared to the RTX 3090, the Nvidia GeForce RTX 3080 Ti is as capable of 4K gaming as its high-end sibling. Ray tracing at 4K is even possible, if you make use of the DLSS 2.0 feature.

    However, this is still one of the most difficult graphic cards to find due to the global shortage and scalping issues that plague the graphics card industry at the moment.

    Cooler – NZXT Kraken X62

    NZXT Kraken X62 Best Gaming PC Build

    This is the best gaming PC build we can imagine. You have a powerhouse Intel Core i9 processor and an Nvidia GeForce RTX 3080 Ti graphics card, so it makes sense to have a beastly cooler. Here we have the NZXT Kraken X62 and yes, it’s the BEST PC cooler there is because it can handle overclocking the i9.

    The reason why you’re actually getting a cooler is that Intel Core processors don’t have their own CPU cooler, so you’d have to rely on third-party coolers. They’re not like the AMD Ryzen processors where they have their own coolers, but you can still opt to use the NZXT Kraken X62 with the first gaming PC build above.

    If you plan on pushing the Intel Core i9 to its limits, you’ll run into some problems if you just rely on the NZXT Kraken X62. You’ll need a custom liquid cooling loop, which is far beyond the scope of this build, because not even the best AIO cooler can handle a maxed out Intel Core i9 processor.

    Memory – G.Skill Trident Z5 DDR5-6400

    G.Skill Trident Z5 DDR5-6400 Best Gaming PC Build

    You’re probably wondering why we didn’t settle for a DDR4 for the RAM, but this was just too good to pass on. With a motherboard that could accommodate DDR5 memory, it would’ve been a complete shame to use anything but a DDR5. With that said, we get two sticks of 16GB DDR5 RAM at 6400 frequency. The G.Skill Trident is one of the few DDR5 RAMs out there that we’d ever want to put into this build.

    And yes, 32GB of RAM is more than enough for gaming or content related tasks such as video editing, 3D rendering, and so on.

    Primary Storage – Sabrent Rocket Q 4TB

    Sabrent 4TB Rocket Q4 Best Gaming PC Build

    If you think you’ve seen once, you’ve seen them all, but you haven’t really seen a 4TB SD just yet. The Sabrent Rocket Q 4TB SSD packs a lot of storage and performs just as well with MLC drives. Granted, the Sabrent Rocket Q 4TB SSD may not be as bandwidth-friendly as other PCIe 4.0 drives, but without this combination of CPU and motherboard on this gaming PC, the Sabrent Rocket Q 4TB SSD’s storage would be put to waste.

    At this point, you won’t even need an optional storage because you have everything that a gaming PC in 2022 will ever want in an SSD.

    Power Supply Unit – EVGA SuperNova 1000 G5

    EVGA SuperNOVA 1000 G5 Best Gaming PC Build

    By this point, overclocking a gaming PC in 2022 is so yesterday’s news, and this build is still capable of delivering more power from more cores. But do you really need to?

    Well, in case you really need to overclock an Intel Core i9 processor, you’ll need the EVGA SuperNova 1000G5. This bad boy offers 1000W of power for this extreme build and provide you with a smooth gaming experience unlike any other. After all, you need all that power for the Intel Core i9 processor and the Z690 motherboard we just put together, not to mention the RTX 3080 Ti.

    But if you’re not running an RTX 3080 Ti or an RTX 3090, you can make do with EVGA SuperNova 850T2 that should cut down on some costs for this extreme build.

    Case – Corsair Obsidian 1000D

    Corsair Obsidian Series 1000D Best Gaming PC Build

    A high end gaming PC deserves a high end case, and for that we have the Corsair Obsidian 1000D, a behemoth PC case with a tempered glass side panel, expansion slots, and enough space to house 18 fans and 4 massive radiators at one time.

    And yes, this is the case that you need for when you’re overclocking an Intel Core i9.

    How To Choose Operating System and Computer Peripherals

    We’re done with the hardware so it’s time to talk about the extras, such as the operating system and the peripherals. These are also integral to get you the best gaming experience possible out of the gaming PCs we’ve built above.

    Operating System – Microsoft Windows

    While there are three operating systems, namely Microsoft Windows, Apple iOS, and Linux, we’re going to have to go with Microsoft Windows as the OS of choice for the gaming PCs on this article.

    When it comes to gaming PCs, Microsoft Windows 10 is the most popular choice, achieving more than 80% market share back in December 2021. The reason why Microsoft Windows is so popular is its ease of use and user-friendly UI. It’s easy to navigate and it’s easy to install apps.

    Updates are rolled out regularly and as long as you have it set to automatically update, you shouldn’t have to worry about falling behind on the latest versions. Now, one could argue that Windows 11 is the new thing and easily outmatches the Windows 10 in terms of gaming. With Windows 11, you get access to a built-in store that houses thousands of game along with the Xbox app and more.

    Mouse and Keyboard

    Gaming PCs wouldn’t be complete without a gaming mouse and keyboard. Much like the PC case, this is more of a personal preference than anything else. You can go for brands such as HyperX, Logitech, Razer, Corsair, and SteelSeries just to name a few.

    Once you’ve picked up a brand, it’s time to decide if you want to go the wireless route or if the wired setup is still the best gaming PC setup for you.

    Gaming Monitors/Displays

    A great monitor is half the build of what makes the best gaming PC, but ultimately, it’s still a personal preference. What you really want to buy here is the monitor that matches the specs of your computer.

    For the builds we’ve listed above, we recommend going for a 1080p/144Hz/240Hz monitor, or go for a 1440/144Hz monitor. If you want the best displays possible, settle for a 4K/60Hz monitor or 1440p/144Hz/240Hz monitor.

    Other Points for Consideration For Building the Best Gaming PC

    If you want to build a gaming PC, there are several things that you have to consider. But the main point of consideration here is your budget because it affects your ability to buy the components necessary for a gaming PC.

    So how much should people be saving up for if they want to build the best gaming PC possible?

    What Are Your Needs and How Big Is Your Budget?

    Your needs are ultimately dependent on the size of your budget. Component prices are expensive, but it doesn’t mean to say there are no practical options available. On the contrary, you’ll find a lot of people who are into gaming PC builds will often stretch their budgets on just certain components, like graphics cards.

    These are the people who are already familiar with hardware compatibility, so they don’t have issues at all with combining certain components from various price ranges. But if you’re just starting out on getting into gaming PC builds, you can refer to the following price categorization:

    • Entry Level Builds – Estimated Budget: $300 to $600
    • Midrange Builds- Estimated Budget: $700 to $900
    • High-End Builds – Estimated Budget: $1000 and above

    Editor’s note: the price range covers only case and hardware, with no inclusion of other peripherals.

    What Does Entry Level Mean?

    A $300 to $600 budget for your gaming PC allows you to run certain games at low settings, but you definitely won’t be able to play AAA or any demanding games. At this price range, this is the best PC for playing older games, like games that were released about 5 to 10 years ago.

    Note that with the stupidly inflated pricing of graphics cards, you’ll probably end up with running integrated graphics on this budget for PC builds.

    If you’re fine with spending at least $500 to $600, you could land yourself a budget graphics card and an Intel Core i5 12400 (but realistically, you’re getting probably 9th generation or 10th generation) with about 8GB of RAM and 240GB SSD for storage.

    But you might just want to hold off on capping your budget at $600 and just move on to the

    What Does Midrange Mean

    At this price point, you’re looking at about $600 to $800 (maybe even stretching to $900) for these PC builds. You’re good to go with probably landing a decent processor like an Intel Core i5 12400 (or even 11th generation) with a decent air cooler, with a GTX 1000-series graphics card (if you can find one).

    With a price range for this build, you’re going to have fun with higher graphic settings and higher FPS settings. You’ll also have more money to spend for more RAM and storage capacity.

    What Does High-End Mean?

    This price point for a PC specifically has you just saying “money’s not a concern at this point”, or you just want to get the best bang for your buck. Either way, you’re no longer hesitant to stretch out your budget to build the best gaming PC possible.

    At a $900 or higher, you’re getting the high-end components. For Intel processors, you’re ending up with an Intel Core i5 12400 or an Intel Core 7 12th generation processor. For AMD Ryzen, you’re probably getting at least a Ryzen 5 or Ryzen 6. For gaming PC builds of this price range, you’re enjoying 4K gaming at 60FPS or 60FPS at 1440p gaming even.

    What Is A Good Budget Then?

    When it comes to building a gaming PC, a bigger budget would guarantee better gaming performance. After all, your gaming PC is equipped with the right hardware that will allow you to play games at the desired settings.

    For the current market that we have, including the fact that we have an insane surge of graphics cards’ pricing, a decent budget for a gaming PC should be somewhere around $1,200. With the different price points above, you should be able to land an Intel Core i5 or i7 / AMD Ryzen 5 or 6 processors while still having enough money to purchase a GeForce GTX 1000 or 2000-series graphics cards (or AMD Radeon 5000-series).

    Go For A Custom PC Build or Buy a Prebuilt PC?

    By this time, you’re still arguing as to whether or not it’s better to get a custom PC build or purchase a prebuilt PC.

    Assuming your budget is capable of purchasing either of the builds we’ve listed on this article, it’s not exactly a bad idea to also go for a prebuilt gaming PC. Note that you might end up paying more to match the specs of the custom PCs we’ve listed here to a prebuilt PC. The reason being is that a manufacturer or brand of prebuilt gaming PCs will have already marked up their prices based on the components.

    For example, a custom PC build will cost you about $1,500. Pre built gaming PCs of that same price might have the same specs or so, but expect some of them to be a little less powerful than the custom PC. For that budget, you could get yourself an Intel Core i9 processor with an RTX 3000-series video card for the custom PC. But for a prebuilt PC, your processor and graphics card may be downgraded to match the markup. If you go for a prebuilt PC with an Intel Core i9 and an RTX 3000-series graphics card, you’ll end up paying more than $1,500.

    With that said, there are two considerations here and should help you determine what’s the best move for you here:

    Go for a Self-built PC If:

    • You are fully confident about your capability to assemble the PC from scratch.
    • You are tech-savvy and you know where everything should go
    • You’re able to get all of the components without difficulty, or are able to locate possible alternatives if any components are unavailable for purchase 

    Go for A Pre built Gaming PC If:

    • If you’re technophobic or feel the slightest bit not confident in your ability to put together a PC
    • Your knowledge about computer hardware and its inner workings are limited
    • You don’t have access to getting all the right PC components

    Playing games on either a custom PC build or a prebuilt PC with the same specs should still provide you with similar gaming experiences. Unless the prebuilt gaming PC you’re eyeing is a big downgrade from the custom PC, the margin for better performance is thin at best.

    But Is It Difficult To Build Your Own PC?

    The honest answer here is NO. But the main concern for any newbie builder is compatibility issues and susceptibility to damaged parts. Compatibility can easily be managed if you know how to do you research for hardware.

    But for damaged parts, you should be able to avoid catastrophically damaging any of the parts if you follow the instructions.

    What Tools Do You Need?

    How To Build a PC Tools

    Before you build a PC, it’s important that you have all the necessary tools and space to do so. Some of them you’ll be able to find easily in your local hardware stores, if you don’t have them at home.

    So what are the things that you need?

    1. Workstation or a large enough table to accommodate all parts laid out
    2. Phillips Screwdriver
    3. Antistatic bracelet
    4. Thermal paste
    5. Lint-free cloth or paper towel
    6. Cable ties and cable snips (optional)
    7. Isopropyl alcohol
    8. Anti-static mat

    Let’s talk about a few of these items because we’re pretty sure you’re unfamiliar with some of them:

    Workstation

    You need a large enough space that’s clean and capable of handling all the boxes of computer parts. You don’t need a high-end set up as well or an anti-static room to do all of the assembly.

    Make sure that wherever you’re working has enough lighting because there are several intricate actions done when putting together certain components. You can also use an anti-static mat on top of the table to lay out all of the items. This anti-static mat will also prevent electrostatic discharges from damaging any of the components.

    Screwdriver

    The screwdriver will be your most used tool when it comes to building your gaming PC, from installing and removing the tempered glass side panels to installing the CPU cooler. It’s also important that your screwdriver has all the heads to match the heads of the screws that the components areusing.

    Thermal Paste

    If you’re building your own PC, you need to secure a thermal paste. This thermal paste is used in conjunction with the processor and its cooling fan, or CPU cooler, to prevent overheating. If you’re running an AMD processor, its CPU cooler will have been treated with thermal paste, so you don’t have to worry.

    Antistatic Bracelet, Mat, and Gloves

    Antistatic gloves, mats, and bracelets are important if you want to build a PC. This is to help protect your components from unnecessary electrostatic discharges. Some components, like the SSDs, are sensitive to these discharges, so if you’re not careful, you could end up damaging them during assembly.