Being able to monitor the temperature of your PC is really important. If your temp’s get too high you risk damaging your computer, losing performance, or having to deal with crashes and failures.
The damage heat can cause to your sensitive and often expensive components can be significant if left unchecked, which is why it’s really important to make sure you’re able to keep track of them.
This will help you learn how your PC is coping with various different workloads and stresses, as well as how different environmental conditions and cleanliness are affecting your PC’s ability to keep itself cool.
A good CPU monitor uses sensors throughout your system to track how hot various different components get, and while they have a focus on preventing your CPU itself from overheating, they will quite often be able to check other components including your graphics card, storage drives, and even your motherboard and RAM.
The best monitoring tools are often quite small and easy to use programs, but some are easier to use than others and have clearer, more streamlined interfaces.
In this article we’re going to look at some of the best free temperature monitoring tools for Windows computers, evaluating how well they perform, their usability, and compatibility.
This will help give you a much better idea of how many options you have and will allow you to try a few different tools to make sure you’re getting consistent, reliable results which will ensure the longevity and performance of your system.
HWMonitor
HWMonitor is a very detailed tool that was made by the same team who created CPU-Z, a very popular piece of freeware that is also capable of monitoring and profiling systems.
This tool works with Windows and is compatible with both 32-bit and 64-bit systems, meaning it’s very versatile and will enable users to monitor their temperatures even on older systems.
This is actually more important because older systems are more likely to heat up and throttle the performance, so keeping track of this is a way for users on older systems to keep an eye on things and prevent throttling or crashes.
It’s a tool that’s very easy to install and is available both as an installable or non-installable version depending on user preference.
The tool reads a variety of metrics and tracks CPU temperature as well as voltages, fan speeds, and other component temperatures.
The interface is very clear and simple to use in its summary format, but those who want a more in-depth look at these metrics can use the ‘sensor only’ mode to view a longer and more detailed list of information from various different sensors in your system.
This tool is lightweight, reliable, versatile, and easy to use making it one of the best temperature monitoring systems available.
Speccy
Speccy is another free monitoring tool and was developed by the team who produced CCleaner, one of the most popular programs for drive management and removal of waste files.
Their reputation based on the success of CCleaner alone is stellar among tech nerds, and speccy has some telltale signs of its creator’s touch.
It’s a fairly lightweight and fast application, with easy-to-use interfaces and a range of helpful and easy-to-access information about temperatures for almost all your components, including storage drives.
This app can also create detailed reports about your hardware’s performance over a certain period of time. The tool is updated quite often meaning it is constantly being improved and offers a ton of utility for its size, and is also available in a creator bundle for those interested in CCleaner or the other products this team offers.
HWiNFO
HWiNFO is another great free tool that provides a lot of monitoring capabilities including CPU temperature monitoring which is the most crucial of all.
This is a great choice for those who are using older operating systems as it works on all Windows versions as far back as Windows 98, for those individuals who are stuck waaaaay back in the past.
This tool can monitor various components including individual chipsets and it also has the ability for users to customize specific notifications for any component which is being monitored, making it easy for you to keep track of performance while working on other tasks.
It is also compatible with several other third-party applications and extensions.
Open Hardware Monitor
This is a very simple monitoring tool that has a very minimalist and easy-to-navigate interface, making it ideal for use while gaming or performing other high-load tasks.
It can monitor SMART information about your storage drives, and also monitors clock speeds, fan speeds, and of course temperatures for various important components.
It’s compatible with 32-bit and 64-bit versions of Windows and works with everything from Windows XP to Windows 10. It is also compatible with some Linux-based operating systems, which is a neat feature if you change your OS down the line.
It works with most major manufacturers including Intel, AMD, and NVidia, and as an open-source project, there is a high level of trust and community assistance available.
Core Temp
Core Temp is a tool that is very lightweight but also very powerful, allowing you to monitor crucial metrics when performing difficult tasks.
The tool allows you to track the temperature of each individual core in your CPU and see changes occurring in real-time which is incredibly useful for monitoring performance when overclocking or stress testing.
Various processors by Intel and AMD are supported, and it works well on Windows systems.
It is also very easy to use with a simple and clear user interface and clear readings, making it very simple to use even for beginners.
It’s also possible to install extensions that add several neat features such as remote monitoring from separate devices.
Speed Fan
Speed fan is another great tool with many awesome features such as temperature monitoring and altering the fan curve of your system, which allows you to tailor your cooling and manage your temperatures according to your own usage and workloads.
This tool is compatible with all versions of Windows from 95 to Windows 10 and works with x86 and 64-bit processors.
It also has some neat features that allow more experienced users to track additional data, such as hard drive SMART information and storage temperature.
Real Temp
Real Temp is a fairly popular and simple way to keep an eye on your CPU temps without massively adding to your workload, however, there are a few caveats, unfortunately.
This tool only works with Intel processors and doesn’t work at all with AMD or Pentium 4 CPUs, meaning alternative tools are required for users of these systems.
The beauty of this tool is in its simplicity and leanness, it doesn’t come packed with features and versatility. It is simply for temperature monitoring and it is focused on doing that as efficiently as possible.
CPU Thermometer
CPU Thermometer is a tool that works with Intel and AMD processors, and functions with 32-bit or 64-bit systems from Windows Vista to Windows 2008, Windows 7 and Windows 10.
It’s a fairly basic tool and has a very minimal interface which is quite easy to understand and work with.
It allows you to set a max temperature for your CPU, meaning it will display a warning at this temperature, or you can also set it to shut down your system or reboot depending on your preference which is a very simple way of ensuring your system is protected from heat damage.
AIDA64 EXTREME
This monitoring system is a very powerful series of sensors and tools designed for those who want as much information and flexibility as possible from their monitoring software, making it a great choice for overclockers in particular.
There is a 30 day free trial of this tool, but the full version is a paid program. However, the level of detail and assistance this tool provides is excellent. It is compatible with most modern versions of Windows be they 32-bit or 64-bit.
If you just built your own computer, or have been running an old system that you might want to check up on, one of the first things that you need to do is to check on your CPU temperature. You need to know what the normal CPU temp is, and what temp you need to be running at to protect the integrity of your system unit.
But monitoring your average CPU temp won’t do you any good if you don’t know what CPU temperature you should be at for games, office tasks, or even entertainment. In this article, we’ll show you how to check for normal CPU temperature, and tell you how hot your CPU should be running.
Every processor is built to run at different temperature ranges, meaning they’ll have different maximum operating temperatures. The core premise is still the same, regardless. If your CPU is too hot when it shouldn’t be, you end up damaging your PC in the long run.
If you just want a quick answer, or a one-size fits all kind of answer, don’t fret. We also have that information available to you in this article.
Quick Fix – Is Your CPU Temp Too High?
This section may not be an accurate one-size-fits-all answer, but you should have a slight idea on what normal CPU temperature your PC should be hovering at.
When we say “Normal” CPU temps, it usually varies between processors. But generally speaking, your CPU temp limit should hover at about 45-degrees Celsius when idle, or over 95-degrees Celsius when under full load. By full load, we mean you’re doing heavy processing tasks such as gaming, video editing, rendering, and more. If you find your CPU hitting 45-degrees Celsius, or 95-degrees Celsius consistently, then it’s a cause for concern because you might have a problem.
Note that this is a blanket statement and may or may not even affect your CPU in its entirety. What might be high CPU temperatures for one brand might be different for the next. If you really want to know the root cause of high CPU temperatures, continue reading this article.
What’s The Ideal CPU Temperature Range?
When we say ideal CPU temperature range, we mean the optimal temperature that allows your CPU to perform at its best. One might consider a good CPU temp would be somewhere at low temperature limit when under a light load, and then increase from there when certain tasks call for more processing power.
When CPU temperatures get too high, it can damage PC components or slow down the entire system unit. Modern CPUs have built-in thermal protection that prevents the CPU from reaching dangerous temperatures. But as mentioned earlier, different processors on the market have different tolerances or ranges, but you’ll find that there’s an optimal range for temperatures that help maximize CPU usage and performance. The acceptable range for any brand is about 150 to 160 degrees Fahrenheit (about 65 to 70 degrees Celsius) when the CPU is running apps. If you’re gaming or intensive software (3d-rendering or editing, video editing, etc.) temperature limit can go as high as 175 degrees Fahrenheit (which is 80 degrees Celsius).
Laptops are a different story because they’re most prone to high temperatures due to the nature of their build. The acceptable temperature range for laptops running at low load is about 160 to 170 degrees Fahrenheit (71 to 80 degrees C), and as high as 190 degrees Fahrenheit (88 degrees C) for playing games and intensive tasks. Higher-end 120Hz gaming laptops are more capable of handling higher temperatures than non-gaming laptops.
For optimal performance for either laptop or desktop, you should be hitting these ranges for your CPU’s temperature. If it’s higher, then you might have issues.
How Do You Monitor CPU Temperature?
Monitoring your CPU temp should be done as frequently as you’d check your car’s oil, but it’s a lot easier to check for the former. You don’t need to do it daily, but it’s something that you might want to keep an eye out for.
Keeping tabs of your CPU temp will help you identify potential issues that could affect your performance. If you know what your current temperature is for idling, playing games, and office productivity tasks, then you should have no performance issues at all because you know what temps you should be running. You also have an idea on a healthy temperature range for your CPU, and so you avoid thermal throttling.
Thermal throttling happens when you’ve reached maximum temperature for a specific task, i.e. gaming or video editing, and to prevent further damage to your unit, your CPU or GPU will reduce its performance to shed some heat.
Bu how do you check your CPU temp? There are a couple of ways for you to do this.
Via Motherboard’s BIOS
You can check for your CPU temperature via your Motherboard’s BIOS, but you’ll only read your average CPU temp when the unit’s idle. It won’t help you know what temps you’re running when you’re stress testing.
Temperature shown in BIOS may also be a bit higher than what the system is actually idling in Windows because BIOS will boot your processor using higher voltage levels to make sure that it will start up.
If you want a more accurate reading of CPU temperature, you’ll need to work with third-party programs. Most of them are free to download and use, while there are others that require a small fee.
Use Hardware Monitoring Software such as Core Temp
As mentioned above, you check for CPU temperatures using third-party hardware monitoring software. A good example is Core Temp, which is also what I use to monitor my CPU’s temperatures.
My gaming rig runs on an Intel Core i7-8700K processor, which is a 6-core CPU. Core Temp will show you the temperatures are for these six-cores. My average CPU idle temp for all cores sits at 30-degrees C, which is lower than you’d expect from its AMD CPU counterparts.
Now this might not be the case for another Intel CPU, but Core Temp will definitely let you know how hot your CPU is going, regardless of brand and hardware specifications.
Using Prime95 to Stress-Test
To push CPUs to the limit, we use third-party software stress-test tools such as Prime95 to identify potential heating issues and more when GPUs and CPUs are put under heavy load.
What these software actually do is to push both processor and even GPUs past their realistic levels. By realistic levels, we refer to the highest maximum temperature that may or may not affect performance.
Stress testing CPUs and GPUs will allow you to determine how hot your system can go under controlled environments. You’re not exactly forcing them to run on its maximum recorded temperature for too long. Stress-testing only takes a few minutes and even then, you’re not exactly running at max temps all throughout.
What Are Safe CPU Temps Under Load?
Using my CPU as an example, Core Temp puts my average CPU temperature at about 77 degrees C to 80 degrees Celsius at a 100% load.
Now I know what my ideal temps should be for my Intel Core i7 processor, but is it a good range in general? These temps are relatively safe, regardless if it’s an Intel CPU or AMD CPU. But there are a few things to consider here:
You Now Know Your CPU’s Normal Temp When Idle and Under Heavy Load – What’s Next?
Intel and AMD are the biggest hardware manufacturers for CPUs, but they do not provide you with specific numbers on what’s considered normal CPU temperature. There’s not a lot of info anywhere on the web that will give you this info outright.
This is because there are different factors that will determine what temperatures your processor’s cores are running at. If a hardware manufacturer suggested a one-size-fits-all recommended operating temperature, it could make things worse for the end users.
So the only way for you to gauge if your average idle temp and heavy load temp are within ideal range is to compare it with other people who own the same CPU as you. You can check forum posts or watch videos about the processors that they have
You’ll find that a lot of PC enthusiasts are more than happy to provide you with CPU temperature information, mostly for the purpose of third party benchmarking reference or for showing off. The latter is quite an uncommon reason, but people still do it especially when they overclock their processors and run on better cooling solution (i.e. liquid cooling). Liquid cooling allows people to let their CPUs run hotter for extended periods without sustaining thermal damage and reducing blue screen risks.
Different Factors That Affect CPU Temps
It’s normal for CPUs and GPUs to increase in temperature when they’re doing minor or intensive tasks. But apart from idling and heavy load, there are different factors that come into play that will affect your CPU’s temperature.
Optimal CPU Temperatures Depend On What Brand of CPU You Have
My Intel Core i7 processor will be running at different temperature ranges than someone with an AMD CPU counterpart, or an older Intel Core i3 CPU at idle and under heavy load.
Processors run at different temperatures but it doesn’t mean that the discrepancy is large. you’re looking at a couple degrees Celsius, higher or lower. Then there are other factors that come into play that could affect CPU temperatures greatly.
So, the first thing you need to understand is that you shouldn’t compare the temperatures you are getting to the temperatures someone else is getting who has a completely different processor.
Better CPU Cooling Solutions Mean Better CPU Temps
Paired with my i7-8700K is an 360mm AIO cooler, which is a lot better than the stock coolers that typical processors might come with. When I would compare my idle temp with another person who runs the same CPU but with the stock cooler, my temperatures would be relatively lower.
It comes as no surprise that custom system builders who are putting their CPUs under heavy loads constantly run liquid cooling systems to help dissipate heat. These are people who thrive on higher CPU temperatures just so they can have more processing power. And obviously, people with liquid cooling will have CPU temperatures that are lower than mine, even when under heavy load.
The same thing can be said for the thermal paste that you’re using. Stock thermal paste applied on Intel’s CPU stock coolers are not going to give off better heat transfer as compared to a high-end thermal paste or compound. As a result, reapplying thermal paste that’s considered high-end will greatly affect your CPU temperatures. Different PC cases can also affect your cooling solutions.
So this is also something worth considering for managing CPU temperatures.
Better PC Casing With Higher Airflow Equals Better CPU Temps
Think of your computer as a house. Your house wouldn’t be as cool as the next house if you didn’t have any windows or any form of ventilation. Likewise, a good PC casing that provides you with better airflow can greatly affect your CPU temperature and GPU temperature.
You might have the same processor as me, or the next person, but if they have a PC casing that has more fans and more ventilation than yours, they’re going to run on lower temperatures for idle and heavy loads.
Of course, you could also consider that these if you want less heat coming from your PC.
Ambient Room Temperature Must Be Considered Too
Another factor that affects normal CPU temp is your ambient room temp. Let’s say you built a PC with the same processor as me, which is an i7-8700K and you fire it up. Your normal CPU temperature is somewhere at 33-degrees C for idle. You’re probably thinking this is normal and average because you saw someone post a temperature of 30-degrees C with the same CPU on another forum.
Why is your processor is 3 degrees higher than the other person’s CPU? It’s quite possible that your room temperature where you are running your computer is higher than that person’s room temp when he or she was running their computer. It could also mean that your processor was
A fully air-conditioned room will affect the CPU’s temperature differently, both idle and under heavy loads, as opposed to another room that just relies on window ventilation. It might just so happen that the person who was running 3 degrees lower than you had a cooler room or lives in a country that’s colder than yours.
Overclocking Your Processor Means Higher Temperatures
It goes without saying that overclocking your processor will result in higher temperatures. Overclocking happens when you have your CPU running higher clock speeds than its stock settings.
The faster your CPU is running, the hotter it will get. Combine this with liquid cooling system and a software that allows you to manage fan speeds (i.e. MSI Afterburner). If you’re just relying on stock cooling solutions, then overclocking is going to cause your CPU’s integrity to deteriorate faster.
What Is A Normal CPU Temp While Gaming?
Gaming will always put extra stress on your CPU and GPU. This means that when you’re gaming, you’re more or less running at close to high temperatures for both components. Of course, both CPU and GPU will be running at temperatures that they can manage. The CPU won’t get too hot, unless there are underlying problems.
What’s the optimal CPU temperature when it comes to gaming? That’s a common question asked by a lot of people who aren’t familiar with how hot their components should get.
What Is The Optimal CPU Temperature While Gaming?
For this section, it doesn’t really matter if you’re running an AMD or Intel CPU. The temperature threshold for processors may vary greatly, but the discrepancy is very minimal. You’re looking at plus or minus a couple of degrees Celsius between two different processors to determine which has better temperatures.
Optimal CPU temperatures when you’re gaming should not exceed 80 degrees Celsius (176 degrees Fahrenheit), and should hover anywhere between 75 degrees and 80 degrees Celsius. If you have cooling features that allow you to run on less heat, then that’s a different story.
But even if you have a better cooling design, longer gaming sessions will always force you your CPU to reach higher than normal temperatures. This, in turn, will result in thermal throttling. Your gaming performance will deteriorate just so it can shed off some heat.
Now thankfully, modern games are now designed in a way that the majority of their performance is drawn from the GPU’s power, which wasn’t always the case before. Back then, games heavily relied on CPU to meet performance requirements. Today, games are now reliant on drawing more power from GPU to increase frame rates. This resulted in consumers now demanding more power from the GPU manufacturers and better cooling solutions to help balance out performance and heat.
But for the longest time, AMD and Nvidia are two GPU manufacturers which have gone after each other’s throats. The latter just so happens to have dominated the market, but it doesn’t mean that AMD is lackluster in terms of their GPU roster as well.
At most, modern GPUs capped out their max temps at about 95 degrees Celsius. This is done so there’s no further damage done to the GPU when it’s under heavy load. But having said that, it doesn’t mean that you should always be pushing past 85 degrees Celsius at any given time, even if your GPU is meant to go hotter.
Regardless of whatever brand of GPU you have, it’s worth noting that there are different contributing factors that affect your GPU’s temperatures:
Playing heavily GPU-dependent games
GPU’s cooling design
Ambient room temperature
Quality of the case
Available cooling solution (i.e. liquid cooling, high-end CPU coolers, etc)
Quality of airflow (i.e. number of case fans, ventilation options)
Going back to previous discussions about comparing the same CPU but with different parameters, having the same GPU with another person does not mean you’ll be running on the same temps. Whatever affects the overall temperature of your CPU will also affect your GPU.
How Do You Fix High CPU Temps?
We’ve discussed what are the different factors that could affect your CPU’s temperatures, and we’ve also tackled how you can improve your CPU’s temps as well.
If you really want to fix your high CPU temperatures, then consider doing the following:
reinstalling your CPU cooler, or purchasing a better one
Reapplying thermal paste (consider purchasing commercial or high-end compounds)
Buy a better case
Reconfigure your fans (you can do this together with buying a new case)
Clean out your computer with compressed air or some light brushing
Remove the side panel of your PC (if you’re overclocking)
Doing any of these should help you reach optimal temperatures for both CPU and GPU, resulting in optimal performance anytime.
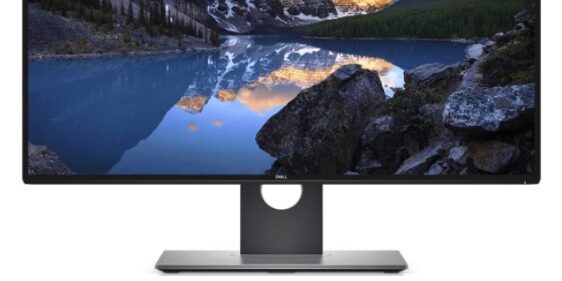
To introduce the article, we thought that the first thing we should do is to introduce what these specs actually are. Computer specs simply mean the specifications of your computer. They include various components but the ones that we are going to be focussing on are CPU, GPU, Motherboard, and RAM.
Depending on your level of computer knowledge, the terms CPU and GPU may well be totally confusing to you, or you may feel like an expert on them. RAM and motherboard are a little more widely known, we guess, but even so, many people might have heard the terms but may not know exactly what they mean.
Here’s a quick rundown:
CPU – This is the central processing unit of a computer. It is like the brain of the computer and is what puts things into action. It is the main data processor of all computers.
GPU – This is the graphics processing unit of a computer that can process data quickly and with ease to provide images. This is essential for gaming, video editing, and more.
RAM – This stands for random access memory which is basically the short-term memory of your computer. Data gets stored as and when your processor needs it.
Motherboard – This is where the magic happens in the sense that this is the backbone that exists to allow all the other components of the computer to work. It needs to be totally functional for your PC to work.
We would also hazard a guess that, even if you know what the terms mean, you may not know how to find out what specific CPU, GPU, RAM, or motherboard your PC has.
You certainly won’t be alone in this, especially if you have had your computer for a long time – you might have totally forgotten its exact specs.
Why do you need to know the specs for your computer?
You may not think it is important to know the specs of your computer (or perhaps you do think it’s important, in which case – you’re right), but when it comes to wanting to upgrade your computer or sell it on, these are vital pieces of information that you will need to know about.
Upgrading your computer will mean you need to improve on the specifications for each of these components. Therefore, you need to know what they are in order to choose better.
When you are selling your computer, buyers will be interested to know what they can expect, and the best way to do this is by looking at the specs.
So, let’s find out how you can check these specs…
Just a note, we will be exploring how to find these components on a Windows 10 computer specifically. However, we will be explaining another method you can use to try to ascertain the specs of another computer.
How to Check Your CPU
One of the most important components of the computer is the CPU. In this section of the article, we are going to be teaching you how to establish what specific CPU you have and how to find it.
It really is just as simple as two clicks! Yep, really! All you have to do is locate the windows start menu icon. This should be located at the bottom left hand corner of your screen.
When you have found that simply right click on there and then find the word ‘System’. Click this and you should get a lot of information pop up.
Look for the word ‘Processor’ and this will tell you the CPU of your computer.
Super easy, isn’t it? We bet you thought it would be waaaaay more difficult than that! OK, now onto the GPU…
How to Check Your GPU
So, now we’re onto GPU. the graphics processing unit. Well, we’re sorry to say that this is going to be a little bit more difficult than finding out the CPU.
There is a specific reason for this and that is that the process involves one extra click! However, will you manage?
For real though, in just three clicks you will be able to find out your GPU. all you have to do is locate that same windows start up menu in the bottom left hand corner and right click on it.
When this opens up you should find the term ‘Device Manager and click on it. When this opens up you should see another menu with one of the terms listed as ‘Display Adaptors’.
Under this, there should be the specifications of your GPU. For example, mine is written as AMD Radeon(™) Vega 8 Graphics.
…and it really is as simple as that!
Keep in mind that depending on your computer, you may well see two options under this, one for your dedicated GPU and one for your integrated GPU. Your dedicated GPU is the one you want to determine and it is typically the second on the list.
How to Check Your Motherboard
Ummm, just give her a call, obviously…
Oh, wait motherBOARD! I see… Well, that’s even easier than checking on your actual mother!
The process of checking your motherboard is a little different from the one used to check your GPU and CPU. one option is to physically open up your computer and look at the motherboard. The manufacturer and model name should be clearly displayed.
However, many people are put off by this (rightly so) for fear that they will damage it. As well as this, it can be quite confusing as often it just looks like a jumble of letters and numbers following the name of the laptop manufacturer (e.g. Lenovo M71Z).
So, the other option is to try to locate it yourself on your laptop or desktop. To do this you can locate the Windows search bar. Into this, type something along the lines of System Information or System Settings.
Click on the System Summary button and you should be ab;e to locate some terms that say BaseBoard Manufacturer or MotherBoard Manufacturer, and the same stating the BaseBoard or MotherBoard model and name. These will give you the exact information you are looking for.
Keep in mind that this may not give you specifics, and the only way to get these may well be to look inside your computer at the motherboard itself
How to Check Your RAM
Finally we want to talk about how you can check your RAM. This is the memory you have in your computer. It is yet another super easy task.
You know how you checked the CPU of your computer? Well, it’s basically the same concept when you want to check your RAM.
All you have to do when you want to check out the RAM component of your computer is to locate that Windows start menu icon that we talked about before and give it a right hand click.
Select the menu that says system and then look on the list until it says ‘RAM’ or ‘Installed RAM’. It will likely give you a figure in gigabytes or even terabytes such as 1 TB or 32 GB.
You will also be able to find out the RAM of your computer by searching for System Information.
Easy as can be!
Other ways of checking specs
As well as these manual methods of checking out your computer specs, we just wanted to draw your attention to the use of third party hardware monitoring applications and tools.
These can be used to help you find out the specific information you need as well as monitoring the performance of your PC. some of the best of these third party apps include:
Core Temp (this is for checking CPU)
Speccy
CPU-Z
…and lastly HWInfo
Try these out today if the manual methods are not your kinda thing!
Whether you’re looking for your first-ever PC or seeking a total reboot of your existing setup, finding a quality new PC can be really difficult.
A lot of people don’t have the time or energy to sift through massive amounts of information about the latest hardware, how they compete with each other and how they perform in different games and applications.
This is one of the difficult things about the PC marketplace, it’s super competitive and full of data and statistics that can be impossible to keep up with.
Despite this, it’s well-known that getting a PC built offers a lot of benefits that buying stock computers can’t offer.
Pre-built PCs can’t be tailored to your specific performance needs, and they often offer pretty poor value compared to building a PC yourself.
Luckily there’s a perfect middle-ground for enthusiasts who want the flexibility and choice of PC building without having to spend time and effort learning how to install the parts themselves.
This middle ground comes in the form of PC building services. These companies offer enthusiasts a wide range of selection for components and once you’ve chosen your preferred options, they will build and ship the completed PC to you so that it’s pretty much ready to go straight out of the box.
There are many benefits to using a PC builder, chief among them being that you don’t have to research and attempt to install expensive and sensitive components that cost several hundred dollars.
People who build their own PCs take a risk every time they build themselves as if any components are damaged while installing there isn’t any coverage. If you break something, no one is going to provide you with a replacement or fix your problem for you.
This is where PC builders are really worth their weight in gold. Having a professional team of expert technicians working on your PC takes all of the stress and worry out of buying a custom PC.
You can rest easy knowing that an experienced team is handling everything, and using their knowledge to make sure everything is put together exactly as it’s supposed to be.
Another huge advantage of using these services is that they will often test your PC before shipping, to ensure that your system has been built correctly and is functioning exactly as it’s supposed to.
This gives maximum reassurance to you and enables you to boot up at home with full confidence in your system, which is something that most home builders will admit is truly nerve-shredding.
Hitting the power button and suddenly remembering you forgot to apply thermal paste is not an experience we’d like to repeat, and we certainly wouldn’t recommend this to anyone else!
The other great thing about custom builders is that they are experts in overclocking, allowing you to get the most out of your components without having to spend hours experimenting with voltages and trying to balance your temperatures.
This means you get a super powerful setup arriving ready to go, with no need to worry about stability or performance issues.
Another great benefit is that these experts will be confident when setting up efficient cooling systems, using their knowledge of cable management and airflow to create optical fan setups and cooling profiles, and also being able to set up water cooling systems with confidence.
To top it all off, many of the best builders offer warranties to cover everything from labor to parts, giving you total peace of mind not only when you buy but into the future too.
With their ability to handle various orders and cater their builds to every customer’s needs, it’s no surprise that these services are wildly popular among beginners and enthusiasts who want the absolute best performance and componentry without needing to spend a lot of effort and time researching and building.
The popularity of these services has led to a wide array of custom PC builders expanding and becoming very well known.
There are a vast number of different builders to choose from, and apart from your required parts list, the only thing you need to do is decide which PC builder is best for you.
In this article, we’re going to look at some of the biggest and best custom PC builders to help you find a team who will offer amazing value, parts, and build quality as well as superb customer service.
PC Builders – A Rundown
iBUYPOWER
iBUYPOWER is well known among gamers thanks to their prominent sponsorship deals with major gaming events, as well as content creators and professional gamers.
They have a great reputation for quality and are definitely one of the go-to choices for experienced computer users, particularly those interested in high-performance gaming setups.
They do offer builds to suit other needs, however, from workstations to streaming PCs and an array of other options.
iBUYPOWER provides a great array of parts and accessories and frequently offers exclusive deals and sales that offer amazing value.
They also provide robust warranties that range from a 3-year labor warranty and 1-year parts warranty, a 4-year labor warranty and 2-year parts warranty, or even a five-year labor and 3-year parts warranty, each of which provides you with reassurance should something go wrong.
Purchasing from iBUYPOWER is quick and easy, and they have a truly staggering selection of options, as well as order tracking to let you see how your build is progressing.
They also offer an easy building tool to help beginners put together an advanced system without needing a lot of prior knowledge about components which is a really handy tool for younger users or those with specific parts in mind.
They also offer debit packages for customers who prefer to spread the cost of their purchase.
If you have second thoughts about your choices and want to refund, iBUYPOWER also offers a 30-day money-back guarantee, however, they don’t cover shipping and do charge a 15% restocking fee so keep this in mind before you buy.
OriginPC
OriginPC has been creating excellent custom PCs for a long time now, and they are known to produce some of the sleekest and attractive custom builds available.
They have a deep parts list allowing for maximum flexibility and have helpful recommendations to allow you to find a rig that will do everything you need it to without coming with a lot of unnecessary features and add ons.
They have frequent special offers that eagle-eyed customers can take advantage of, maximizing the value you get from this building service.
OriginPC also offers a range of warranties that start at a year and extend to three years, however, their coverage doesn’t include software issues or damages that are caused by things outside of the companies control.
Their prices range from around $1000 to $8000 dollars and are able to build gaming systems, workstations, laptops, and even media setups.
They also offer 4K gaming setups, overclocking, VR Ready systems, and water cooling installation to give you maximum performance and access to the latest technology and features.
Like a lot of custom builders, OriginPC offers a 30-day money-back guarantee, however, there is a 15% charge to cover restocking and certain aspects of the translation such as service fees aren’t refundable.
There are several great templates to choose from here, however, you can also put together bespoke parts lists to give you a lot of control over your system and performance.
Digital Storm
Digital Storm is one of the longest-running custom PC builders in the game and they put this vast experience to use building various systems from custom gaming laptops to ultra-quiet desktop workstations and everything in between.
They have a price range of around $700 to $3000 and are capable of fitting water cooling systems as well as overclocking your parts to make sure you’re getting every drop of performance possible.
They also offer fairly good warranties, such as a 3-year limited warranty for labor and a 1-year parts warranty, however, there are other packages available that range all the way to 6 years for labor and 4 years for parts, which gives amazing peace of mind for users who rely on their systems for work as well as fun.
Digital Storm also offers lifetime technical support which is available during working days from 9 till 5, which allows users with questions or issues to potentially solve problems without needing to worry about sending their equipment back to the manufacturer.
Overall Digital Storm offers some of the best warranties available, as well as a great array of build templates and custom options and many of the specialist services you’d expect from a quality custom pc builder.
They also offer a range of accessories at great prices and have an active community to turn to for advice and comparisons.
Falcon Northwest
Falcon Northwest was founded all the way back in 1992, which means they’ve seen all of the change and development computers have gone through over the last 29 years.
It’s a testament to their knowledge and quality that they have managed to navigate through a fast-changing industry and still produce some of the best custom PCs available.
They typically focus on high-end systems with a price range starting at $2000 and which extends up to $12000, meaning that these builds are some of the most powerful as well as truly stunning to look at.
Their focus on achieving stunning visual aesthetics alongside industry-leading performance has built Falcon a strong reputation for quality, and several of their builds have won industry awards over the last few years.
They offer laptop builds and desktops in a variety of form factors, allowing you to fit high-tier performance into a size that suits your needs.
Speaking of cases, Falcon actually uses some of the best paint – of automotive quality – in order to add a personal touch to your rig while also giving it long-lasting durability. They even offer custom artworks to really give you the chance to express yourself with your newest build.
They offer lifetime technical support as you’d expect from a well-established building service, and will answer any questions you have from 9 am to 6 pm pacific time, and these services are available 7 days a week which is really reassuring.
It’s also possible for you to get a 30-day money-back guarantee, however, the cost of some services such as custom artwork is non-refundable.
CyberPowerPC
CyberPower is a well-known brand that has built a strong image thanks to its superb gaming PCs and prominent sponsorship deals in the eSports community.
They cater to a range of prices from budget rigs at around $700 to high-performance 4K gaming setups worth over $6000.
They offer pretty standard warranties that are comparable to many of the other major builders, including 3-years of labor coverage, as well as lifetime technical support.
While they do cater to a more entry-level area of the market they are capable of also producing extremely well-finished products at all price points and also offer overclocking services, water-cooling installation as well as very high-quality cable management.
Alienware
Alienware is best known for its outstanding prebuilt gaming laptops and their excellent marketing across the industry, however, they do offer some customization on their website, allowing you to tweak their excellent existing designs so that they better suit your needs and preferences.
They offer pretty standard warranties and can produce systems capable of 4K gaming as well as providing overclocking.
If you’ve been won over by their iconic design and aesthetics then you’ll be in safe hands as their machines are some of the best looking and best performing available and can be found at various price points.
EcollegePC
EcollegePC is far less well known than some of the industry-leading brands we’ve looked at so far, and they actually made their name focusing on helping college students get excellent and affordable systems to help students access the power of custom systems.
They provide a range of options at prices from $500 to $1800 and also offer excellent warranty coverage which has 3 years labor and 3 years of parts coverage, one of the best packages available.
Xidax
Xidax is one of the best builders due in large part to their comprehensive lifetime warranty on parts and labor, which sets them well apart from their competitors in this regard.
It is a real sign of quality and craftsmanship that they have so much faith in their builds. The only downside is that AMD video cards aren’t included in this warranty, and have a separate limited 2-year warranty, while liquid parts have a 1-year warranty.
Besides this Xidax offers comprehensive cover giving you maximum peace of mind about your components.
The drawback is that while the 45-day money-back guarantee period seems generous, it is subject to approval which can mean you may not be able to return your rig so easily if you’d prefer a full refund.
Velocity Micro
Velocity Micro is another good builder that offers a wide range of options catering to various budgets, however, it’s their customer service that really makes them stand out.
They actually include lifetime in-house tech support available from 11 pm to 8 pm EST, with 24/7 support available for critical issues that prevent you from using your PC, such as boot failures, crashes, or systems failures.
Things to Consider
Budgets
Making sure you have the right budget is very important when planning to use a custom builder, as not all companies offer the same prices.
It’s also important to note that the services these companies provide do come at a premium, so you may find that some parts and builds are a little more expensive – however, the warranty coverage and tech support is often worth it.
Customizability
Choosing a company that has ample customization options will make it far easier for you to cater your build to your needs, and will make your budget stretch further.
Some companies have more options than others so if you have a particular parts list in mind, make sure to check several builders for quotes and availability to avoid disappointment.
Warranties
Most builders offer warranties of various lengths and styles to suit different budgets. Always make sure you’re getting the right coverage for you.
Typically longer warranties are more expensive but do give excellent peace of mind and value if something goes wrong.
Customer Service
One of the most important aspects of choosing a company to build your PC is their brand’s reputation for quality service, particularly when things have gone wrong.
Making sure they are responsive to queries and offer good post-sales care is important to ensure you aren’t left stranded with a faulty system.
PC case sizes. No one ever talks about them. They’re boring, they’re simple, and a lot of people they’re nothing more than just housing for all your PC hardware. A PC case is as insignificant as that protective case that you have on your phone.
But it’s far from the actual truth. PC cases are just as complicated and just as crucial when it comes to building a powerful gaming PC. A PC case can make or break your entire build because not all cases are made equal. Believe us when we say that there’s a lot of terminologies to memorize and learn when it comes to understanding how PC cases play a role in building custom PCs.
If you’re reading this article, chances are you’re a first-time buyer or PC builder who needs a new PC case to upgrade their current custom PC build, or looking to get started with building.
What is a Computer or PC Case?
A Computer Case, or PC case, protects the internal hardware and provides structure for the computer. The sizes and form factor of the PC will determine what hardware goes inside.
That’s right. Your computer’s case size will tell you what hardware you can install and can’t install. When it comes to building a custom PC, knowing if you have enough space or not is crucial.
There are two important functions highlighted in any PC case:
Ventilation and cooling support – Apart from managing air flow, your PC case can accommodate additional ventilation and cooling features such as bigger fans and liquid cooling systems. Even if you don’t have liquid cooling on your PC, air circulation is still important to keep your unit cool.
Protection from external damages – A PC case, no matter what size you get, is rigid enough to withstand small bumps to prevent damage to the internal hardware. Worst case scenario, your entire rig falls off the table. Your PC case should be able to minimize damage to the hardware (i.e. CPU, GPU, fans, etc.), but there’s no guarantee that these components won’t be unscathed either.
What Are The Different PC Cases?
Size matters. At least for PC cases. PC cases should have enough space to accommodate and protect hardware such as GPU, HDD/SDD, CPUs, and so on. Without proper air circulation or if your case doesn’t have cooling fans, overheating will damage these components.
The size of your computer cases and the build of the computer itself should both be compatible with one another. This section should go over important aspects of computer case size comparison and what sizes are best for which functionality.
Full Tower Case
Motherboard Form Factor: Extended ATX (or E ATX) or Standard ATX
Most custom gaming PC enthusiasts would often go for a full tower case as their main choice for PC case size. Full tower computer cases can accommodate any E ATX or SSI CEB-sized motherboard and have a lot of expansion compatibility. There’s also improved thermal performance, but does not apply to all full tower cases in the market.
Apart from gamers, people who are building their own servers choose a full tower case with extended ATX because it can accommodate extra RAM and CPU . Then you also have those overclocking enthusiasts who need a lot of cooling to quickly dissipate heat when certain components such as CPU and GPU are pushed to the limits. To make this possible, they need to equip the PC with triple heat sinks, CPU cooler, water cooling, and big radiators. And these components aren’t exactly small and portable.
It’s also possible to install multiple GPUs using SLI and crossfire with a full tower case, or even install large GPUs thanks to vertical GPU mounting. An RTX 3090 Gaming PC would also use full tower cases just for the sheer size of the GPU.
Mid Tower Case
Motherboard Form Factor: ATX or Micro ATX
Mid towers offer the most flexibility for PC builders because they’re smaller and more compact, but capable of equipping standard ATX motherboards or micro ATX motherboards. The cases can also accommodate LED lighting and added cooling fans for those who want to show off some RGB swag.
Similar to full towers, mid tower computer cases are able to support two graphics cards. Some can even accommodate up to three graphics cards. But most builders won’t even add a second or third GPU because they just want to take advantage of the PCI-e slots for later expansions down the line. For example, installing a 2080Ti takes up a couple of PCIe slots on the motherboard. You could make it work with a mid tower, but if you want to add in a second GPU with your 2080Ti, then just go for the full tower case
It goes without saying that mid tower cases are smaller than full towers, so you get more desk space but you do get increased ambient temperatures when you’re running the rig. Mid towers can’t install as much CPU fans as a full tower, so there’s less air flow and reduced air circulation.
But air flow is just the tip of the iceberg for many mid tower cases. A mid tower offers lesser space for optimal cable management, less HDD support, and unable to equip large liquid-cooling configs. Overclocking is out of the question for a mid tower. But if that’s not your end goal for building a custom PC and just want something compact on your desk, then a Mid Tower might be worth considering.
Mini Tower
Motherboard Form Factor: Mini-ITX or Micro-ATX
Smaller cases accommodate small form factor motherboards, namely mini ITX or Micro ATX. Mini tower cases have risen in popularity for their unique tempered glass design, affordability, and ability to accommodate other small form factor components. We’re talking about using a low profile GPU with subtle cooling configs.
But not all mini tower cases are equal. Sure, they can accommodate smaller micro ATX motherboards, but that’s not really a big deciding factor. You have less spaces for HDD and less expansion slots, and you might not be able to accommodate large GPUs because of clearance issues.
Smaller Form Factor
Motherboard Form Factor: Mini-ITX
The smallest computer case of them all, the small form factor case is not to be underestimated. Despite its size, there are computer builders out there who’re pumping out high-end builds with just a mini ITX motherboard.
What Features Do You Want When Shopping for Computer Cases?
Now that we’ve gotten the computer case size comparison out of the way, it’s time to talk about PC case features. Size affects what features you’re getting on a case, such as a bigger motherboard tray, custom loop support, case fans, drive bays, and so on.
Here’s what you need to know about features that are affected by computer case sizes:
Drive Mounting – Drive mounting is an important factor to consider because you’re looking at hard drive space. Your new PC case should have enough room for 2.5″ HDD or 3.5″ HDD, or even 5.25″ HDD drives that you’re using.
There are cases in the market that have the right mounting space directly on the motherboard tray’s sheet metal. You’ll want to look for four holes where you can screw the drive in. There are also other cases that have a removable caddy that will allow you to access all your installed drives easily. Think of it as a plug-and-play feature, but on your PC case.
Water-cooling features – Custom loop water cooling will always be the best option for PC cooling, no matter what people say. To make this possible, you need a radiator. But this isn’t going to fit into a mini ITX case or a smaller form factor case. You need a PC case that can accommodate hardware of this size, and that’s going to be a full tower case. You’ll be lucky to find a mid tower case that can fit a radiator or custom loops too, but they’re not that uncommon.
Cable Management – Mini ITX cases and smaller form factor cases might not have the best options for cable management because there’s not enough space. How much space you have on your PC case will determine your ability to manage cables. If you’re particular about how your cabling should look like, a full tower case is the best option.
Toolless design – High end PC cases often have a toolless design, which is a modern design aspect done by case manufacturers. These are features that make your life easier as a PC user. You just remove one screw from a clip-on drive bay and you can easily access your hardware. Other toolless design features are motherboard cut-out covers, removable PSU shrouds, and hard drive caddies.
Motherboards Are Linked To Computer Case Sizing
PC building is more than just knowing what size of PC case to use. You also need to consider the size of the motherboard that could fit into the PC case you want to use.
Motherboards come with different sizes or form factors. Smaller motherboards go well with smaller cases, and larger motherboards go with large cases.
There are three main form factors:
Mini ITX
Micro ATX
ATX
Full tower cases can accommodate E ATX and Micro ATX motherboards (largest and smallest form factor motherboards respectively). Mid towers can handle standard ATX and Micro ATX motherboards. Mini towers can accommodate Micro ATX and Mini ITX. Smaller Form Factors can only accommodate Mini ITX motherboards.
Size doesn’t really matter in terms of performance because you’ll find that each form factor has the best motherboards. Smaller motherboards will have fewer PCIe slots, storage expansion ports, and RAM slots. Opting for a smaller motherboard means you’re willing to sacrifice your ability for upgrade or expansion.
What’s The Best Cast Size for Hardcore Gamers?
We’ll consider three factors when it comes to choosing the best case size for hardcore gaming.
If You Want to Build a Small Size PC
If you want something small on your desktop, the Phanteks Evolv Shift 2 is the best mini ITX case that offers flexibility and extreme versatility. This is great for gamers who want to go to LAN parties a lot.
Ideally, you want a small case that can support micro ATX motherboards because of the slots available. But if you really want the smallest size possible, you could work with an SFF (Smaller Form FactorS) case. You’ll end up spending more money because a mini ITX motherboard is expensive but with fewer capabilities. You’re also going for small form factor cooling hardware and PSU.
If possible, stretch your budget so you can purchase mini ITX cases. At least you’re getting some value out of the size. With a case like this, your gaming PC would probably be put together for less than $1000.
For Those Who Don’t Care About Size
If you don’t really mind looking at a humungous piece of PC in your room, go for be quiet!’s Dark Base Pro 900, a full tower case with a lot of potential room for upgrades. You want to get this case because there’s a lot of room for hardware, more RAM, PCI-e card expansion slots, and storage expansion.
You also get to enjoy larger cooling solutions and better air circulation thanks to the added fans you can install.
An ATX motherboard in a full tower case gives you all the flexibility you need for upgrading in the future. But if a budget PC is what you’re aiming for, consider a micro ATX board to go with a full tower case.
If You’re Fine With Spending A Lot of Money
You want to go all out with this one, so E ATX motherboards are definitely the way to go with a full tower case. You might even go for an Ultra Tower with E ATX motherboard. A good option to go here would be the Thermal Take Core P8, a huge lunk of a case with great EATX mobo support. Prebuilt gaming PCs would often use cases that accommodate E ATX motherboards (we’re looking at you, Alienware).
Size of the case and price of the case won’t even be part of the equation anymore because you just want a PC case to give you a lot of options for upgrade and expansion. And an E ATX motherboard can give you that.
If you do decide to go with an ultra tower case, know that these cases are very heavy and large. You might not be able to move them easily too. But if you want to bring along your expensive PC, just go for a full tower with regular ATX mobo.
Best Bang for Your Buck
If you want the best bang for your buck, consider the micro-ATX Lian Li 205M. This is the best option for those working on a tight budget. You could also consider a micro ATX motherboard to go with a mid tower.
Micro ATX motherboards may have a couple of PCI-e slots with x16 lanes, which is more than enough for most gamers. They also have four RAM slots with NVMe storage capability. Upgrading and expanding is not really a challenge here with a micro ATX motherboard. You might be able to use this for $600 gaming PC budget builds too.
Mid tower cases can also get you enough space to host large cooling solutions with enough cable management options.
Closing
Now you know everything there is to know about different sizes for computer cases. You know what most common form factor motherboards should go with whatever the size of computer case you want to purchase.
Ultimately, it will boil down to what you’re willing to spend on, and what your aesthetic tastes will be like in deciding which size of computer cases will be right for you.
Planning on building a gaming PC? What if we told you that you could build one right now that maxes out the latest games at 1440p and all you have to spend is $1,200?
Granted, trying to find any of the high-end graphics cards at reasonable pricing may be a challenge right now, so we’ve done our best to research the best possible alternatives without compromising quality, power, and performance.
The gaming PC build that you’re about to see might be the best gaming PC you’ll ever see, at least for the $1,200 price range. And with all these great games coming from the gaming industry, there’s no better time to build than now.
If you’re not up to DIY building a powerful gaming PC, you might as well go the prebuilt route. For this one, we’re going to show you one of the best prebuilt gaming PCs.
Introducing the CyberPowerPC Gamer Xtreme, the best prebuilt gaming PC that you can find for the $1,200 price range. Here’s a look at the specs, which is more or less similar to the builds that we’re about to list down:
CPU: Intel Core i5-11600KF
GPU: RTX 3060 12GB
RAM: 16GB DDR4 RAM
Storage: 500GB SSD + 1TB HDD
The CyberPowerPC Gamer Xtreme comes with Windows 11 64-bit installed, along with 1-year parts and labor warranty and lifetime tech support. Of course, there are other prebuilt gaming PCs out there that are within the same price range as the CyberPowerPC Gamer Xtreme.
First $1,200 Gaming PC Build
The core concept of the first gaming PC build is to ensure that all possible future upgrades are to be done within the next 3 to 5 years. We’ve done research on how to best futureproof your new PC.
For these specs, you can always upgrade some of the other components when you see fit. Maybe you want more RAM, higher SSD storage capacity, or you want to add large storage drives for storing video content.
A Breakdown Of The Gaming PC Build
This $1200 gaming PC build is a good combination of the AMD Ryzen R5 processor along with a Zotac RTX 3060 Twin Edge OC. This DIY build is more than capable of giving you 1440p gaming experiences, or even at 4K resolution without breaking a sweat.
Take note that the price of the DIY build is only for the CPU only. You’ll still need to purchase an operating system, a monitor, and gaming peripherals if you don’t have them yet.
First off, we have the NZXT H510i, a decent mid-tower ATX case and considered a decent upgrade from the S340 casing. The NZXT H510i comes with everything you need, from the mounting hardware and the inclusion of 2 pieces of 120mm fans. The case itself can support both AIO and custom liquid cooling systems, accommodating radiators up to 280mm.
This is also a personal recommendation as I own a H510i Elite myself. The tempered glass has always been a favorite of mine because I can see the RGB insides of my unit.
We’re not cutting corners with the build, so you’re getting the AMD R5 3600 processor, which is a 6-core and 12-thread monster with a boost clock speed of up to 4.2GHz across all cores. This is also an unlocked CPU, meaning you can overclock this beast without issue.
We’re only going to utilize the AMD R5 3600’s stock cooler because it’s decent enough for what you want to achieve here and that’s for intense gaming. But if you want to overclock, you’ll need to set up a liquid cooling system or AIO liquid cooling system maximize its processing power without blowing it up.
The MSI B450 Tomahawk MAX is our motherboard of choice for this build. This is an ATX sized, B450 Chipset, and AM4 Socket motherboard. It has all the slots you need for the other components in this build, as well as more room for potential upgrades.
You have multiple USB 3.1 ports, M.2 NVMe slot in case you want to add SSD storage, 6x SATA ports, and 4 RAM slots. You also have on-board RGB with Crossfire GPU support and integrated 7.1 audio. Unfortunately, there’s no integrated WiFi in this motherboard, so you’ll need an adapter.
For the graphics card, we’re getting the 12GB RTX 3060, which is a powerhouse for 1440p and 4K gaming experiences. The Zotac RTX 3060 Twin Edge OC provides solid performance for the price you’re paying and with solid stock cooling.
However, you’ll be hard-pressed to know that the Zotac RTX 3060 Twin Edge OC is one of the more difficult graphics cards to find in stock right now. A decent graphics card alternative would be an RTX 2080 (Non-Super edition) that can give you the same 1440p and 4K experience as the Zotac RTX 3060 Twin Edge OC.
For this PC, you’ll only need 16GB of RAM and we’re giving you the Corsair Vengeance LPX, which is 2x8GB sticks of 3000MHz RAM. With the motherboard, you’ll have room for future upgrades for RAM if you want to expand the RAM capacity further. If your purpose for this PC is to do more than just play your favorite games and you want to take advantage of the multi-threading powers of the Ryzen processor, consider adding another pair of Corsair Vengeance LPX for a total of 32GB of RAM.
But not everyone will probably add another pair of RAM because 16GB is decent enough for 4k and 1440p gaming.
The EVGA 650 B5 80+ Bronze is a modular power supply that’s reliable enough to power the RTX 3060 and its bigger brothers. Because it’s a modular PSU, you don’t have to worry about unused cables. Just plug everything that you’re using into the EVGA 650 B5 80+ Bronze and you’re good to go.
Much like having a 16GB RAM is more than enough for a great gaming experience, you only ever need 500GB of SSD storage to skip out on those long load times. You can also opt to add more, especially with the NVMe slot that this build’s motherboard has. All you need to do is buy the drives and plug them in yourself.
Second $1200 Gaming PC Build
The second gaming PC build is for the Intel fan boys as it utilizes a 10th generation Intel Core i5 processor and still allows you to play your favorite games at 1440p and 4k resolution easily.
We also consider this as the best $1200 gaming PC for its futureproof qualities, processing power and overall aesthetics.
If you want a spacious and stylish case, the Phantex Eclipse P400A is a solid choice. The case dons a classic all-black color with tempered glass panel and a stylized front panel. It doesn’t have those fancy RGB fans attached to it that you usually find in a prebuilt PC, but it’s a non-issue. You can easily customize the fans if you want to by buying RGB ones instead, or add in RGB led strips.
The Phantex Eclipse P400A comes with 2 pre-installed fans, which help with the overall airflow and heat dissipation. After all, you’re going to be running an RTX 3070 on this build and your processor doesn’t have a stock CPU cooler. But regardless, you shouldn’t have any heating issues here (unless you overclock).
There’s also enough room on the Phantex Eclipse P400A to accommodate an EATX motherboard and for the other bigger GPUs in the market. The panel contains all the Power Button, Reset Button, 2x 3.0 USB ports, and a controller for the fan speed.
Don’t underestimate the Intel Core i5-10600F just because it’s a Core i5 processor. It’s still a powerful processor with six cores and 12-threads. The base and max frequency is at 4.1GHz for base and 4.8Ghz boosted. It’s also an unlocked processor so you can overclock it much like the AMD processor listed above.
For multi-core performance, you probably still want the AMD Ryzen processor but as far as gaming experience is concerned, the Intel Core i5-10600F is a beast in itself that can’t be beat at the $200 price tag.
This processor has everything you need to play most games (the latest AAA games and possibly future releases) at the highest settings possible, enjoy VR immersion, or multi-task various programs. The only downside here is that there’s no stock cooler that comes with the Intel Core i5-10600F, so you’ll have to adjust your budget to get an aftermarket cooler.
The MSI MPG Z490 Gaming Plus is one of the best motherboards within the $200 price range. This motherboard does not support overclocking features and there aren’t any Thunderbolt ports included, but it’s not a bad motherboard all in all. There are other choices out there within the same $200 price range if you want to do some overclocking.
But for the build we have, the MSI MPG Z490 Gaming Plus is decent enough to provide you with everything you need to house these components. The MSI MPG Z490 Gaming Plus has a 6-layer PCB and stable power system that should run your processor as smooth as possible. The BIOS itself can be navigated with ease and you’ll be able to unlock your RAM’s full potential without any difficulty.
Other notable features include Twin Turbo M.2. slots, pump fan support, 2.5G LAN, and reinforced graphics card slot. Sadly, there’s no integrated WiFi. If you want integrated WiFi, we suggest the MSI MPG Z490 Gaming Edge, but it might cost you extra.
If you can’t find stocks of the MSI MPG Z490 Gaming Plus, there are more options such as the MSI MAG Z490 Tomahawk and the Gigabyte Z490 Aorus Elite. Note that they’re about $20 higher than the MSI MPG Z490 Gaming Plus, but it’s completely negligible at this point.
This motherboard does not PCI 4.0 but it should be capable of handling 11th generation Intel processors, so you could upgrade this build from a 10th generation Core i5 to an 11th generation Core i5 (or i7).
The MSI MPG Z490 Gaming Plus is a solid choice for a motherboard for this build and it should fit your budget without forcing you to spend more money on unnecessary components.
We mentioned that the CPU for this build does not have a stock CPU cooler, so you’re going to want to purchase one.
We recommend Cooler Master Hyper 212 comes with RGB lighting. If you’re into the whole RGB backlighting thing, this is a great choice of an aftermarket cooler. It’s considered by enthusiasts as one of the rare but slightly more affordable and effective coolers out there. It’s not the best one but it’s enough to cool the Intel Core i5-10600KF processor.
The Cooler Master Hyper 212 Black Edition with RGB lighting is smaller and installation is easy. Its aesthetics is a good mix of a solid black with some RGB backlighting, so it’s one of the right components for those who’re particular about minimalist aesthetics too.
Their cooling performance is no laughing matter as the Cooler Master Hyper 212 RGB provides an excellent cooling solution to the CPU, so your frame rate is more or less stable at all times. However, the noise can become too overwhelming especially when you’re carrying out heavy tasks (e.g. video rendering or 3D editing).
For the GPU, we’re going to have to recommend the EVGA GeForce RTX 3070 XC3 Black Gaming. This GPU is considered by many as “stronger than the RTX 2080Ti” at half the price. The EVGA GeForce RTX 3070 proves itself to be the best value graphics card in the market.
It may not be as powerful as the new RTX 3090, the EVGA GeForce RTX 3070 is still a powerful GPU and could play most games at the highest settings possible at either 4K or 1440p.
You could argue that you could just settle for the RTX 3080 because the futureproofing is a lot better than the EVGA GeForce RTX 3070, but we’re talking about best value graphics card here and is perfect for those who have to follow a strict budget for their new PC build.
The EVGA GeForce RTX 3070 has 8GB of VRAM with a boost clock of 1.73GHz, so it can definitely play most games at the ultra or highest settings, including Crysis.
Similar to the first PC, we’re satisfied with our choice of RAM and that’s the Corsair Vengeance LPX. Corsair is a reliable and trustworthy manufacturer and has proven itself to be one of the best manufacturers for the right components for building a new PC.
Again, you don’t really need anything more than 16GB unless you really need more RAM speed for purposes other than gaming. If you have to upgrade, go for a pair of 8GB RAM as opposed to getting just one stick of 16GB of memory. The former is what builders would consider a fail-safe option. In case one stick fails, you still have 8GB for back up as opposed to losing the entire stick of RAM.
To power all of the components on here, you’ll need the Thermaltake Toughpower GX1. It has enough wattage for this build, while providing you more room for upgrades in the future. The Thermaltake Toughpower GX1 has an 80+ gold certificate, which is to assure people that this is not going to give up anytime soon.
The quality of life features are also impressive. One worth mentioning is the fluid dynamic bearing fun that provides lower noise levels than the other PSU brands out there for the same price. It also has short circuit and over voltage protection, so you don’t have to worry about your other components getting fried when the next power surge hits.
However, the Thermaltake Toughpower GX1 is a non-modular PSU, so you’ll have to put in some work for managing the excess cables.
The first build only had 500GB of storage, but for this one, we’re going all out with 1TB of SSD storage. This is a must-have for gamers who just want all of their games to have little to no loading times.
NVMe SSD’s are still faster than the SATA III SSDs, so if you need a quick boost of load time speed for many games, the Western Digital Blue SN550 should suffice. But note that not all SSDs, or NVMe SSDs, are made equal. Some brands are faster than the others, but Western Digital still comes close to performing as good as Samsung and Kingston brands. But if you really want the top of the line SSDs, go for the Samsung 970 EVO Plus.
Can These Builds Handle 4K Gaming?
There’s no doubt here that any of the builds we listed, or the prebuilt PC that we mentioned, can handle 4k gaming without any problem. The gaming performance of both these builds is excellent and they’re both capable of handling 60FPS for games, albeit you’d have to decrease the graphics settings a little if you’re going for 4K.
Even at ultra settings and 4k resolution, you should be hitting about 50FPS on average for many games, and you shouldn’t even experience a huge dip in FPS for most AAA games.
For what it’s worth, the two builds we listed here are more than capable of playing many games, demanding or not, at 4K resolution or at 1440p even and hitting close to 60FPS or higher for older game titles.
What About VR and Streaming?
These PC builds can definitely handle VR and Streaming, maybe even 4k streaming without any difficulty. As for VR, you only need the bare minimum specs of a PC to run VR games, but the builds we have on here are far from bare minimum.
Should Prebuilt Gaming PCs be Considered For This Budget?
If stocks for certain components are not available within your immediate vicinity, or anywhere online, then a prebuilt gaming RIG might be a decent alternative.
The upside to purchasing prebuilt gaming rigs is that you only need to do a one-time purchase to get everything. Some of the prebuilt PCs within the $1,200 share more or less the same specs as the two builds in this article. You might even land a decent case with a tempered glass side panel and other goodies. The operating system also comes with purchasing any prebuilt unit too.
The downside here is that the parts inside a prebuilt PC might be overblown by markup, and that you might end up paying more for something that’s less powerful than the PCs we’ve built. But then again, majority of prebuilt units already come equipped with 16GB of RAM, 1TB SSD, and Nvidia RTX 3000-series graphics cards (or AMD Radeon 6000-series). t
Closing
For $1,200, you’re getting an extremely powerful PC that gives you the best gaming experiences possible. If you want to secure your rig today, you better start shopping because these components are popular choices for a lot of builders.
If you want the best gaming PC, you can always search around the Internet and see better and more powerful alternatives for the computer parts we’ve listed on here.
What makes a “GAMING” laptop? Is it the processor, or the dedicated graphics card, or the SSD storage, or the display of the laptop itself? For a lot of us, a laptop is meant for gaming when it has a dedicated graphics card (or GPU) as opposed to using an Integrated graphics card. Rather than taking graphics processing power from the CPU, gaming laptops are equipped to run games at medium to the highest settings because of these GPUs.
We’re talking about GPU’s coming from Nvidia GeForce and AMD Radeon, similar to what you’d install in a gaming PC. Right now, the best gaming laptops are equipped with the RTX 3000 series or the AMD Radeon RX 6000 series. These GPUs are meant for high intensity gaming while still giving you a lot of power for everyday use and other tasks.
[affiliatable id=’115110′]
Powerful Components For Powerful Displays
Gamers are the type of people who need more out of their computer or laptop, mostly because they want to squeeze out those high frame rates in order to maximize their laptop’s display for a complete immersive experience in gaming. Players with Steam accounts will always want to play the newest AAA games at the highest settings for the experience or for bragging rights.
Years ago, you wouldn’t even think this was possible with a gaming laptop but here we are. We now have laptops that have a higher refresh rate than normal laptops. Playing games on the go has never been this easy. With gaming laptops powered by the latest GPUs, future-proofing your laptop is a walk in the park. We’re talking about specs that don’t run their course for at least five more years. Even then, you’ll still be able to play the latest AAA games five years from now with your high-end gaming laptop.
If you’re serious about purchasing a high-end gaming laptop for late-night gaming sessions on the go, or if you want a powerful laptop that lets you do some video editing and other creative tasks, we got you covered.
What Do Each Of These Brands Has To Offer?
Gaming laptops are often judged right off the bat based on their manufacturer. There are manufacturers out there who focus more on hardware and design, while there are others out there that focus on software.
Here are the most popular brands of gaming notebooks that you’ll find on this list:
Dell Alienware – One of the very first brands to delve into the gaming laptop scene, and now they’re jumping into the prebuilt PC scene as well. Alienware is known for their sheer bulk and power without compromising one for the other.
Asus – More importantly, Asus Republic of Gamers (ROG) is more focused on custom software, with their ROG Gaming Center included in all of their laptops. The ROG Gaming Center allows you to manage and share device information such as storage and RAM usage and temperatures. They also have Armoury Crate, which allows you to work with customized RGB lighting.
Razer – Razer used to be the king of gaming paraphernalia, but now they’re also trying to vie for the title of king of gaming laptops. And their Razer Blade series are no laughing matter. No matter what size you pick, you’re getting high performance hardware with enough RGB to make people think you’re bringing along a small gaming PC.
HP – HP also broke into the gaming laptop scene with their HP Omen series. You might also find an elite HP Pavilion gaming laptop, but you’ll always want the Omen series. They’re known for their Omen Command Center, which allows you to see and manage GPU and CPU usage, RAM usage, and even a network booster.
Acer – Acer is one of the leading brands for budget gaming laptops, thanks to their constant use of affordable gaming hardware. But that doesn’t really stop them from innovating too. They released the Acer Predator 21X with curved display, along with their PredatorSense application that lets you manage CPU and GPU usage and control fan speeds.
Lenovo – Lenovo’s gaming laptop lineup is Legion, and they’re more geared towards minimalism and sleek design. Lenovo, as a whole, has been reputed to be one of the more sturdier brands because they’re known for creating the perfect workhorse laptop (cue in Lenovo ThinkPad) that doesn’t cost a lot of money.
MSI – MSI’s just like Alienware. They’re big, bulky, and they don a black/red color combination. But they recently released their most compact gaming laptop yet, the MSI Stealth (which we’ll feature here). They’re known for utilizing high-end hardware with their proprietary software, like the MSI Dragon Center. This software allows you to monitor your entire system, control fans, manage keyboard and RGB lighting, and more.
Gigabyte/Aorus – Aorus is a sub-brand of Gigabyte, and they have a long line of gaming laptops, both budget and premium pricing. Gigabyte laptops are more on the low-end side of things with a lot of color options while Aorus are focused on being sleek and thin. Both will come with Fusion software for custom RGB lighting. Aorus machines also make it easy for you to overclock CPU and GPU with their Command and Control software.
The Top 10 120Hz Gaming Laptops In The Market
Listed below are the top 10 gaming laptops that have 120Hz high refresh screen or higher. These are not arranged in any particular, even the ones listed under Honorable Mentions.
When it comes to sheer size and power, no one can beat the Asus Zephyrus S17. This is a powerful 4K laptop with a screen size of 17.3-inches and max refresh rate of up to 120Hz. The specs and size of the Asus Zephyrus S17 makes it so that it beats out any desktop out there that’s nowhere near as powerful.
Let’s talk about the display first before we move on to the technical stuff. The Asus Zephyrus S17 sports the highest refresh rate possible even at 4K resolution. Toning down resolution to 1440p or 1080p should still get you an amazing gaming experience at high FPS. The grey-to-grey response time is 5ms, if Overdrive is enabled, so you shouldn’t even experience ghosting at this kind of refresh rate.
To make this possible, the Asus Zephyrus S17 is packed with high-end and powerful components. For the processor, you’re getting an Intel Core i9-11900 combined with 32GB of RAM, 1TB SSD, and of course, the cream of the crop, Nvidia GeForce RTX 3080. The i9 is currently the most powerful processor in the market right now, and you’re not getting a low-powered RTX 3080 too. You’re getting the RTX 3080 that has a maximum TGP of 140. On top of high FPS gaming, the CPU/GPU combination should let you do multi-threading tasks such as 3D editing without making the laptop sweat too much.
As for the size and weight, the Asus Zephyrus S17 does not hold back. Without the power brick, the laptop alone weighs about 6.21lbs or 2.82kg. Battery life for non-gaming holds out at 5 hours or so.
This is not your ordinary budget gaming laptop. This is the king of 120Hz gaming laptops and if you are planning on buying a compact gaming machine, the Asus Zephyrus S17 should be on top of your list.
Probably one of the best gaming laptops on here you could ever lay your hands on, the ASUS ROG Strix Scar 15 might just be the epitome of a powerhouse workstation. Right off the bat, the 2022 version comes with the latest Intel Core i9-12900H processor and supported by 32GB RAM with 1TB SSD Storage space. Of course, the GPU is none other than an Nvidia GeForce RTX 3080. For extra money (about $800 or so), there’s also an Nvidia GeForce RTX 3080Ti upgrade. Whatever the case, you’re guaranteed smooth gameplay for the most demanding games.
Let’s talk about the display. You’re getting a 15.6-inch screen size with max refresh rate of up to 300Hz with a 3.8ms grey-to-grey response time. The 300Hz refresh rate is more than satisfactory for the avid gamers who are into FPS or first person shooting games.
For more upgrades, you have the option of getting up to 64GB RAM and 2 pieces of 2TB SSD option. Quite frankly, you can do enough with 32GB and 2TB SSD, but who are we tell gamers what they need to play most games, right? This laptop is also an SD Card Reader supported device with Displayport and Thunderbolt support.
Probably coming in to a close second to the Asus Zephyrus S17, we have the ASUS ROG Strix G15 Advantage Edition. For AMD fanboys, this is the ultimate laptop. The ASUS ROG Strix G15 comes with an AMD Ryzen 9 5900HX processor and AMD Radeon RX 6800MM GPU. Apart from playing games, the ASUS ROG Strix G15 is the perfect gadget for video and audio editing because the AMD processors are known for the multi-threading power. This CPU/GPU combo is also backed by 16GB of RAM and 512GB SSD storage, which is part and parcel of any gaming laptop.
However, you should anticipate some bottlenecking with the ASUS ROG Strix G15 due to its RAM’s low clock speed, but this isn’t a major slowdown. You could upgrade to a bigger SSD storage and more RAM capacity if you really want to avoid this bottleneck.
XMG Neo 15 E22 / Eluktronics MECH-15 G3
CPU: Intel Core i7-12700H
Graphics Card: Nvidia RTX 3070 Ti (150W) / 3080 Ti (175W)
RAM: 32GB
SSD Storage: 1TB SSD
Screen Size: 15.6″
Max Refresh Rate: 240Hz
The XMG Neo 15 E21/Eluktronics MECH-15 G3 might be an uncommon brand of gaming laptop, but don’t ever underestimate this brand because it’s on this list for a lot of reasons.
The 2022 model is packed with powerful components. You’re getting an Intel Core i7-12700H, supported by 32GB of RAM with 1TB SSD for storage, and of course, powered by Nvidia GeForce RTX 3070Ti with max TGP of 150w (or an RTX 3080 variant with 175w TGP). The XMG Neo 15 E21/Eluktronics MECH-15 G3 also comes with external OASIS liquid cooling system support, in case you want to run higher temps than normal.
Other optional purchases include a 4TB SSD storage upgrade and up to 64GB RAM upgrade. Talk about turning this gaming laptop into a workhorse! The XMG Neo 15 E21/Eluktronics MECH-15 G3 also comes with ports such as an SD Card Slot reader, USB-C/Thunderbolt Support (if you’re opting for the E22 version), high quality trackpad, and optomechanical keyboard.
As for the display, you’re getting max 1440p resolution at 165Hz and with a 7ms grey-to-grey response time and 98% sRGB color gamut. It’s more than sufficient for gamers, but may not be that enticing for graphics designers who want professional color grading features.
The only downside here is that the laptop speakers aren’t really that great. You’re getting FreeSync as opposed to G-Sync.
But other than that, the XMG Neo 15 E21/Eluktronics MECH-15 G3 is one of the best value picks here for a high-end gaming laptop.
A brand that needs no introduction, it’s no surprise that the Razer Blade 14 is on this list. You’re probably thinking how this 14-inch laptop is going to compete against the other bigger laptops on here.
The Razer Blade 14 comes equipped with an AMD Ryzen 9 5900HX processor combined with an Nvidia GeForce RTX 3080 (with max TGP of 100W). You’re getting a 14″ display with max resolution of 1440p, so the gaming experience here is anything but mediocre. The RTX 3080 is underpowered but it’s not exactly going to matter because you’re still playing the latest AAA games at the highest settings possible with 115FPS if your resolution sits at 1080p.
As for the screen size and display, it sits at 14″ but you’re getting 99.8% sRGB coverage and 83% Adobe RGB, so it’s suitable for graphics design work. You also get a grey-to-grey response time of 4ms, which is expected from a 14″ machine but you hardly notice the ghosting issues on here.
As for portability, the Razer Blade 14 isn’t that heavy but it’s lighter than most of the gaming laptops on this list. It’s ergonomic enough that it fits snugly inside a messenger bag or a briefcase. The build of the Razer Blade 14 is also excellent, with its chassis made from durable aluminum which is sleek and nice to look at.
Quite possibly, the Razer Blade 14 is the best 14″ gaming laptop in the industry right now.
The latest Razer Blade 15 dominates the gaming laptop market for the sheer power and display capabilities. Under the hood, you have the latest 12th Gen Intel Core i9 processor with an Nvidia GeForce RTX 30xx series GPU (from GeForce RTX 3060 to GeForce RTX 3080 variants), making the Razer Blade 15 a high performance laptop to beat.
Gaming experience on this beast is unparalleled as you’re getting high refresh rates at 1080p, 1440p, and 4K resolution gaming. At 4K, the higher refresh rate of 144Hz is nothing to scoff at either.
The Razer Blade 15 is also quite handy, albeit it’s not exactly the lightest laptop on here. Weighing in at 5lbs, you’re able to bring this laptop for gaming sessions without any difficulty. You can store this inside your standard backpack or messenger bag.
For the keyboard elitists, they’ll be glad to know that there’s a change in the key sizing. The shift keys are larger while the arrow keys are half the height compared to the other Razer Blades. You also get per-key RGB lighting and typing on the Razer Blade 15 is just swell.
If you’re in the market for a gaming laptop and want to make a big purchase, the Razer Blade 15 should be on top of your shopping list.
Lenovo Legion 5 Pro does not need to prove itself against a loaded list like this. This powerhouse of a gaming laptop brings with it an AMD Ryzen 7 5800H processor backed by 16GB of RAM (upgradeable to 64GB) and with 1TB SSD (up to 2TB Storage Space upgradeable). Lastly, the graphics card on the Lenovo Legion 5 Pro is an impressive Nvidia GeForce RTX 3060, upgradeable to GeForce RTX 3070.
For the display, we’re getting a 16:10 aspect ratio on a QHD Screen, which is the main highlight of the Lenovo Legion 5 Pro. At 1600p max resolution, you’re sitting at about 165Hz refresh rate. Gaming and creative tasks have never looked so good on this screen, or any other external monitor. Speaking of gaming, the Lenovo Legion 5 Pro can play the latest games without any difficulty. Combined with the powerful display, gaming experience for demanding games such as Elden Ring or God of War is just as immersive.
The Lenovo Legion 5 Pro is also a solid pick for an office partner because of the keyboards. You’re getting rounded bottom keycaps with a large touchpad, but of course, you’re going to want to use a mouse when gaming. The only downside to the Lenovo Legion 5 Pro is its speakers, which is a common trait shared by a lot of gaming laptops even on this list. The microphone on the Lenovo Legion 5 Pro isn’t that impressive as well, with third-party feedback stating that they sound far away when using the Lenovo Legion 5 Pro’s microphone.
Over the years, Lenovo has proven to the world that they too can compete with Asus and Razer when it comes to creating a gaming laptop, and the Legion lineup is proof of that. If you’re an AMD fanboy who prefers more multi-threading processing power, consider the Lenovo Legion 5 Pro as your next purchase.
The newer Asus ROG Zephyrus G14 is just as impressive as its predecessors. This time, you’re looking at a slimmer design but with all the high performance hardware you can get.
You’re getting an AMD Ryzen 9 6900HS processor combined with 24GB of RAM (upgradeable to 32GB) and 1TB SSD (up to 2TB Storage Space for upgrade). There’s more than enough power here to play your favorite games at highest settings possible. But more than that, the Asus ROG Zephyrus G14 does well above gaming too.
AMD is known for its capability to handle multi-threading tasks, so video editing, audio editing, and heck, even 3D editing and rendering shouldn’t be an issue with the Asus ROG Zephyrus G14 . The AMD Radeon RX 6700 graphics card does a good job at topping the GeForce RTX 3080 and RTX 3070’s framerates, but it does lag a bit behind the RTX 3080Ti found in the Razer Blade 15 and 17. Of course, it goes without saying that both Razer Blade 15 and 17 are bigger than the Asus ROG Zephyrus G14.
But what really makes this laptop so enticing is that it’s a 14-inch laptop. It’s slim and portable but powerful enough to give the 15s and 17s a run for their money. As for the display, you’re getting a 16:10 aspect ratio on the 14-inch screen, which is bigger than the previous iteration’s 16:9 aspect ratios.
But with all good things, the Asus ROG Zephyrus G14 has some bad things as well. For one thing, the battery life isn’t that impressive compared to the other laptops on here. Gaming unplugged will give you less than an hour of battery life, but you don’t really game without being plugged in. But for office productivity and other non-gaming tasks, you’re still getting a good battery life from the Asus ROG Zephyrus G14.
If you’re in the market for a 14-inch laptop but don’t want to pay more than what you need, the Asus ROG Zephyrus G14 is a solid pick over the Razer Blade 14. But if you do have the cash, just go for the Razer Blade 14.
The Acer Predator Helios 300 was impressive back then, even with just the GeForce 10-series, and it’s still as impressive as it broke into the market. For starters, price range for the Acer Predator Helios 300 is just below $1,500 and is one of the most powerful laptops for that price range.
The current generation of the Acer Predator Helios 300 is a powerhouse laptop, and we just can’t repeat that enough. For the price you’re paying, the Acer Predator Helios 300 comes with an 11th gen Intel Core i7 processor (up to 12th gen Core i7), 16GB of RAM (upgradeable to 32GB), 1TB SSD (upgradeable to 2TB), and an Nvidia GeForce RTX 3060 graphics card (Upgradeable up to GeForce RTX 3080).
This generation of Acer Predator Helios 300 is also sleeker while packing an RTX 3000 series graphics card. You also get a 144Hz screen with smaller bezels. The refresh rate sits at a maximum of 240Hz for 1920x1080p resolution, so just imagine your gaming experience with the Acer Predator Helios 300.
Our only complaint here with the Acer Predator Helios 300 is the SSD, which is at 512GB. However, you have two slots for additional SSD’s and one HDD, so upgrading might be a necessary evil if you want to pack in more games.
But other than that, this budget gaming laptop (if you consider a price range of sub $1,500 as budget pricing) is sleek, impressive, and powerful. You’re never going to find any other best value gaming laptop that would come close to what the Acer Predator Helios 300 has to offer.
The MSI GS66 Stealth is a powerful machine, but it comes in this sleek design that makes you want to just appreciate it from afar. We’re talking about a gaming laptop that should play the most demanding games at the highest FPS possible even with the GeForce RTX 3080’s compromised ampere power, which is sitting at 95w. That means the RTX 3080 on the MSI GS66 Stealth is probably close to a maxed out RTX 3070. But that’s not indicative of the MSI GS66 Stealth’s lack of power.
If anything, the MSI GS66 Stealth still packs a punch with the 12th gen Core i9 processor, 32GB of RAM, and up to 2TB of SSD storage. All of this is packed into a chassis that’s 18mm thin. Now, this build can get loud during gaming sessions, especially when you’re playing the latest games. But with the Whisper Mode 2.0 feature, your gaming volume is literally barely audible, bringing real meaning to the term “STEALTH”.
You’re still getting good battery life with the MSI GS66 Stealth, but heating might be an issue due to the old chassis designs on these new laptops. When the temperature gets too high enough, you will experience a drop in frame rates while the GPU and CPU cools down. This is the equal compromise for getting a low-profile gaming laptop.
When everything’s said and done, the MSI GS66 Stealth makes it to this list because it’s slim and powerful, and might even compete side by side against the Razer Blade 14. For those who’re in the market for a compact and slim gaming laptop, you might want to add the MSI GS66 Stealth on your to-buy list.
Honorable Mentions
We’ve broken down our top 10 choices for the best gaming laptops that give you 120Hz gaming, but we’re not done yet. If you can’t find the gaming laptop on the top 10, consider one of the three honorable mentions on this list.
We have considered these gaming laptops as honorable mentions because they are just as competitive and as powerful as the rest of the top 10 gaming laptops. Sometimes, people are also very particular about which brand of gaming laptop they want, and we just can’t cover all of the brands in a single list.
Another giant gaming laptop on this list is the MSI Vector GP76, and just like the Alienware below, it’s a 17-inch laptop with 360Hz refresh rate at 1080p resolution. There’s also a lot of power packed underneath the hood.
You’re getting a 12th generation Intel Core i9 processor with an RTX 3070Ti graphics card, supported by 32GB of RAM and 1TB SSD for storage space. These specs are everything that’s needed by a gamer for an immersive gaming experience.
But the key highlight here is its display, as it puts more focus on speed than resolution. You’re getting 360Hz for 1920x1080p resolution, which is insanely fast. The graphics card’s high performance also guarantees smooth gameplay, combined with the Nvidia G Sync software.
Alienware is a brand that needs no introduction. They’ve been considered as one of the giants in the gaming laptop market because they do not hold out on what their laptops can offer to the gamers. The brand is not known for making sleek and compact laptops, but rather, you’re getting the opposite.
In order to house such power, an Alienware gaming laptop are usually 17-inches to get you the highest performing gaming specs into one compact machine that overpowers a normal workstation.
For this list, we have the Alienware m17 R4, a beast of a 17-inch laptop and packed with the right hardware goodies. You’re getting a 10th generation Intel Core i9 processor, 16GB base RAM (upgradeable to 32GB), 512TB SSD Storage (upgradeable to 1TB), and GeForce RTX 3060 graphics card (with RTX 3070 and GeForce RTX 3080 upgrades available).
And yes, the Alienware m17 R4 is capable of Ray Tracing 2.0 and is supported with Alienware’s own Cryo-Tech cooling solution. This is also the first gaming laptop with a display boasting a 360Hz refresh rate (at 1080p resolution). You’re also getting good battery life with just day-to-day tasks, office productivity, and even creative tasks (video, audio, and 3D editing). This is one of those gaming laptops that just doesn’t shy away from not being as compact as the rest of the laptops on here.
Last but definitely not the least in this list of impressive gaming laptops with 120Hz refresh rate or higher is the Asus ROG Flow X13. It’s the smallest laptop on here with a 13-inch screen, but don’t be fooled by its size because there’s some power underneath.
The Asus ROG Flow X13 runs on an AMD Ryzen 9 5900HS with an Nvidia GeForce RTX 3050Ti (but can be upgraded to GeForce RTX 308o). The RAM sits at a hefty 32GFB with a dual 1TB SSD for storage. It’s just as mobile as it’s powerful, so gaming experience shouldn’t even be gimped at this point.
For the display, you’re getting 1920x1080p resolution with 120Hz refresh rate. This makes it the perfect laptop for gamers who’re into demanding FPS games (such as Call of Duty). Costing less than $1,500, the Asus ROG Flow X13 is already a mid-range gaming laptop for the specs that you’re paying. If you want a compact laptop that has an RTX 3000-series graphics card, the Asus ROG Flow X13 should be on your list of gaming laptops to purchase.
Why Does Your Gaming Laptop Need Higher Refresh Rate To Begin With?
For gamers, there’s nothing more important than high refresh rate screen, especially when a game has fast movement or fast animation that affects your reflexes. By now, we’re seeing gaming laptops with high refresh rates up to 300Hz, but of course you’re going to be playing your favorite games at 1080p resolution to hit this high refresh rate.
Back then, laptop screens were just laptop screens. They didn’t have a high refresh rate. If anything, you’d need an external monitor if you wanted to check out something that had more colors on it. Those days are now OVER.
Today, gaming laptops are now marketed with the inclusion of high refresh rate in their spec sheet, mostly because gamers are so nuanced with what they want to see and feel for their gaming experience. Some gamers who are heavy into the first person shooting games require at least 120Hz or a high refresh rate to augment their gaming reflexes. A handful of gamers are satisfied with whatever refresh rate they sit at, as long as they’re playing their games at the highest settings possible on a 4K resolution.
The high refresh rate on these specs sheets are often unexplained, so the uninformed gamer would probably just go for the one with the highest refresh rate (in this case, a 300Hz). But allow us to explain just how your refresh rates will affect your gaming experience and even your day-to-day experience.
What Are Refresh Rates?
Refresh rate is the measure at which how fast your monitor or screen can redraw an image repeatedly to generate a smooth and fluid motion. This is measured in hertz or Hz, so the higher the Hz, the higher the refresh rate.
What does this mean for the gamers? Well, displays with a high refresh rate can draw and redraw itself frequently. For the baseline in real world measurement, Hollywood movies are presented at 24 frames (or pictures) per second, which is enough to guarantee fluid motion. In order for a screen or monitor to display the movie properly, it needs to redraw itself 24 times per second, or 24Hz in refresh rate. One hertz is the equivalent of one FPS (frame per second).
This large number of frames or frame rate gives you the illusion of fluid motion, depending on what you’re looking at. For movies, 24FPS is enough but it’s a different story for video games. This is because if your computer screens just operate at 24Hz, your mouse wouldn’t be moving fluidly. Rather, it’d look like a stone skipping over a water surface.
This is the reason why your monitors for your PC or even laptops start at about 60Hz and go on from there. This means you’re viewing motion at 60FPS at the very least. Gaming at 60FPS on a 60Hz screen will give you a smooth experience.
So if 60FPS is more than enough for a gamer, why do you need to pay for higher refresh rates? Well, anything higher than 60Hz is already considered a higher refresh rate screen. Gaming laptops can clock in at a minimum of 120Hz and hit up to 300Hz as of this writing. You’ll get varying refresh rates at 144Hz and 240Hz, depending on the resolution, graphics card power, and overall processing power. This is why your gaming laptops on this list are running on the latest generation Intel Core i7 processors or i9 processors with an RTX 3000 series graphics card.
The main reason gamers want higher refresh rate on a gaming laptop is they want a more fluid motion for their video games. For example, let’s have a video of a car passing by. Using a 6oHz screen would mean you only see 60 FPS or frames for the video. On the other hand, using a 120Hz screen means you see 120 frames per second. This means that you get a smoother motion or animation for the same video with the 120Hz screen as opposed to a 60Hz screen.
To delve deeper into the world of high refresh rate displays and how it can affect your gaming experience, we need to explore some of the more technical jargon.
What Does Response Time Mean Compared to Refresh Rate?
Your monitor or computer screens are made up of millions of pin-sized elements called PIXELS. These individually change colors depending on what’s being shown, like an image, a movie, or even a video game. Consider the pixels are each piece of the puzzle trying to form the entirety of the display.
Response time is a way to measure how quick these pixels can change colors. This is measured in milliseconds. Unlike refresh rates where you need higher Hz measurements, you want the complete opposite for Response Time. Lower response time means quicker pixel response, but lower doesn’t mean better. Unlike refresh rates, there’s no industry standard for response time measurement. For screen manufacturers, the response time is the time that it takes for pixels to change from grey to white to grey, hence the term “grey-to-grey”. This is a smoother transition than the classic black to white to black transition in the old days.
So what does this have to do with refresh rate? Well response time is related in a way to refresh rate. A screen with a high refresh rate but low response time is useless because pixels will have a hard time keeping up with the frames’ demands for speed. To put it to you simply, images will look like ghosts in scenes that have fast motion.
Response time would probably be more important when you’re looking at a specs sheet compared to refresh rate, but these gaming laptops on this list are well-made to the point that gaming experience is anything but subpar.
What Does Screen Resolution Have To Do With Refresh Rate?
Another technical term that ties in with refresh rate is screen resolution. If you’ve noticed in our list, we specified the resolutions at which certain refresh rates can be achieved.
Screen resolution is the measure of how many pixels are in a screen. The higher the resolution, the more pixels there are being displayed and utilized. Native Resolution is the term that refers to the optimized resolution for a panel. Measurement of resolution is displayed as number of pixels horizontally by the number of pixels vertically. Gaming laptops are averaging at about 1920x1080p native resolution, which is also called as full HD resolution or 1080p gaming. There are screens that can go higher by as much as 2560×1440 pixel resolution, or what’s referred to as QHD or 1440p gaming. These screens were prevalent in gaming laptops released in 2021.
For gaming laptops, the best choice would always be the Full HD because it already provides enough detail without making the graphics card work overtime. You see, higher resolutions mean more graphics processing power. Consider GTA V on two laptops: One at full HD and another at QHD. You get more frame rates on a full HD laptop than you would with a QHD screen. Or worse, your laptop may not be able to handle higher frame rates on QHD screen. Period. You’d have to significantly reduce the graphics settings to get higher frame rates on a game.
For most gaming laptops, even those with the GeForce RTX 3000-series graphics cards, it’s near impossible to hit 4K resolution at high settings for the most demanding games as of this writing. Full HD and QHD resolutions can hit refresh rates up to 240Hz, but you’d probably hit 120FPS for 4K and about 300Hz or higher for 1080p.
Which One’s Better for Gaming? – 1080p or 1440p?
For competitive gamers who’re into first person shooters, 1080p is the best resolution for them, even though 1440p is now turning into the standard for high resolution gaming. You get higher refresh rates at 240Hz to 300Hz and smoother animation with an 1080p, as opposed to 1440p with lower refresh rates sitting at 120 to 144Hz but you get higher FPS or frames per second.
To put it simply, if you’re into games that need smooth animation to help with your decision-making and to help you react faster, then you’ll need the 1080p resolution. If you’re into immersive gaming experience, like open world games, then you’re going to want to invest in a 1440p resolution monitor.
A gaming laptop with screen size less than 17-inches are better off with 1080p resolution because there’s hardly any difference in refresh rate and FPS if you go for higher resolutions, at least from a visual standpoint. But if you want your games to run at 120FPS consistently, go for a 15″ laptop with a 1080p display (Full HD).
Are There 4K Gaming Laptops In The Market?
We’ve listed the top 10 120Hz gaming laptops in the market, along with some honorable mentions. But you’re probably wondering: are there even 4K laptops in the market right now?
The answer is YES. We even have a couple on here that are 4K laptops that reach 120Hz refresh rate. But before you think about buying one, allow us to explain something first that might point you to the right direction.
Getting a 4k laptop with a 14″ or 15″ screen is pointless, unless there’s a real need for you to carry around a gadget like that. Even if you do get a 17″ laptop, playing games at 4K resolution on a laptop might just be too demanding because of the extra work that your graphics card has to put in. With this amount of work being done, the graphics card and processor are working overtime. Your laptop will get too hot and will not be able to properly cool down because of the limited ventilation and cooling options on a laptop, as opposed to a gaming rig with proper air flow and bigger fans afforded to them. You won’t be able to come close to what a gaming PC will need to run 60FPS on highest settings on 4K resolution with an IPS panel.
But this doesn’t mean that gaming experience on a 4K laptop is subpar. If anything, it’s still going to be immersive but when it comes to the latest games, you’ll probably have to lower the settings to medium or low. Make no mistake that you won’t find a budget gaming laptop with 4k resolution too.
Are There Frame Rate Smoothing Software or Technologies Available?
A screen’s standard refresh rate is constant, meaning it will always function given its frequency. If your monitor is 240Hz at 1440p, it won’t go higher than that, but it also won’t go lower than that unless you increase resolution to 4k and hit 120Hz (if it’s available to your gaming notebooks).
This can be a bit of a frustration for gamers because the computers they are using may not produce frame rates that are divisible by the refresh rate, so you’ll get what’s called “TEARING”. Imagine a laptop that plays a game at 73FPS, and the refresh rate is 120Hz. Every time the screen redraws itself, it may generate a new or complete frame from the graphics card. But the graphics card needs to send out frames to maintain this picture at 120 frames per second, so to speak. To compensate for the lack of the new frames, it will send back part of the previous frames and some parts of the next frames to keep up.
This mismatch of frames will look like it’s torn, with part of it being misaligned. Hence, the word TEARING. Thankfully, not all gamers notice this phenomenon, especially if their screens have higher refresh rates.
To solve this problem, there’s what we call frame rate smoothing software that helps with frame-rate syncing, or what’s referred to as adaptive syncing. This allows screen to dynamically change the way they refresh the screens so they’re able to match the frame rates generated by the graphics card. A good example of this frame rate smoothing software is Nvidia G Sync, which is found in most laptops that come with Nvidia graphics cards. For AMD Radeon graphics cards, they get the AMD FreeSync. However, not a lot of gaming laptops provide support for adaptive syncing.
Frame-rate syncing or smoothing technology is still relatively uncommon because manufacturers have to shoulder the costs of including said technology into their laptops. If you’re particular about smooth FPS and constant high refresh rate, you want to look for a laptop with adaptive syncing but your choices might be limited.
How High Of A Refresh Rate Do Gamers Really Need?
Favorite games aside, a budget gaming laptop’s screen sits at about 60Hz refresh rate, which is also found on normal laptops. If you want AAA gaming or just want to do some casual gaming while being mobile, you might consider 60Hz at most with a low-end graphics card like a GeForce GTX 1650 (or GeForce GTX 1650Ti), or anything under AMD Radeon RX 5500M. These cards can give you 30FPS to 60FPS at Full HD screen (1080p resolution).
Competitive gamers on the other hand might consider most gaming laptops that give them about 120Hz or higher refresh rates, even without an external monitor. Combined with low-end graphics cards from the ones mentioned above this paragraph, you can still run favorite games such as Fortnite,CS:GO, League of Legends, and Rainbow Six: Siege at triple FPS. If you’re after a budget gaming laptop, don’t hesitate to get one with a low-end GPU as long as you have 120Hz or 144Hz refresh rates, or higher. Most gaming notebooks with these specs might cost you about close to $1000 or less.
If you can stretch your budget further, you can get gaming notebooks with higher refresh rates than 144Hz, like the Acer Predator Helios 300 or the Alienware m17 R4 laptops on here. These laptops are extremely powerful to get you enough frame rates for smoother animation and gameplay at a refresh rate of 240Hz and higher.
What Kind of GPU Do You Really Need?
Most games are still bound by graphics card usage, while there are a handful that rely on CPU usage. Majority of the gaming laptops you’ll want to purchase either use Nvidia GeForce RTX/GTX series or AMD Radeon graphics cards.
The latest graphics cards from Nvidia are the Nvidia GeForce RTX 3000 series, starting from 3050 all the way to RTX 3080Ti. AMD also has the Radeon RX 6000M series, which starts at RX 6300M for budget gaming laptops and scaling all the way up to 6800 for the premium laptops.
Just like the Ferrari, gamers are drawn to any laptop with RTX models on them because they’re premium hardware, even though the RX 6000 series perform just the same. But you’ll find that the AMD fanboys will always be drawn to the AMD Radeon powered laptops.
With that said, you should know what to consider for your GPU depending on the kind of gaming you’re wanting to do:
Casual level – By entry level, we are referring to those who don’t mind just sitting at low to medium settings for the most demanding games. Settling for a RTX 3050 or RX 5500M is sufficient gaming power, but you could always scale up to a RTX 3060 or RX 5600 if if you want to increase your FPS on higher settings. You’ll probably end up with a gaming laptop that’s around the $900 to $1,100 price range for the kind of graphics cards that you need.
Mainstream level – Mainstream level gaming is always going for the latest AAA games, or the most favorite games right now by a lot of players. You always want to make sure that your laptop is capable of playing future generation of games too, so future-proofing is kind of a necessity. With that being said, you can settle for any laptop with at least an RTX 3060 or RTX 3070 with a 16″ or 17″ display. You’ll more likely spend $1,200 to $1,500 for gaming laptops with these specs.
Highest level or VR level – This level is the ultimate gaming level. You’re not meddling about with graphics here and you’re not settling for anything less than ULTRA settings. You can settle for an RTX 3070 or RTX 3070Ti when available, but you can always go for the RTX 3080. Likewise, you can go for the RX 6700M graphics card if you want AMD Radeon. The price range on these beasts start at $2,000 and can go higher than $3,000.
What Do You Recommend?
For Gamers With Deep Pockets
There are actually two choices here for those who won’t mind what the price tag says. The Asus Zephyrus S17 and ASUS ROG Strix Scar 15 are two of the best choices on here where you’re getting a high refresh rate screen, latest generation Intel Core i9 processors, and RTX 3000-series graphics cards with options to upgrade up to 64GBRAM and 2TB SSD storage. If you’re not really particular about the size but as long as you have a high refresh screen, you might want to consider the Alienware m17 R4 laptop too.
For Budget Conscious Gamers
For those who don’t want to spend a lot of money on gaming notebooks with high refresh rate, there’s still a solid choice here and that’s the Acer Predator Helios 300. It’s about less than $1,500 with some room for upgrades while still running an RTX 3080 graphics card.
For Gamers Who Want The Best Value Laptop
Best value here refers to the value of the hardware you’re getting for the price you’re paying. You’re getting exactly what you want from a gaming notebook, such as a high refresh rate. For this section, go for the Razer Blade laptops (14 and 15) because you’re getting high-performance hardware with enough room for upgrades without forcing you to spend a ton of money on it.
Another consideration here would be Asus ROG Zephyrus G14 if you just want a high refresh screen without the unnecessary extravagance. Considering also that the G14 is also a compact 14″ laptop running on an AMD processor and graphics card.
When you’re building your own PC for the first time, the most common problem that you’ll encounter is when your GPU fans not spinning. This can be frustrating because you’ve probably done everything right, or that you might have a potential problem.
But in most cases, GPU fans not spinning is a simple problem to remedy, and you don’t need to do some complicated troubleshooting.
In this guide, we’ll go over how your gaming PC’s GPU fans work and how you can fix the most common problems associated with graphics card fans.
What’s The Most Common Reason Why GPU Fans Not Spinning Properly or At All?
Your gaming PC does not need to run its GPU fans at all time, or at least until they hit a specific temperature. Your GPU software may come with a passive cooling mode that’s designed to reduce system noise, which in this case, is the noise of your GPU fans.
Most first-time PC builders would turn on their computer and take a moment to realize that their GPU fans are not spinning, or spinning slowly. When they do find out their fans not spinning, they immediately assume they did something wrong or that their new GPU is defective.
To find out if your graphics card actually has a GPU fan problem, just simply run a game or do a stress test/benchmark test that will put your GPU under load. You can install MSI Afterburner, or something similar, to help you raise the speed of your fan manually too.
If your fans do not spin after going through benchmarking your computer, or even after you’ve manually set the MSI Afterburner, then you might have a GPU problem.
What Are Other Problems Associated with GPU Fans Not Spinning Properly On a New Gaming PC Build?
If you have a brand new gaming computer and everything is turned on except for the fans, here are some common problems to help you do basic troubleshooting:
PCIe Power Isn’t Plugged In
It’s common for first-time PC builders to forget to plug things in properly. A PCIe power connector might be one of the few things that first-time builders often overlook, which cause GPU fans not spinning.
If you suspect that you might not have plugged in your PCIe power connector, this can easily be fixed by plugging it in to the power supply unit.
You can also check if your GPU is connected to the PSU properly. Take note that older graphics cards such as GTX 1050Ti/1050 don’t have 6-pin or 8-pin power connectors to connect to a PSU because they run on the power provided to them through the PCIe lane.
If your graphics card does not need to be connected to a power supply via a PCIe cable and the fans aren’t spinning, then you might have a different problem.
A Different Power Cable Isn’t Plugged In
If your PCIe cable is connected properly to the power supply and the fans are not spinning, you might have another cable that’s not plugged in correctly. If everything is plugged in correctly but fans not spinning at all (or slowly), then you might have a GPU problem.
To check if you do have a GPU problem, you can reseat all the cables and ensure that they are all connected properly to where they’re supposed to be connected (graphics card included). If everything is properly plugged and other connections are working as intended except for the fan or GPU, then you might need to purchase a new graphics card.
What Are Common Issues That Could Cause Your Fans To Stop Spinning In An Older Build?
If you have an older gaming rig and your video card’s fans suddenly decide to stop spinning, you can look at these following issues:
Your Video Card Might Be Too Dusty
It’s possible that your video card might be too dusty. Your fans not spinning might be due to heavy accumulation of fan dust. Think of them as a heavy piece of cloth dangling around the fan blades.
If this is the problem, you can just pull the video card out and clean it. You can use a can of compressed air to get rid of all the fan dust and in other components of the video card. You can also use small paint brushes together with a can of compressed air to help you clean the dust around the fans. This should make it easy for your fans to start spinning once more.
Your GPU Fans’ Bearings Need To Be Oiled
If you have one of those old GPUs, a common cause for GPU fan not spinning is its bearings. You can expand your video card’s life by re-oiling the fans’ bearings with a lightweight machine oil (like a 3-in-1 household oil). Word of advise: do not use WD-40. They can do more harm than good to your aging video card.
If you’re lucky, a little bit of oil might make it look like your GPU has a new fan. But if your GPU fans are not functioning properly even after being oiled and dusted, then it might be time to replace it with a new GPU.
Different Fixes For Most GPUs
If you have one of those modern GPUs and your fan is not working properly even after you’ve done the basic troubleshooting above, you can try one of these fixes. You don’t have to use all of them. You just need to work your way down with any of the go to fix listed below:
Fix #1 – Update your Graphics Driver
Sometimes, when fans stop spinning, it’s mostly because of a driver issue. It could mean that you’re using a broken or outdated driver. In most cases, when you didn’t install the graphics driver properly, it doesn’t necessarily mean that it makes things worse, but there will be problems. Your GPU might not even show up in the Device Manager if you have a faulty driver.
This is also easy to resolve because you just need to visit your video card’s manufacturer website (Nvidia/AMD), download the latest correct installer, and follow the steps provided.
You can also use a software called Driver Easy, which is a software that makes driver installation and updating easy. You just install the program, click Scan Now button and it will do the rest.
It will list down every driver that needs to be installed or updated, as well as drivers that contribute to a faulty component. But note that you need the Pro Version of the software if you want to make this program work for you.
Note that you can still manually download and install all the drivers with the free version even if you don’t have the technical know how, but it’s time-consuming. Some drivers may require a bit of web browsing if the free version has problems installing it.
Once all drivers are updated, your computer hardware should be running smoothly, including your GPU. Any hardware issue caused by an outdated GPU driver should be resolved afterwards.
Fix #2 – Reconfigure Your GPU’s Fan Speed or RPM
If your GPU fan not spinning properly even after you reinstalled the drivers, you might want to readjust the fan’s RPM or fan speed. You can do this by using a hardware monitoring program such as MSI Afterburner so you can adjust the fan speed manually.
Open the MSI Afterburner program and click on the A Icon to toggle auto control. Once the fan speed control is accessible, drag the slider to manually toggle fan speed. If you don’t hear anything even if the slider is already at 100, proceed to the next fix.
Fix #3 – Scan and Repair Your System
To proceed with this step, try and remove your graphics card and install it in a test PC. This test PC may or may not have the same specs are your actual unit. You just want to make sure that the components are properly installed, including your graphics card, PCIe power connectors, and more.
If your graphics card works on another PC perfectly, but it’s not working on your actual unit, then it might be a system issue. When we say system issue, it could mean that you have bigger problems than your graphics cards. It could mean that your power supply unit might not have enough power to boot up your graphic card, or there are missing or corrupted files in your operating system.
To help determine if your system is at fault here, you can use a program called Restoro. This is a professional repair solution that lets you scan and fix system issues without deleting or losing personal data.
Much like Driver Easy, there’s a Free Version as well as a Paid Version. The Free version only allows you to scan your system but not repair the files. The Paid Version lets you do the full repair. Don’t worry as there is a 60-day money-back guarantee if Restoro is unable to fix the problem.
If GPU fans not spinning yet after running Restoro or checking for system files, then proceed with the next fix below.
Fix #4 – Upgrade your GPU BIOS
Much like a corrupted driver, a corrupted GPU BIOS can also cause problems that make things worse. BIOS problems are uncommon, but they’re still problems regardless. You need a little bit of technical know how to upgrade your BIOS, but nothing that a quick site search can’t fix.
If you aren’t confident about your technical skills, you might want to refer to a computer specialist to help you do upgrade your BIOS.
Frequently Asked Questions About GPU Fans Not Spinning
How Do I Force My GPU Fan to Spin?
If you really want to manually spin your GPU fan, you’ll need a third party software such as MSI Afterburner. This is a software that lets you manually toggle the speed of your fan. Just go to the Fan Speed section and click Manual.
Then just slide the dial based on the speed you want. If this doesn’t force your GPU fan to spin, then you might have done something wrong when you built the PC the first time, or you’re already dealing with an old GPU that needs to be replaced.
How Do I Know If GPU Fans Are Not Spinning?
GPU fans aren’t exactly known for being silent, so you’ll actually know whether or not your fans are spinning just by listening.
Doing a stress test, or manually firing up a graphically demanding game at the highest settings possible, is a sure way to make your fans spin and sound like an airplane taking off.
If you have a top-of-the-line case with a tempered glass side panel, you might be able to see for yourself if the fans are spinning or not. If not, you might want to de-lid the PC casing and see if the fans are spinning or not.
How Do I Know My GPU is Dying?
If your GPU fan is dying, it will show the following symptoms:
Abnormal Performance – Lastly, when your GPU temperatures spike for no reason at all, even when it’s idle, it’s a sign that there’s something wrong with the GPU fan or the GPU itself. Note that when this happens, you might not need to replace the GPU just yet. Simply reapply the thermal paste on your GPU and see if it’s working fine after that. If the temperatures still spike after a new thermal paste, double check if your fans are spinning or if there’s something that’s pushing your GPU to the limit when there shouldn’t be. If there’s nothing suspicious with your GPU and fans don’t start spinning still, it’s time to buy a new video card.
Crashing – When your GPU suddenly crashes unexpectedly and you’re unable to reboot, chances are your GPU is dying and needs to be replaced. Note that you don’t need to put your GPU under heavy load as well. It’s actually worse if your PC crashes even when it’s idle.
On-Screen Artifacts or Excessive Glitching – If you’re noticing FPS drops for no reason, or if your game is graphically glitching, your GPU might be having problems and it’s letting you know that it’s not going to last long. When you ignore glitching or on-screen artifacts, you’re putting more load on your GPU and PSU, so you’re at risk for further component damage apart from your GPU.
Is It Bad To Have GPU Fans Running All The Time?
There’s nothing wrong with having your graphics card fans spin all the time, even if they’re at 100% (if you use MSI Afterburner or its counterpart). You can run them this way because GPUs are meant to handle heavy workloads.
When fans are always running, it will keep your GPU temperature below average, which is what you want regardless if you’re gaming, working, or editing. The downside here is that having your fans constantly on creates noise pollution if your case has a tempered glass panel. If you’re wearing gaming headsets or if you live alone, the noise shouldn’t be completely detrimental.
But note that years of constant spinning might wear off your GPU fan bearings faster than they should. You can refer to the previous section above that talks about maintaining fan bearings with lightweight machine oil.
Conclusion
The methods mentioned in this article to fix GPU fans are only possible if you have ample time. You must primarily check the power cable and graphics card fan are appropriately connected. If under these multiple stress tests, too, there is a fan spinning issue, and there it is under warranty, you must contact your seller.
We hope this article gives you some details about the GPU fans of your computer on spinning, but you should always upgrade it to keep your PC safe. GPU fans can make you worry about your PC’s motherboard, which can be very risky. If your GPU fan becomes a faulty product, it must be replaced with a new one.
You can either go with a lower-range GPU fan or a higher-range GPU fan. If you want the latest GPU card, then you can go for the all-new RTX 20 series cards, which can be your best buying option at a higher rate. This new series will work fine and live up to your imagination while playing a high graphics game.
Gaming chairs are considered a luxury. They’re made of high-quality materials, and are both functional and aesthetically pleasing to look at. It comes as no surprise that brands such as Secret Labs, DXRacer, Lenovo, and Cougar to name a few.
To keep these chairs in tip-top shape, you need to keep them clean and properly maintained. You’re not dealing with regular office chairs here, after all. This article will show you how to clean a gaming chair, how to maintain their materials, and more.
How Do You Clean Gaming Chairs?
It takes more than using a damp cloth to remove tough stains on your gaming chair. Sure, it may do the trick, but you’re probably doing more harm than good.
This section will discuss the general step by step guide for you to clean a gaming chair, and later on, we’ll show you how to maintain your gaming chair, regardless if it’s made from PU Leather, PVC leather, and so on.
First Step – Identify What Upholstery Your Gaming Chair Is Made Of
Before you clean your gaming chair, you have to know what upholstery is on it. You have to know what the chair is made of so you don’t end up damaging the material. There are different approaches to cleaning different materials, and we’ll talk about them in a while.
Gaming chairs are usually made up of one of the following upholstery materials:
Some gaming chairs might be a combination of different upholstery, so you’ll have to clean them separately. Your gaming chair’s manufacturer will provide you with whatever upholstery is used and probably some generic cleaning instructions.
Second Step – Use a Vacuum Cleaner To Remove All The Dust
Now assuming you know what your gaming chair is made of, it’s time to start cleaning it. First thing you need to do is to remove all the dust, debris, and other small particles that could leave a smudge or cause further staining when touched by a wet cloth or cleaning solvent.
For mesh chairs or those with fabric upholstery, vacuuming can help remove the dust particles that’s embedded into the material. You can use a brush attachment for the vacuum cleaner over the fabric upholstery, or regular vacuum attachment for the mesh chairs.
If your chair is made from PU Leather or PVC Leather, there’s no need to use a handheld vacuum. You just use a regular feather duster, or use a microfiber cloth.
Third Step – Clean Upholstery With Solvent Solution or Water
Your gaming chair deserves better, and vacuuming and dusting can only do so much. When it comes to food stains, sweat stains, and other stains, you need to use water or solvent solution.
But how do you know if you need to use either? Simple. Look for the care tag that’s attached to your gaming chair. They’re usually found at the back or underneath the chair. You’re looking for one of two letters here: S or W.
S stands for solvent, and W stands for Water. If you see S/W, then the chair can be cleaned with either S or W.
PU Leather and PVC Leather (or any type of faux leather) chairs usually come with the W-tag, and mesh or fabric upholstery can use either. When you’re using a cleaning solvent for these tougher stains, gently blot over the stained area but never rub over it. If it’s fabric, you need to brush directly over the stains.
Fourth Step – Spot Cleaning For Tougher Stains
This is an optional step if the third step can’t get rid of the tough stains. If you still see some stains on problem areas even after you use a water or solvent solution, then you’ll need to spot clean them.
To spot clean these problem areas, you just need rubbing alcohol and cotton ball. Soak the cotton ball with rubbing alcohol first. But don’t dab on the area just yet. You need to find out if the alcohol can damage the material.
You can do a test by wiping a small area on the underside of the chair, or least a spot that’s out of sight. Wipe a small area and wait for a few minutes to determine if alcohol can damage the material. If it doesn’t, proceed to spot clean the affected area by gently blotting or rubbing the alcohol-soaked cotton swab.
Be careful with spot cleaning on a mesh chair because the material can get damaged easily.
Fifth Step – Wash The Frame, Base, and Armrests
Upholstery is clean by this step, but you’re not done cleaning gaming chairs just yet. Now you need to move on to the other parts of the chair, namely the base, frame, and armrest.
This is relatively easy because to clean a gaming chair’s armrest, base, and frame only requires warm water combined with mild detergent. Use a clean cloth to wash the surface and then proceed to wipe it dry with a paper towel or a dry cloth.
Be sure you’re not using the same damp cloth that you cleaned for the upholstery because you might be adding more dirt as opposed to removing them.
Sixth Step – Clean The Casters and Tighten Screws
After the base, armrest, and frame have been cleaned, it’s time to move on to the caster wheels. This is the most difficult part because the wheels gather lots of debris that may get embedded into the mechanism. These debris are often difficult to remove, especially if there are fur or carpet fabric lodged into it.
The first thing you need to do here is to flip your chair upside down first. Ideally, you want to start cleaning the casters first before you clean the upholstery and other parts because you might end up getting them dirty again.
Grab a vacuum cleaner and remove debris using the crevice tool. Once all the big debris and chunks of fur and hair are removed, use a soft cloth and wipe the caster wheels down with surface cleaner. For the inner parts, use a clean cloth soaked with rubbing alcohol. Use a paper towel to remove any moisture.
Once those are clean, be sure to lubricate the chair’s wheels with something like WD40 if you’re hearing squeaking noises or if the wheels don’t roll easily. Be sure to check for loose screws and bolts and tighten when necessary.
And voila! That’s how you clean a gaming chair.
How Do You Deep Clean A Fabric Gaming Chair?
My personal experience with fabric gaming chairs is that staining is inevitable. Spills, sweat stains, coffee stains, and even dried out dust particles can be hard to clean if they’ve been ignored for too long.
Part of learning how to clean a gaming chair is learning how to deep clean fabric materials. You may be using a faux leather chair now, but sooner or later, you’ll upgrade to the fabric ones.
To deep clean a fabric upholstery, you need to use baking soda. First, vacuum the chair like you would with any gaming chair.
Then once the dust particles and small debris are removed, it’s time to use baking soda. Using a microfiber cloth, work baking soda into the upholstery and let it stay on for 30 minutes.
Run the vacuum cleaner a second time to remove the baking soda. By this time, stains should have faded but they’ll still be there.
Apply a layer of baking soda once more using the microfiber. Then put the chair out in direct sunlight to completely dry and deodorize the upholstery.
Why Is Your Gaming Chair Dirty?
To better learn how to clean a gaming chair, you need to know why your chair is dirty to begin with. Like our parents used to say, “prevention is better than cure”. So if you can prevent your chair from getting too dirty, you’ll end up cleaning it less frequently.
These are some of the biggest factors that cause your mesh or fabric chair to become dirty:
Eating and/or Drinking – It goes without saying that mesh, fabric, and faux leather chairs can get dirty when you eat or drink while gaming. You’ll end up spilling your drink or dropping crumbs that get embedded into the mesh or fabric. When spilled drink or sauce becomes unattended, it turns into stubborn stains that may be difficult to remove later on. Water stains are also quite common problems because they’ll cause spot discolorations or inadvertently damage the surface.
Dust From Outside – Dust particles can come inside your house or room from different sources. Your centralized air-conditioning units might be reeling in dust from outdoors, or you could tracking dust from your clothes when you do go outside. Your gaming chair will never be dust-free unless you just cover it with cling wrap.
Bodily Fluids – Or sweat stains to put it simply. Sweat stains against a white fabric or mesh can become easy to spot because they’ll turn yellow as time goes on. You won’t really notice you have sweat stains on there until they turn a shade of yellow.
Faux leather chair, be it PVC leather or PU Leather, are actually more resistant to dirt because they don’t allow dirt or dust particles to get embedded into the material. But it doesn’t mean that your chairs won’t get dirty too.
Much like fabric and mesh chairs, PVC leather and PU leather get dirty the same way. The only difference here is that the latter’s cleaning process is easier and the materials are easy to maintain. You may not get the usual stubborn stains as you would with mesh and fabric chairs. The cleaning process for leather chairs is a lot easier too.
How to Maintain Your Gaming Chairs And Keep Them As Clean As Possible
After all that’s said and done, you now want to make sure that your chair is as clean as possible for a long time. If you really want to keep it clean, here are some tips:
Remove Dust Particles Once A Week
To keep your chair regularly clean from surface dust, you need to vacuum or dust at least once a week. Dust particles often work themselves into the fabric or material when left unattended. They turn into tough stains that end up becoming too difficult to clean.
Direct Sunlight Is Your Worst Enemy
Exposing your gaming chair to direct sunlight for prolonged periods of time can damage the upholstery. Discoloration might occur for fabric and mesh chairs, while surface cracks might appear for faux leather materials.
If your workstation is near a window with direct sunlight running through it, use a curtain to reduce sunlight from coming into the room.
Read Your Manufacturer’s Cleaning Instructions
If you bought your gaming chair as brand new, then you’ll need to read through the manufacturer’s cleaning instructions. The cleaning directions provided will help you clean the chair as intended rather than relying on a random cleaning solution.
Not all gaming chairs are made equal, so be sure to browse through it first. Certain fabrics might be sensitive to mild detergent, or a commercial cleaning solution, so you might end up damaging the chair. Some brands might also have their own water based cleaner or stain remover, like Secret Lab. A few drops of that cleaner might do wonders for a Secret Lab chair, but might not be the case for another named brand.
Can you believe that a monitor with a middle panel and a big bezel would suffice for your everyday web surfing, reading, and gaming needs? You don’t want this stuff to keep you from working on your computer. You require something pleasing to the eyes. It’s not acceptable to expect the highest frame rate and superb bezel-less looks from a display that costs less than $100.
We’ve done our utmost to compile a list of the best bezel less monitors available.
Thin Bezel Monitors are a vital aspect of a multi-monitor system, and many gamers love it because it allows them to focus solely on the game. Many professionals may be well-versed in this area, but many others would like to join the fight but are unsure where to begin.
Dell has been the number one display brand for four years in a row, which didn’t happen by accident. It is a business that is around for decades and the innovations they bring to the table.
The Dell U2718Q 27-inch display with 4K resolution is equal to stunning 3840 x 2160 pixels. It has been one of the best bezel-less monitors to buy in 2021. Let’s take a look at a few of the monitor’s advantages.
The InfinityEdge borderless design is minimalist and matches with every piece of furniture in your home. Because of the inclusion of IPS technologies, you can view the monitor display from any perspective.
With an ultra-wide viewing angle of 178°, you’ll be able to find the best seat in the house from any spot. It’s an excellent choice for a multi-monitor rig. It has a 7.3mm top and side bezel and a 9mm bottom bezel.
For a wide variety of networking options, the display has been allowed to connect to HDMI, DP, and mDP ports. There are also four USB 3.0 downstream ports and one USB 3.0 upstream port.
ASUS is a corporation that has sent out some of the most well-known electronic gadgets. They have gaming mice, branded desktops, but now the ASUS Designo MX27UC 27-inch 4K Frameless Monitor adds to the list.
To begin with, this 27-inch LED panel has one of the finest frameless designs available. Followed by a 1mm bezel that offers a brilliant viewing experience from edge to edge. Its stunning architecture features ultra-thin bezels, which can be helpful in multi-monitor setups.
The wide-angle vision often allows users to game and avoid difficulties when viewing graphical gaming. It has a high-quality AH-IPS panel it ensures that color quality remains consistent even when viewed from unusual angles.
Sonic Master’s sound optimization technology is also included in this ultra-thin bezel monitor. It was created in collaboration with Bang & Olufsen to provide the most immersive music you’ve ever seen. Two 3W stereo speakers offer this lovely sound.
The ASUS Designo MX2UC 27′′ UHD Frameless Monitor also comes with various networking options. It includes HDMI 2.0, DisplayPort 1.2, and DisplayPort over USB-C ports.
With a single USB Type-C, the monitor can deliver 4K video, files, and power. There are also two USB 3.1 downstream ports for fast charging. When you need to attach an external computer to it, these comprehensive networking solutions will make your life easier. It can also accommodate monitor arms in case you want to go for wall-mounted PC builds.
The bezel on the Dell UltraSharp U2415 24-inch Screen LED Monitor is just 6.9mm thick. Dell is a corporation that does more than making great things. But it also incorporates new technological features into each new product range.
With this edgeless monitor, they’ve managed to outdo themselves once more. It is one of the most common options among competitive gamers. It has also appeared on several lists of the best Bezel-less Monitors available.
The Dell Computer UltraSharp U2415 24′′ borderless display has a few noticeable features. For example, a bezel-less display allows you to create a multi-monitor setup with a vertical resolution. It is usable for any device configuration. It is, however, suitable for the monitor’s 16:10 aspect ratio.
It has a 1920×1200 resolution and a 16:10 aspect ratio on its display. You’ll find that the vertical resolution and aspect ratio is higher than the standard 1080 resolution and 16:9 ratio. When surfing the web or playing sports, this slight improvement offers a fantastic experience.
This Dell U2415 display can be attached to every other peripheral without sacrificing image quality. A USB 3.0 charging port with a substantial current delivers a massive amount of power to the display for charging.
It isn’t easy to find a budget monitor with an excellent interface and a lot of options. One such jewel is the HP VH240a, which comes at an incredible price. It’s the ideal blend of thin bezel architecture, good specifications, and smooth performance. Think of it as having a cheap PC case. It does a good enough job without breaking your bank.
This product provides you with all these benefits without putting a strain on your wallet. It’s an excellent pick for those who would use the monitor for office work, text editing, recreational gaming, and web surfing.
The organization has struck the jackpot with the VH240a 24-Inch IPS Frameless/Slim LED Display. It is offering one of the thinnest Bezel monitors money can buy for people on a tight budget.
The HP VH240a has a 23.8-inch touchscreen with a good maximum brightness of 250 nits, a 5ms response time, and a 60Hz refresh rate. There are reasonable benchmarks for those interested in casual gaming.
The stand is the best part of this package. Tilt, swivel, pivot, and height adjustment are all available for it. If you want to install it on a stand, it has VESA support. It has built-in speakers, but they aren’t great, so you’ll want to use external speakers for it. One HDMI port with HDCP support and one VGA port is available.
This package includes an IPS panel, which is a must-have feature. To make the picture seem lifelike and wonderful from all viewing angles. It also features an ultra-narrow bezel that gives it a borderless look. It’s also ideal for a dual-monitor or triple-monitor system without breaking the bank.
When it comes to electronics, LG is unmistakable. They are already going high in the year 2021. They’ve been a technological behemoth for a long time. The products they’ve introduced to the field of computers are unrivaled in the modern era. As a result, the latest LG 24MP88HV-S 24′′ IPS Monitor is a device that can be trusted and is well worth the money.
The LG features a full HD IPS monitor, which is one of its best features. It allows you to enjoy some of the most entertaining shows, play sports, and edit photos without worrying about the monitor ratio or color combos. With the 2.5mm bezel Infinity touchscreen, you get a flawless bezel-free panel that looks amazing and has a great minimalist style to match.
The LG 24MP88HV-S 24-inch borderless display has a few primarily external issues. The monitor’s stand is flimsy, and the power button continues to glow even after the monitor is turned off. The ports do not have auto-switching because if two monitors are in use, the monitor will not immediately switch to another video source.
When it comes to color display and impeccable image editing capabilities, the sRGB is over 99 percent, making it incredible. The on-screen control is also split 2.0, making it simple to use and prevent novice computer users’ complications. It has a black stabilizer for critical features like viewing in the dark. It also has a reader feature for people who read e-books.
MSI continues to assist us in gaining a better understanding of what it takes to produce high-quality computing goods on a limited budget. The MSI i2777fq 27-Inch Class IPS LED Display, their most recent entry into the industry, is one of the most elegant monitors available. It has an excellent HD resolution that will knock the socks off.
With the 27-inch IPS LED panel, MSI has gone all out in terms of features in this show. It also has an extra-narrow bezel to give it the appearance of being a borderless monitor. This aspect ratio has become routine, and it supports over 16 million colors to make the pictures jump off the wall.
It’s an excellent product for all your entertaining needs because of its brightness and 5ms reaction time. This monitor allows you to watch videos, play sports, and work on design projects without experiencing any issues. The monitor itself has VGA ports, HDMI ports, and a video port for proper networking.
About the good aspects of the MSI i2777fq, 27-Inch Class IPS LED Monitor, a few users have reported seeing screen flashes within a few months of buying it. It is one problem that the producer has to address.
Acer has ushered in a transformation in the gaming business with goods that have left an indelible mark. People’s perceptions of gaming have shifted due to the growing technologies. The Acer Predator XB321HK is one such model with impressive specifications.
With the support of an HDMI port, you’ll be able to easily switch from games to your PC or gaming console with this thin Bezel 4K G-Sync display. The monitor has a DP 1.2 connector for multi-monitor configuration and accommodates graphic cards.
Pro gaming has never been this amazing, thanks to the high-end IPS panel and 4ms response time. Gamers will get goose bumps from the integrated NVIDIA G-Sync support for tear-free gaming. And the excellent quality of the 4K UHD display.
There is nothing finer than the 3840 x 2160 (4K) resolution provided by the Acer Predator XB321HK 32-inch Monitor when it comes to resolution. Your gaming experience will be uber smooth thanks to the thin bezel monitor’s 4ms response time. The monitor has a matte black screen with a thin bezel on the outside. The finished result is stunning and perfectly complements the room’s interior design.
Since the stand is sturdy, it does not cause any problems when you’re gaming. The height adjustment and tilt system are also in perfect working order. Since it is VESA compliant, wall mounting is not an issue. The only drawback to this 3840×2160 resolution beauty is the price, which is prohibitively expensive for most gamers.
ASUS is a well-known brand that has been in existence for quite some time. By being a leading manufacturer of high-quality gaming devices. ASUS has carved out a niche for itself in this market.
They have sealed the deal when it comes to displays. The display revolves around image output and proper gaming with the Asus Slim Bezel Black VC239H 23′′ Display. This ultra-thin display is one of the most sought-after products on the market. It helps to attract a lot of attention to the importance of having a good gaming display.
It has the most up-to-date stereo speakers and HDMI and DVI-D signal inputs for excellent performance. The 1920 x 1080 resolution with a proper contrast ratio ensures that you get the best possible gaming experience from this display.
The display is equipped with the new IPS technology. It offers a 178° wide-angle view, allowing you to view the screen from any angle and location in your home.
We’re not saying it’s the best display on the market, but it does the job. Its colors are true to life, and the viewing angles are excellent. Thin bezels are also available to serve you in terms of style. Aside from all the bells and whistles, ASUS offers a three-year rapid replacement warranty.
Acer has been infiltrating the industry, offering a high-quality commodity at a lower price than its rivals. While this strategy has helped them enter the exclusive club of high-end device makers, it has also resulted in a few issues. They’ve had to deal with negative press and far worse offerings that the general public would reject.
They recently unveiled displays with eye-tracking and incredible refresh speeds of up to 240Hz at CES. It says that they are an organization that is constantly changing and innovating.
However, they hope to redeem themselves with the Acer R240HY bidx 24′′ IPS Widescreen Monitor. And to ensure that they will enter the ranks of some of the most prestigious machine manufacturers.
The Acer R240HY bidx 24′′ IPS thin-bezel display features a full HD 1080p IPS screen. It allows you to stream movies without having to worry about viewing angle or consistency issues. The 24-inch length is just a standardized measurement; the original size is 23.8 inches. However, you cannot let this deter you from buying this great commodity when it has many other benefits.
It has a 178° viewing angle, allowing you to see all of your entertainment features from all sides of the room without sacrificing efficiency. Furthermore, the zero-frame design means that you will have frame-to-frame viewing pleasure.
The model also has a 15-degree flexible stand, which is unheard of in other monitor buying units. As a result, the Acer R240HY bidx 24′′ IPS Widescreen Monitor has a USP that functions in its favor. Another feature of the Acer R240HY bidx borderless display is its VGA, DVI, and HDMI ports. It makes it an excellent product for all of your entertainment needs.
Gamers have always been excited by 4K resolution gaming. The LG 27UD68-W thin-bezel display has brought enthusiasm to a whole new dimension. Its borderless architecture features an eye-catching edge-to-edge IPS screen backed by a silver frame. Due to this, the widescreen viewing space has a neat monitor without borders that offers an outstanding gaming experience.
The backside of the panel is white. The LG 27UD68-W has a curved build stand that adds to its look. There is no way to change the height or orientation of the stand, so it’s just suitable for tilting. Aside from this minor niggle, we are incredibly pleased with the concept.
Its IPS panel has excellent 99 percent sRGB coverage, and colors appear vivid and accurate even when seen from various angles. This 4K display has a screen split feature for increased productivity and multitasking. There is a single joystick at the bottom of the monitor that can change all settings for screen split and other OSD features.
The inclusion of AMD FreeSync technology is the most appealing aspect of this ultra HD offering. You will do this to avoid input lag during gaming if you have an AMD graphics card. Game mode and a black stabilizer are both available to meet your gaming needs. It has a 5ms response time and a 60Hz refresh rate.
The Viotek NB32CW has the best thin-bezel display. It features a 32-inch screen and a native aspect ratio of 16:9, and a recommended maximum resolution of 1920 by 1080. It’s a VA-type screen on a curved LED display.
The monitor’s frame is so small that it could almost be invisible. It makes it an excellent option when combined with its VESA usability. With its HD resolution, it’s a perfect option for a multi-monitor system to boost professional competitiveness and performance.
The monitor’s refresh rate and reaction time keep it from being an outstanding option as the main monitor for gaming. When I used it, the near-invisible structure and curved shape allowed for a very immersive experience.
However, 75 Hz is a poor refresh rate for gaming, and a response time of 5 milliseconds is at the absolute bottom of reasonable response times for gaming. However, the immersion allowed for a delightful experience, and I wouldn’t be surprised if this were to become my primary monitor.
Gamers will like the fact that this monitor supports FreeSync. It will remove any potential screen tearing. It will also smooth the graphics at the cost of your game’s framerate, meeting this monitor’s lower refresh rate.
This monitor’s bells and whistles are targeted at gamers, and any novice player would be delighted to use it as their primary gaming board. On the other hand, pro players should look for a gaming-specific display because of the slower reaction time and refresh rate. Because of the high-quality graphics and large viewing angles, it’s also ideal for watching videos or doing work.
Pros
Freesync
High-Quality Graphics
Large Viewing Angles
Multi-Monitor System
Cons
Speakers are not good.
Aspects to Consider Before Buying the Best Thin Bezel Monitor
Screen Size & Resolution
According to manufacturers, the most common display screen sizes in Singapore are 24 and 27 inches. A larger screen allows you to see more pixels, but screen quality, which reduces image quality, should not be overlooked.
A 27-inch display with a resolution of 1,920 x 1,080-pixels (1,080p) is not as sharp as a 24-inch monitor with the same resolution. As a result, the former may not be suitable for text-intensive applications. On the other hand, gamers might choose a lower resolution to get the best graphics output.
A 4K resolution on a 27-inch screen, on the other hand, can cause text and objects to appear too small but can correct this in the device settings. A higher-resolution display is expected to be more costly than a lower-resolution monitor of the same screen size.
Aspect Ratio
About the fact that most displays have a 16:9 aspect ratio, ultra-wide versions with a 21:9 or 32:9 aspect ratio are gaining popularity. Since a single ultra-wide display will replace two or even three displays, it reduces the need for screen bezels.
Brightness
Most displays have a brightness range of 300 to 400 nits, with high dynamic range (HDR) content becoming more available for devices. The Video Electronics Standards Association developed the DisplayHDR specification. It lets users know whether a monitor would correctly display HDR content.
The DisplayHDR standard is divided into many levels. The DisplayHDR 400 specification, for example, requires a minimum peak brightness of 400 nits and a standard color gamut.
If HDR is essential to you, choose a monitor with the DisplayHDR 1000 certification. It requires a peak brightness of 1,000 nits and a broad color gamut. HDR is also provided in game consoles.
Panel Type
Display panel technology affects viewing angles and image clarity. Broad viewing angles up to 178 degrees and decent image quality are provided by in-plane switching (IPS) monitors. Twisted nematic (TN) displays are less expensive and have faster reaction times.
Vertical alignment (VA) panels have the highest contrast ratio and image clarity. They have a slow reaction time and viewing angles that aren’t as large as IPS panels.
The Straits Times recommends an IPS display for most use cases due to its balanced characteristics. IPS monitors have image quality comparable to VA displays. Their reaction time is decreasing to the point that they can interact with TN displays.
Monitor Curvature
Curved displays are said to have a more immersive view while putting less pressure on the eyes. They will usually have a big screen to encompass a user’s field of view best.
The sum of curvature is generally expressed as a number like 1,800R. It means the display has a radius of 1,800mm and is curved like a disc. A smaller number indicates a more pronounced slope.
Refresh Rate
The refresh rate of a display specifies how often the image on the screen is updated. Photos are redrawn 60 times a second on a regular display with a 60Hz refresh rate. Playing games and manipulating the computer interface sound cleaner and more fluid with a higher refresh rate.
Monitors with flexible or adaptive refresh rate technologies, such as AMD’s FreeSync and Nvidia’s G-Sync, take this a step further and becomes costly. These functions include a compatible AMD or Nvidia graphics card. To change the monitor’s refresh rate and to match the frame rate to minimize screen tearing horizontal lines that break up an image.
FAQs
Which is the best brand for bezel monitors?
Many firms have recently begun to produce these types of displays. But there is currently only one market leader: Dell. Per fifth, they ship the most electronic displays. The fact that Dell UltraSharp U2415 is at the top of our list is no coincidence. Because of the many favorable consumer feedback, this model has won its place.
What is the difference between the IPS & TN panels?
Engineers produced IPS panels to address the problems with TN panels’ color reproduction and viewing angles. Since they had a much-improved contrast ratio and colors, In-Plane Switching screens were a huge hit. When watching the screen from various angles, there is very little color change. The other disadvantage is that IPS displays are more costly than Twisted Nematic displays.
Do ports and connectors matter in bezel less monitor?
HDMI and DisplayPort connectors are commonly used on monitors. They can also have a USB hub for connecting several USB devices and built-in speakers for listening to music. HDMI and DisplayPort have different generations and different capabilities.
G-Sync from Nvidia also includes a DisplayPort 1.2 adapter. Correspondingly you could use AMD’s FreeSync with HDMI. A USB-C connector, which can deliver power and hold audio and video signals, is also seen on newer (and more premium) displays.
Conclusion
When it comes to frameless displays, there are always a variety of options to consider. So, we’ve done our best to provide you with a list of some of the best bezel-less displays currently available in 2021.
This list is inclusive of all types of individuals. If you’re on a tight budget, the MSI Full HD Bezel Monitor or Acer R240HY are viable options. If you’re looking for a gaming laptop, the Acer Predator XB321HK is the one for you.
Throughout this article, we’ve talked a lot about how thin-bezel displays are widely used for multi-monitor setups. Borderless displays, on the other hand, are just good in single panel configurations. And, thankfully, there aren’t many premium put-on displays with a frameless configuration.
![9 Best CPU Temperature Monitor Tools for Windows [FREE]](https://www.epicwinapp.com/wp-content/uploads/2021/07/9-Best-CPU-Temperature-Monitor-Tools-for-Windows-FREE.jpg)
![9 Best CPU Temperature Monitor Tools for Windows [FREE]](https://ww2.epicwinapp.com/wp-content/uploads/9-Best-CPU-Temperature-Monitor-Tools-for-Windows-FREE.jpg)
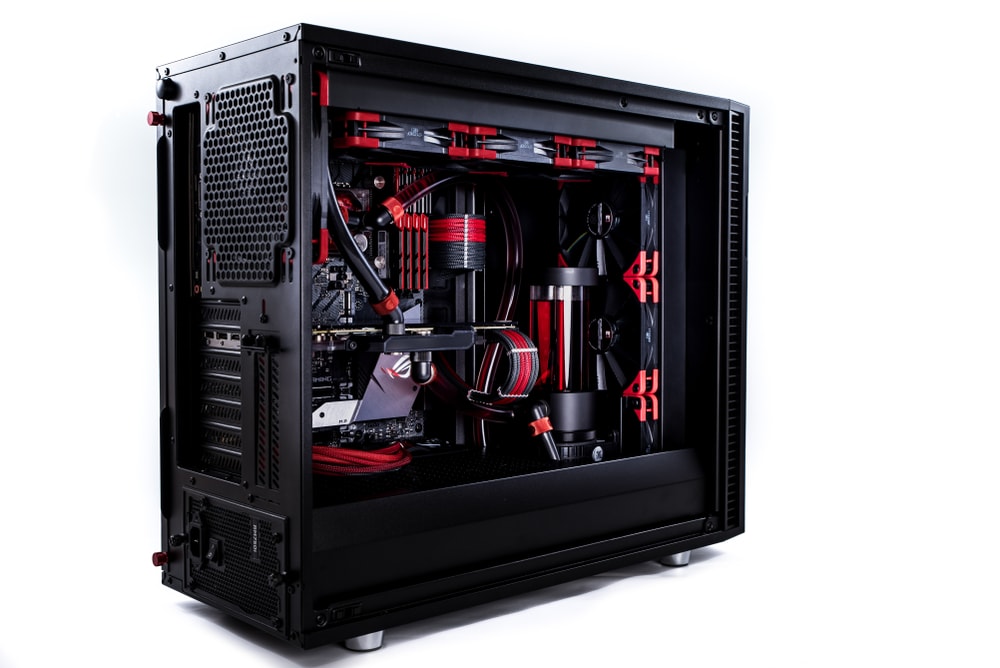


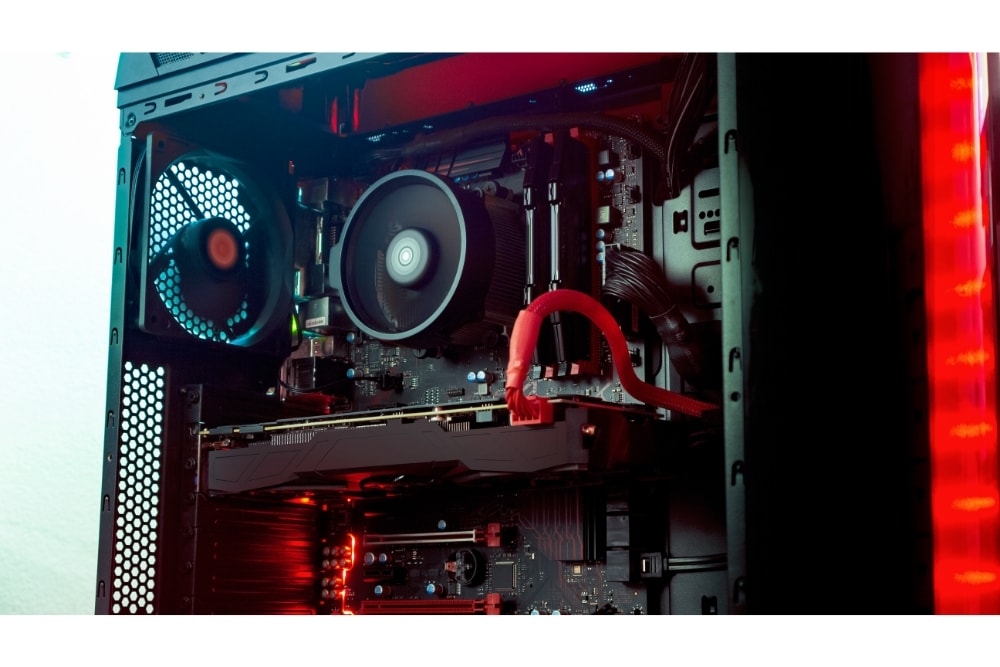


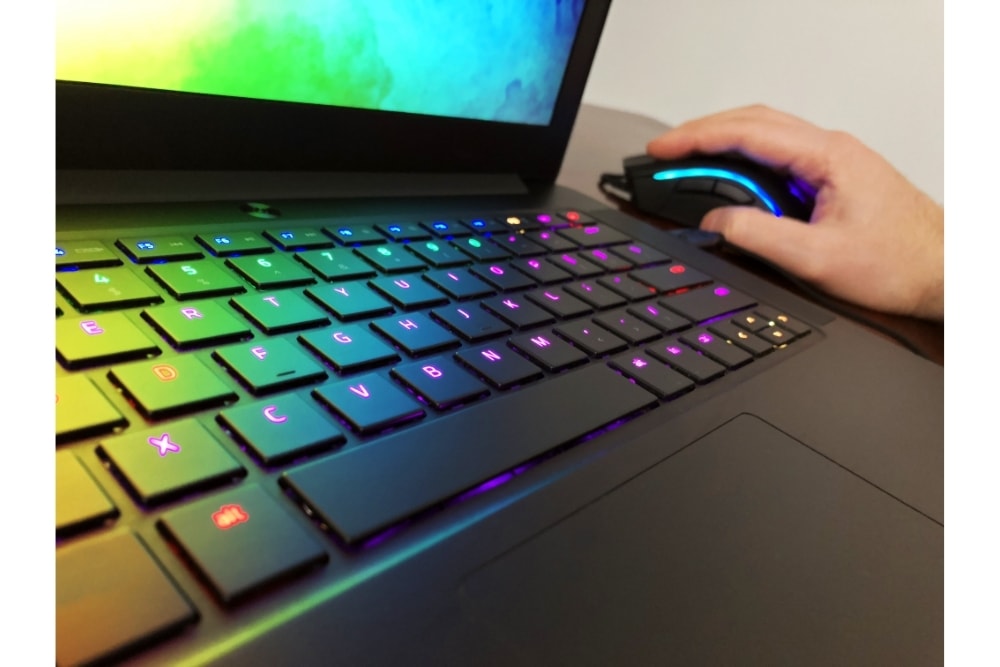


![GPU Fan Not Spinning [Resolved]](https://www.epicwinapp.com/wp-content/uploads/2021/05/gpu-fan-not-spinning-featured-e1621971865558.jpeg)