Author: Jim Stephenson

  • All You Need To Know About Liquid Cooling Maintenance

    All You Need To Know About Liquid Cooling Maintenance

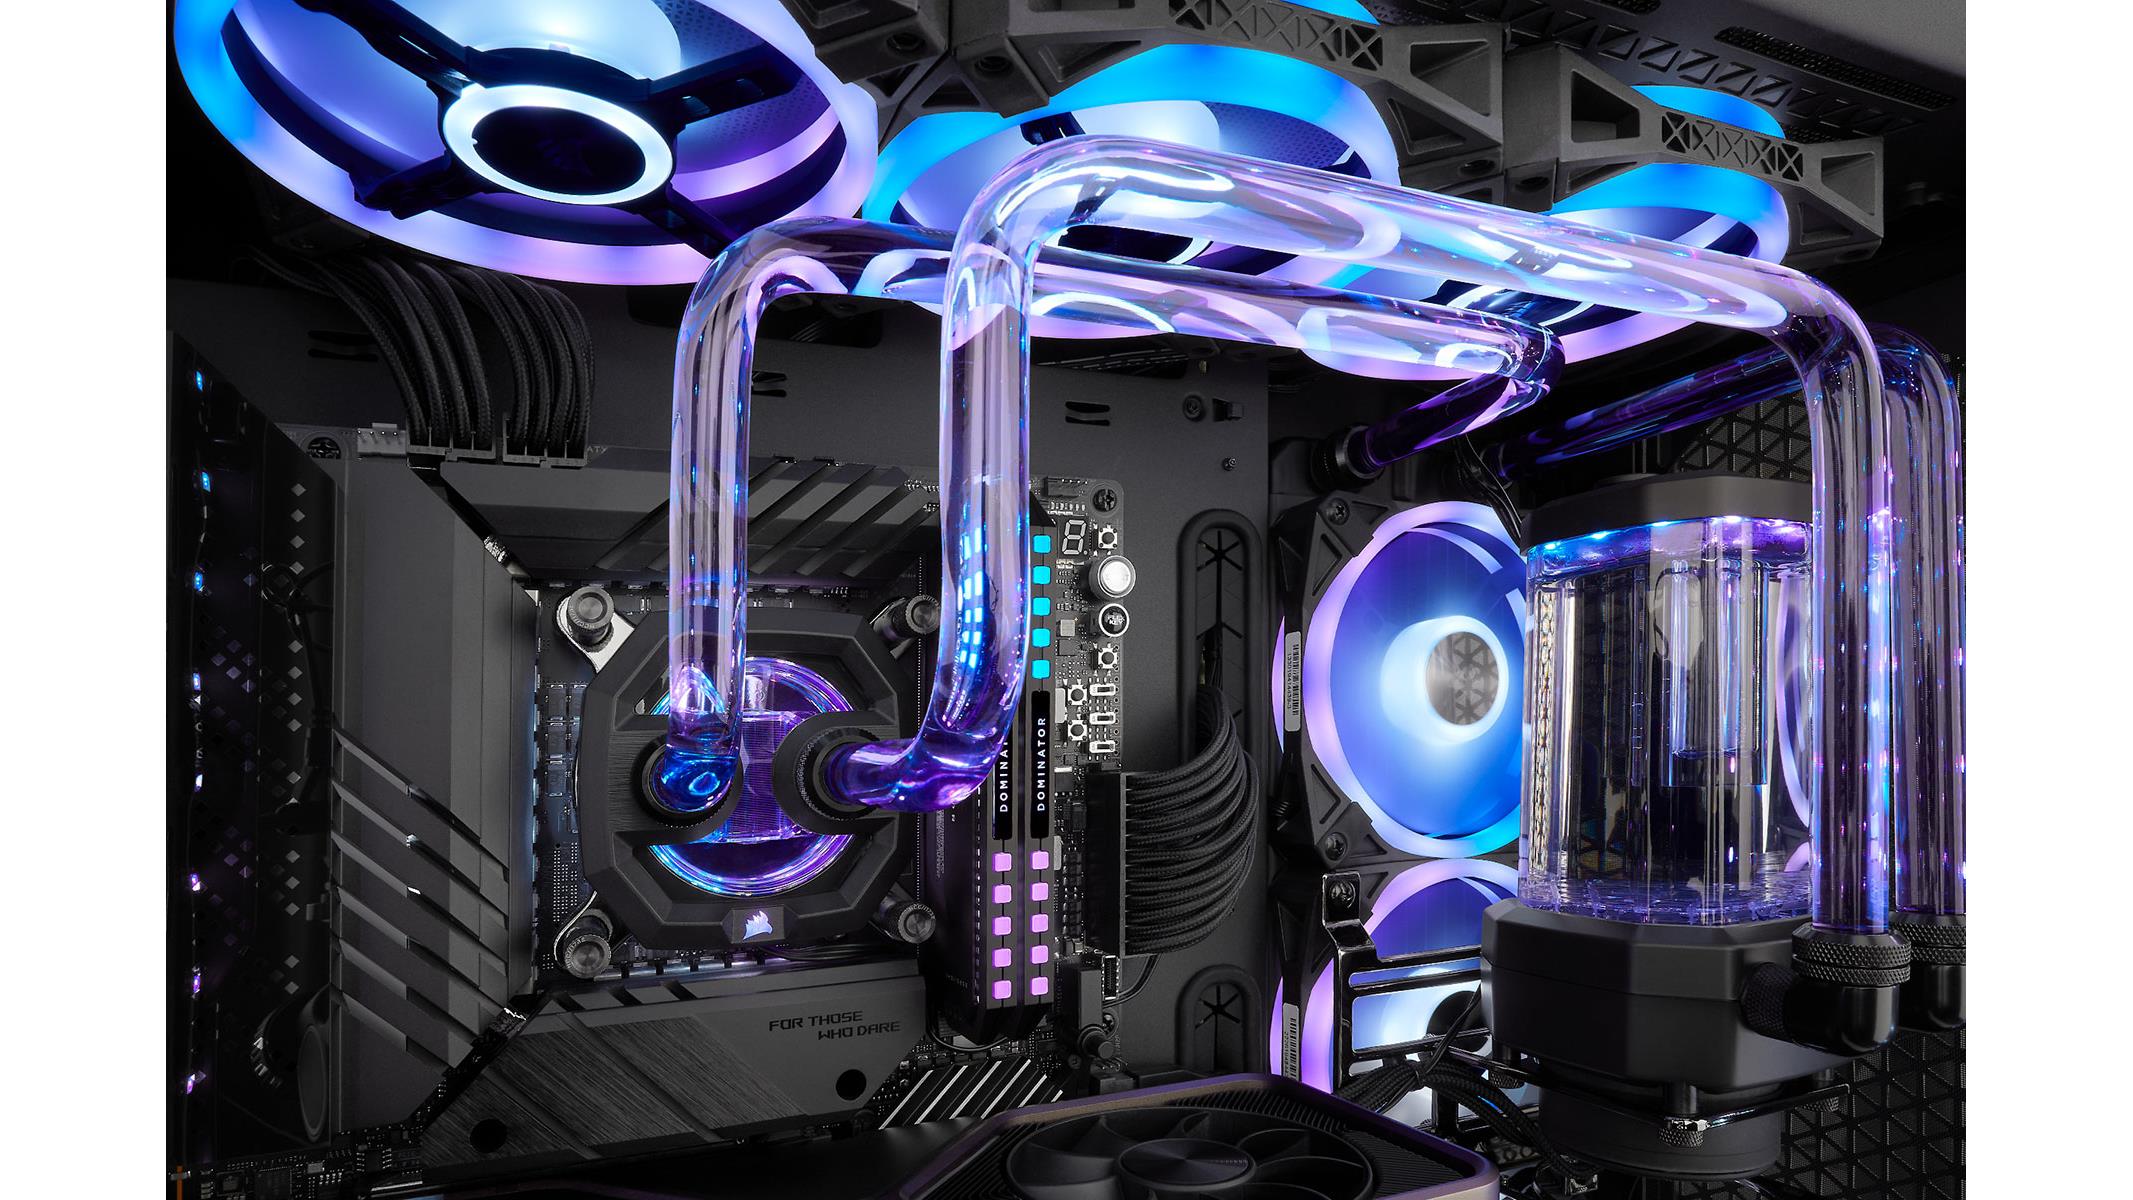
    Liquid cooling, or water cooling, is as cool and as functional as it looks. It’s probably the most efficient, albeit expensive, way to keep your system cool while gaming or doing heavy-duty rendering.

    The aesthetics of a liquid cooling system is also too hard not to notice, which is probably why first-time PC builders or buyers are drawn to choosing this option over using traditional cooling systems.

    But what first-time builders and liquid cooling users don’t know is that behind the lights and dazzle is the amount of regular maintenance that needs to be done.

    And in this article, we’ll talk more about how water cooling systems work and how they’re regularly maintained.

    How Does Liquid Cooling or Water Cooling Work?

    Liquid Cooled PC Liquid Cooling Maintenance

    Liquid cooling is exactly what it implies. Liquid cooling systems use water, which is often the most preferred type of liquid, to help keep certain hardware like CPUs and GPUs cool. Water is primarily used because of its high heat capacity and its non-toxic properties.

    Water is circulated throughout the systems it is installed in (i.e. CPU and/or GPU). Excess heat is transferred as the water passes through these parts, which is expelled through the radiators.

    What Are The Different Types of Liquid Cooling Solutions?

    All In One (AIO) Liquid Cooling

    All In One (AIO) Liquid Cooling Liquid Cooling Maintenance

    AIO or All In One systems are commercially available and are considered plug-and-play versions of liquid cooling systems. An AIO liquid cooler comes with everything you need without the hassle, from the tubes to the fans to the aesthetics.

    It’s also relatively easier to install AIO coolers than air coolers, according to many builders. The downside to using an AIO system is that you can’t upgrade it. If you’re running a custom-built PC, chances are an AIO might not work for you.

    Custom Water Coolers (Also Known as Custom Loop or Custom Cooling Loop)

    Custom Water Coolers Liquid Cooling Maintenance

    Unlike AIO coolers, custom liquid cooling is built from the ground up. Much like your custom PC, custom cooling systems have handpicked parts according to what you need.

    One added advantage to using custom liquid cooling is that you can easily upgrade individual parts without changing any hardware in your PC. But the downside is that this system is really expensive and requires more maintenance than AIO cooling.

    An Overview of the Different Parts of a Liquid Cooling System

    Both AIO and custom water cooling systems aren’t exactly zero maintenance. If it’s your first time to use either, then you need to know what the different parts are and how they work.

    1. Water Pump: This is responsible for pumping distilled water or coolant inside the system.
    2. Radiator: The radiator expels heat coming from the circulating water into the air, keeping the water cool as it cycles back through the CPU/GPU.
    3. Fan: Fans are responsible for maintaining airflow inside the system by bringing in fresh air.
    4. Pipes/Tubes: Pretty self-explanatory. Pipes or tubes carry the coolant or water throughout the PC and flow constantly during PC usage.
    5. Reservoir: The reservoir stores extra water or coolant in a container. This ensures that there’s always water coming through the pipes, so you don’t have to worry about running out.

    The basic premise of any liquid cooling system is this:

    • Water is pumped through the pipes.
    • Heat is transferred from the CPU or GPU into the running water.
    • The water that’s carrying the heat travels to the radiator.
    • The radiator takes away the heat and blows it out of the system.
    • The water, which is now cool, travels back to the CPU or GPU to transfer heat.
    • The fans help keep the insides of your system cool by bringing in fresh air.

    And this goes on and on.

    Does Liquid Cooling Require Maintenance?

    Like air cooling systems, liquid cooling requires maintenance and attention because of the different moving parts. When one part malfunctions, it’s safe to say that the liquid cooling system is compromised.

    Maintaining custom water cooling systems will have you checking and filling in the water reservoir, or it will stop working. You’ll also need to check for leaks as you do your maintenance because we all know that water, or any other liquid, is dangerous for your PC hardware.

    Water cooling systems also have parts that are not readily available in hardware stores, so that’s something to consider as well.

    But the bulk of maintaining custom water cooling is making sure that the coolant level or water level is sufficient. Avoid using tap water and instead, run distilled water as the latter is free from sediments and minerals that could compromise the integrity of the cooling system.

    Do AIO Coolers Need Maintenance?

    On the other hand, AIO cooling systems are easier to maintain than custom cooling systems. But the biggest downside is that if there’s a part that needs to be replaced, you need to replace the entire system.

    For AIO coolers, you just need to make sure that the fans and radiators are as clean as possible. Over time, dust will accumulate on both of these parts. The weight of the dust accumulation will eventually be heavy enough to slow down the fans and radiator’s speed, so they’re no longer as efficient.

    Will AIO Coolers Leak?

    AIOs, much like any other cooling system, will eventually fail as the years go by. They’re not meant to run longer than they should, and time will come when you’ll eventually have to replace the unit.

    With that being said, AIO coolers won’t have issues with leaks but they will have issues with their pumps, which is the biggest cause of failure.

    If AIO leaked as often, you’d probably hear about it over the Internet and people would probably tell you to just get an air cooler.

    But in case your AIO system does leak, you’ll need to report it to the manufacturer and the warranty will take care of everything.

    What Do You Need For Maintaining Your Liquid Cooling System?

    On the off chance that you are running custom water cooling, then you’ll actually do some heavy lifting when it comes to maintaining the entire system.

    For custom solutions, the idea of something going terribly wrong at any given time persistently haunts them. One day you’re doing some video editing or gaming, and the next thing you know, coolant sprays all over your motherboard and your PC dies. You’re now left with the daunting task of buying a new PC.

    Do A Coolant Flush

    To properly maintain your liquid cooling system, you’ll need to do what’s called a system flush or a coolant flush. Coolant refers to the liquid that’s running through the tubes that’s keeping your PC cool while running heavy loads.

    Every year, you’ll need to drain the entire reservoir and pump and replace it with a fresh batch. The reason being is that heavy usage of the liquid cooling system will lead to the production of air bubbles as a result of evaporation. This results in coolant pollution and negatively affects your system’s performance and overall efficiency.

    Ideally, you want to run distilled water to prevent or minimize corrosion to the different PC parts and parts of the cooling systems. But you’ll also find pre-mixed coolants that are commercially made and intended for liquid cooling your PC. These coolants come in different shades and hues, so customization is really high.

    Once the coolant is replaced, you’ll then need to check the integrity of the other components like tubing, the O ring, and the clamps to make sure that there are no issues once the system starts running.

    The Wrap Up

    Whether you’re using a liquid cooling loop (AIO cooler) or a custom liquid cooled system, you now know what it takes to keep both of these systems properly maintained. Liquid cooling maintenance is a daunting task by itself, but there’s no reason not to do it.

    If you feel like you don’t trust yourself enough to maintain a water cooled system, then you can always hire a professional to do it for you.
  • The Best CPU Cooler Brands (Jul 2026)

    The Best CPU Cooler Brands (Jul 2026)

    “Ah don’t spend too much on it. It’s only a CPU cooler.”

    “You don’t need to spend a lot of money on CPU coolers.”

    Believe it or not, first time PC builders are more likely to choose generic CPU cooler brands for one or more of the following reasons:

    • They don’t know enough about CPU coolers to make an informed decision.
    • They don’t know that there are really good CPU cooler brands in the market.
    • They don’t know that cooling performance is often dictated by how well the CPU cooler is built.

    But don’t you worry. If it’s your first time to build your own PC, or if you’re thinking about replacing your stock CPU cooler, we have created this list of recommendations for the best CPU cooler brands in the market right now.

    Why You Should Never Ignore Your CPU Coolers

    Think of it this way. Would you work in an office or study in a classroom if it’s hotter than normal? Would you be able to concentrate at 100%?

    The same logic can be applied to your CPU. When the CPU gets hot enough, performance gets severely affected. In worst case scenario, the CPU suffers catastrophic failure from heating up past its limit.

    This is where CPU coolers come in. By design, their job is to absorb the heat coming from the CPU and expel it through their exhaust fan (if you’re using air CPU coolers) or with the help of fluids (if you’re using a liquid cooler).

    Doing office work or browsing the Internet might not strain the CPU a lot, so the CPU coolers won’t have too much heat to dissipate. But if you’re gaming, editing a video, or doing any CPU-intensive tasks, then the CPU generates a lot of heat. The CPU coolers kick in and do their job by making sure that the CPU’s temperatures are within a reasonable range.

    If the CPU cooler doesn’t do its job right, you end up with an overheating CPU, which leads to gradual CPU degradation over time. Instead of your CPU lasting you five years or more, this gradual degradation can reduce its lifespan by half.

    With that being said, it’s important for you or anyone to invest in the best CPU coolers that money can buy.

    What Are The Best CPU Coolers In The Market?

    We’re going down through the best CPU coolers that money can buy. Because we’re talking about the best, expect them to be a little bit on the pricey side. But don’t worry, investing in any one of these CPU coolers is going to be worth it.

    Noctua NH D15 chromax.Black

    Best Overall CPU Cooler In The Market. Period.

    Noctua NH-D15 chromax.Black CPU Cooler Brands

    Why Is It The Best?

    • It’s a powerful air cooler and it’s capable of cooling even the most powerful CPUs in the market right now
    • Quiet operation
    • Two fans for the best cooling performance possible
    • Competitive against liquid coolers
    • Costs you about $109 for brand-new units

    What’s The Downside?

    • It’s one of the bulkier air coolers and may block out RAM slots

    First on our list is the Noctua NH D15 is quite possibly the best air cooler that you could get your hands on. The design of the Noctua NH D15 is intended to make sure that it dissipates large amounts of heat in a short period of time.

    The Noctua NH D15, or any of the Noctua coolers, comes with a 6-year warranty, which also makes it one of the most reliable air coolers in the market. The Noctua NH D15 comes with everything you need, from thermal paste to a mounting system that works with even the latest CPUs (like the Intel i9 or the AMD Threadripper). It’s also assumed that the Noctua NH D15 is compatible with the upcoming Intel 12th gen processors and AMD Ryzen 7000 series.

    Noctua NH D15 comes in brown and black colors, but we’re featuring the black colorway simply because it easily blends into the system without drawing in too much attention.

    But the Noctua NH D15 proves to be a challenge for mid-sized to small-sized computers because of its immense size. Coming in at 150mmx135mmx160mm (WxDxH), it might block out a RAM slot for typical PC builds. If your RAM kit is taller than 32mm, then you’ll need to remove the outside fan to make room.

    Be Quiet! BW006 Pure Loop 240mm All In One Liquid Cooler (AIO Cooler)

    Best for Gaming Overall

    Be Quiet! BW006 Pure Loop CPU Cooler Brands

    Why It’s the Best

    • A quiet cooler even when doing some heavy gaming sessions
    • Mid-to-high performance category
    • Minimalist design
    • About $94 retail

    What’s the Downside?

    • Might not be powerful enough for Intel i9 or Ryzen 9 CPUs

    For gamers, this might be the best AIO cooler in the market: the Be Quiet! BW006 Pure Loop 240mm. For its size, it’s capable of cooling both Intel i7 and Ryzen 7 CPUs without producing a lot of noise. Be Quiet! is a computer peripheral company known for its minimalistic components and cases, so it’s no surprise that the BW006 Pure Loop follows the company’s product philosophy.

    Unlike most completely closed loop coolers, the Be Quiet! BW006 Pure Loop 240mm is easy to maintain. You can just unscrew the fill port on the radiator and add your coolant to make sure that the system is always up and full.

    Corsair iCUE H150i Elite LCD Liquid CPU Cooler

    The Best High End AIO Liquid Cooler

    CORSAIR iCUE H150i ELITE CPU Cooler Brands

    Why It’s The Best?

    • The best high end liquid cooling system in the market
    • Categorized as a high performance AIO liquid cooler
    • Comes with high-pressure RGB fans and built-in LCD screen
    • Priced at $240

    What’s The Downside?

    • Really expensive

    Almost more than double the price of the first two CPU cooling systems above, the Corsair iCUE H150i Elite LCD is probably the most expensive liquid cooling you could ever get your hands on. With a $240 price tag, the Corsair iCUE H150i Elite LCD can definitely cool down the Intel i9 processors and AMD Threadrippers easily even when both are overclocked.

    The Corsair iCUE H150i Elite LCD is equipped with a 2.1-inch LCD screen that’s fully customizable and will show you either your current temperatures or different LCD animations. The three high-performance fans have a set of 48 customizable LEDs, all controlled via the iCUE configuration software.

    Price-to-performance ratio of the Corsair iCUE H150i Elite LCD is excellent, given that Corsair is just one of those brands that know their way around high-quality computer peripherals.

    Cooler Master Hyper 212 Evo V2 Black Edition

    Best Budget Air Cooler

    Cooler Master Hyper 212 Evo CPU Cooler Brands

    Why It’s The Best

    • Cooler Master is a recognized brand for computer peripherals
    • A solid mid-sized air cooler
    • Very affordable
    • Solid cooling performance
    • Fits a lot of standard PC builds
    • Priced at $49

    What’s The Downside?

    • Needs a special bracket if you want to use it for Intel’s 12th gen CPUs
    • Not exactly powerful enough for high-end CPUs

    Because we’re talking about the best CPU coolers, it would be unfair to not include the best budget cooler. And just because it’s on the budget side doesn’t mean it’s an underperforming cooler.

    For the list, we have the Cooler Master Hyper 212 Evo and it’s almost always one of the few air coolers that even the most expert rig builders recommend to first-time builders.

    The Cooler Master Hyper 212 Evo is a mid-sized cooler and is decent enough for Intel i7 and Ryzen 7 5000-series processors. For any midrange CPU, the Cooler Master Hyper 212 Evo is a solid pick but don’t expect this air cooler to do well against the high end AMD or Intel CPU (Threadripper or i9, respectively).

    Which Is Better? Liquid CPU Coolers or Air Coolers?

    If you ever wanted to start a debate on the Internet, ask which one is better: air cooling or liquid cooling, and you’ll get an entire forum riled up for hours.

    But in all honesty, both CPU coolers are good in their own right and have their own benefits and drawbacks.

    What’s So Good About Air Coolers?

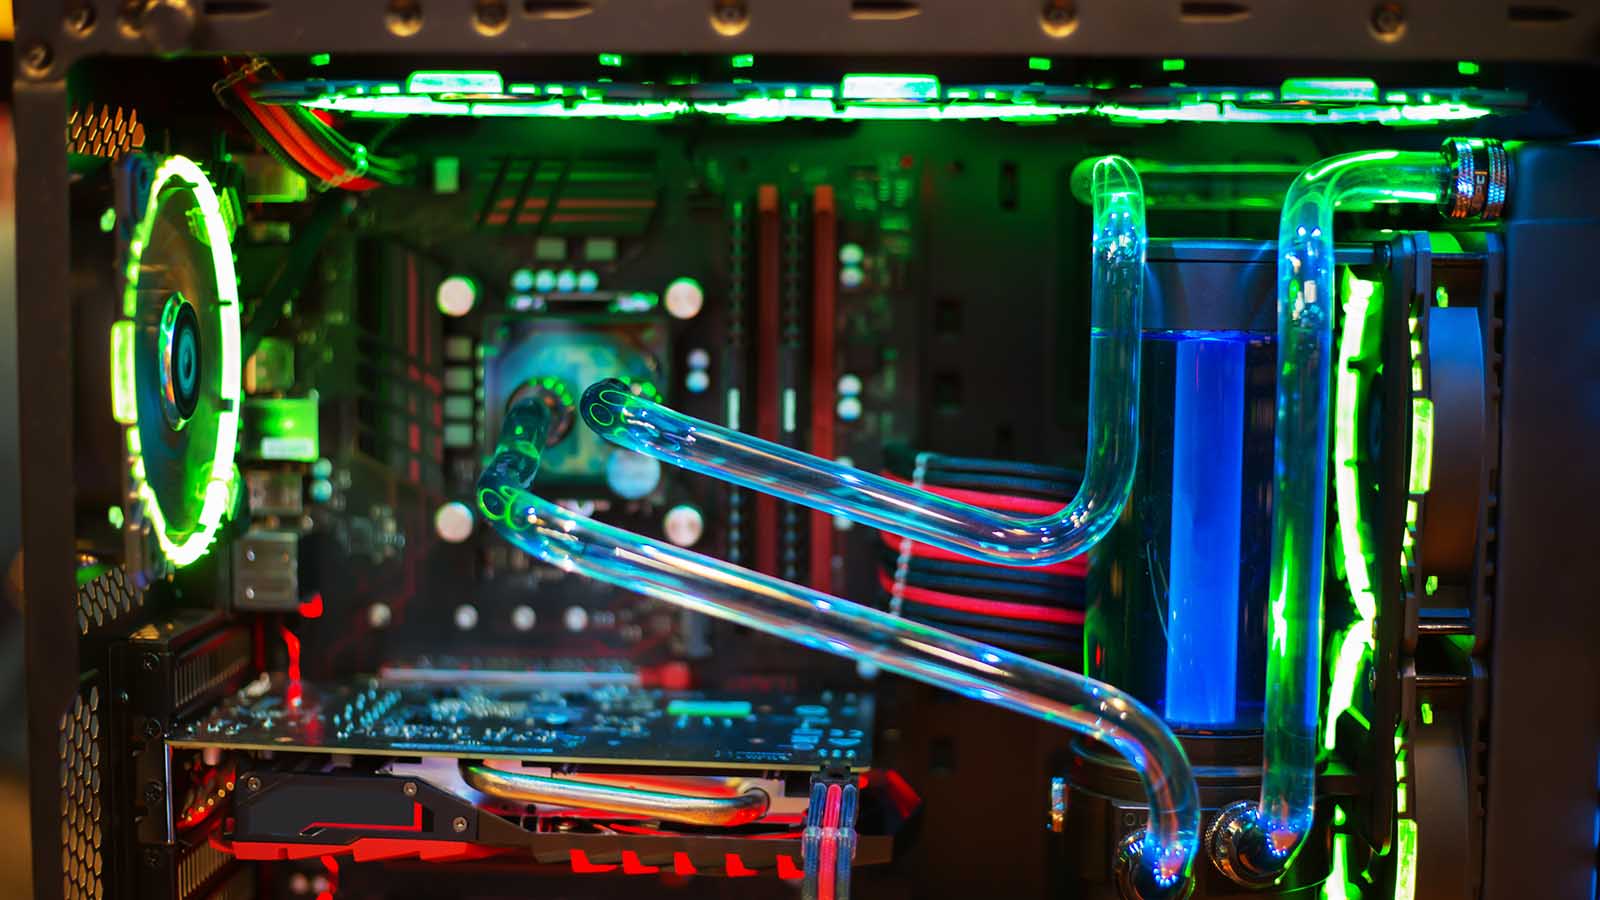
    Air Cooling Setup CPU Cooler Brands

    Air coolers are commonly used by a lot of people, mostly for those on a budget or those who don’t want the fancy aesthetics that liquid coolers have.

    Usually, air coolers come with two common components: a metal heatsink that draws heat away from the CPU and a fan that blows out the hot air from the heatsink. This hot air is expelled out of the case with the help of the case’s exhaust fans. Quite a simple solution to a complicated problem.

    But the downside to these air coolers is that they’re bulky and take up a lot of space. For high-powered CPUs like the Intel i9 and AMD Threadripper, you’d need large air coolers(something like the Noctua NH D15). Noise is also an issue for an air cooler. As the processor generates more heat, the fans need to work overtime (both the CPU fan and the exhaust fans).

    Unless you don’t mind the noise and the aesthetics, then an air cooler might be a solid pick for you.

    What’s So Good About Liquid Cooling?

    Liquid Cooling Setup CPU Cooler Brands

    Liquid cooling has become a popular alternative to air coolers, simply because they become easily accessible every time a company releases a new AIO cooler and the older models become cheaper.

    Are liquid coolers and AIO coolers one and the same? Yes, they are. In fact, liquid cooling goes by many names such as:

    • AIO cooler (all-in-one)
    • Closed loop liquid coolers

    Liquid cooling systems are equipped with water pumps, radiators, and fans to absorb and expel heat from the CPU. Liquid coolers come in different sizes, so you can choose what size to fit your PC case.

    Performance-wise, AIO coolers are better than air coolers but the marginal difference isn’t that high. But there are instances where high-performance air coolers like the Noctua NH D15 provide better cooling performance than an aftermarket AIO cooler. If you want something for the aesthetics, well look no further than having a liquid cooling setup.

    The downside to a liquid cooling setup is that it’s more difficult to install compared to air coolers. There’s also the added risk of the liquid itself leaking to other components, which damages other components. Leaks rarely happen, but it’s still something to consider if it’s your first time using it.

    But How Much Cooling Do You Really Need?

    We mentioned earlier that you shouldn’t hold out on spending for your cooling system, but it doesn’t mean that you should also go overboard. Think like Goldilocks: you don’t want less, but you also don’t want more. You just want something that’s right.

    How much cooling you need will depend on how much work is being done from your CPU. If you’re just doing some light gaming sessions on top of office productivity tasks, then air cooling is sufficient.

    On the other hand, heavy gaming sessions combined with tasks such as video editing or 3d modeling might have you either going for a high-performance AIO cooler or an air cooler.

    The brand and make of your CPU will also play a huge role in determining what kind of cooling power you need. High-powered CPUs will always require high-end air coolers or high-end liquid coolers.

    So what’s the best CPU cooler for you and what can we recommend? If you want the best air cooler, we recommend the Noctua NH D15. For about $100, you’re getting the best cooling performance and power for the latest Intel and AMD processors.

  • How Many SSDs Can You Have?

    How Many SSDs Can You Have?

    The introduction of the SSDs or Solid State Drives has changed the way people are gaming or working on their PCs. Before, gamers were stuck on the loading screen for a few minutes. With SSDs, load times are faster now, so much so that you can’t even go take a break while waiting for the game.

    SSD storage back then was very expensive, so multiple SSDs required spending a lot of money if you want 512GB of storage. But now, a 1TB SSD will cost you about $200 to $300, depending on the brand.

    In this article, we’ll talk about how many SSDs can you have in a single system and how you can maximize your SATA SSD ports if ever.

    How Many SSDs Can You Have?

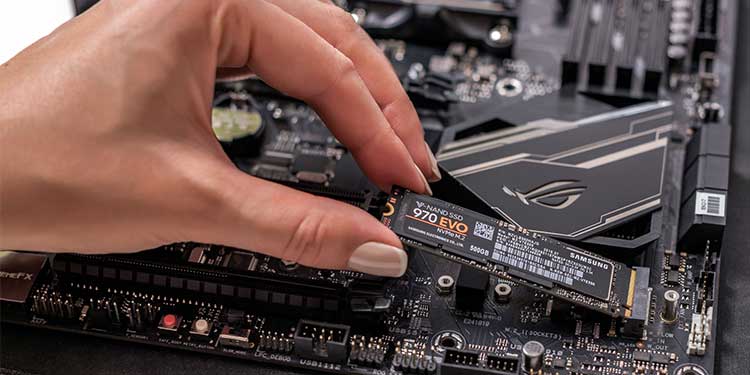
    Installing an M2 SSD How Many SSDs Can You Have

    The answer is simple: it depends on how many SSD slots your motherboard has. There are motherboards out there that have one to two SSD slots, while there are those that will give you more. The SATA standard will probably give you about 6 to 8 drives, but SATA SSDs are limited.

    Depending on the mounting options and the size of the SSD storage, you might be able to get about 2 to 4 SSD drives in compact motherboards and cases. But some people get creative enough that they use tape to mount their SSDs to the case panels. This is perfectly fine because there are no moving parts in an SSD that would be disrupted by rattling or bumping.

    Motherboard supports may vary for SSD storage. Some motherboards may support a dedicated SSD, an M.2 SSD slot combined with HDD slots, or a hybrid of both combinations. If your motherboard doesn’t have a dedicated SSD slot, then you can use a caddy to install the said drive into your laptop’s optical drive spot.

    SATA slots are still common amongst motherboards and is still considered the best slots for hard drive option, regardless if it’s an SSD or traditional HDD. M.2 slots are relatively smaller and easy to use, making them perfect for small-form motherboards and laptops.

    Note that there are SSDs that use NVMe bandwidth and will take up an M.2 form factor, and if your motherboard supports them, you could have more SSDs installed in a system compared to utilizing SATA drives. However, motherboard may restrict bandwidth for NVMe drives, so your NVMe M.2 SSD might not even function to its full potential.

    PCIe slots are far superior than SATA SSDs in terms of size and they’re utilized for high-performance gaming rigs or systems with RAID configurations.

    To sum it up, it boils down to how many SATA ports are available in your motherboard that will determine how many SSDs you can install. For example, my motherboard allows me to install 2 NVMe SSDs and 2 slots for an SSD drive. In theory, I could install 2 1TB NVMe SSDs and Traditional SATA drives (HDD) for storage), or use one of the SATA slots to house a SATA SSD.

    So you see, running multiple SSDs will boil down to how many SSDs your motherboard supports and how big your wallet is.

    How Do You Identify SSD Slots?

    Believe it or not, identifying SSD slots is very easy. If you want to mix SSds, or just want to find out if your motherboard supports all other SSD types, then this is how you tell which slot is which.

    Refer To The Manual

    The best source of information will always be your motherboard’s user manual. Head on over to the Technical Specifications section and you should be able to see the kinds of SATA port your motherboard has, if it support SATA III, and other important details.

    Check Specs Online

    If you’ve chucked your motherboard’s user manual, then don’t fret. You can still check your motherboard’s specs online so as long as you know the motherboard model.

    What’s The Ideal Storage Capacity For An Internal SSD?

    Taking into consideration your operating system, some productivity programs, and possibly some light gaming, 512GB storage capacity might be more than sufficient for the average Joe and Jane.

    For gamers who like to show off their libraries, they’re better off with 1TB or 2TB of SSD storage. They can run multiple SSDs too if they want to get more than 2TB.

    Is Having Multiple SSDs Worth It?

    The answer is YES. Regardless of your SATA setup, having more than one SSD gives you some advantages.

    1. More storage capacity compared to buying just a singular SSD. Sometimes, it’s a lot cheaper to buy 2 512GB SSDs than 1 1TB SSD, but the amount of money you save is negligible at best.
    2. In case one of your SSDs malfunction, you still have a back up SSD that’s working.

    But ideally, you really want to use a traditional HDD if you’re thinking about storing files. SSDs should be used for storing programs and applications. Different PC cases can determine what kind of motherboard you’ll be using, which in turn affects your ability to have multiple SSDs.

    Is a 256GB SSD Enough?

    For gaming? Not in the least, unless you’re planning on installing just one game title on there. 256GB SSDs are commonly used in laptops (the non-gaming types, at least). Some office PCs may have a 256GB SSD installed if it’s prebuilt.

    Is 512GB SSD Enough?

    Gaming laptops are equipped with 512GB SSDs at the very least, but they have room to accommodate another NVMe SSD in case you ever want to upgrade.

    For gaming, 512GB is more than enough, provided that you don’t have a lot of games installed or if you’re just loading in a couple of your most-played games.

    The Wrap Up

    The moment you install a Solid State Drive SSD into your system, you’ll never want to go back to using a traditional HDD for anything other than storage.

  • Can You Upgrade a Prebuilt PC?

    Can You Upgrade a Prebuilt PC?

    Avid computer enthusiasts make it a point to build their own PCs. They’ll source their own PC components to build a new rig, or purchase the necessary PC upgrades for their current one. But for some of us, as much as we want to DIY, we don’t have the luxury or possibly the budget.

    This is why some of us resort to buying a pre built PC. But is a prebuilt computer worse than a custom-built computer? Can you upgrade a prebuilt PC even?

    We’ll answer those questions and more in this article…

    What The Heck Is A Prebuilt PC?  

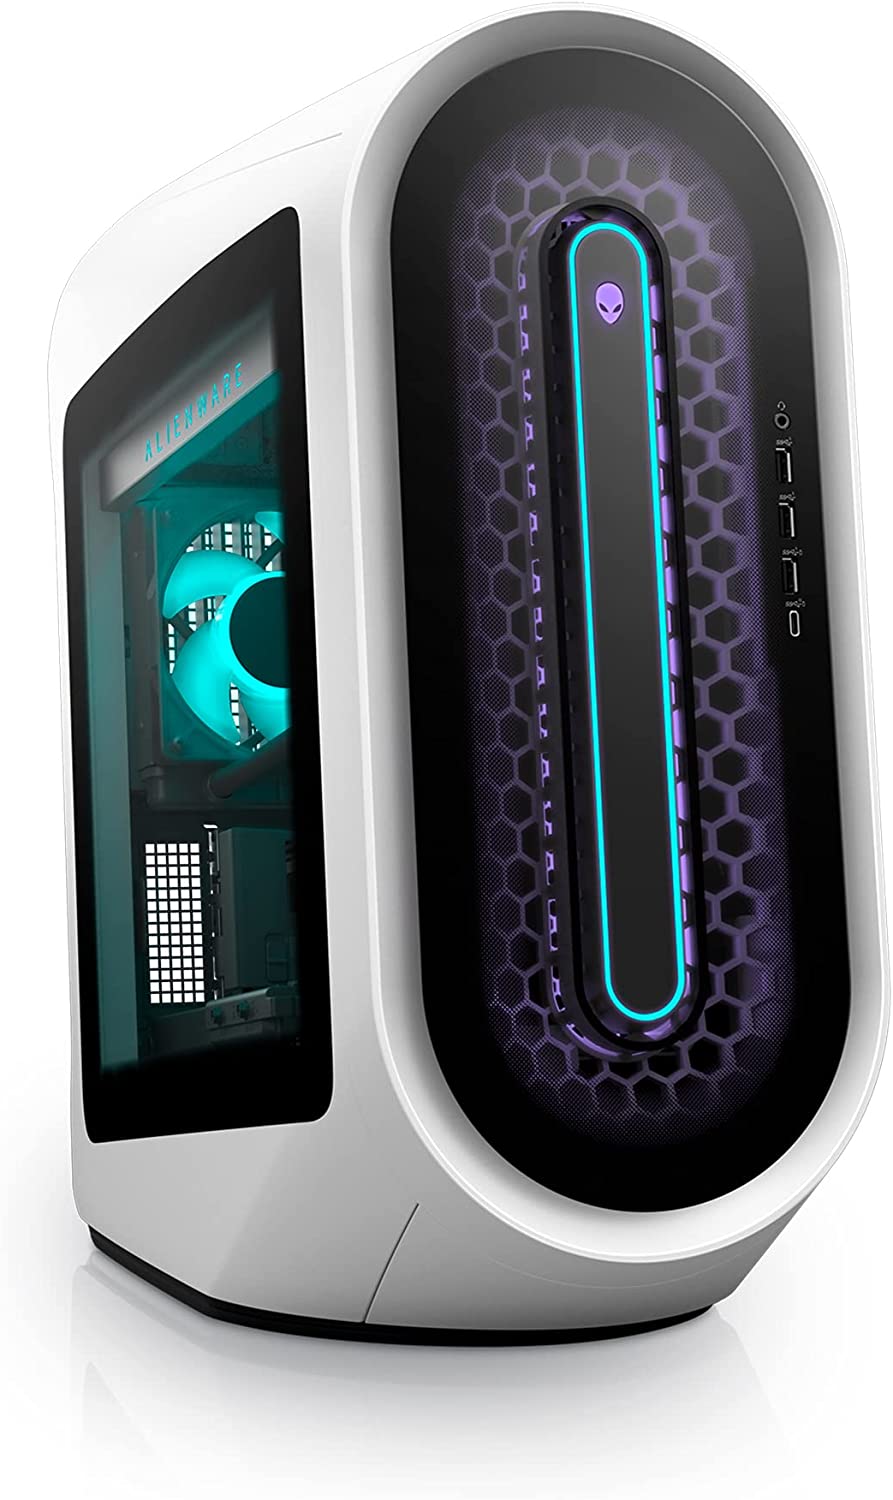
    Alienware Aurora R13 Can You Upgrade a Prebuilt PC

    A prebuilt computer can be defined as is. It’s a plug-and-play PC with all the components installed. Pre built PCs have different specs according to brand, much like a mobile phone. Some pre built PCs are meant for office work so it may not have an upgraded CPU and it may also have outdated RAM generation.

    However, there are also pre built PCs that are meant for gaming. Brands such as Alienware are known for their top-tier prebuilt gaming rigs and already contain all the PC upgrades that you need for gaming.

    Much like laptops, retailers will offer the option to upgrade certain PC hardware like the graphics card, RAM, storage, or CPU even. But it might cost you a few more bucks to do a GPU upgrade.

    Now, there are three categories for prebuilt PCs:

    • Standard Prebuilts are your regular PC and will contain the standard PC parts necessary for a full desktop PC.
    • Factory Prebuilts are manufactured in a factory and will probably contain exclusive versions of certain parts like CPU and GPU unavailable to the public.
    • Boutique Prebuilts are the most expensive amongst the three as they’ll have all the high-end computer parts and are shipped from the manufacturer to the customer directly.

    Can You Upgrade a Prebuilt PC? 

    For the most part, yes, you can definitely upgrade a prebuilt PC. Some give you the option to upgrade GPU, CPU, RAM, HDD/SDD, and even power supply unit.

    What you really want to look out for in determining whether or not a prebuilt PC can be upgraded to your liking is motherboard compatibility.

    Because the motherboard acts as the backbone of the system, you have to make sure that the upgraded major components that you’re getting can be accommodated by the motherboard. Otherwise, you’ll have spent your money for nothing.

    Fpr example, many pre built PCs may not have motherboards that have a PCIe x16 slot, so upgrading your video card may be out of the question.

    What Parts Can You Upgrade?

    Prebuilt gaming PCs, or a standard PC for that matter, will give you enough room for upgrades. CPUs and GPUs are two common components that people will choose to upgrade first, but other components such as RAM, power supply units, and cooling fans can be upgraded too.

    Take into consideration that prebuilt PCs are specific to their brand, so you might want to check the exact model number of your PC first.

    Why Do You Need to Upgrade the Prebuilt PC?

    There are two reasons to upgrade a prebuilt PC:

    • to replace outdated parts
    • if a system’s components are defective or no longer as efficient as they need to be

    More often than not, people upgrade their PC with costly components to improve speed, remove CPU bottlenecks, add cooling setups, or just improve in game performance.

    How Do You Upgrade a Prebuilt PC?

    For this section, we will assume a few things:

    • First, you have a motherboard that’s capable of accommodating modern components such as CPU and GPU
    • Second, you have enough RAM slots
    • Third, you have a decent enough power supply that will complement your desired upgrades.

    How Do You Upgrade Your GPU?

    A lot of prebuilt PC owners will almost always upgrade their GPU first above anything else. Unless you’re the proud owner of an Alienware Aurora with an RTX 3070, then a GPU upgrade is probably the first thing on the list. Or in some cases, an assembled PC might not have a GPU installed, to begin with.  

    First and foremost, you’ll need to make sure that your motherboard contains a PCIe x16 slot so you can replace your current GPU with an RTX graphics card, or something recent. What’s amazing about this PCIe slot is that it’s backward and forwards compatible, so you can use graphics cards that are either recently released or to be released soon (we’re looking at you RTX 40-series).

    On the other hand, if your motherboard doesn’t have a PCIe x16 slot, then you can’t upgrade your GPU. You’ll need to purchase a motherboard with said PCIe slot and then upgrade the GPU.  

    How Do You Upgrade RAM? 

    The biggest problem with upgrading RAM isn’t the lack of available RAM slots, but rather it’s inability to be backward compatible. Some motherboards on prebuilt PCs will only take in DDR3 modules, so they may not accommodate DDR4 RAMs.

    And it’s a complete waste of money if you’re replacing DDR3 RAM with the same generation, so much like upgrading graphics cards, you’re just going to have to replace the motherboard if you want to use next generation RAM.

    How Do You Upgrade Storage?

    Prebuilt PCs will always come with an HDD storage preinstalled, but it’s another thing to see preinstalled SSDs. In case you have a preinstalled SSD, you can simply just look at the PCIe SSD slot in order to determine what upgrade to purchase.

    You should prioritize upgrading storage capacity first if your SSD is lower than 500GB. If your motherboard can accommodate an NVMe SSD, then go for that one instead.

    Always Prioritize Your Upgrades

    Now that you’ve determined what parts can be upgraded, it’s time to decide on which upgrade to go for first. If you’re going to do some gaming most of the time, then you’ll need to upgrade your GPU and SSD storage capacity.

    Is It Worth It To Upgrade A Prebuilt PC?  

    A prebuilt PC is kind of similar to a laptop. You have enough wiggle room to upgrade certain components, but you’re kind of limited in terms of how big of an upgrade you want. A prebuilt gaming PC will almost always have the latest parts installed, but sometimes, we just want more power out of our prebuilt gaming PC.

    Based on personal experience with having owned prebuilt computers back in the day, upgrading was worth it for a couple of reasons:

    • There was a huge improvement in performance after upgrading
    • I was using these prebuilt computers for work and for gaming so it made sense to upgrade

    A few years down the line, I transitioned into building my own PCs and that meant sourcing my own GPUs, RAM modules, CPU and CPU cooler, and other parts. But my point of reference for building were prebuilt gaming PCs and trying to base my build on their exact specs, or something close to it.

    If you’re in the market for a new PC, a prebuilt PC with modern GPUs and a new CPU will probably be a good investment for you. If you want a big upgrade from your old system, then you can either go for the high-end rigs like Alienware Aurora. They’ll cost you about a few thousand dollars, but they can last you for more than five years.

  • Building a 3D Modeling Computer

    Building a 3D Modeling Computer

    A 3D modeling computer might be the most decked out computer rig you’ll ever build, and for a good reason.

    Working with 3D modeling and rendering takes up a lot of CPU and GPU power. And to speed things up, you’ll need the top of the line processor with enough CPU cores for CPU rendering, and a graphics card to help supplement CPU and GPU rendering.

    In this article, we’re going to help you build the best PC possible for 3D modeling and rendering, as well as cover some important topics that will help you make the best decision possible.

    But first, we need to understand first two things: 3D modeling and 3D rendering.

    What Is 3D Modeling?

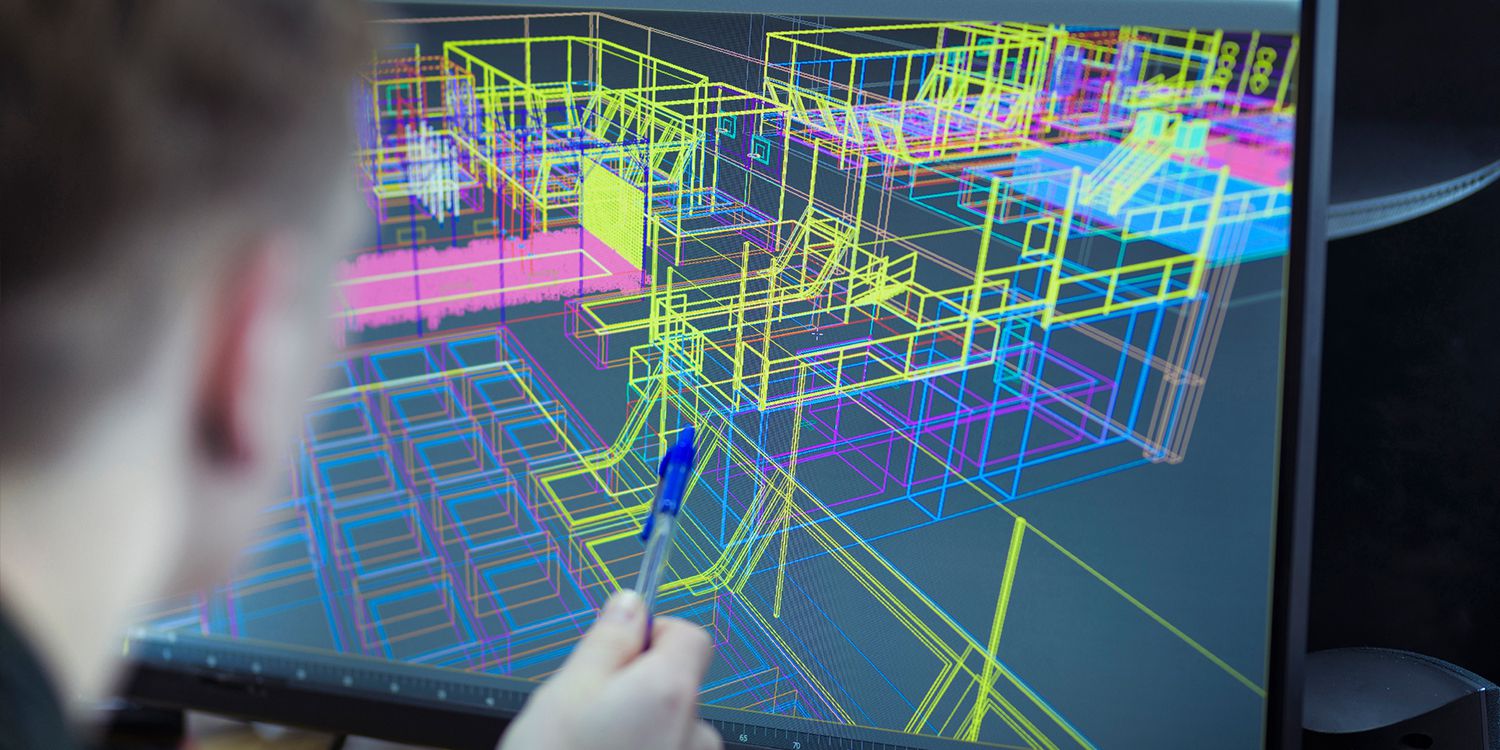
    Sample Scene 3D Modeling Computer

    3D modeling can be defined as is: it’s the creation of 3D models used for different purposes such as animation and design. With the introduction of 3D printers in the market, 3D modeling has become more widespread than ever. People who’re in the business of 3D printing need to work with 3D software to design and prep whatever it is they need to print.

    What Is 3D Rendering?

    3D Rendering 3D Modeling Computer

    Rendering is the visualization of a 3D game or object or scene using a rendering software. When you’re creating a 3D model or animation, you’re working with the raw file which is not accessible to anyone. Rendering will finalize whatever it is that you’re working on and produce output that’s made available to the public through a variety of file formats.

    For both 3D modeling and rendering, the need for a high powered workstation computer is high. Rendering needs a lot of processing power to carry out the necessary mathematical computations required.

    Sample PC Builds for 3D Modeling and Rendering

    Some caveats here: the budgets listed may be higher or lower than intended, depending on where you are located and the availability of certain parts.

    The builds listed here should also be taken with a grain of salt. They’re designed to give you a lot of rendering power for programs such as Blender, Maya, and Modo to name a few.

    Lastly, keep in mind that the best computer might depend on the specs, but ultimately, it will boil down to helping you meet your needs the most. The best computer doesn’t necessarily have to be expensive, but it also doesn’t mean you can skimp out on the graphics cards or processors. Remember, a 3d modeling and rendering PC should be considered an investment.

    With that being said, let’s go over some sample builds.

    $700: A Cost-Effective Build

    The first build that we have makes use of AMD’s budget CPUs and one of the more decent Nvidia GPUs, the GeForce 1650. Combined with 16GB of RAM and a 512GB SSD, you’re looking at a competent rig with enough 3d modeling and rendering power.

    $1200: A Balanced Build

    Spending a few more hundred dollars from the cost-effective build above would probably yield you a build something like this.

    You’re getting a 6-core CPU, one of the more powerful midrange Nvidia GPUs, enough RAM and storage, and futureproof.

    If you noticed, you’re getting 2 sets of storage devices: one SSD and one HDD. The SSD will house your OS, software, and other applications. Your HDD will store all your raw files and rendering output.

    Unlike the first build, you’re getting a CPU cooler to help keep the Ryzen 7 processor cool while rendering. The computer graphics power is also sufficient for most GPU render engines.

    $1700 – High Performance Build

    This would probably be considered the best workstation computer because you’re getting an excellent processor with superior clock speed and one of the best graphics cards on the market right now.

    With this build, you’re getting a high-performing PC capable of running most of the popular graphics software and 3D modeling software computer programs thanks to the Intel i5 CPU and the 3060Ti graphics card, complemented by 32GB of RAM and enough SSD storage to host any computer program.

    $2900+: Professional Setup

    At this point, money is no longer an issue for you. You want the best graphics card, the best processor, and the best of everything to give you the best computer possible.

    You’re getting an i9 processor combined with an RTX 3080Ti graphics card, though you could also upgrade to a 3090Ti too. Speed is everything in this build, from the insane clock speeds to the incredible read/write speeds from your SSD.

    As for futureproofing, this beast will last you for at least five years. There’s nothing in the market that could ever be a mile above either the RTX 3080Ti or the Intel i9-13900K.

    PC Building Guide – How To Choose Your Computer Components?

    The builds above are just templates, so you don’t necessarily have to follow them to the T. Remember, the best PC for you is the one that’s capable of meeting your needs without forcing you to spend too much money.

    For the builds listed above, we’ve stuck to the budget specified but you could always mix and match depending on your needs.

    How Do You Choose A CPU?

    How To Choose a CPU 3D Modeling Computer

    If this article was made a decade ago, we’d have put more thought into choosing a CPU more so than any other component. And the reason being is that the CPU was involved the most in the rendering process.

    Now, GPU rendering overtake CPU rendering, but not by a lot. CPU is still as important as ever in the rendering process, but you get better rendering speeds with a GPU in tow. Now you’ll also use the CPU for other things like gaming and productivity-based computer programs so it doesn’t hurt to invest in something that’s futureproof.

    A good start would be AMD’s budget processors or something as powerful as an Intel Core i5 processor if you want some computing power without blowing your entire budget.

    How Do You Choose Your Graphics Card?

    Graphics Card 3D Modeling Computer

    Unlike graphics design, rendering relies on the strength of your graphics card as it determines how fast it will take to complete the process. GPU rendering, so long as it’s available, is ten times faster than CPU rendering.

    With power and strength in mind, you won’t want to work with an integrated GPU. A good and solid choice would be one of the Nvidia graphics cards, preferably RTX. But Nvidia GeForce GTX isn’t a bad choice either, so as long as you’re going for a GTX 1660.

    But why are we promoting Nvidia GPUs? Why isn’t AMD GPUs being considered?

    Between AMD and NVIDIA’s GPU rendering, Nvidia’s CUDA has better rendering performance than AMD-backed OpenCL. OpenCL is available for other graphics, but CUDA is only for Nvidia.

    If your rendering engine can support CUDA, you might as well grab an Nvidia graphics card. If the app is split between CUDA and OpenCL, Nvidia is still the ideal pick. Hopefully, OpenCL has wider support, allowing for better performance.

    How Do You Choose RAM?

    RAM and the rest of the components aren’t going to be your main concerns, as they’ll only minimally affect any active working process.

    For the lower-end builds on here, you’ll notice that we’re sticking with 16GB DDR4 RAM while the midrange and high-end builds have 32GB DDR5. Dual-channel RAM kits are affordable and compatible with the latest motherboards. But if you want exceptional performance, you’ll need to shell out more money to get quad-channel RAMs. You’re looking at spending a few hundred dollars for these quad-channel RAMs, but they are the best hardware components for the RAM category. A single RAM kit may not be sufficient for 3d complex modeling.

    The rule of thumb is this: you’ll need at least 8GB of RAM if you want to build a computer for 3D modeling and rendering but you’ll want to shoot for 16GB. More RAM doesn’t necessarily hurt and it will help you speed up things.

    How Do You Choose Storage?

    A computer for 3D modeling doesn’t need as much storage as a computer for video editing or gaming. Modeling files, images, assets, and raw data have smaller file sizes than expected. But it doesn’t mean that you should be stingy about choosing which storage component to use.

    But for the purpose of this article, you’ll need to consider using two different devices, each with their own purpose for storage space.

    SSDs or Solid State Drives

    Your own computer should have an SSD because while it may not affect rendering performance, it does affect how programs and OS load. SSD read and write times are 100x faster than traditional HDD.

    At least 500GB of SSD is more than enough for 3d modeling, graphic design, gaming, and more. If you can shell out a few more hundred dollars for storage, get 1TB SSD. As much as possible, you want to store every program on the SSD so they load faster. You can literally do multiple tasks with ease on an SSD.

    HDDs or Hard Disk Drive

    Unless you’re getting a 2TB SSD, it makes sense to have a traditional HDD to store your files. And HDDs are relatively cheaper than SSDs.You can easily secure 4TB and it’d still be cheaper than paying for a 1TB SSD.

    How Do You Choose Power Supply Units?

    Power consumption is something that you’ll need to consider for PC building. A budget PSU may not be ideal since your processor and GPU will have more cores and have high clock speed, so their power consumption is high.

    Your rendering workstation should work with a high-quality PSU so you don’t get gimped on power limits while ensuring that you’re protecting all the other computer parts.

    FAQs about Rendering Process

    We’ve talked about the different builds and the process of selecting computer hardware for the PC build.

    For this section, we’ll go over some of the major questions on the render process itself and why rendering images need a lot of hardware power.

    Why Does Rendering Take Long?

    The rendering speed depends on software and hardware, and the options you have in place. Let’s take a look at a sample scene to illustrate why rendering might take long.

    Imagine a simple scene, like panning from left to right on a flower. Not a lot of details to work with here. You’ll have some gradients and lighting involved, different polygon angles, and other complex modeling involved.

    Your own PC is trying to compute and repeatedly estimate different things at once, ranging from the changing of the color gradients to light bouncing off of reflective surfaces, creating shadows, and so on. Depending on how detailed the flower is, each petal might house hundreds if not thousands of polygons at one time.

    To keep it simple, the PC carries out complex mathematical equations on the fly to simulate what the human eye is seeing. A high clocked CPU and a GPU with enough video memory can make short work of rendering compred to another rendering workstation that’s a bit underpowered than the former.

    Do You Need a Powerful CPU or GPU?

    For the previous section, we were talking about rendering a flower panned from left to right. But what if we’re rendering something complicated, like visual effects or a detailed 3d model of a human being, then you’ll definitely need a powerful CPU.

    Processing data at this level will take up a lot of video memory and will work more cores than rendering a flower scene. This will vary amongst different GPU render engines, or any render engine for that matter. What matters here is that you get the CPU with the highest clock speed and as many cores possible that money can buy, sufficient wattage, a decent amount of RAM slots, and GPU with maximum speed.

  • Are Mechanical Keyboards Worth It?

    Are Mechanical Keyboards Worth It?

    Clickety-clack! Clickety-clack! Clickety-clack!

    We can’t put our finger around it, but hearing the clicky switches on a mechanical keyboard as you type away is just magical. We just want to press every key possible on our mechanical keyboard.

    Does it have something to do with the nostalgic feeling of listening to typewriters from way back? Or does it have something to do with listening to the sound of clicks and clacks that makes you think you’re productive?

    If you’re reading this article, you’re probably thinking about transitioning from membrane keyboard to a mechanical keyboard because your friends told you to get one. But you’re probably wondering: are mechanical keyboards worth it?

    We’ll answer that question and more in this article.

    What’s A Mechanical Keyboard?

    Featured Image Are Mechanical Keyboards Worth It

    Mechanical keyboard or not, all keyboards are basically the modern adaptation of typewriters. But mechanical keyboards are more or less just a step ahead of the typewriter in terms of evolution.

    Mechanical keyboards were just as popular back then in the 1980s thanks to companies such as Cherry MX and IBM who made these accessories affordable. Unlike membrane keyboards, mechanical keyboards use physical switches underneath each key. Each key is composed of metal contacts that are held together by a spring.

    When a key is pressed, the connection between the metal contacts and the physical switch is what causes the clickety-clacking noises for which mechanical keyboards are famous.

    But one important feature of a mechanical keyboard is their simultaneous keystroke accuracy. Because the keys are comprised of individual switches, mechanical keyboards are better at picking up keystrokes that are pressed simultaneously than membrane keyboards. This is called a key rollover feature and will depend on the keyboard. Some mechanical keyboards recognize up to a half a dozen simultaneous keystrokes, while others are built to recognize every keystroke.

    What Do We Know About Keyboard Switches and Brands?

    Colored Switches Are Mechanical Keyboards Worth It

    One of the primary factors that answer our question “are mechanical keyboards worth it?” is the mechanical switches and their brands.

    A switch is the most important component of a mechanical keyboard that helps you determine its quality and experience. And there are different brands of switches, so you get a different experience.

    The most popular brands of mechanical switches are:

    Now these are just some of the most popular, and probably premium, mechanical keyboard switches in the market right now. But you get what you pay for in terms of quality and performance. These switches are also utilized by popular computer paraphernalia companies such as Steelseries, Razer, and Logitech to name a few.

    If you’re on the lookout for a mechanical keyboard, look for these brands of switches.

    What Are The Different Switch Types?

    Switch Types Are Mechanical Keyboards Worth It

    We talked about the different brands of mechanical keyboard switches, and we know that they’re all built differently. What’s similar across all brands of switch are their color coding.

    You may see something like RED SWITCH or BROWN SWITCH listed on a keyboard’s box. This is an example of the color coding used by mechanical keyboards. How noisy they are will depend on the Switch types listed below:

    • Clicky Switches – Considered the noisiest switch and makes clicking noises when pressed
    • Tactile Switches – Quieter than clicky switches, but has more feedback to it
    • Linear Switches – Very smooth typing experience

    This infographic below categorizes the colored switches and their corresponding switch types:

    Linear vs Clicky Are Mechanical Keyboards Worth It

    What’s A Membrane Keyboard?

    A lot of gaming keyboards nowadays are mechanical keyboards, but there are still a handful of brands out there that make use of membrane keyboards.

    The membrane keyboards are what you’d consider the modern version of a mechanical keyboard. They were popular back in the 1990s and dominated the industry because they were easy to produce and cheaper to purchase. They were also easier to maintain than mechanical keyboards because membrane keyboards are more resistant to dirt and dust.

    If mechanical keyboards function with the use of physical switches, membrane keyboards use connecting circuits via a layer of rubber or silicone installed underneath the keys. The membrane is composed of domes situated under each key, so when the key is pushed, the rubber membrane is pressed into the dome and into the corresponding circuit.

    What Are Pros and Cons of Using Mechanical Keyboards?

    Now that we know the difference between membrane and mechanical keyboards, it’s time to talk about the pros and cons of each.

    Pros of Using Mechanical Keyboards

    Most mechanical keyboards may differ from one another in terms of brand and build quality, but you do enjoy similar benefits of using them such as:

    Customization

    The biggest advantage of using mechanical keyboards is its customization. Most mechanical keyboards, if not all of them, can be tweaked, upgraded, and changed accordingly.

    If you don’t like the clicky sounds of the keys, then you might want to go for red Cherry MX switches.

    Do your fingers or wrists hurt after a long gaming session? Some custom mechanical keyboards have ergonomic accessories such as a wrist pad that you can install. Some gaming keyboards are also advertised as ergonomic keyboards, catering to those with hand or arm-related conditions such as RSI or Carpal Tunnel.

    The customization alone is one benefit that makes mechanical keyboards worth the purchase. Imagine an entire keyboard that you can customize based on your needs and wants. And you might even find a mechanical keyboard community in your area too.

    Durability and Quality

    Mechanical keyboard switches, like Cherry MX switches, are a lot more durable and sturdier than any rubber dome keyboards (membrane keyboards). Membrane keyboards run the risk of membrane tearing with excessive use, and can withstand far less keystrokes than mechanical keyboards.

    For mechanical keyboards, switches and keys are replaceable so you can just buy them off from stores like Amazon or any other retail store.

    Easy To Clean

    Mechanical keyboards are easier to clean and maintain because the keys and switches are removable. You just need to purchase a couple of tools that will help you remove them, and you’re done!

    Membrane keyboards, on the other hand, are the exact opposite. Once you tear up any of the rubber dome keyboards while cleaning, you’re done. Dust and grime also stick to the membrane layer and are a bit difficult to remove unless you wipe

    Programmable Keys

    If you ever wondered why a gaming keyboard is categorized as such, then you need to know that a gaming keyboard that’s mechanical has programmable keys.

    What do we mean by programmable keys? Well, a gaming keyboard will have a set of keys not usually found in typical keyboards. Sometimes, they’re labeled as Function Keys (i.e. Fn1, Fn2, and so on), but regardless of the name, these keys easily stand out.

    These programmable keys, by default, don’t do anything. But keyboards like Razer will come with their own software like Synapse, allowing you to program these keys accordingly per game. You can’t do this with a membrane keyboard, even if they’re branded as a gaming keyboard.

    Better Typing and Gaming Experience

    Mechanical keyboards provide better gaming and typing experiences for anyone. For typing, mechanical keyboard switches are easier to press and a lot more responsive than membrane counterparts. But don’t bring your clicky keyboards to the office, otherwise you’ll end up annoying everyone else. Thankfully, there are keyboard switches that are silent and don’t make a lot of noise when pressed.

    For gaming, mechanical keyboards have taller keys that are easy on the fingers, and gamers swear that their actions are more precise than on a membrane keyboard. Other keyboard intensive tasks also feel better on a mechanical keyboard

    Cons of Using Mechanical Keyboards

    This isn’t going to be a one-sided article, so we’re also discussing about the disadvantages of owning or buying mechanical keyboards.

    Price

    Handing Out Money Are Mechanical Keyboards Worth it

    One of the biggest drawbacks to owning or buying a mechanical keyboard is that it’s pricey. Now you’ll probably see mechanical keyboards worth about $20 to $30, but these are not the branded ones nor will they have all of the features that are found in branded keyboards.

    The brand of mechanical switches also plays a huge part in determining how expensive a keyboard is. For example, keyboards with Cherry MX switches may be a lot more expensive than those with Gateron or Oetemu switches. Wireless keyboards will also be a lot more expensive than their wired counterparts.

    If you were to go for the branded ones like Ducky, Royal Kludge, or Keychron, then you’re probably spending at least $80 for a decent keyboard. Brands like Razer, Steelseries, and Corsair may go as high as $200 to $300. Yes, there are mechanical keyboards that are that expensive.

    But the best mechanical keyboards aren’t determined by their price, but by what they can do. For brands like Ducky and Royal Kludge, their mechanical keyboards offer full customization and connectivity for up to three devices (for their wireless keyboards).

    Customizing a whole keyboard can also be pricey, especially if you’re going down that rabbit hole. Customized switches and keys and even a customizable keyboard frame will cost you a few hundred dollars too.

    Who’s Meant To Use Mechanical Keyboards?

    Now, don’t get us wrong. Everyone who wants to have an enjoyable typing experience is meant to use a mechanical keyboard. They’re just a league of their own compared to membrane keyboards. And once you get started with using a mechanical keyboard the first time, you’re never going to want to use any other type of keyboard.

    People who love to play games or who work with keyboard intensive tasks like writing will appreciate mechanical keyboards more than the everyday user.

    Are Mechanical Keyboards Worth It or Not?

    Ultimately, this answer is tied to what you want out of your mechanical keyboard. If there’s going to be some substantial usage, then mechanical keyboards are the way to go. Their far more durable and feel better under your fingers.

    But you don’t need to buy keyboards worth $200 or so. A good brand like Ducky or Royal Kludge will set you back at least $60 to $80, and they’re both popular amongst keyboard enthusiasts.

  • What Is A Safe Motherboard Temperature?

    What Is A Safe Motherboard Temperature?

    Your PC motherboard is probably the most important component in your gaming rig. It houses all the other components such as CPU, GPU, RAM, and storage devices to name a few. You may think of it as the foundation on which your gaming rig is built.

    Pc on Fire Safe Motherboard Temperature

    But like all PC hardware, motherboard temps are susceptible to overheating, leading to a gradual degradation of the motherboard itself and even going as far as damaging the other components.

    In this article, we’ll talk about how to maintain normal motherboard temperature without relying too much on ambient temperature and other hardware. We’ll also talk about the different factors that contribute to an increase in your motherboard’s temperature.

    How Hot is Too Hot For Motherboard Temperatures?

    Motherboard temperatures may go up and down, depending on the usage. Different components such as the CPU and GPU generate heat in different ways, but the heat dissipation is more or less one and the same for all components inside your rig.

    If we were to create a yardstick for ideal motherboard temperatures, we’d be looking at something between 68 degrees and 176 degrees Fahrenheit (20 degrees Celsius to 80 degrees Celsius).

    A CPU also has the same range of temperatures as your motherboard’s temperature. GPU temperature may also fall within the same range, depending on usage. Under normal workloads, your temperature should be below 60 degrees Celsius or hit the low 70s. But when you’re gaming, editing a video, or doing something that requires intensive CPU and GPU processing power, you can expect temperatures to reach 80 degrees Celsius, or at least close to it.  

    Now, there’s a caveat. Your cooling system, such as intake and exhaust fans, might play a factor in determining motherboard temperature. If you’re running a liquid cooling system, then you can expect your rig to hit at least 70 degrees Celsius even when working heavy loads.

    What’s Considered Safe Motherboard Temperature?

    This might be considered a broad question because different motherboards from different brands will have different temperature ranges, but the discrepancy isn’t that great.

    There are two things to look at to determine what a safe motherboard temperature is.

    Computer Under Light Use

    If you’re just doing non-intensive work like surfing the net, or doing productivity-related tasks, your motherboard temperature hovers between 20 and 50 degrees Celsius. These are considered normal for light use because the motherboard isn’t being overworked, nor are the other components.

    Ambient temperature might contribute to some increase in temperature, but not by a lot.

    If you have unusually high temperatures going above 50 degrees Celsius when doing light work on your PC, then you might have some computer hardware issues, or you might have a couple of programs making the GPU or CPU work unnecessarily.

    A quick troubleshooting session here would involve checking out the case fans and the cooling system itself to ensure that the PC is cooled off properly. If everything is okay at a glance, meaning the intake fans and exhaust fans are working properly or that there are no obstructions that would prevent hot air from coming out of the PC case, then, you might want to double-check software.

    Computer Under Intensive Use

    When your computer is put to work, like you’re doing a heavy session of gaming or video editing, then your motherboard temperature will increase by up to 80 degrees Celsius. The increase in motherboard temperature is caused by an increase in GPU temperature and CPU temperature.

    If you have the latest models for CPUs and GPUs then they are capable of handling higher temperatures past 80 degrees Celsius without throttling.

    Throttling is a safety feature found in CPUs and GPUs that prevents them from overheating. When a CPU or GPU is pushed to its limits, meaning all the cores are working, then the temperature will skyrocket. CPUs and GPUs can tolerate high temperatures past their limit, but not for a long time. When they’re about to overheat, the CPU or GPU will intentionally shut some of the cores down to cool off. This goes on for a few minutes, depending on how high the temperatures were, and you’ll notice a massive dip in performance temporarily when this happens.

    How Do You Know Your Motherboard Is Overheating?

    Now we already discussed safe motherboard temperatures and the range you’re looking at is between 20 degrees Celsius (on idle) and 85 degrees Celsius (under maximum load). But depending on the manufacturer, some motherboards can tolerate higher temps.

    We also talked about overheating in the previous paragraph. A video card or processor will overheat when under heavy load and will slow itself down when needed. But how will you know your motherboard’s temperature is too much?

    These are the common signs of overheating motherboard and what you can do to prevent it from happening.

    The System Keeps Shutting Down For No Reason

    If you find your PC randomly shutting down for no reason, especially during idle sessions, then your motherboard temperature is probably higher than normal.

    The reason why your motherboard shuts down is because it’s trying to keep temperatures within a normal range, or at least within the safe temperatures that it was built to withstand. If your motherboard doesn’t shut down, then it might throttle its performance to give itself time to cool off.

    If this happens more than once every hour, then you’ll probably need to check if there is something that’s preventing hot air from being expelled from the computer case, or if something’s blocking cool air from coming in. You might also want to check if your computer’s fans are functioning as they should.

    Blue Screen of Death or BSOD

    Blue Screen of Death Safe Motherboard Temperature

    The notorious Blue Screen of Death or BSOD is another product of an overheating motherboard, and this is often caused by hardware or driver issues.

    Your CPU or GPU temperature might also be too hot that it forces itself to shut down in the middle of a full load of work. When this happens, try to give your computer some time to cool off and to go back to whatever it is that you were doing.

    If for some reason you still encounter BSOD even when the unit is idle, then you might have issues with your motherboard, processor, or video card.

    Unusual Noises or Rattling Inside System Unit

    Albeit rare, overheating motherboards might also make random rattling noises and will indicate that there’s a problem with case fans.

    When you hear rattling noises, chances are your case fans are either overworked, not working properly, or there’s something that’s dislodged and hitting the fans. Either way, when you hear unusual noises, turn off your PC immediately to determine the cause before you damage other parts.

    How Do You Fix High PC Temperatures?

    We now know that an overheating motherboard can cause complications, with the worst one being computer failure. You’ll need to end up replacing the entire motherboard and PC parts that were damaged.

    To prevent this from happening, we need to go over different ways to prevent overheating.

    Check Case Fans Inside

    One of the most common causes of overheating is case fans not working properly. You’ll need at least two fans working to maintain airflow and ventilation. One intake fan brings in cool air and one exhaust fan expels hot air out.

    When there’s enough air circulating inside the system unit, components are kept within a reasonable temperature range regardless of workload.

    Disable Overclocking

    Depending on the motherboard manufacturer, overclocking is a solid cause of overheating. Now, some GPUs and CPUs are meant to be overclocked, which means they’ll be able to withstand higher temps than their non-OC counterparts.

    Overclocking becomes a problem when there’s not enough airflow inside or if you’re doing more than you should.

  • What’s The Best 650w PSU In The Market?

    What’s The Best 650w PSU In The Market?

    A lot of first time builders and enthusiasts often overlook an important component for their gaming rigs: the power supply. Power supplies are important because it serves as the lifeblood of the PC. Without it, your PC won’t just run at all.

    They are often overlooked because of several factors:

    • The tech specs are too difficult to understand sometimes
    • It’s difficult to find out what brands make an efficient power supply
    • Budget constraints can take its toll

    A modular power supply is just as important as choosing what kind of RAM or GPU to run with your rig, and in this article, we’re going to go over the best 650 PSU or power supply unit in the market right now.

    We consider them to be the best 650W PSU because of their features and pricing.

    What Is The Best 650w PSU For You?

    Listed below are the best 650w power supplies in the market. We’ll take note of certain features like top notch build quality, incredible efficiency, and other details.

    These are not arranged in any particular order, so feel free to go over any noe of them and see which is the best for you.
    EVGA SuperNOVA 650

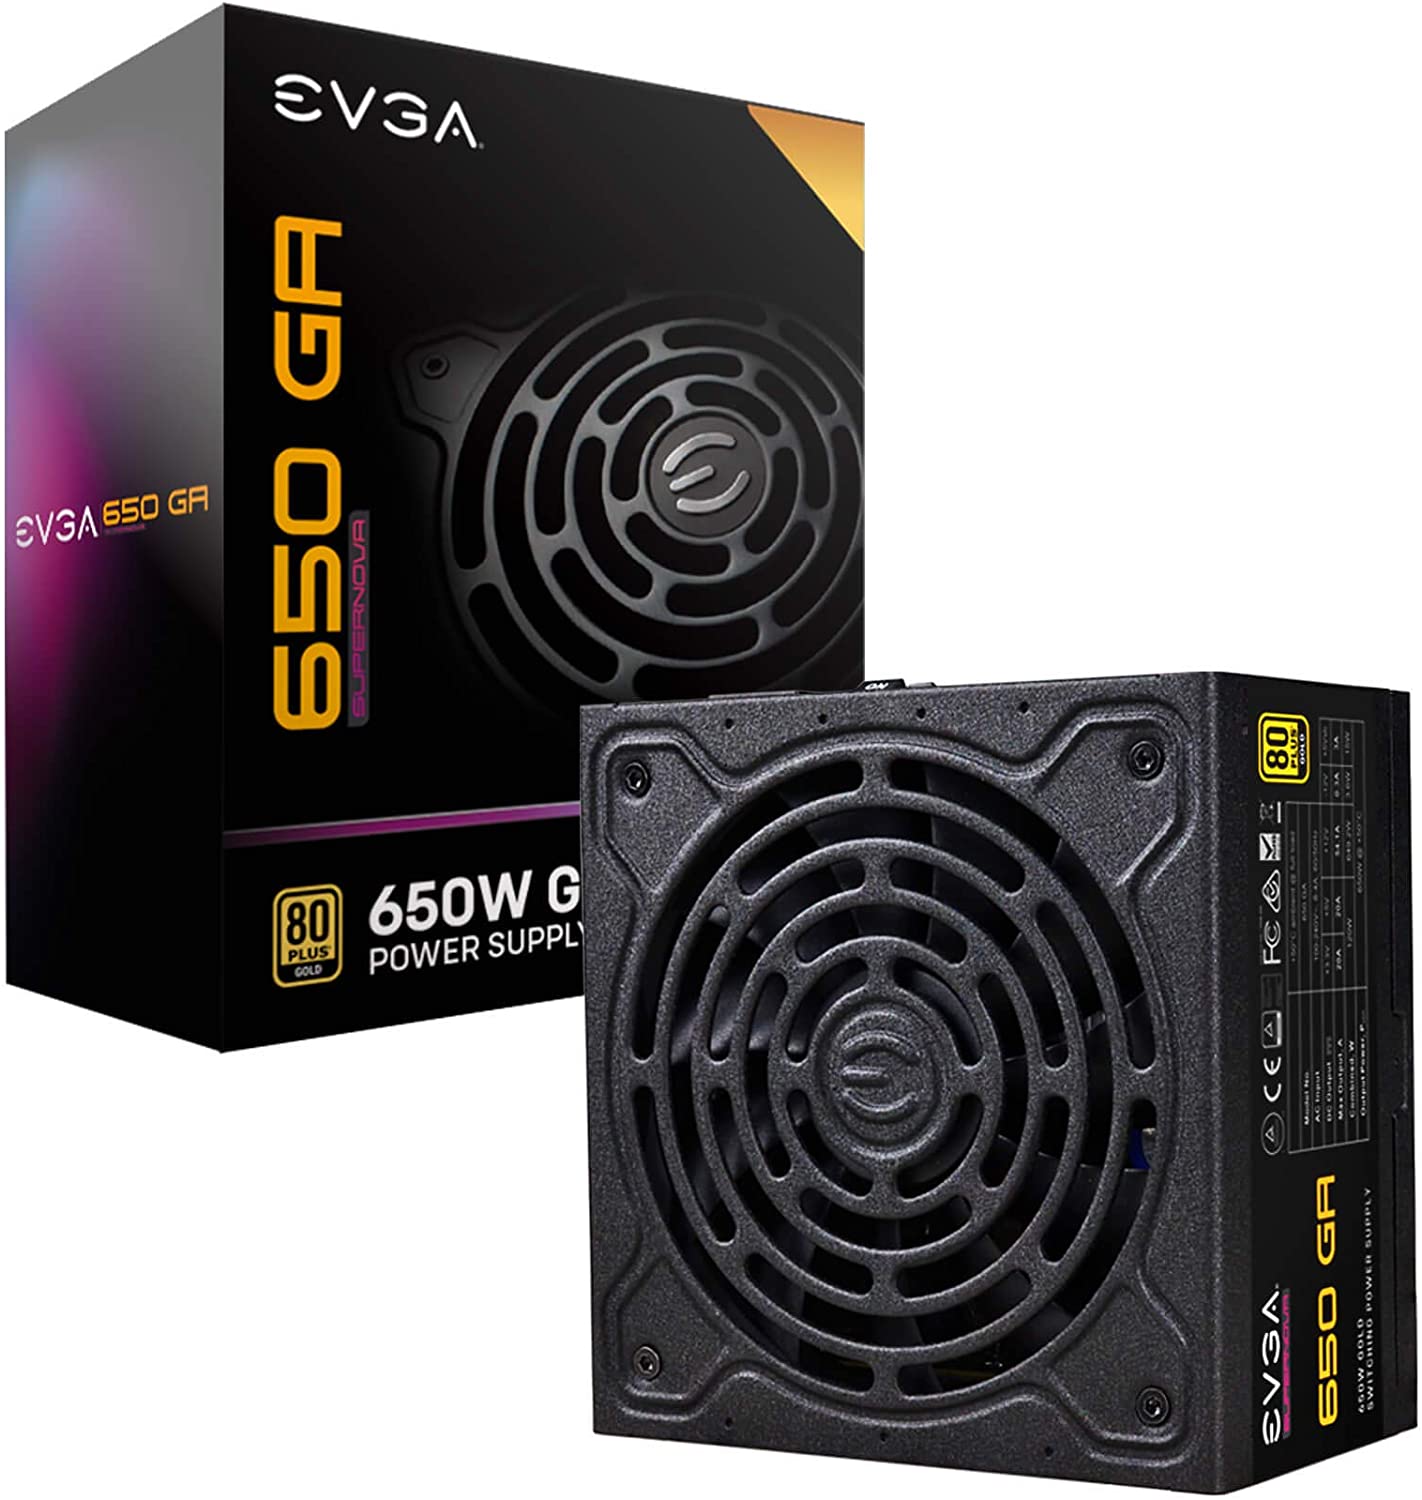
    EVGA SuperNOVA 650 GA 80+ Gold Best 650w PSU

    Technical Specs

    • Combined +3.3V and +5V output: 120W
    • +12V output: 649.2W
    • +5Vsb output: 15W
    • -12V output: 3.6W
    • Operating Temperature: 0° to 50°C
    • Weight: 2.64 kg or 5.82 lbs
    • Dimensions: 86mm x 150mm x 150mm (HxWxL)
    • Price: $130+

    Why Consider It?

    • +80 Gold efficiency
    • 10 years warranty
    • Provides support for Eco Mode, which helps keep the PSU quiet during low to medium workloads
    • Full support for DC to DC conversion
    • Fully modular power supply

    Why Avoid It?

    • A lot more expensive than other brands
    • Does not have surge protection, fan failure protection features, and inrush current protection
    • No semi-passive operation

    First on our list is the EVGA SuperNOVA 650w, which you can find for about $60 to $130 online. The SuperNOVA lineup of power supplies is widely known for their top notch build quality, rectifiers, and capacitors. Power delivery is also very reliable especially during full workloads.

    The EVGA SuperNOVA 650w is based on an OEM design from FSP and boasts of a 10-year warranty, 80+ Gold efficiency, 100% Japanese capacitors, and 135mm high-quality industry grade fan.

    Because the EVGA SuperNOVA 650w is fully modular, power cables are easy to organize. If you’re ever in the market for a power supply, the EVGA SuperNOVA 650w is a solid pick.

    Thermaltake Toughpower GX1

    Thermaltake Toughpower GX1 RGB 600W 80+ Gold Best 650w PSU

    Technical Specs

    • Combined +3.3V and +5V output: 100W
    • +12V output: 588W
    • +5Vsb output: 12.5W
    • -12V output: 6W
    • Operating Temperature: 5° to 40°C
    • Dimensions: 86mm x 140mm x 150mm (HxWxL)
    • Price: $80+

    Why Consider It?

    • High quality components
    • 80+ Gold Certification
    • Compact power supply

    Why Avoid It?

    • A bit pricey
    • No OCP, OTP, UVP surge protection

    Up next we have the Thermaltake Toughpower GX1, and it’s difficult to not include this bad boy on this list. The Thermaltake Toughpower GX1 is an excellent power supply and is one of the few PSUs that have an RGB feature, so if you have an RGB build in mind, this might be worth considering.

    The Thermaltake Toughpower GX1 may not be a fully modular PSU, but it does allow you to vertically mount the unit. This is a common feature found in most Thermaltake’s Core cases, so you’re more likely to pair those cases with the Thermaltake Toughpower GX1.

    The Thermaltake Toughpower GX1 comes with 80+ Gold efficiency rating, 120mm hydraulic bearing fan with 10 RGB LED lights, and a dedicated RGB lighting button that allows you to control color and RPM.

    The Thermaltake Toughpower GX1’s capacitor is Japanese and can tolerate max temperatures up to 105°C.

    Silverstone Essential ET650-B

    Silverstone Essential 650W 80+ Bronze Gold Best 650w PSU

    Technical Specs

    • Combined +3.3V and +5V output: 120W
    • +12V output: 600W
    • +5Vsb output: 15W
    • -12V output: 3.6W
    • Operating Temperature: 0° to 40°C
    • Dimensions: 86mm x 140mm x 150mm (HxWxL)
    • Price: $73 to $78

    Why Consider It?

    • High quality components
    • Silent operation
    • Compact design and lightweight
    • OVP, SCP, OPP, OCP Support

    Why Avoid It?

    • 80+ Bronze Certification
    • No UVP, surge protection, or fan failure protection

    The Silverstone Essential 650E is a robust power supply unit despite being Bronze-rated. If it had a Gold rating, this would be the best pick amongst 650w power supplies.

    Just like Thermaltake, Silverstone is a well-known manufacturer for power supplies, so you can’t go wrong with picking this one. The Silverstone Essential 650E also comes in a sub-$80 price range, making it a cheap PSU for people on a tighter budget than most.

    SeaSonic S12III 650W

    SeaSonic S12III 650W 80+ Bronze Best 650w PSU

    Technical Specs

    • Combined +3.3V and +5V output: 120W
    • +12V output: 648W
    • +5Vsb output: 12.5W
    • -12V output: 3.6W
    • Operating Temperature: 0° to 40°C
    • Dimensions86mm x 140mm x 150mm (HxWxL)
    • Price$69.99

    Why Consider It?

    • Seasonic is a respected brand for power supplies
    • Extremely quiet operation
    • Full support for OVP, SCP, OCP, and OPP
    • Compact design

    Why Avoid It?

    • A little pricey
    • 80 plus Bronze certification
    • No surge protection, UVP, OTP, fan failure protection, and inrush current protection

    Another respectable brand is Seasonic, known for not only their power supplies but also other components. The brand is widely respected in the industry and experts have classified Seasonic PSUs to be some of the best in the PSU market.

    On this list, they have the Seasonic S12III and comes with an 80+ Bronze Efficiency rating. Combined with a 5-year warranty, the Seasonic S12III is a cheap PSU but with high efficiency that’s competitive with other PSUs in the market.

    The Seasonic S12III comes with a 120mm sleeve bearing fan that helps you regulate the fan speed and giving you more control for noise output. It’s not exactly a guaranteed silent operation with the Seasonic S12III, but the noise output is respectable enough.

    Enermax Cyberbron

    Enermax Cyberbron Best 650w PSU

    Technical Specs

    • Combined +3.3V and +5V output: 110W
    • +12V output: 552W
    • +5Vsb output: 12.5W
    • -12V output: 3.6W
    • Operating Temperature0° to 40°C
    • Dimensions: 86mm x 140mm x 150mm (HxWxL)
    • Price$49.99

    Why Consider It?

    • High quality components
    • UVP, OVP, SCP, and OPP support
    • Compact design
    • Affordable

    Why Avoid It?

    • No surge protection, UVP, OTP, fan failure protection, and inrush current protection

    Just because it’s a cheap PSU doesn’t mean that it’s a bad choice. The Enermax Cybertron is on this list for a good reason. First, it’s one of the few 650w power supplies in the market that’s under $50 and with Bronze+ certification. It also has all the common features of the other power supply units on this list, so there’s nothing to hate about the PSU.

    You also get a 3-year warranty with the Enermax Cybertron, so definitely a solid choice for people who’re looking for entry-level hardware or those on a tight budget.

    The Wrap Up

    The best power supplies in the market don’t need to cost you an arm and a leg, but you’ll definitely need to set aside some funds for it.

    Power consumption is going to be the biggest point of consideration when it comes to picking power supplies. Of course, if you are going to run an Nvidia RTX graphics card on your rig, you’ll need more than 650w for these power hungry components.

    But if you’re just getting started and you don’t mind getting one of the 650w power supplies, then you just need to go for something that’s at least 80 plus gold certified.

    Modular PSUs are also good for consideration if aesthetics is one of your goals in building a rig. Modular PSUs are great at managing power cables than non-modular ones, but they’ll be a bit more expensive though.

  • What’s The Best Curved Monitor for Video Editing?

    What’s The Best Curved Monitor for Video Editing?

    Video editing is complicated and time-consuming. It’s also an expensive venture. You need a high-end PC with a powerful processor and graphics card, and an ultrawide monitor to help you do that.

    Ultrawide monitors aren’t just great for gaming, but they’re also really great for editing due to the added visual real estate.

    In this article, we’ll help you pick out the best curved monitor for video editing based on your budget, needs, and more.

    What Do You Look For In Curved Monitors?

    Whether you’re in the market for curved monitors or just a regular ultra wide flat monitors, it helps to pay attention to the following factors. These are what you’ll mostly find listed on their specs, and we’re here to help translate the technical stuff for you.

    Screen Size

    This is probably the biggest draw if you’re in the market for a new video editing monitor. The screen size is important because it affects the video editing process. It’ll also affect the graphics card’s power to run high-end software like DaVinci Resolve or Adobe Premiere Pro.

    In most cases, you’d do well with a 21:9 monitor as you’d have a wider field of view for video editing. A 34-inch screen is more than enough for video editing, regardless if it’s a flat monitor or curved monitor.

    Screen Resolution

    Resolution measures the number of pixels that comprise the entire screen, and the higher the number of pixels, the better the quality of the video. Higher resolutions also give you sharper and bigger images.

    A 34-inch curved monitor will probably get you an additional 1.3 million pixels, and that’s a handful for graphic designers.

    You should be able to find the numbers on the monitor’s OSD, right alongside their refresh rates and G-Sync.

    High Dynamic Range (HDR) Support

    High resolution quality means a lot for video editing, and if you want high-resolution viewing, you need to find a monitor that has HDR support. The latest curved monitors and flat monitors are equipped with HDR support and other important technology.

    Panel Types

    An important factor to consider is the panel type. IPS and VA panel types are great choices, but they are expensive. IPS panels tend to be more expensive but recent upgrades to technologies used by computer monitors are reducing the effect of panel type on the monitor price.

    A good example is the mini-LED backlight technology and high 8K resolutions are available in IPS monitors.

    Video editors and graphic designers lean towards IPS panels because they have better contrast than other panel types.

    What Is The Best Curved Monitor for Video Editing?

    If you’re ever in the market for a new curved monitor, then you’re in luck. We’ve listed down some of the best curved monitors in the market right now. They’re not arranged in any particular order, so feel free to find which one’s good for video editing.

    Dell UltraSharp U3421WE

    The Best Curved Monitor Money Can Buy

    Dell UltraSharp U3421WE Curved Monitor for Video Editing

    SPECIFICATIONS

    • Screen Size: 34.1-inch
    • Aspect Ratio: 21:9
    • Resolution: 3440 x 1440
    • Curvature radius: 1900R
    • Panel type: IPS

    Why Buy It?

    • Excellent color production
    • USB-C with 90W power delivery

    Why Avoid It?

    • Expensive
    • Only 3440×1440 resolution

    First on the list is the 34-inch Dell Ultrasharp U3421WE, which is probably the best curved monitor for video editing that money can buy. Literally.

    The Dell Ultrasharp U3421WE sports an IPS LCD panel technology, which is uncommon amongst curved monitors, and gives you amazing color and contrast accuracy compared to VA-type curved monitors. Dell Ultrasharp U3421WE’s wide gamut panel also gives you excellent color reproduction at 99% sRGB, 99% Rec. 709, and a whopping 95% of the DCI-P3 color space. This monitor competes with the display systems found on 120Hz gaming laptops.

    However, we’re quite disappointed that the Dell Ultrasharp U3421WE is less than your 4K resolution, so it’s got about a 109ppi pixel density. It’s not crisp enough that you get a Retina-like effect when you look closely at images or videos.

    But all in all, the Dell Ultrasharp U3421WE is a solid choice if you don’t mind that it’s not a 4K monitor.

    Dell UltraSharp 40 Curved U4021QW

    The Best 40 Inch Curved Monitor In The Market

    Dell U4021QW UltraSharp Curved Monitor for Video Editing

    SPECIFICATIONS

    • Screen Size: 39.7-inch
    • Aspect Ratio: 21:9
    • Resolution: 5120 x 2160
    • Curvature radius: 2500R
    • Panel type: IPS

    Why Buy It?

    • Higher than 4K resolution
    • Practical 21:9 Aspect Ratio
    • Excellent color space coverage

    Why Avoid It?

    • Expensive, but worth the money

    All right, if you really want 4K curved monitors then look no further than the Dell UltraSharp 40 Curved WUHD Monitor. This humungous monitor sits at 40-inches and brags a 21:9 ultrawide display with 5120×2160 resolution.

    The Dell UltraSharp 40 Curved WUHD Monitor sports a 2500R screen curvature radius, so you get 929mm viewable screen width, so everything is just visible even within the corners.

    The Dell UltraSharp 40 Curved WUHD Monitor’s resolution gives you genuine 4K/UHD vertical resolution with additional pixels to help you fill in the 21:9 aspect ratio. The color accuracy is just as impressive at 100% sRGB, 100% Rec.709, and 98% DC-P3 color space.

    If money is not an issue, the Dell UltraSharp 40 Curved WUHD Monitor is a solid choice as it goes beyond being just a video editing monitor. Watching movies or gaming on this beast will probably be a unique experience in itself.

    Gigabyte G34WQC

    Best Budget Curved Monitor for Video Editing

    Gigabyte G34WQC Curved Monitor for Video Editing

    SPECIFICATIONS

    • Screen Size: 34-inch
    • Aspect Ratio: 21:9
    • Resolution: 3440 x 1440
    • Curvature radius: 1500R
    • Panel type: VA

    Why Buy It?

    • HDR10 certified
    • Decent color coverage

    Why Avoid It?

    • Not an IPS Panel
    • Less than 4K resolution

    If you don’t want to spend a lot of money on a video edit monitor, then consider the Gigabyte G34WQC.

    The Gigabyte G34WQC is a good example of a budget curved monitor because it doesn’t compromise on screen resolution. It has the same 3440×1440 pixel density as the first monitor, but the Gigabyte G34WQC is way cheaper.

    Now, the compromise you do need to make is the color coverage, the lack of 4K display, and the VA panel type. But these are all minor drawbacks compared to what kind of value you’re getting with the Gigabyte G34WQC. At best, you still get a 1ms response time and 144Hz refresh rate. Combined with the AMD FreeSync support, video editing and gaming on this monitor is going to be a pleasant experience.

    ASUS ProArt Display PA34VC

    Curved Monitor with Excellent Color Accuracy

    ASUS ProArt Display PA34VC Curved Monitor for Video Editing

    SPECIFICATIONS

    • Screen Size: 34-inch
    • Aspect Ratio: 21:9
    • Resolution: 3440 x 1440
    • Curvature radius: 1900R
    • Panel type: IPS

    Why Buy It?

    • 100%R sRGB Coverage
    • Thunderbolt 3 Connectivity
    • Factory Color Calibratd

    Why Avoid It?

    • Expensive
    • Below 4K resolution

    The ASUS ProArt line of monitors is designed with graphic artists and video editors’ needs in mind. And their entry into the curved monitors scene proves that they are good at what they do.

    The ASUS ProArt PA34VC is a 34-inch curved display sitting at 3440×1440 resolution, capable of displaying 100% sRGB color space. It’s also factory color calibrated to the accuracy of Delta-e <2. It’s got uniform back-lighting so you see the image displayed on the entire screen surface.

    And on top of that, the ASUS ProArt PA34VC makes for a good dual monitor setup when paired with a gaming laptop thanks to its Thunderbolt3 USB C ports.

    LG 34WP85C-B

    Best Value Curved Monitor for Video Editors

    LG 34WP85C-B 34-inch Curved Curved Monitor for Video Editing

    SPECIFICATIONS

    • Screen Size: 34 inches
    • Aspect Ratio: 21:9
    • Resolution: 3440 x 1440
    • Curvature radius: 1800R
    • Panel type: IPS

    Why Buy It?

    • 95% P3 color coverage
    • HDR10 support
    • USB-C with power delivery
    • IPS Color Consistency

    Why Avoid It?

    • Not 4K resolution

    The LG 34WL75C may not be the cheapest curved display on here, but it’s also not the most expensive one either. It’s sitting at about $700, give or take. But don’t let the price tag fool you. LG 34WL75C’s a decent monitor for video editing because of its color accuracy and because it’s an IPS display too. The image quality on IPS panels is anything but terrible.
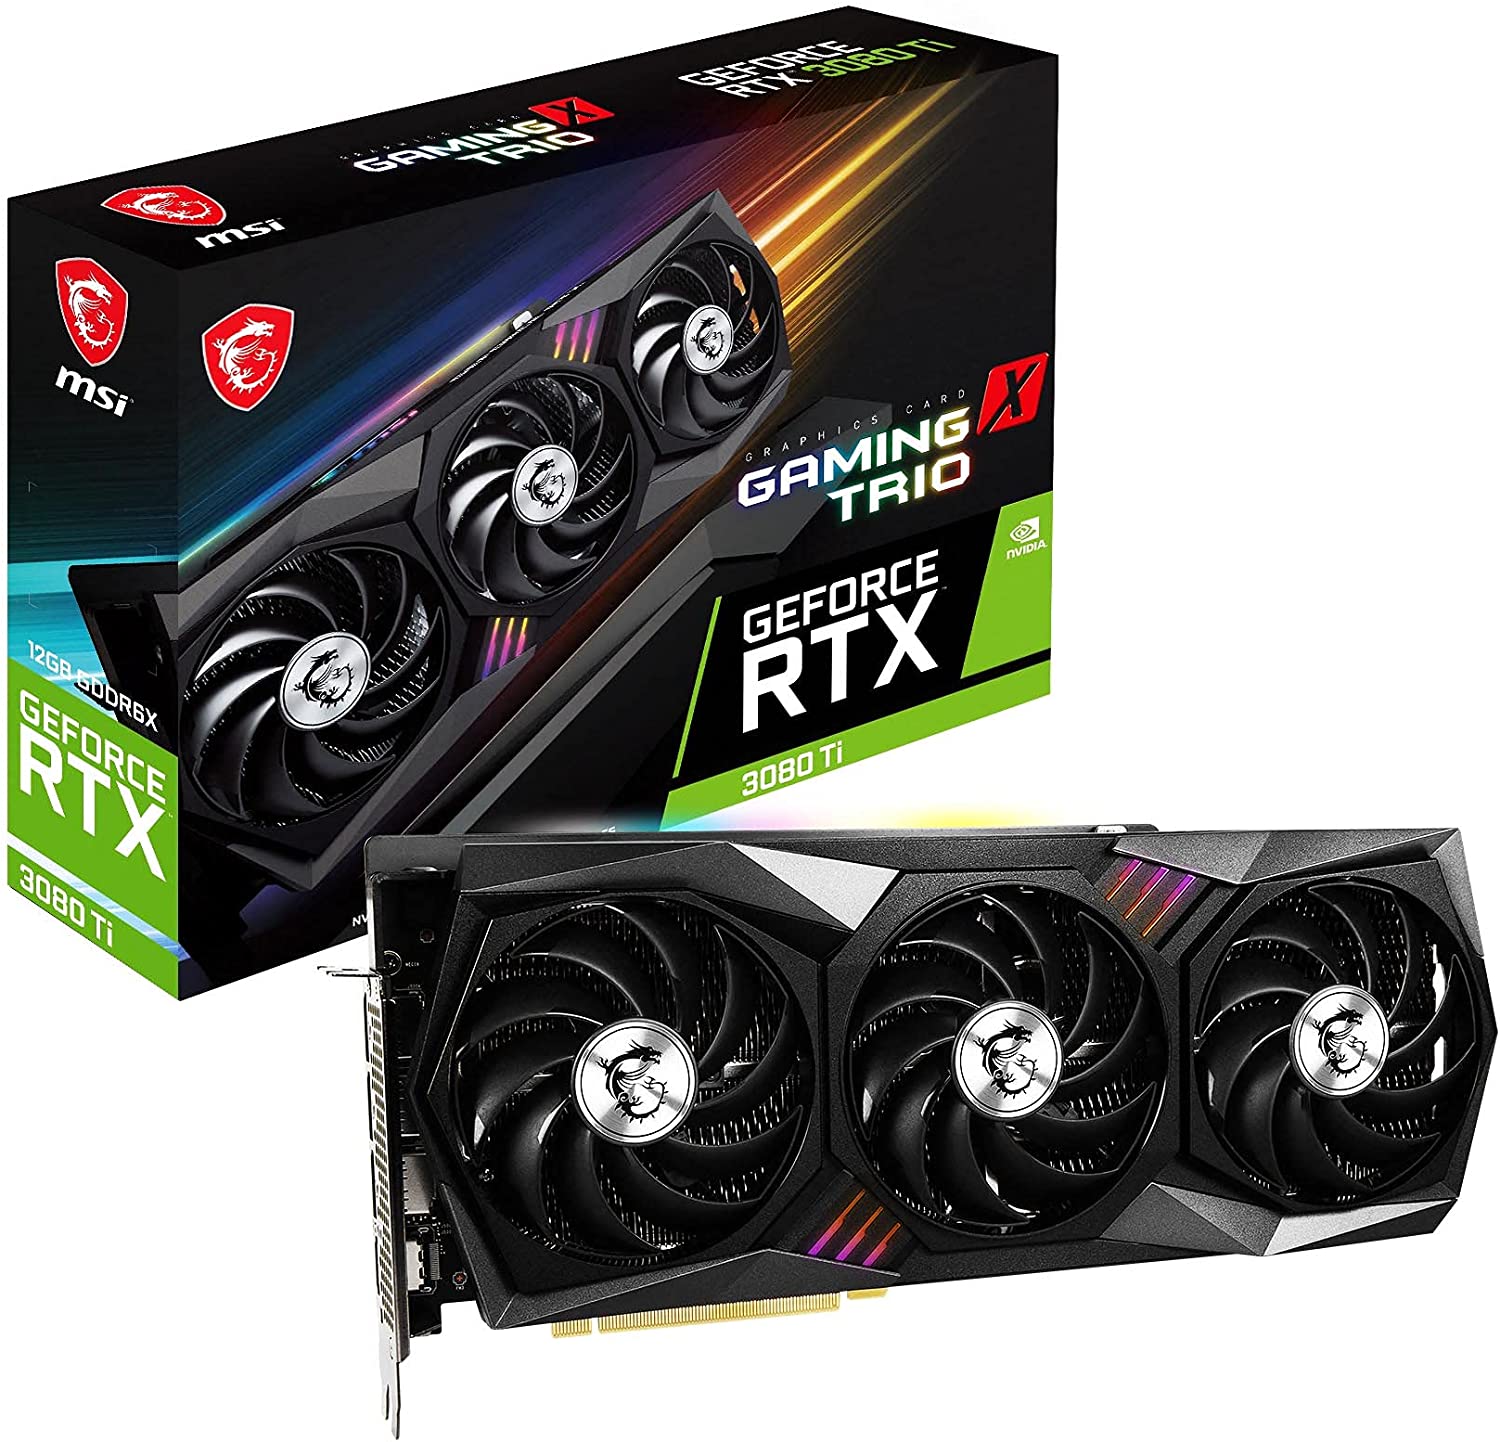
    The LG 34WL75C is also good for video editing because of its HDR10 certification. You get to enjoy HDR content, from gaming to movies to photos, on the fly.

    The downside here is that it’s not a 4K display, so it might be severely lacking compared to the other displays on here that share the same price tag. But again, you get what you paid for. The LG 34WL75C is a good buy, all things considered.

    Samsung CHG90 QLED

    Widest Curved Display That You Could Buy

    Samsung CHG90 QLED Curved Monitor for Video Editing

    SPECIFICATIONS

    • Screen Size: 48.9-inch
    • Aspect Ratio: 32:9
    • Resolution: 3840 x 1080
    • Curvature radius: 1800R
    • Panel type: VA

    Why Buy It?

    • Uber-wide aspect ratio
    • HDR support
    • 92% Adobe RGB coverage

    Why Avoid It?

    • Very expensive
    • 1080p vertical only

    If you want the widest curved monitor for video editing, then the only thing on your list should be the SAMSUNG 49-Inch CHG90, or the Samsung CHG90.

    It measures at a whopping 49.5 inches and it will literally consume a lot of deskspace. But the visual real estate you’re getting beats out dual or multiple displays at any given time.

    The Samsung CHG90 comes in with a 3840×1080 resolution and HDR support. Even though it doesn’t get you 4K resolution, the wide viewing angle makes up for it. Due to its immense size, you should be able to work on different photos and videos better than using multiple monitors.

    The Wrap Up

    So, is a curved monitor good for video editing? If we’re going for screen size here, then a curved screen should just be as competitively useful as flat screens. Screen real estate is the name of the game here, so you really want to make sure that the monitor you get has more than enough for your needs without having you use a secondary smaller screen.

    What’s the best monitor on this list based on what we’ve shown you? Well, if you don’t mind spending the money, the Samsung 49-inch curved display is the best bang for buck if you want a lot screen real estate.

    On the other hand, if you want peak brightness and all the color accuracy for photo editing or video editing, then you can’t go wrong with the Dell Ultrasharp U4021QW 40 Inch Curved.

  • What Does Ti Stand for in GPU?

    What Does Ti Stand for in GPU?

    Graphics cards are not only expensive, but they’re just as confusing. Today, you’ll find that one graphics card model will have different names or suffixes, making it difficult for you to select which one’s actually the one you need.

    One of the most popular and confusing suffixes is “Ti”, a designation that goes along with Nvidia graphics cards. But what does Ti stand for in GPU and what exactly do they tell us about a particular model?

    What Does Ti Mean in a GPU?

    Ti means Titanium and is a suffix or designation that’s specific to the Nvidia line of graphics cards. The Ti label is part of their naming scheme and is used to indicate that a given graphics card is upgraded or a better version of the regular counterpart.

    Simply put, a Ti variant performs better than a non Ti version.

    MSI Gaming GeForce RTX 3080 Ti What Does Ti Stand For In GPU

    For example, let’s look at one of the most popular RTX graphics cards: the GeForce RTX 3080 and the GeForce RTX 3080Ti. Both of these GPUs have the same features and specs, but the 3080Ti currently has more upgrades than the regular 3080. The 3080Ti has 10,240 CUDA cores while the 3080 only has 8,704. In terms of memory, the 3080Ti has 12GB while the 3080 only has 10GB.

    RTX 3080 What Does Ti Stand For in Gpu

    Nvidia GPUs will also follow the same features. Ti models will have more CUDA cores and may have higher memory than the non Ti counterparts.

    Does It Really Matter If The Nvidia GPU is Labeled as Ti?

    Well, the answer is both YES and NO. If cost is an issue, then non TI counterparts are relatively cheaper than the Ti versions. For example, a Zotac Gaming Nvidia GeForce RTX 3060 will cost you about $369, while the Zotac Gaming Nvidia GeForce RTX 3060Ti will cost you $459. The Nvidia GeForce RTX 3080 used as an example in the previous paragraph will cost you about $699 while the 3080Ti hovers at about $1,199 to $1,499.

    But if pricing is not an issue and you want the best bang for your buck, you’ll definitely want to go for the Ti graphics card. Additional power and performance always come in handy, but it will depend on the graphics card. Getting the latest Ti GPU is the best thing to do.]

    Ti Graphics Cards vs Non Ti Graphics Cards

    Okay, now that we understand what a Ti graphics processing unit is and why they’re so different from the non Ti versions, let’s take a closer look at some of the latest Nvidia cards.

    First we look at the Nvidia GeForce RTX 3090, the cream of the crop of Nvidia graphics cards.

    GeForce RTX 3090

    • CUDA Core Count — 10496
    • Boost Clock (GHz) — 1.7
    • Base Clock (GHz) — 1.4
    • VRAM — 24GB GDDR6X
    • Memory Interface Width — 384-bit
    • Graphics Card Power (W) — 350

    GeForce RTX 3090 Ti

    • CUDA Core Count — 10752
    • Boost Clock (GHz) — 1.86
    • Base Clock (GHz) — 1.67
    • VRAM — 24GB GDDR6X
    • Memory Interface Width — 384-bit
    • Graphics Card Power (W) — 450

    The comparison shows us at first glance that the GeForce RTX 3090Ti has more CUDA cores than the regular 3090. We’re talking about 10,496 CUDA cores for the regular version and 10,752 CUDA cores for the TI version.

    Base and boost clock speeds are also different, with the TI version packing more than the non Ti version.

    The VRAM for both Ti and non Ti GPUs are equal at 24GB, and other specs such as memory interface, ray tracing cores and tensor cores, and architecture are similar. But the 3090Ti does draw in more power at 450 watts as opposed to the regular 3090’s 350 watts.

    Simply put, game titles run on the 3090Ti will probably result in better performance, but not really that much. For example, running the Witcher 3 on ultra settings and with ray tracing on (thanks to their latest December update) on a 3090Ti will probably get you a few more FPS than the regular 3090. But at that point, it’d already be moot considering that anything past 60FPS is barely noticeable to the human eye.

    As you can see, the discrepancy between an RTX 3090 and RTX 3090Ti is a good example of the marginal difference in terms of performance. But there are other graphics cards from Nvidia that show us something else.

    For the next model, we have the GeForce RTX 3060 and the GeForce RTX 3060Ti with their specs below:

    GeForce RTX 3060

    • CUDA Cores — 3584
    • Boost Clock (GHz) — 1.78
    • Base Clock (GHz) — 1.32
    • VRAM — 12GB
    • Memory Interface Width — 192-bit
    • Graphic Card Power (W) — 170

    GeForce RTX 3060 Ti

    • CUDA Cores — 4864
    • Boost Clock(GHz) — 1.67
    • Base Clock (GHz) — 1.41
    • VRAM — 8GB
    • Memory Interface Width — 256-bit
    • Graphic Card Power (W) — 200

    CUDA core count for the 3060Ti is at 4,864 while the regular 3060 sits at 3,584. But this is where it gets interesting. The 3060Ti has a slower boost clock than the regular 3060, but the base speed of the 3060Ti is faster.

    The 3060’s VRAM sits at 12GB of GDDR6, while 3060Ti sits at 8GB. Power consumption is similar to the 3090. The 3060Ti consumes more power but the discrepancy isn’t that huge compared to the 3090/3090Ti comparison.

    But according to some benchmarks found online, the regular 3060 is marginally slower than the 3060Ti (roughly at 35%).

    But why did Nvidia have a lower VRAM for the 3060Ti than the 3060? Well, no one really knows. All that’s important is that performance-wise, 3060Ti is far more powerful version than the regular counterpart.

    The Wrap Up!

    Ti graphics cards will get you that extra performance that you need, but at a cost. Literally. Ti variants are far more expensive than the regular variants. You’re looking at spending a few hundred dollars more for a Ti GPU.

    Ti graphics cards don’t really have a more superior technical improvement but the difference in performance is marginal to say the least.

    If you want to save money on buying a new GPU, a regular variant will give you everything that you need. Investing in a Ti variant or a Super variant even is considered an upgrade from the regular variant, so that’s something to consider.