Author: Jim Stephenson

  • A Complete Intel Processor List By Performance and Budget

    A Complete Intel Processor List By Performance and Budget

    Intel processors are dominating the CPU market, all thanks to their 12th generation Alder Lake line of processors. Despite having a slow couple of years, Intel processors are on the verge of a comeback, but that won’t last long as AMD will be releasing their Ryzen 7000 processors very soon.

    In this list, we’ll be going over the best Intel processors in the market right now, both high-end ones and budget-friendly ones.

    The Best High-End Intel Processors

    This section covers all the best processors, assessed based on their overall performance. Note that these processors are on the higher side of the price ranges, but every one of them is considered a great buy.

    So, without further ado, let’s get on with the list.

    Intel Core i7-12700K

    The Best Intel Processor for Gaming

    Intel Core i7-12700K Intel Processor List by Performance

    What makes it good?

    • Cheaper than the Intel Core i9-12900K
    • Higher performance in gaming compared to other processors
    • Overclocking

    What makes it bad?

    • Definitely not as good as the i9-12900K
    • Needs additional cooler

    Price range

    • About $350

    One of the most solid choices for overall performance is the Intel Core i7-12700K, and is a considerable alternative to the i9-12900K (for those who don’t want to spend a lot of money on the golden waffle).

    The Intel Core i7-12700K is part of the Alder Lake line of Intel processors, so performance and price are right up there. The Intel Core i7-12700K comes with 12 cores, 8 allocated for performance and 4 for efficiency, and almost comes close to the i9’s core count at 16 cores. The base speed is 3.6GHz and overclocked to 5.0GHz.

    If you want to avoid thermal throttling, the i7-12700k needs a serious cooling system (either a high-powered air cooler or an AIO cooler).

    Did we mention that the Intel Core i7-12700K is $200 cheaper than the i9-12900K with only a marginal gap in terms of performance?

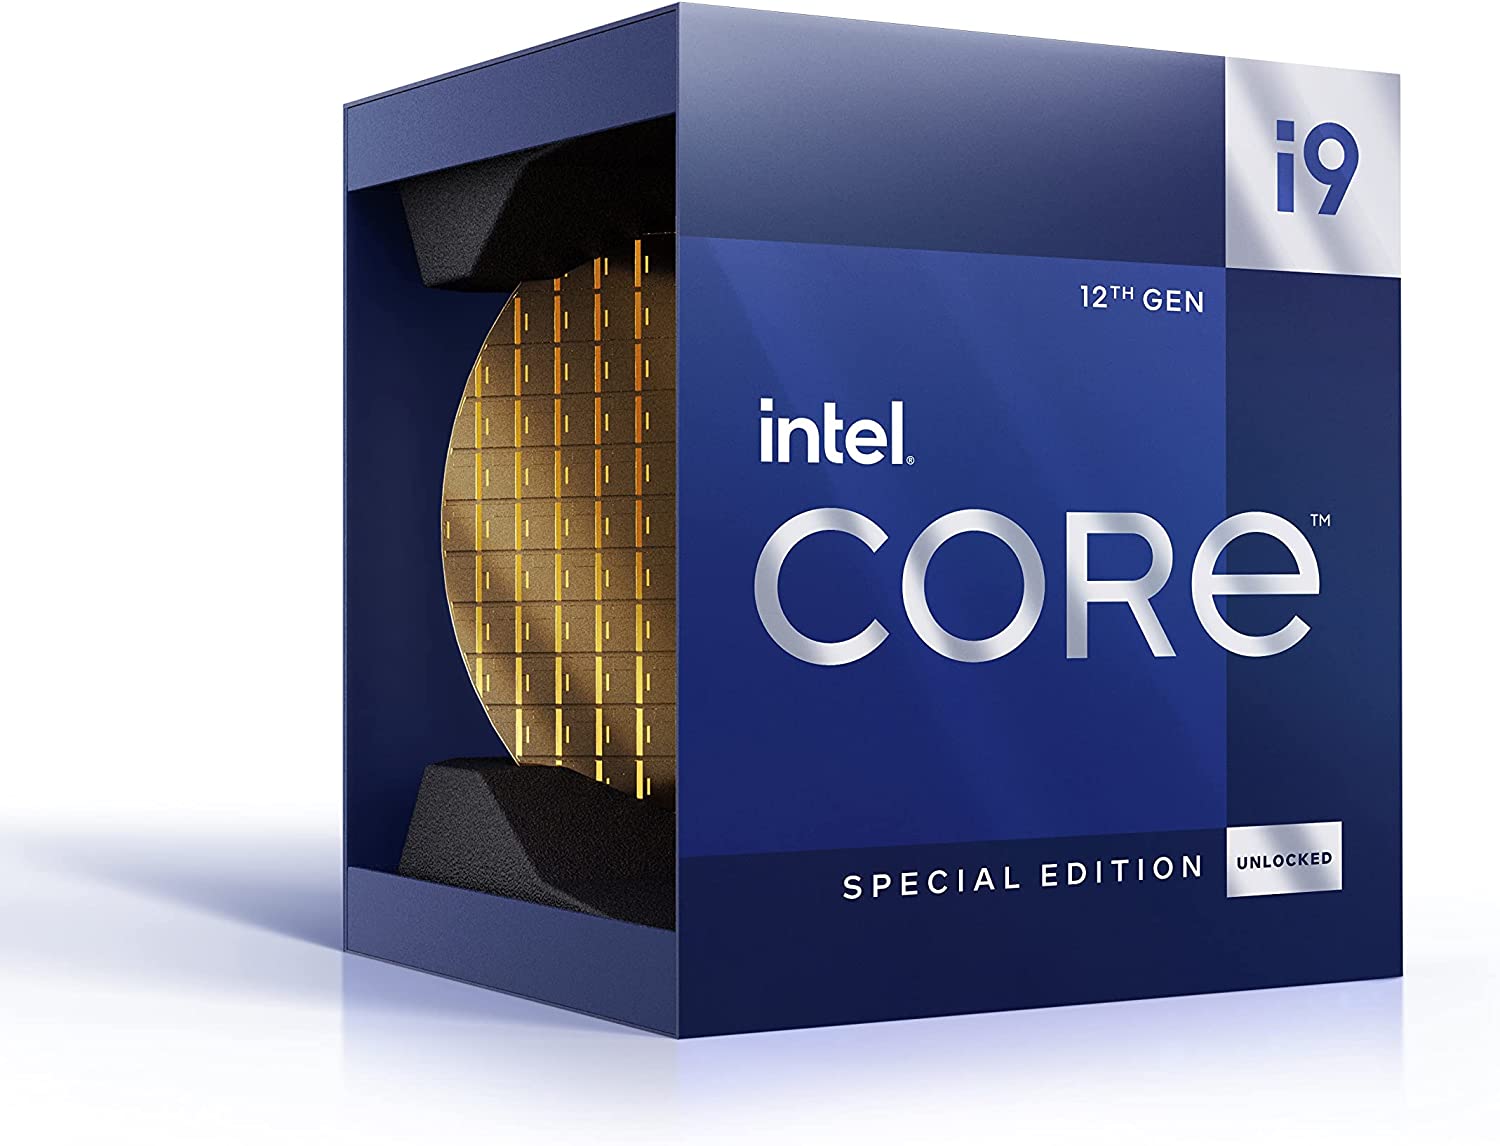
    Intel Core i9-12900KS

    Fastest Intel Processor In The Market

    Intel Core i9-12900KS Intel Processor List by Performance

    What makes it good?

    • Amazing performance for single-core and multi-core
    • DDR5 memory support
    • The industry leader in gaming performance

    What makes it bad?

    • Expensive
    • Needs adequate cooling solutions
    • Power consumption is high

    Price range

    • About $700 to $730

    The Intel Core i9-12900KS is dubbed the king of processors right now, and the Intel Corporation has done such an amazing job with this beast of a CPU.

    The Intel Core i9-12900KS is specially-binned and overclocked 12900K that’s able to push its overall performance further than any of the other Intel CPUs. Now, the 12900K may be a bit ahead of the Intel Core i9-12900KS, but it’s still the fastest CPU you can get your hands on in 2022.

    The Intel Core i9-12900KS has 16 cores, 8 designated for performance and 8 for efficiency, and 24 threads. The clock speed of the Intel Core i9-12900KS is higher than the 12900K, sitting at 5.5GHz (the 12900K sits at about 5.2GHz). And yes, 16 cores are more than enough for gaming.

    The Intel Core i9-12900KS is the best Alder Lake processor right now, or up until we see an Intel Raptor Lake processor. But that’s still a few years down the road.

    But even though it’s the fastest CPU in the market, it has a few downsides to it. First, it’s an expensive processor. You’re looking at about $700 or so to purchase the Intel Core i9-12900KS, and compared to the other midrange processors, you’re not exactly looking at a huge jump in overall performance. Sure, the Intel Core i9-12900KS has higher performance but it’s not noticeable when you compare it to a Core i7-12700K.

    On top of that, the Intel Core i9-12900KS is a power-hungry CPU as it has higher TDP demands compared to the other processors on this list, or any other CPUs in the market.

    But if budget is not an issue and you just want the best performance possible that money can buy, the Intel Core i9-12900KS is a solid pick.

    Intel Core i9-12900K

    The Best High-End Intel Processor Right Now

    Intel Core i9-12900K Intel Processor List by Performance

    What makes it good?

    • Outperforms a lot of the AMD Ryzen processors, most specifically the Ryzen 9 5950X
    • Also cheaper than the Ryzen 9 5950X
    • DDR5 Support
    • Excellent overclocking
    • PCIe 5.0 for supported motherboards

    What makes it bad?

    • Can get too hot
    • High power consumption

    Price range

    • $580 to $620

    When we’re talking about speed, performance, and power, nothing really comes close to the Intel Core i9-12900K (except for the KS counterpart). The Intel Core i9-12900K sports 16 cores and single-core boost speeds hitting 5.2 GHz. Other than the Intel Core i9-12900KS, the Intel Core i9-12900K is currently the best CPU in the market for gaming, productivity, and everything else in between.

    Its AMD counterpart, the AMD Ryzen 5950X, is 30% underpowered and also relatively more expensive than the Intel Core i9-12900K. But the closest thing that could ever come close to the Intel Core i9-12900K from the AMD processors is the AMD Ryzen 7 5800X3D, and proves itself to be a solid rival.

    But what really sets the Intel Core i9-12900K processor is not its gaming power but rather, its content creation capabilities. From video editing to graphics design, the Intel Core i9-12900K is powerful enough to carry out heavy rendering processes.

    The downside to the Intel Core i9-12900K is that it’s a power-hungry processor, which is pretty much a standard of most of Intel Alder Lake’s hybrid architecture.

    If you can spend $100 more for a processor, the Intel Core i9-12900KS would be a better choice. But if not, the Intel Core i9-12900K is still solid enough and can get you through at least 5 more years of gaming or content creation without upgrading it.

    Intel Core i5-12600K

    A Great Intel Processor For Multitasking and Gaming

    Intel Core i5-12600K Intel Processor List by Performance

    What Makes It Good?

    • Great price-to-performance ratio
    • The excellent gaming performance and productivity performance
    • Multitasking is solid thanks to its hybrid architecture

    What Makes It Bad?

    • Not the most powerful CPU on the market, but decent enough for its generation

    Price Range

    • $230 to $250

    If there was ever one CPU that you need to purchase for gaming or for productivity, it’d be the Intel Core i5-12600K. It’s not the best or the fastest processor in the market, but it’s a solid overall processor in itself.

    The Intel Core i5-12600K comes with 10 cores, with 6 cores designated for performance and 4 for efficiency. Now comparing this to the Intel Core i7 and i9 processors, the Intel Core i5-12600K puts up a fight as it provides gamers with extra bandwidth for those heavy processing tasks.

    The Intel Core i5-12600K outpaces even the AMD Ryzen 9 5950X, and the latter just so happens to be three times more expensive. But when we’re talking about CPUs for gaming desktops, the Intel Core i5-12600K reigns supreme.

    While the hybrid architecture makes it breeze through AAA games without difficulty, the Intel Core i5-12600K doesn’t shy away from being a decent processor for workstations. Content creation such as streaming or video editing using the Intel Core i5-12600K is smooth as silk.

    Intel Core i5-11600K

    Excellent Previous Generation Intel Processor

    Intel Core i5-11600K Intel Processor List by Performance

    What Makes It Good?

    • The best midrange CPU
    • Gaming performance is superb
    • Cheaper than the latest CPUs

    What Makes It Bad?

    • Previous generation CPU
    • Not worth paying at full price

    Price Range

    • $200 to $220

    Just because it’s a previous generation processor doesn’t mean that it doesn’t deserve to be on the list. The Intel Core i5-11600K proves to be a decent option for gaming and productivity-based workstations, even though we have some of the latest processors within the same price range.

    Intel Core i5-11600K’s architecture isn’t exactly perfect, and it’s far worse than the Core i5-12600K honestly. However, the Intel Core i5-11600K is a decent pick if you’re on a tight budget, or if you’ve spent more on your graphics cards than you should’ve.

    In terms of gaming performance, the Intel Core i5-11600K stands its ground with AAA games such as Death Stranding and proves that you don’t need current generation processors for high-end gaming.

    For productivity and other non-gaming tasks, the Intel Core i5-11600K blows the AMD processors out of the water thanks to its superb single-core performance.

    All in all, the Intel Core i5-11600K makes it to this list for what it has to offer in terms of speed and performance. Is it worth paying the full price? Nope. For $20 more, you could already purchase the i5-12600K. But if the Intel Core i5-11600K is discounted, then it’s worth considering.

    Intel Core i9-12900H

    Best 12th Generation Intel Core i9 Mobile Processor

    ASUS ROG Strix Scar 15 Intel Processor List by Performance

    What Makes It Good?

    • The best mobile processor in the market for laptops
    • The best laptop processor for gaming and productivity
    • Decent power consumption even at higher performance levels

    What Makes It Bad?

    • Difficult to find
    • Expensive as the laptops they come in

    Price Range

    • $1,500 to $2,500 (depending on the laptop)

    Gaming laptops are now getting the best processors packed into them, and Mobile Alder Lake processors are slowly becoming the new standard. In this case, the Intel Core i9-12900H is the best one in the industry.

    As seen in the image, the Intel Core i9-12900H is found in a lot of high-end laptops like the ASUS ROG Strix Scar 15 and ASUS ROG Strix Scar 17. And believe us when we say that the Intel Core i9-12900H does not shy away from performing.

    The Intel Core i9-12900H is a high-end processor packing 14 cores (six for performance and eight for efficiency) and 20 cores combined with 24MB of Intel Smart Cache. Clock speeds are capped at 5.00 GHz on Turbo mode.

    Combined with the RTX 30-series graphics cards, the Intel Core i9-12900H is a beast. There are other powerful mobile processors out there, but nothing compares to what the Intel Core i9-12900H can do in terms of performance, speed, and power.

    Best Budget Intel Processor List by Performance

    We’ve covered the high-end processors from the Intel Corporation, and you’re paying a lot of money for higher performance that’s guaranteed at best. But believe it or not, there are budget options out there that can still get you the performance that you need.

    In terms of benchmarks, these may not be the best for the most demanding games, but they’ll get you through.

    Intel Core i5-10400F

    The Best Budget Intel Core Processor

    Intel Core i5-10400F Intel Processor List by Performance

    What Makes It Good?

    • Really affordable
    • Price-to-performance ratio is solid
    • Best for non-demanding games or older games

    What Makes It Bad?

    • You need a discrete GPU

    Price Range

    • $120 to $130

    First on the list is the Intel Core i5-10400F which is a solid pick for the $100-price ranges. The Intel Core i5-10400F comes with 6 cores and 12 threads and runs on 2.9 GHz base clock speed. Overclocking puts you through 4.3 GHz easily, which is impressive, to say the least.

    The Intel Core i5-10400F is $80 to $100 cheaper than the 10600K, but bears the same specs. However, the Intel Core i5-10400F requires a discrete GPU or graphics card. Other than that, the Intel Core i5-10400F is great for what you need out of it.

    Rendering videos isn’t a problem with the Intel Core i5-10400F, and gaming on the Intel Core i5-10400F is decent enough. Combine it with a nice graphics card and you’ll get yourself a midrange gaming rig that could run the latest games, albeit not just at the highest settings possible.

    Intel Core i3-12100F

    The Best 12th Generation Processor Under $100

    Intel Core i3-12100F Intel Processor List by Performance

    What makes it good?

    • An upgrade from the Core i3-10100F
    • The best processor for light gaming and productivity tasks
    • Good price-to-performance ratio

    What makes it bad?

    • Needs a discrete GPU

    Price range?

    • Less than $100

    Older Intel processors became relevant as soon as the current-generation Intel Alder Lake processors were released. Much of the previous generation processors were dethroned by their 12th generation counterparts, but to say that the previous generation is underperforming would be unfair.

    The Intel Core i3-12100F is one of those processors who were dethroned, but don’t underestimate this CPU. It’s considered as the best entry-level CPU for both gaming and productivity tasks, but don’t expect a lot from it.

    The Intel Core i3-12100F is equipped with 4 cores and 8 threads, with overclocking speeds hitting 4.3 GHz, so it still packs a punch to say the least for the price range. While the Intel Core i3-10100F is from the Alder Lake line of processors, it doesn’t share the same hybrid architecture as the current generation processors as it only has P-cores (cores intended for performance). But it doesn’t mean that the Intel Core i3-12100F is unstable.

    The Wrap Up

    If we have to recommend one processor for highest performance possible, it would be the Intel Core i9-12900K. While the KS version is a little bit more powerful, the performance leap from the Intel Core i9-12900K is barely noticeable.

    You’re looking to spend about $600 to$700 for the Intel Core i9-12900K, less so if you get it at a discounted price. Combine this processor with something like an Nvidia GeForce RTX 3080 or RTX 3090, you’d have one hell of a gaming rig that should run the latest AAA games on ultra settings.

  • What Is CPU Thermal Throttling And Is It Bad For My PC?

    As a gamer or video editor or animator, you’ve probably heard the terms like CPU throttling or CPU thermal throttling thrown around, but what exactly is it?

    PC owners want their hardware to exceed its potential, so much so that they’re willing to risk breaking them for the sake of power and performance. CPUs and GPUs are two common components that are pushed to their limits, or overclocking as you will.

    CPU on Fire CPU Thermal Throttling

    For CPUs, overclocking is a neat feature and while the new generation of CPUs are built to withstand heat generated, it doesn’t mean that you need to push beyond the threshold. When you do push your CPU to its limit, you’ll get what’s called CPU throttling or thermal throttling.

    But before we discuss what throttling is about, we need to understand a couple of concepts first.

    What Is The CPU Base and Boost Frequency?

    Base frequency refers to the minimum clock speed your CPU is set to operate at, while Turbo Boost Frequency (or boost frequency) refers to the maximum clock speed.

    CPUs will also have different base and boost frequencies. High performance CPUs, usually those used for gaming and heavy processing workloads, have higher base and boost frequencies compared to power saving CPUs. Laptop-grade CPUs will have lower base and boost frequencies by default for certain reasons.

    CPU throttling refers to these two speeds within ideal conditions. Throttling happens the CPU operates between the base and boost frequency levels.

    What Does TDP Stand For?

    Another thing that you need to understand about CPU throttling is something called TDP, or Thermal Design Power. Thermal Design Power is expressed in Watts. This is defined by Intel as the maximum power consumed by your CPU when operating at base frequency with all CPU cores working.

    To help you understand why TDP matters when it comes to throttling, here’s a short cheat sheet:

    • The higher the core count, the higher the TDP
    • The higher the frequency, the higher the TDP
    • The higher the TDP, the more heat it generates
    • The more heat the CPU generates, the more likely it is to throttle when there’s no decent cooling system in place.

    What Exactly Is CPU Throttling Then?

    Now that we know about the different frequencies (base and boost) and TDP (thermal design power), we’ll be able to understand what CPU throttling is and why it happens.

    CPU throttling is caused by a technology called Dynamic Frequency Scaling. This is a technique or technology featured in most processors that allows them to limit power consumption by limiting the power of the CPU.

    What it basically means is that Dynamic Frequency Scaling is the reason why your CPU will slow down whenever you have too much going on. If you have multiple tabs open on a browser and you’re running an AAA game in the background, your CPU will be putting in the work. Without throttling, your CPU will become severely damaged caused by excess heat.

    For laptop CPUs, throttling happens to help you conserve battery life. If you have a gaming laptop, it’ll go through GPU and CPU throttling. Laptops will still be able to carry out basic functions like web browsing and productivity programs. Gaming and other heavy workloads will still be doable at the risk of reducing your battery life faster.

    Dynamic frequency scaling also prevents your laptop from reaching maximum temperature by slowing down intentionally simply because they don’t have the same cooling solution as PC’s.

    What Causes CPU Throttling?

    CPU throttling can be caused by one of three factors, sometimes even three of them happening at the same time:

    1. Battery power (for laptops)
    2. Workload
    3. Heat generation or thermal throttling

    CPU is Running On Battery Power

    Laptops that run on battery power will end up throttling their CPUs to help conserve battery life. Gaming laptops will also switch from discrete GPU to integrated GPU to continue to provide graphics processing power.

    By design, all laptops go through CPU throttling when they’re on battery mode as part of their processor power management feature. Economical power plans will also provide you with longer battery life by cutting down performance on CPU and GPU.

    Some gaming rigs PCs also have some form of power management feature, but doesn’t necessarily mean it will run on battery. These power management features on a PC simply let you manage your power consumption better for when CPU and GPU aren’t in full use.

    Heavy Workload

    CPU throttling also occurs when the processor is under heavy use. Even when you have the best cooling solution possible, CPU throttling is inevitable as the processor tries to slow down, or return to the frequencies at which it was supposed to operate at.

    Thermal Throttling

    CPU Thermal Throttling happens when the CPU becomes too hot. But don’t worry. Thermal throttling is a fail-safe mechanism found in all CPUs for when the cooling system doesn’t function, or when the ambient temperature becomes too hot.

    To prevent thermal throttling, you’ll need to make sure that:

    • Ambient temperature is normal when working heavy loads
    • Reduce poor airflow by cleaning out CPU fans and case fans when possible
    • You give your PC ample time to rest and recover in between heavy workloads

    Poor temperature management can damage your CPU in the long run. It’s an exaggeration to say that your PC will catch on fire, but it does happen when the heat build up becomes too much.

    What Are The Other Causes of CPU Throttling?

    If you really want to know how to stop CPU throttling, you’ll need to understand the different causes as well. We’ve listed down the three most common causes, but there are also other causes that you might want to keep an eye out.

    Wear and Tear

    Processor limits are defined by wear and tear, so under normal circumstances, you’d be able to get the most out of a CPU for about 5 years or so. But if you’re consistently pushing it to its limits, then you’ll get around 3 years, 5 if you’re lucky.

    As the CPU deteriorates, its performance takes a hit though not that much. An old CPU running a new AAA game might struggle at some point, so you’ll get CPU throttling.

    Overheating Caused by Overclocking

    Overclocking CPU Thermal Throttling

    Overclocking is another way of pushing processor limits to the extreme, or at least, to its advertised speeds.

    For example, you have one of the new Intel CPUs with a base clock speed of 3.6GHz and overclock speed of 4.2GHz. So when you require higher processing power, overclocking is your solution but at a cost.

    Overclocking increases CPU temperature, which also speeds up processor wear and tear. And when the CPU reaches a high temperature past its advertised limits, then CPU throttling will happen to protect itself.

    Poor Temperature Management

    Sometimes, your PC or laptop might just be the cause of overheating. Even with adequate cooling solution, increase in CPU temperatures can be caused by an accumulation of dusts in case fans or CPU fans itself.

    Heat is not dissipated fast enough inside the case, so ambient temperature is higher than it should be.

    But Is CPU Throttling Bad?

    Believe it or not, CPU throttling is not as bad as it sounds. Think of it as your car’s emergency brake system. The point of a CPU throttling feature is to make sure that the CPU does not overheat or does not get overworked.

    Yes, throttling is annoying especially when you want consistent high performance from your CPU but things happen. Would you rather have a few minutes of lower frame rates or spend hundreds of dollars in replacing the CPU?

    Can You Turn Off CPU Throttling?

    Thermal Failure CPU Thermal Throttling

    You can manually turn off or alter CPU throttling, but we don’t recommend you do this. Think of it as removing the emergency brake level from your car, if you will.

    When you turn off CPU throttling, you’re going to cause serious damage when the CPU overheats. Remember, because it can’t reduce its performance, you won’t be able to dissipate heat. And sooner or later, you’ll probably set your entire PC on fire.

  • How Many CPU Cores Do I Need For Gaming?

    How Many CPU Cores Do I Need For Gaming?

    Every time a new processor from AMD or Intel comes out, we can’t help but feel left out. Newer processors from both manufacturers are running multiple CPU cores, so much so that performance will never be an issue.

    Not too long ago, we were so hyped about seeing a dual core processor in the market, but in the blink of an eye, the quad core processor took over. Since then, core count was one of the most important features that a lot of PC builders, especially gamers, are more concerned with.

    When you’re doing video editing or even 3D animation, you’d need multiple cores as well. But the real question you’d probably be asking is this: how many CPU cores do I need for gaming and all the other heavy processing stuff?

    That’s what we’re going to talk about in this article, but first…

    What Are CPU Cores?

    CPU Overview

    How many CPU cores do I need for gaming or video editing? That’s probably a question that you’ll be asking first if you’re planning on buying a new CPU. You want to know how many CPU cores is enough so you don’t blow your budget, but at the same time, you don’t want to overpay for something.

    We all know that the CPU or central processing unit or processor is the brains of the system unit. Your PC may function without a GPU, but it will not function without a CPU.

    Back then, processors were only executing program instructions such as the adding or removing or moving of data. The first version of CPUs was only able to process one instruction at a time. Since then, operating systems, programs and even video games now process a lot of data, so the processor needs to be able to keep up. This is why we now have multiple processing units, or referred to as CPU cores, in one processor.

    For better performance, CPU cores are split into threads, or what you’d commercially recognize as multithreading, or hyperthreading if it’s an Intel processor or simultaneous multithreading (SMT) for AMD processors. The operating system creates virtual cores to help utilize the CPU’s physical cores better.

    What Are The Modern CPU Standards and Requirements?

    How many CPU cores do you need? Well, it’s a challenge to find the exact number of cores but it’s a lot easier to spot a model that may be within range of the number of CPU cores that you need.

    Simply put, if you think you need 5 CPU cores, you’re going to want to secure a 6-core (hexacore) processor. CPU cores only come in pair, so you have 2,4,6,8, and so on. If there were CPU cores with an odd core count, then that’d be a weird sell for both Intel and AMD.

    For majority of CPUs, thread count is almost always double the core count (so a hexacore or 6 core processor would have 12 threads, theoretically). The only exception to this is the 12th generation Intel’s Alder Lake processors.

    Intel Core i9-12900KS How Many CPU Cores Do I Need

    To make your shopping for CPUs easier, we’ve created a short guide on common core/thread combinations and how they can affect your needs.

    Single-Core Processors

    While you won’t be finding any SINGLE CORE CPUs nowadays, it pays to know how it all began. You might chance upon a single core CPU in Intel’s Pentium Library, but there’s hardly any stock.

    The reason why you won’t find any single core processor today is that operating systems and programs now run on multiple cores or threads, or at least they run smoothly because of the CPU’s multiple processing units.

    If you think you’re going to be able to run any modern program on a single core processor, think again. It’ll probably be the most infuriating experience you’ll ever go through. Single core performance is just terrible in this day and age.

    Dual-Core Processors

    Intel Pentium Gold G6405 How Many CPU Cores Do I Need

    While not as rare as single core CPU, dual core processors are just as uncommon. But you will find that Intel and AMD will still have them for new generation Pentiums and Athlon APUs respectively.

    Today, dual core processors have four threads because of multithreading and if your CPU cores are fast, you’d be able to run productivity programs (like Microsoft Office) and some basic video games like League of Legends.

    If you’re in the market for a dual core processor, then you might want to check these out:

    • Intel Pentium Gold G6405 – Powerful enough for basic productivity tasks, almost comparable to an Intel i3.
    • AMD Athlon 3000GE – Solid choice if you don’t have a dedicated GPU. The integrated GPU on the AMD Athlon is more powerful than Intel UHD.

    Quad-Core Processors

    Intel Core I7-7700K How Many CPU Cores Do I Need

    Quad core processors are more common than dual core or single core processors, and good examples are the Intel i3 series. Intel i3 usually run with 4 cores and 8 threads, and they were all locked to 4 threads until AMD pushed for multithreading on their quad cores.

    Quad core processors, or any CPU with higher core counts, will have at least 8 threads, and their performance is just a league of its own compared to single core and dual core processors.

    Video editing/rendering and gaming is faster, but you get more performance and speed from higher core counts. Ideally, an eight core CPU would be more than enough for your video editing or gaming needs.

    For gaming, a CPU with quad cores is decent enough for gaming. You should be able to use Intel i7-7700k, albeit they’re outdated compared to the more recent processors. Still, they’re powerful enough.

    Aside from the Intel i7-7700k, we also put these processors up for your consideration:

    • Intel i3-10300 – Cheaper than the Intel i7-7700k with the same core and thread count. There’s a six core version as well, which we recommend checking out first.
    • Ryzen 5300G – Relatively faster than the two quad core processors mentioned above. But these are only found in OEM systems, so locating this particular quad core processor might be a challenge.

    Hexa-Core Processors

    Intel® Core™ i5-11600K How Many CPU Cores Do I Need

    Hexacore or hexa-core refers to the six core CPUs, which are midrange processors by today’s standards. Processors such as AMD Ryzen 5 3600 and the Intel i5-10400K are good examples of hexacore processors with great performance at budget pricing. For less than $200, you’re getting the best processors around for gaming and it’s a deal that you just can’t refuse.

    A lot of gamers, streamers, content creators, and video editors are already satisfied with a six core processor’s power. Most modern games are doing well and to be honest, you don’t really see a massive FPS jump when you go up to 8 cores or higher. Running multiple programs at one time isn’t a hurdle with much CPU resources.

    If you’re in the market for a six core processor, here’s our recommendation:

    • Intel i5-11600K – Slower than the Ryzen 5600X, but not that much. It’s cheaper by about $40, so it’s a solid choice if you’re on a tight budget.
    • Ryzen 3600/X – Considered as the best value purchase on the market as you’d find this processor for about $180 or less. The non-X version will cost less than the X version too, which isn’t a bad purchase.
    • Ryzen 5600X – The fastest hexacore processor in the market right now but it’s worth the price tag (currently about $300 or so).

    Octa-Core Processors

    Intel Core i7-10700KF How Many CPU Cores Do I Need

    Eight core CPUs are relatively more expensive compared to the hexacore counterparts, but with Intel and AMD constantly at each other’s throats, we’ll hopefully see these prices go down.

    As mentioned earlier, gaming doesn’t really see a lot of improvement when you transition to an octacore processor from a hexa core processor. You don’t really see the need to increase your physical CPU core past six unless you need more processing power for 3D animation or rendering.

    If you do want to go for 8 CPU core count, then here is our short list:

    • Intel i7-10700K/11700K – Identical in performance, so getting either isn’t a bad choice. They’re the best bang for your buck, so go for the one that’s more accessible (budget-wise and stock-wise).
    • AMD Ryzen 5800X More expensive than the 11700K, but it is the fastest CPU in the market right now.
    • AMD Ryzen 3700X – Another affordable octacore CPU and relatively cheaper by about $100 compared to the two other octacores.

    The Wrap Up

    If you want a TL:DR (too long, did not read) version of the article, here’s a short guide on how many cores you need:

    • Single core processors are obsolete and hard to find. You don’t want to use them.
    • Dual core processors are more than enough for basic tasks, word processing, and some light gaming.
    • Quad core processors are good enough for gaming and productivity tasks, but you’ll need more.
    • Hexacore processors are what you really want for gaming, and they’re also powerful enough for video rendering and heavy processing tasks.
    • Octacore processors are the pinnacle of processing power, at least from a practical point-of-view. You don’t need more cores, honestly.
    • But if you want ten or more cores, you’ll pay more for them, but these are just intended for 3D animation or heavier-than-normal processing power.
  • What Is A USB Header?

    What Is A USB Header?

    A computer hardware that we’re all familiar with, but don’t really know much about, is the USB header. We know that these are the slots to use to insert our storage devices, webcams, headsets, and other devices.

    But how important is it for you to know what a USB header is? Well, it’s important enough that it’s going to help you build new PC’s better in the future.

    In this article, we’ll be talking about what a USB header is and what they can do for your system.

    What Are USB Headers?

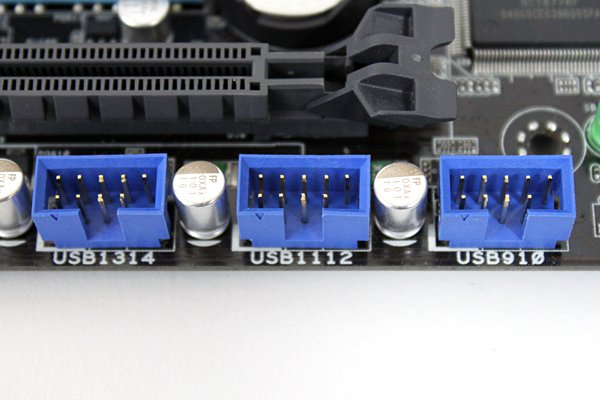
    Sample Shot USB Header

    A USB header is a connector on the motherboard that lets you connect a USB port found on your PC case. If a PC case has USB ports, it will also come with plugs that let you connect to the correct USB headers.

    Much like USB ports, there are different versions and types of USB headers.

    What Are The Different Types of USB Headers?

    Now, there are four types of USB headers:

    1. USB 2.0 Header
    2. USB 3.0 Header
    3. USB 3.1 Gen 2 Header
    4. USB 3.2 Gen 2×2 Header

    Your PC case will let you know what kind of USB header you’ll need to use. Essentially, USB 2.0 headers will be intended for USB 2.0 ports and USB 3.0 ports will be for USB 3.0 headers, and so on.

    USB 2.0 Header

    USB 2.0 headers are small and their pins are arranged in a 5×2 grid. However, this header only has 9 pins in total. The missing pin from the array serves as a key for helping you align the plug correctly.

    USB 3.0 Header (or USB 3.1 Gen 1, USB 3.2 Gen 1)

    USB 3.0 Header USB Header

    The USB 3.0 header contains 19 pins arranged in a 2×10 array. This USB header goes by different names such as:

    • USB 3.0
    • USB 3.1
    • USB 3.1 Gen 1
    • USB 3.2 Gen 1

    You’ll know the USB header’s name on the motherboard’s book or spec sheet, depending on when it was manufactured. The latest motherboards usually have USB 3.2 Gen 1 header, while older motherboards might have the same USB header but under different names.

    Motherboard manufacturers also take into consideration when the USB standard changes. If the USB standard changes the nomenclature, then motherboard manufacturers will follow suit.

    But more or less, they’re all the same. A PC case containing USB headers 3.0/3.1 Gen 1/3.2 Gen 2 ports will come with the corresponding USB 3.0 header cable.

    USB 3.1 Gen 2 Header (or USB 3.2 Gen 2)

    USB 3.1 Header USB Header

    Unlike the first two USB headers, a USB 3.1 Gen 2 header is unique in terms of its form factor. It doesn’t have pins sticking out, which makes it unique from the previously mentioned USB headers.

    In modern or newer motherboards, this is known as USB 3.2 Gen 2 header.

    A USB 3.1 Gen 2 header has a very unique form factor. It does not have pins sticking out like the rest of the USB headers.

    In the recent motherboards, this is known as the USB 3.2 Gen 2 header. 

    If you have a PC case with a relevant port, then it will come with the following cable. 

    USB 3.2 Gen 2×2 Header

    USB 3.2 headers are similar to the 3.1 headers, but the difference is that 3.2 headers are dual channels and labelled as USB 3.2 Gen 2×2 on spec sheets.

    These are similar to the USB 3.1 Gen 2 headers above. However, they have dual channels are specifically labelled as USB 3.2 Gen 2×2 on the specifications.

    These are quite rare and only a select few top of the line motherboards feature this at the moment.

    How Do You Connect USB Ports to USB Headers?

    Now that we identified the different USB headers, it’s time to move on to something called Internal USB Cable. This cable acts like an extension cable that allows you to connect USB port to a USB header.

    Today, there are two kinds of internal USB cables. One cable will have a USB header jack and one cable will have individual wires for each pin. While both are essentially the same, the latter is a bit complicated to connect. So if you don’t secure the connection properly, you’ll probably encounter the error “USB Device Over Current Status Detected”. This is also a common error when you put your PC on the carpet.

    So to avoid this, you’ll need to learn about the different connectors used by an Internal USB Cable.

    • VCC Pin – This is known as the Voltage Common Collector or VCC. This connector is responsible for carrying +5V signal to the USB ports. This connector will also have the letters VCC on its label, or you can easily tell it apart from its wire color, which is red.
    • DATA- Pin – This connector is located right next to the VCC pin and dons a white colored wire. The DATA- Pin is responsible for transmitting downstream data connections.
    • DATA+ Pin – Much like the Data- Pin, the DATA+ pin is responsible for the upstream data connections and maintaining proper communication between USB and your PC. The DATA+ Pin is right next to the DATA- Pin and is a green wire.
    • GND Pin – This is called the Ground Pin, which helps reduce electromagnetic interference. The last pin that we have sends back the voltage carried by the VCC pin. The GRND Pin ensures that there’s no additional current flowing from the motherboard to the device and vice versa, so you avoid short circuiting.

    Is the USB 3.2 Gen 2 Header The Same as Thunderbolt 3?

    Unfortunately, both are completely different from one another as Thunderbolt 3 uses a different header. Thunderbolt 3 is a lot faster than the USB 3.0 ports since it transmits data up to 40Gbps. USB 3.2 and 3.2 Gen 2×2 only hit 10Gbps and 20Gbps, respectively.

    Newer motherboards are equipped with one or two Thunderbolt 3.0 or higher.

    How Do You Install More USB Headers?

    You have the option of installing more USB headers for your system using one of two methods:

    1st Method – DIY USB 2.0 Header Duplication

    You can turn a single USB header into a port for 2 cables if your motherboard has USB 2.0 headers. And this functionality is supported without any problem.

    But you need to do some rewiring to make this possible.

    1. Take a pair of tweezers or any precision instrument to flip open the plastic tabs at the edge of the second USB header cable.
    2. You’ll need to extract the wires and pins from the second cable before placing them inside the ones for the first, which should be directly beside matching colors.
    3. Your formerly empty pins on the USB 2.0 header will now allow both devices to work simultaneously and flawlessly.

    But this method only works for USB 2.0 headers, so if you’re planning to add more headers for USB 3.0 or a USB Type E Header, then you’ll need to purchase a separate hardware.

    2nd Method – Using PCIe USB Headers or USB 3.0 to USB Type E Header

    You can get more USB headers if you use the PCIe or PCI Express slot, which is another new feature of most motherboards released over the last two years.

    Ideally, you want to look for PCIe Expansion Cards that come with onboard USB headers, regardless if you just want to add USB 2.0 headers or other versions. But apart from PCI Express cards, you’ll also see smaller devices that go on top of the original USB header.

    For example, you’ll find a converter for a USB 3.0 Header to USB Type E Header (for Type C ports.But take note, these are niche devices so don’t expect big brands to carry these types of products. A quick search on Amazon will lead you to small companies selling this type of converter.

  • Why Is My GPU Utilization So High?

    Why Is My GPU Utilization So High?

    A not-so-often discussed topic when it comes to graphics cards is GPU usage or GPU utilization. On the surface level, we know enough that a GPU will run hotter than normal when it’s put under heavy load like gaming, rendering, video editing, and graphics design to name a few.

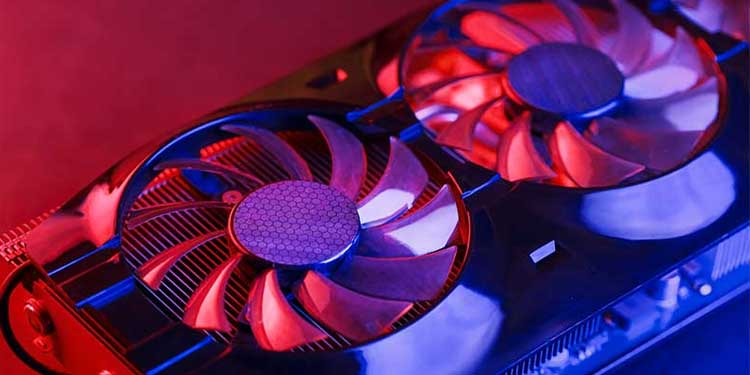
    Close up of Graphics Card GPU Utilization

    Regardless of how much memory your GPU has, your GPU performance will still diminish once it’s past certain limits on how it’s operating. When your graphics card overheats, it will immediately throttle its performance to give itself room to cool down. So if you’re into a heavy gaming session and the frame rate drops from 60 to 30 real quick, then that’s an indicator that the card is overheating.

    However, it’s a different story when GPU utilization spikes for no reason at all. This would result in overheating and then throttling, and then sooner or later, your GPU’s durability and performance will be compromised.

    In this article we’ll discuss the common reasons why your GPU utilization spikes for no reason and how to prevent this from happening.

    What Are The Common Reasons For Spikes in GPU Usage?

    Why does GPU usage spike for no reason? Well, it may be caused by one of these factors:

    Malware

    Malware Icon GPU Utilization

    Malware, or malicious software, can spike GPU usage for no reason. Malware often affect CPU usage more than GPU usage, but it doesn’t mean that it won’t affect other components.

    Some malware would hide in GPU memory which go undetected by anti-virus software, and that would probably be too late already by then. Malware like rootkits, trojans, and keyloggers will tend to hide in GPU memory, and cause severe damage.

    In your performance tab, you’ll see unrecognized tasks running and eating up a lot of your GPU memory. This will cause the physical GPU to overheat and throttle, and then repeats the process all over again.

    When your malware is infecting your GPU instead of the CPU, it becomes difficult to detect, but thankfully Windows has a feature to help you. Your Windows operating system will come with a pre-installed Virus and Threat Protection feature, which should help you detect and eliminate the malware GPU.

    If you detect malicious apps or processes taking up GPU resources in the performance tab on Windows Task Manager. You should be able to stop these processes in the performance tab, but it’ll be tedious.

    Background Apps Slowing Down GPU 

    Sometimes, it’s your legitimate or regular software that end up taking a chunk out of valuable GPU resources for no reason.

    If you purchase a brand-new laptop with a pre-installed Windows OS, it’ll come with some bulkware. Bulkware is considered harmless and are usually software from the laptop manufacturer to help your laptop “run smoothly”, when in fact, it doesn’t.

    Normally, only applications that require graphics processing will run on the GPU, like gaming, graphics design, or video editing. But when normal apps take up dedicated GPU resources, that’s when it becomes a problem.

    If you’re running Nvidia GPUs, then you can use the Nvidia Control Panel to make sure that the only apps to use the GPU are the apps that need a GPU.  

    Problematic or Outdated Drivers 

    Believe it or not, your graphics card driver might cause high GPU utilization. A driver is software that helps computer hardware, like GPU, to work with software. And drivers need to be updated as constantly as you’d update software.

    When a GPU driver is outdated, then it might cause some problems albeit not so serious ones. Your GPU may not run optimally at this point, so it’ll end up using more GPU resources than it should.

    Sometimes, we’ll update our GPU drivers, but more often than not, we don’t. For Nvidia GPUs, updating a driver is made easy with either Nvidia Control Panel or Nvidia GeForce Experience. The latter is a lot easier to use because every time you open it, it prompts up the latest version of the driver for your Nvidia GPU.

    When it does prompt, you just click on the button to start the updated driver installation and you’re done. You just need to open the Nvidia GeForce Experience app every now and then to check if there are new driver versions.

    Games Running At Higher FPS Than They Should

    Witcher 3 GPU Utilization

    GPU engines are meant to run video games at certain resolutions. An older GPU running a newer video game will result in higher GPU utilization than a newer GPU running an older video game.

    Now video games don’t necessarily require a lot of graphics processing power, but you’ll find that AAA games like Witcher 3 are one of those that’ll push your computer graphics card to the limit when you go for higher frame rates.

    As long as your GPU can handle higher frame rates and higher texture quality, there shouldn’t be an issue tied to overheating caused by excessive GPU utilization. But running a game that’s way past your hardware specifications might cause issues, specifically with GPU utilization.

    Graphics Intensive Software

    GPU utilization for running software intended for graphics design, video editing, 3D rendering, and game development will always be at its highest because these programs need the GPU’s processing power.

    When a GPU maxes out its resources on these applications, it means it’s doing its job and that the application is performing as it should. How much memory your graphics card has will determine how high the temperatures will go up. GPU temperatures shouldn’t go higher than 185°F (85°C).

    If you find that your GPU is overheating when using graphics-intensive software, then you might need to purchase a decent cooling system.

    Software Updates Running In The Background

    If you’re running Windows 10 or 11, then you’ll know that one of the most annoying things that it does is when it updates in the background without prompting you. Sometimes, it’ll also be your anti-virus software doing this too.

    When they update their software without prompting you, that means they’re running their updates in the background. Usually, you’d download the update and then install it when it’s finished.

    But since this update did not prompt you, it meant that it was consuming resources, resulting in a spike in GPU usage. As long as the GPU does not overheat when there’s an update running in the background, then there shouldn’t be any issue.

    However if there are instances of overheating, you might want to invest in a cooling system.

    Web Browser Activity Might Cause GPU Usage Issues

    Browser Activity GPU Utilization

    Web browsers can also cause GPU usage issues, specifically those with hardware acceleration. When this feature is enabled in browsers, the GPU is used to speed up the browser performance.

    Disabling this feature won’t hinder you from using your browser to its full potential, but it does get a huge workload off the graphics card.

    But take note. Even without hardware acceleration, browsers might still use GPU, especially when it’s doing something that requires graphics processing. But the GPU usage will be relatively lower.

    High-Performance Power Plan

    While a common feature in laptops, most of the newer gaming PCs are equipped with Power Plans to help you balance power output and performance.

    GPU utilization is at its highest when you go for High Performance settings, meaning it will allow you to run both CPU and GPU to its highest capacity without disregard for power consumption.

    You’ll also have power modes that are economical, so CPU and GPU performance are intended to be lower than intended to help with power consumption.

    GPU utilization might be affected by both high performance options or economical power options. Just go to System and then go to Power & Battery to change your settings. If the presets don’t work for you, you can create your own.
    How High Should GPU Utilization Be For Gaming?

    GPU usage will depend on a lot of factors, but for this section, we’ll assume that you want maximum GPU utilization for best performance possible.

    If your game is running at a capped frame rate or refresh rate, then you’ll probably don’t need to worry about max GPU usage.

    But…

    It’s another story when the game itself is graphically intensive. Running a game capped at 60FPS won’t really do much in terms of reducing GPU usage because the graphics card is already struggling to power through that game.

    For example, running The Witcher 3 at ultra settings on an Nvidia GeForce 1050Ti might cause some issues. Your frame rate might drop immensely, so much so that it’ll probably be unplayable.

    Thankfully, Nvidia and AMD have provided us with their software that allows us to run games at optimal performance. You can use the Nvidia GeForce Experience to automatically set the graphics for any game that should make it run optimally.

    The Wrap Up

    RTX 30 Series GPU Utilization

    GPU utilization only ever becomes noticed when things start to heat up, literally. GPUs are meant to handle excess heat, but it doesn’t mean that you should be pushing for that limit all the time.

    Your GPU memory can only go as far as tell you how far you’d be able to push this limit. Modern graphics cards like the Nvidia GeForce RTX 30-series might handle temperatures higher than 85-degrees Celsius without compromising its durability.

    Once you understand how one GPU differs from another in terms of GPU usage, then you’ll never look at graphics cards the same way ever again.

  • Is It Cheaper To Build a PC or Buy a Prebuilt PC?

    There’s a common debate in the world of PC building: is it cheaper to build a pc or to buy a prebuilt one?

    And the arguments for either side are equally valid, so much so that you’d be convinced that there’s nothing wrong with either choice.

    But sadly, times change. Building your own budget gaming PC has become somewhat more expensive now than a prebuilt PC. The COVID-19 pandemic, combined with the global shortage of components, have made it difficult for anyone to build their own PC.

    A prebuilt gaming PC became the cheaper choice, but even then, supplies at a local computer store or PC hardware store were still minimal or close to none.

    But now that prices have stabilized and supply chain is returning to normal, is now the best time to build your own PC? Let’s find out in this article.

    What Does An Average Gaming PC Need?

    Assembling With Hands Is It Cheaper To Build a PC

    The average PC build will need the following components:

    1. Processor
    2. Motherboard
    3. Graphics Card
    4. RAM
    5. Storage
    6. Power Supply Unit
    7. Fans, Case, and other Components

    A new gaming PC would probably have you focusing your budget on two parts: processors and graphics cards.

    Processors will cost you anywhere between $100 and $500, more so if you’re going for an AMD Threadripper or Intel Core i9 processor. Graphics cards will probably $300 to $2,000, depending on the kind of games you want to play. Then your motherboard needs to be able to accommodate these parts and more, so that will also be as expensive as the first two components.

    Right off the bat, you’re already running almost a thousand dollars, or close to a couple thousand, just for these three components inside.

    Then you’ll need hardware to complement this level of processing and graphics power such as RAM, power supply, and storage. Thankfully, you don’t need to spend as much. A 16GB RAM kit will cost you anywhere between $60 to $100, while a robust power supply unit fell under the same price range. For storage, a 1TB SSD with a 2TB HDD would only be $200 to $300 for both of them.

    Once that’s all said and done, you’re going to spend money on a PC case, some fans, and other peripherals, which would be another $100 to $300 out of your wallet.

    To build your own PC that’s capable of gaming, video editing, and other heavy tasks, you’re more or less spending at least $1,500, maybe more.

    Caveat here is that you’re buying brand new parts from PC manufacturers. Of course, you could save money on buying secondhand parts, or just buying a used custom built PC, but we kind of discourage this unless you really know the person you’re buying the PC from

    Should You Go Ahead and Build A Gaming PC?

    Assembling With Hands Is It Cheaper To Build a PC

    At least one point in your gaming life, you should have built your own PC. There’s a different feeling of satisfaction in building your own computer that can’t be provided by a prebuilt PC.

    But hold on to your horses. There are advantages and disadvantages that you should be aware of if you want to build your own PC.

    What Are The Advantages?

    It’s Cheaper Long Term

    The argument when it comes to building your own PC is that a custom gaming PC might be more expensive if it’s built from scratch as opposed to just buying prebuilt ones.

    Gaming PCs and their components eventually lower in price as newer models come in, so there’s never a reason to not buy certain parts at their current price. If you have to compute the total amount spent on your PC build, you’re almost always going to be a few hundred bucks higher than a prebuilt PC.

    But it’s actually cheaper in the long run. The parts’ quality is guaranteed because you’ve done the research and you’ve picked out the best PC manufacturers for all your components. Prebuilt PCs don’t come with this luxury because the parts inside are compatible with one another. Prebuilt PCs follow a template, much like how manufacturers would build a car. In terms of compatibility issues, you’re more likely to encounter them when you build your own PC but that’s another story in itself.

    Easier to Fix

    Speaking of compatibility issues, a mid range PC or a decent gaming PC wouldn’t have a lot of it as long as the research was done properly before building a PC.

    When a prebuilt PC component needs to be replaced, chances are you need to buy the same component or its equivalent. For example, if you need to replace a true-rated power supply unit, then your replacement will need to be one of those true-rated power supplies.

    If your PC is custom built, you could easily fix or replace parts when you need to. Personal preference plays a huge factor in your ability to save money on replacement, and that’s something you enjoy the most when you’re building your own PC.

    Better Quality Build

    A pre built machine is great and all, but a custom built PC has better quality. You’ve handpicked the parts yourself and ironed out the compatibility issues long before you purchased them. Saving money down the line is no longer a problem because you’re guaranteed that the PC you built is going to last you for a few years before you need to replace a single component.

    What Are The Disadvantages Of Building a PC?

    Unfortunately, there are some disadvantages to building your own PC, so you might want to think it through first. Note that while there’s just a couple of them, it might affect your entire decision in building a PC.

    Expensive Upfront Costs

    Prices of PC parts are going down, but not as fast as we’d like them to go. If you’re going for a budget build, your biggest issue would be to find stocks for your new computer. But on the opposite side of the spectrum, high performance parts may be an issue.

    For starters, the most reliable route right now, albeit a disappointing one, to securing certain parts is paying scalper prices.

    High performance graphics cards like the Nvidia RTX series are a whole lot cheaper when you buy them from reliable stores such as Amazon but stocks are an issue. This is why some builders resort to buying from hoarders, who’re selling these parts at more than MSRP.

    You’d end up spending a few hundred dollars more than your given budget for building a PC as opposed to buying a PC that’s prebuilt already.

    Susceptibility to User Error

    Building your first PC is a challenge, but there are tons of YouTube videos out there that make it easy for you to understand how the process is carried out.

    But that doesn’t exactly guarantee that you’re going to do just fine. Building your PC comes with a huge risk of user error. One wrong move during the build could destroy the whole PC.

    If you’re not confident with your ability to build a PC, either you pay someone else to do it (like a technician from a local PC store) or you buy a prebuilt PC.

    Should You Resort To Buying a Prebuilt PC?

    Alienware Aurora Is It Cheaper To Build a PC

    Now if you don’t want to build a PC, you’re probably thinking of just buying a prebuilt one. It’s the quickest way to have a PC all set up and running at no extra cost or time wasted.

    But just like building a PC, there are advantages and disadvantages to buying prebuilt PCs.

    What Are The Advantages?

    Plug and Play

    Buying a PC is relatively easier than assembling it from scratch. You don’t need to lift a single finger in putting all the parts together, doing cable management, and all the other mundane tasks associated with building a PC.

    A prebuilt PC is plug-and-play as you only need to plug in the monitor, some peripherals, and you’re good to go.

    Cost-Effective

    Prebuilt mid range PCs are cost-effective as you’re already getting it for a price lower than what it would cost you to build your own pc. You’re already guaranteed a good processor, operating system, and other components with decent specs. You’ll also get some that are packaged with decent monitors and other peripherals, so be on the lookout for those.

    What Are The Disadvantages?

    Difficult To Repair

    The final cost of buying a PC accounts for more than just the PC. There are brands out there that use bulk ordered components or cheap components to maintain their margins for prebuilt PCs.

    On the off chance that individual components need to be fixed, or replaced, then you need to find new parts with similar specs. If a graphics card or one of the other core components suffer severe damage, then replacing them might be more tedious and expensive.

    Thankfully, there are decent brands out there that have all the components easy to replace in case of damage. Some brands also allow for purchasing components individually if you want to upgrade the entire PC.

    Build Quality Might Be Mediocre

    Unless you’re getting branded pre built computers (like Alienware or Skytech), you’re probably going to end up with cheap components, like an off-the-shelf graphics card or a processor with lower than normal clock speed.

    The new computer you get might be good at first, but you might still end up with buying upgrades to replace the cheaper parts.

    The Wrap Up

    So which is better, building a PC or buying pre built computers? The answer is it depends on what you need from the PC and how accessible the parts are if you build a PC.

    If logistics are an issue for acquiring parts, then you’re better off with pre built machines. Otherwise, it’s still cheaper to build a PC down the line.

  • What’s The Best Render Engine for Blender?

    What’s The Best Render Engine for Blender?

    Blender is a popular 3D modeling program because it’s free and it’s an open-source software. It has a ton of features that support simulation, compositing, rendering, motion tracking, modeling, and animation. Game production and video editing are also possible with Blender, so it’s no surprise that it’s the most widely used software for 3D artists all over the world. View our list of the best computers for Blender.

    But with its ecosystem comes its downfall as Blender doesn’t really provide you with a powerful rendering solution. Thankfully, it can make use of a third-party rendering engine.

    In this article, we’ll show you the best render engines for Blender and why they’re the best right now.

    What’s a Rendering Engine?

    Sample 3D Rendering Best Render Engine

    A 3D rendering engine, or render engine, is software that converts your 3D scene into an actual model or animation. Rendering is the final stage of the animation or modeling process as animators and modelers add in the finishing touches such as shading and texturing process, motion blur, and other forms of visual effects.

    There are three rendering methods used by 3d artists:

    1. Wireframe – This is a production of an object’s structural frame. It has no surfaces to cover it. Rather, it’s made up of lines and points that shape to the object’s contour.
    2. Solid – The quickest way to render 3D models and makes use of geometrical shapes to form the object.
    3. Surface – This is where the object’s surfaces and edges are defined.

    What’s The Best Rendering Engine For Blender?

    Listed below are the most popular rendering software used in conjunction with Blender. This list is not arranged in any particular order.

    Cycles

    Cycles Best Render Engine

    How Much Does Cycles Cost?

    Free to use

    What Are Its Features?

    Cycles is one of the more popular choices of rendering engine for Blender because of its features and production capabilities.

    Cycles is a path tracer render engine, or path tracing engine if you will, so it’s good at simulating complicated movements coming from light bouncing off of surfaces and its many reactions.

    It also has powerful PBR shading nodes, vector displacement, realistic subsurface scattering, volume scattering and absorption, caustics, and more. Cycles is also constantly updated by its publisher so you can expect it to always have the newest and latest features.

    Cycles also supports Multi-GPU rendering from both Nvidia and AMD graphics cards, and also hybrid GPU rendering and CPU rendering (GPU+CPU rendering).

    What Can’t It Do?

    Cycles currently lacks in caustics, so other rendering software might outperform Cycles. There’a no light linking available in Cycles, which is popular amongst its competitors.

    Redshift 

    Redshift Best Render Engine

    How Much Does Redshift Cost?

    $23 a month, or $274 a year (converted from EUR)

    What Are Its Features?

    Redshift is considered to be a powerful 3D render engine used by the people behind American Gods, and is coming to Blender for use. Redshift license holders are free to try out their beta version for the Blender extension.

    Because of its biased rendering and architecture, Redshift’s GPU rendering is super fast, albeit sacrificing computation accuracy. Users get full control and customization so they get the visual fidelity they need.

    Other features of Redshift include hair rendering, displacement and tesselation, volumetric rendering, and more.

    What Can’t It Do?

    Some functions may not be available from the present version of the addon. These functions include light-linking and motion blur, but development will still continue until the Blender plugin has the same features as the actual Redshift software.

    Chaos V-Ray

    How Much Does Chaos V-Ray Cost?

    Monthly subscription costs you $70 a month, or you can go for an annual subscription that costs you $420.

    What Are Its Features?

    Like Redshift, Chaos V-Ray is a rendering engine used by a lot of commercials, film, and even for feature length animation. The rendering power is solid and readily available for many appliations, including Blender.

    The Blender V-Ray Plugin is free and open-source, which you can download from GitHub. It’s another story if you want to use both V-Ray and Blender altogether.

    What Can’t It Do?

    You’ll need to purchase a Render Node License if you want to interface with the V-Ray Standalone Application.

    Eevee

    Eevee Best Render Engine

    How Much Does Eevee Cost?

    Eevee is free to use, and no, we’re not talking about the Pokemon.

    What Are Its Features?

    One of Blender’s real-time rasterization rendering engine is Eevee. Eevee now comes with Blender 2.80, replacing the software’s internal rendering feature.

    Several of Eevee’s features include subsurface scattering, volume rendering, hair support, and a solid Shader-to-RGB node for NPR shading.

    But what really makes Eevee great to use is that it focuses on filling in the gaps in the feature sets, providing a viable production rendering solution.

    What Can’t It Do?

    Eevee does not have genuine path tracing, making it difficult to create a realistic rendering.

    Workbench

    How Much Does Workbench Cost?

    Workbench is free and is included with Blender

    What Are Its Features?

    The Workbench Engine is th standard engine that powers Blender’s viewport. It’s responsible for guaranteeing smooth performance for tasks performed prior to rendering, texture mapping, lighting, and shading.

    What users like about Workbench is that its features make it easy to handle different tasks at the same time. Tasks such as cavity rendering, outlines, and X-ray options are a breeze for Wokrbench.

    What Can’t It Do?

    Some Blender users are actually attempting to use Workbench for final rendering, but it’s a lot easier said than done.

    LuxCoreRender

    LuxCoreRender Best Render Engine

    How Much Does LuxCoreRender Cost?

    LuxCoreRender is free to use.

    What Are Its Features?

    LuxCoreRender, formerly known as LuxRender, is one of the most powerful physically correct render engines in the market right now, and yes, it’s open-source.

    LuxCoreRender allows you to create physically correct models with ease, thereby outperforming some of the commercial software developed (including Cycles).

    Rendering scenes with heavy refractions is what separates LuxCoreRender from the rest of the 3D render engines in the market. It also has light grouping, something that Cycles (a free rendering software) does not have at this time.

    At time of writing, LuxCoreRender is a favorite among Blender users.

    What Can’t It Do?

    Rendering took a long time with LuxCoreRender, but several improvements were made to shorten rendering time. These improvements focused on performance and GPU rendering.

    Malt/Beer

    How Much Does Malt/Beer Cost?

    Malt/Beer is free to use.

    What Are Its Features?

    The Beer 3D render engine is free and open-source real-time Non-PhotoRealistic render engine for Blender and built using the Malt backend. Malt/Beer was also crowdfunded by the Blender NPR community.

    This 3D render engine might be new to the rendering scene, but it flawlessly integrates into Blender because it was made specifically for Blender. The program’s goal was to improve upon Blender’s Stylized rendering features through the reorganization of shaders.

    Rendering NPR scenes with Beer is easy as you’ll find the features such as rim light and soft edge toon ready for blend.

    What Can’t It Do?

    Like other free rendering software, Beer is still in the early stages of development but you can choose to support the development through crowdfunding. Some features might not be available compared to other render engines in the market.

    OctaneRender (or Octane Render)

    How Much Does OctaneRender Cost?

    OctaneRender has various subscription packages, depending on GPU limit. OctaneRender Enterprise is the most expensive package, costing you 39,95€ (or US$ 40+) per month on an annual subscription.

    What Are Its Features?

    OctaneRender is one of the first GPU render engines to be released and is popular for its rapid rendering features.

    OctaneRender has a spectrally correct and impartial render engine that takes advantage of the RTX graphics cards to create accurate images at rates faster than other rendering engines in the market right now.

    What Can’t It Do?

    The Octane Render plugin is actually Blender with the OctaneRender engine built in (as opposed to having something like Eevee or Cycles). If you use OctaneRender, you may not be able to use shader nodes and editors from Cycles or Eevee.

    How Do You Choose a 3D Render Engine for Blender or any Other Software?

    Out of all the rendering engines for Blender we listed, or for any other 3D software, how do you determine which one’s right for you?

    These are the factors that will affect your decision in choosing the right rendering software or render engines.

    Is It Right For Your Industry?

    The biggest factor that’ll determine what rendering software you’ll use is what industry you belong to. Render engines aren’t exactly multi-purpose.

    For example, if you’re an architect, you’re going to want to go for a rendering software intended for architectural visualization. You’re more or less using something like Rhino or Autodesk Revit, so you’ll need a rendering software that’s compatible with these software. If you’re doing animation or visual effectss, then you’re probably using Maya, Houdini, or Cinema4D. You’d need render engines that will work with these programs.

    The downside here is that some rendering engines are only available to specific applications. Some applications are limited in terms of what they can do, so you’ll need to find render engines that will complement it.

    How Flexible Is The Render Engine?

    As mentioned earlier, 3D artists will have different needs depending on their industry, so the rendering software must be capable of doing everything (or at least close to everything). And by everything, we mean it should be capable of helping you achieve your rendering goals.

    For example, architectural visualization requires billions of polygons to display buildings and interiors as detailed as possible, so you should go for 3D render engines that gives you that.

    How Reliable Is It?

    Render engines gather all the details that they need from your file in order to produce a single image or a frame of animation. When a software is rendering, it needs to carry out the rendering processes without a hitch. Otherwise, you’d end up with a corrupt output.

    Whether you’re rendering a 10-story building with immense foliage or doing visual effects for a short film, the rendering engines you want to work with will need to be consistent and reliable.

    When we say consistent, you’d need a very good engine capable of guaranteeing render quality no matter what the project.

    What Level of Realism Does It Provide?

    On the off chance that you’re a 3D artist that requires photorealistic rendering, then you’d need a rendering engine to give you that. A quick definition of photorealism is how close the 3D subject looks like to its real world counterpart. This could be as a simple as dew mounted on a blade of grass, or an entire workup for a fancy sports car.

    Your rendering software must be able to compute for real-world lighting so your light bounces, refractions, and reflections are accurate. The material you’re rendering need sto obey real-world physics too. If you want to render the swaying of hair against the wind, the movements of the photorealistic rendering should be similar to how hair moves against the wind in real life.

    How Easy Is It to Use?

    Rendering software are not made equal, so the learning curve on how to use some of them will be as different to one another as their real time rendering speed.

    How great is this 3D rendering software in turning your sketch into a masterpiece? And how easy will it be for you to create a such masterpiece? 3D artists want to be creative all the time, not spend hours navigating the learning curve of 3D rendering software.

    What’s the Cost?

    Getting the best rendering tools or engine is one thing, but managing the price is another. Remember when your parents told you about the phrase “not everything in life is free”? Well, it’s the same thing for rendering engines.

    Blender has access to free rendering software like Cycles and Eevee, but they can only do so much and might not be able to meet your demands. If you want a powerful rendering engine, then you’d need to accept the fact that you’ll need to pay top dollar for it, whether it’s a monthly subscription or a one-time fee for a perpetual license.

    How Fast Is The Rendering Speed?

    Real time rendering needs to be fast, period. You don’t want to spend more than a couple of minutes waiting for the rendering to finish. Your rendering engine needs to be able to manage your CPU and GPU power efficiently so you can get it done as quickly as possible.

    Other render engines might not be as capable of combining CPU and GPU rendering, so that might slow you down.

  • AIO vs Custom Loop Cooling Solutions – Which Is Better?

    AIO vs Custom Loop Cooling Solutions – Which Is Better?

    AIO vs custom loop is an endless debate between PC builders. Individually, their cooling performance is on a different level compared to just using air coolers.

    If it’s your first time building a PC from the ground up, you might be wondering about using AIO and custom loop cooling, but don’t know which one to actually use.

    Corsair iCUE AIO Cooler AIO vs Custom Loop

    But before anything else, let’s talk about liquid cooling solutions in general. In reality, there are so many of them out there. There is no ONE TRUE liquid cooling solution, and each of them has its own level of cooling performance.

    What you’ll choose will be determined by how much money you’re willing to spend on a cooling solution and what kind of hardware will need such powerful cooling in the first place. Obviously, a gaming PC will need more cooling performance as opposed to a PC that’s just used for office and productivity tasks.

    In this article, we’ll talk about two popular liquid cooling solutions, namely AIO and custom loop liquid cooling, or what others might call a custom cooling loop or full custom loop.

    Between AIO vs custom loop, which one would be more practical for the average gamer? And which one is better in terms of cooling performance?

    What Is AIO Liquid Cooling or All In One Liquid Cooling?

    Corsair AIO AIO vs Custom Loop

    AIO liquid cooling, or All In One liquid cooling is made up of several parts, namely:

    • Radiator
    • Pump
    • Water block
    • Tubes

    Unlike custom loops, AIO liquid coolers are prebuilt and assembled. It will only take about 15 to 30 minutes to install it in your casing. Because everything’s assembled by the manufacturers, the chances of leaking are close to nil at this point.

    However, cooling performance on a typical AIO liquid cooling setup is lower than a custom loop water cooling.

    Why Even Choose AIO In The First Place?

    An AIO liquid cooler is far more commonly used than a custom loop cooling system and for good reasons. If you’re jumping into the water cooling bandwagon, here are a few good reasons why AIO liquid coolers just can’t be beaten.

    Easy to install

    As mentioned in the previous paragraphs, AIO liquid coolers are easier to install as they’re already assembled by the manufacturers themselves. You don’t even need to fill up the loops or do leak tests because the manufacturers have done it before you did.

    All you really need to do is install the radiator, screw in the fans, mount the water block, and there you have it. Even if you have doubts about your capability to install AIO coolers, there are tons of YouTube videos out there on how to do it properly.

    Affordable

    Top-of-the-line AIO coolers are probably priced at around $200 or $300, but the cheapest custom loop setup could cost at least $500. You see how big of a price difference there is between AIO vs custom loop?

    And the fact is that you don’t need to spend $200 or $300 to get decent performance. You could get yourself a Corsair iCUE H100i Elite Capellix and it will cool your entire gaming PC for years to come.

    Saves time

    This CPU cooler will only take you about 15 minutes to half an hour to install, whereas a custom loop might take you an entire day (and we’re not even exaggerating).

    AIO coolers already come assembled and prebuilt by the manufacturers. It’s a whole system that’s basically plug-and-play at this point.

    Fewer chances of leaking

    We’re not saying that an AIO cooler is leak-proof. Rather, an AIO cooler’s chances of leaking are low. Because the various components are packed already by the manufacturers, they’ll have already done cursory checks on the quality of individual parts.

    The leak tests will have already been done by the manufacturers long before they packed the tubes and various components in. If there ever was a leak, you wouldn’t even know about it because they’d have already replaced it.

    What Is Custom Loop?

    Custom loop, or custom water cooling, is the peak of liquid cooling solutions. Everything about custom looping is handpicked, piece by piece. From the big cooling fans to the radiators to the cables.

    Custom water cooling is a lot more expensive than AIO cooling, and a lot more tedious and more difficult too. Now, AIO coolers only cover the CPU, but a custom loop liquid cooling solution will cover everything from the CPU to the RAM to the GPU.

    The downside? Apart from being expensive, they require regular maintenance.

    Why Bother With a Custom Loop Then?

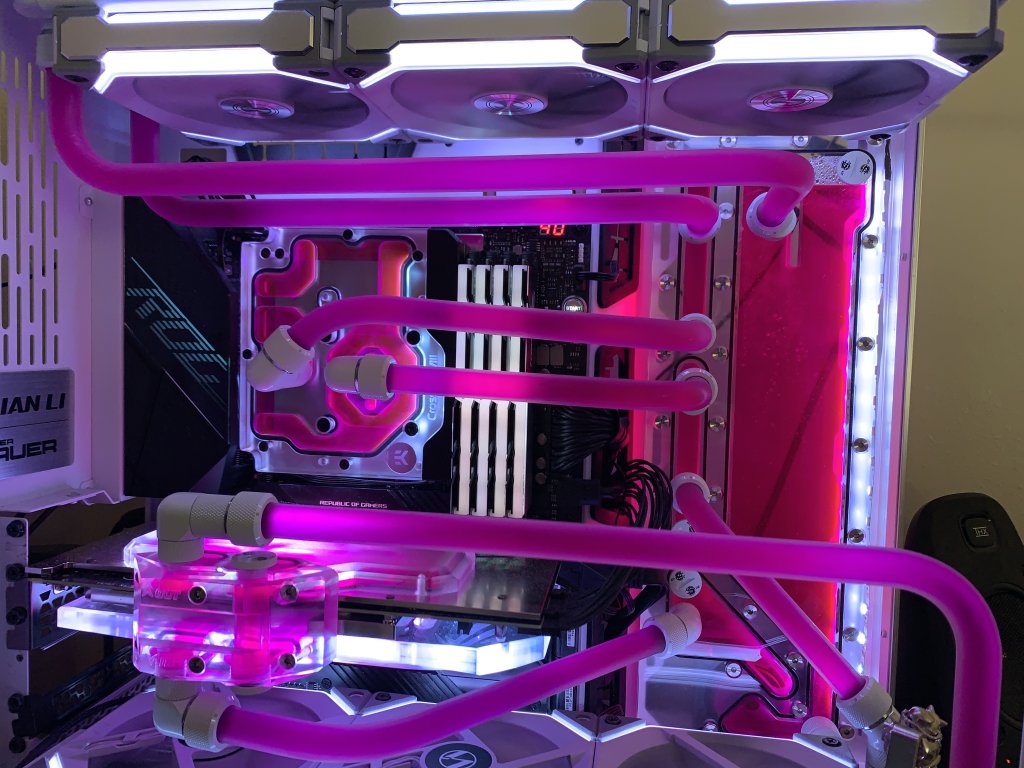
    Purple and Pretty System AIO vs Custom Loop

    If AIO liquid cooling can do the job, why do people even want to bother with a custom loop? Well, an AIO cooler only covers the CPU block and does not include all the other hardware. It’s a potent CPU cooler if you really want to describe AIO cooling in a couple of words or less.

    For custom water cooling, this is where the big boys come and play. These are the people who’re mindful about both thermal performance and cooling performance. The people who run a custom loop liquid cooler will need all the cooling help they need as they push their hardware to the limit.

    So what kind of benefits do PC builders get from these powerful coolers?

    Performance

    One thing that people overlook when it comes to a full custom loop is its unparalleled performance. And the reason why you’re getting the best performance is that your custom water cooling loop is composed of top-of-the-line parts.

    Aesthetics

    Custom loop systems are simply beautiful to look at. We’re not just referring to colored liquid coolant running down through the pipes, but how the entire gaming PC looks with it.

    Covers Whole System

    An AIO cooler only covers the CPU, whereas the custom loop will cover everything on the system unit. Your graphics card, RAM, and even your power supply are cooled off with a custom liquid cooler.

    Much like Lord of the Rings, the custom loop is the one liquid cooler to rule them all.

    The Wrap Up

    All right, between AIO vs custom loop, which one is better suited for you?

    If you want reliability and affordability, an AIO cooler is better suited for you. It does a good job of keeping your CPU block cool, but that’s about it. It’s far better than using an air cooler for sure, but AIO can only do so much.

    But if you have the money to spend and you want your PC to look like something out of Cyberpunk 2077, then a custom water cooling loop is the one for you. However, you’ll need to spend a lot of money to get the best custom cooling system possible.

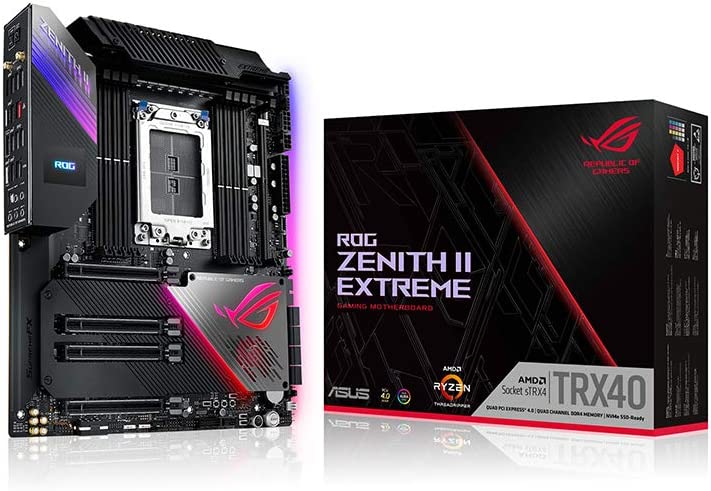
  • What Is The Best Threadripper Motherboard In The Market?

    What Is The Best Threadripper Motherboard In The Market?

    The AMD Threadripper needs no introduction. Just by the name itself, it’s already considered as one of the best and most powerful processors in the market right now.

    The Threadripper CPU is a masterpiece that showcases AMD’s ability to balance performance, value, and extensibility. Even with a massive price tag, the sheer power you get with any Threadripper CPU makes every penny spent worth it.

    But with such a powerful processor, you need a powerful motherboard. Other motherboards won’t just cut it because Threadripper CPUs need a TRX40 motherboard socket.

    In this article, we’re listing down the best Threadripper motherboards that money can buy. These are not arranged in any particular order, but take note of the pros and cons as they’ll be a huge deciding factor as to whether or not it’s worth buying for you.

    What’s In A TRX40 Motherboard?

    Threadripper CPUs are particular about their motherboards, mostly because of the socket they use. AMD Threadripper needs a TRX40 socket, so you’ll need a motherboard with that socket.

    But even if you don’t have a Threadripper CPU, there are still benefits to buying a TRX40 motherboard.

    1. TRX40 motherboards have optimized power solution, ensuring that it powers not just a Threadripper 3990X easily but other CPUs as well.
    2. In terms of form factor, A TRX40 motherboard is a new type of size: an XL ATX motherboard. This means you’ll need a beefy casing to house this beast.
    3. Incredible PCIe slot spacing is great, especially if you’re using those gigantic RTX graphics cards.
    4. 10G LAN and WiFi6 connectivity options are part and parcel of any TRX40 motherboard.

    Now, an entry level TRX40 motherboard will cost you about $600, but at this point, that doesn’t really matter seeing as how you’ve easily gotten your hands on a Threadripper CPU.

    What’s The Best Threadripper Motherboard In The Market Right Now?

    Listed below are some of the best Threadripper motherboards that money can buy. Every one of them is capable of guaranteeing optimum performance, optimized power delivery, and more.

    ASUS ROG Zenith II sTRX4 EATX Motherboard

    ASUS ROG Zenith II sTRX4 EATX Motherboard Best Threadripper Motherboard

    ASUS is a brand that needs no introduction. They’ve always been at the forefront of the motherboard market for many years now because of their high-performing motherboards and now, they’re breaking into other markets such as gaming laptops, paraphernalia, and more.

    On this list, we have the ASUS ROG Zenith II sTRX4 as one of two contenders from their brand. At a glance you get 4 PCIe x 16 slots for your graphics cards, a total of 8 RAM slots, and at least five M.2 PCIe storage slots. It’s literally one of the most robust TRX40 motherboards out there.

    For connectivity, you’re getting Bluetooth 5, WiFi 6 port, an Aquantia ACQ-107 Ethernet port, and 1Gbps LAN port. You also get a 16-phase VRM, guaranteeing optimal power delivery to the new Threadripper CPU. And yes, it’s got enough juice to power the up and coming 64 cores 2990x Threadripper (not released yet).

    It’s one of the best AMD threadripper motherboards out there in the market right now, but it’s also one of the most expensive motherboards on this list.

    Is it worth it? Yes, the ASUS ROG Zenith II sTRX4 is definitely wroth every penny. It’s perfect for quad GPU setups, overclocking, and more.

    ASUS Rog Zenith Extreme Alpha X399

    Asus Rog Zenith Extreme Alpha X399 Best Threadripper Motherboard

    If you’re planning on getting a 70X Threadripper or Ryzen 3960, the ASUS ROG Zenith Extreme Alpha X399 is the perfect motherboard for that.

    Like its big brother, the Zenith II, the ASUS ROG Zenith Extreme Alpha X399 is a high-end gaming motherboard. It comes with the Gamefirst V Network control software, which gives you full control over which applications to prioritize when they’re running at the same time.

    You also get a fancy built-in color OLED LiveDash display that shows you BIOS status updates, CPU temperatures, fan speeds, and more. The lighting effects can be controlled via the Aura Sync Application.

    Enough talk about aesthetics, let’s move on to the boring parts. For slots and VRM, the ASUS ROG Zenith Extreme Alpha X399 couldn’t get any better. Like its big brother, the ASUS ROG Zenith Extreme Alpha X399 comes packed with five PCIe 4.0 M.2 sockets, 8 SATA 6Gbps slots, and 16-phase configuration with TDA21490 A power stages. You get nice connectivity options as well with 802.11ax WiFi 6 and 10GBps LAN speeds thanks to the Aquantia AQC-107C chipset.

    The ASUS ROG Zenith Extreme Alpha X399 is one of the best Threadripper motherboards out there, or if you’re just looking for something to use your Ryzen 3960 processor with.

    ASRock MB TRX40 Taichi

    ASRock MB TRX40 Taichi Best Threadripper Motherboard

    Similar to ASUS, ASRock is one of the most reliable and trusted brands for motherboards. For their TRX4o motherboard entry, we have the ASRock MB TRX40 Taichi and is a solid pick when it comes to housing a Threadripper.

    You get a high-performance cooling system, so overclocking is possible with the ASRock MB TRX40 Taichi. You get four M.2 slots and support for up to six M.2 key-M solid state drives (SSD).

    But the downside to the ASRock MB TRX40 Taichi is that the fan headers and CPU-power are poorly-placed, so it might be stressful when it comes to building up the entire PC.

    Other than that, the ASRock MB TRX40 Taichi is robust and solid for what it has to offer.

    GIGABYTE TRX40 AORUS Xtreme

    GIGABYTE TRX40 AORUS Xtreme Best Threadripper Motherboard

    Gigabyte TRX40 AORUS Xtreme is a powerful TRX40 motherboard since it can accommodate a 3rd generation Threadripper CPU for excellent gaming performance. But the price is very steep.

    Gigabyte TRX40 AORUS Xtreme is equipped with a powerful cooling system that helps keep temperatures in check. The massive heatsink is aesthetically pleasing to look at.

    But you don’t really get the Gigabyte TRX40 AORUS Xtreme for its cooling system. You’re getting it for what it has to offer.

    First, the Gigabyte TRX40 AORUS Xtreme gets you Gen4 A/C Adaptor, four M.2 NVMe slots with thermal guard, and 10 SATA 6GB/s connectors. You also get four PCIe x16 slots for your graphics cards. For audio, you’re getting the Realtek ALC4050H codec that gives you high-quality analog and digital sound.

    Connectivity-wise, you get two Aurois antenna and Bluetooth 5. Other ports also include seven Type-A back panel, and rear and front USB 3.2 Gen2 Type C ports.

    Now, is the Gigabyte TRX40 AORUS Xtreme worth every penny? Yes it is.

    Is it the best Threadripper motherboard? It’s one of the stronger contenders on this list for sure. But we’re not done yet.

    MSI Creator TRX40

    MSI Creator TRX40 Best Threadripper Motherboard

    The MSI Creator TRX40 is a solid gaming motherboard that not only appeases to gamers, but also to custom rig builders. Aesthetics-wise, the MSI Creator TRX40 features Mystic Light, providing support for up to 29 lighting effects and 16.8 million colors. If RGB lighting is your thing, look no further than the MSI Creator TRX40.

    But that’s not the only good thing about this motherboard. You get the enhanced thermal solutions including extended heatsink, Heatpipe, and a frozr heatsink.

    You also get some decent number of USB 3.2 Gen2x2 ports, 8 RAM slots, 6 SATA ports, four PCIe x16 slots with 3-way SLI support, and WiFi 6 connectivity. The MSI Creator TRX40 is fast, packed, and more than capable of being equipped with the latest gaming hardware.

    If you want a solid backbone for your gaming rig, look no further than the MSI Creator TRX40.

    GIGABYTE TRX40 AORUS PRO WiFi

    GIGABYTE TRX40 AORUS PRO Best Threadripper Motherboard
    GIGABYTE TRX40 AORUS PRO Best Threadripper Motherboard

    Another entry from the Gigabyte brand is the Gigabyte TRX40 Aorus Pro WiFi. It’s not as aesthetically pleasing as the MSI motherboards, but the Gigabyte TRX40 Aorus Pro WiFi is a high end motherboard with all the right features necessary to support a Threadripper CPU.

    The Gigabyte TRX40 Aorus Pro WiFi comes with a 16+3 power for robust power delivery for the newest line of Threadrippers. You also get 10 SATA 6Gbps ports, 4 M.2 slots, 4 PCIe x 16 slots, and 8 RAM slots, making it the perfect motherboard for dual GPUs and other extreme gaming rig setups.

    MSI TRX40 PRO 10G

    MSI TRX40 PRO 10G Best Threadripper Motherboard

    Now, we couldn’t really complete this list without a budget option. And by budget option, we mean something that doesn’t really hurt your wallet as much as the other contenders.

    If you’re tight on the budget, then you should secure the MSI TRX40 PRO 10G. It’s a solid budget alternative for supporting AMD Threadripper CPUs. But don’t be fooled by its price. It’s still got a lot of features.

    But what do we like the most about the MSI TRX40 PRO 10G? Well, the heatsink is more powerful than any of the motherboards out there, that’s why the MSI TRX40 PRO 10G is a sought-after motherboard for the AMD Threadripper CPUs.

    The MSI TRX40 PRO 10G uses a 3-phase SOC and 6×2 phase 90A ISL99390 power stages, making it possible to power 3rd generation AMD Threadripper CPUs. Overclocking won’t even be a problem at all.

    The only thing that doesn’t really make the MSI TRX40 PRO 10G stand out from the rest is that it doesn’t have a built-in wireless connection. If it did have wireless connectivity, this would be on top of our list.

    The Wrap Up

    If you want our recommendation for the best threadripper motherboard, we’re torn between the ASUS ROG Zenith II and the Gigabyte TRX40 Aorus PRO Xtreme. Both are great choices and equally expensive, but the features are well worth it. They’ll easily last you at least five to ten years.

  • How To Update BIOS without CPU

    How To Update BIOS without CPU

    One of the most unfortunate things to happen after building your PC is your motherboard not booting. If this happens, you’ll need to update the BIOS. But how exactly do you update BIOS without CPU?

    Isn’t the point of turning on your PC the first time is to make sure that everything’s working? Well, don’t worry. In this article, we’ll show you how to update BIOS without CPU and other tricks you’ll need in the future.

    Aorus Motherboard Update BIOS without CPU

    What Exactly Is a BIOS Flashback?

    BIOS flashback is a common feature found in motherboards that allows you to update your PC’s BIOS without installing memory, GPU, or even a CPU.

    Depending on the brand of motherboard, flashback is referred to as the following:

    1. Gigabyte motherboards call it Q-Flash Plus (not the same as Q-Flash, which is the software used to update the firmware from within the BIOS).
    2. MSI motherboards call it Flash BIOS Button (not the same as M-Flash, MSI’s update utility).
    3. ASRock motherboards call it BIOS Flashback Button.
    4. ASUS motherboards call it USB BIOS Flashback

    If you want to know if a motherboard has a BIOS flashback, you’ll need to check the manufacturer’s sheet or the website itself. On the spec sheet, it will appear as the name as it’s listed on here.

    What If Your Motherboard Does Not Have BIOS Flashback Feature?

    On the off chance that your motherboard does not have a flashback feature, don’t worry. There’s still something that you can do. First, you need to acquire a fresh and formatted FAT32 USB flash drive.

    What Do You Need a FAT32 USB Flash Drive For?

    A FAT32 USB flash drive is what you need to boot up your motherboard’s BIOS without a CPU. Now, users flocked to Reddit citing that new USB 3.0 drives have certain issues when it comes to doing BIOS flashback updates. This is not guaranteed for everyone, but to be on the safe side, just use a USB 2.0 flash drive when possible.

    BIOS software and updates are relatively small, so you’d only need a USB flash drive that’s about 16GB or smaller. But the main reason why you shouldn’t use larger flash drives is that older motherboards may have problems detecting them.

    How Do You Update BIOS Without CPU or Do BIOS Flashback?

    Check your Motherboard’s Official Website

    Download the BIOS update file from the motherboard’s manufacturer website using another laptop or desktop. Never download any BIOS files outside of official manufacturer websites.

    Do a quick search for your motherboard model on Google and it should take you to the official manufacturer’s page for that model.

    Download the BIOS Update

    Once you’re on the motherboard’s official page, click on Support tab (or its equivalent), then go to the BIOS section. This is usually found under Drive and Utilities.

    You should see different BIOS versions alongside their release dates, but the more recent updates are located at the top of the list. Always download the latest BIOS version when you have to.

    However, if the latest BIOS version has something with “BETA” affixed to it, don’t download that version if it’s only less than a week old. If not, then just download that version still.

    Extract Download and Rename BIOS File

    After downloading the file, extract the file first and then rename the BIOS file.

    If you have an ASUS motherboard, it should come with a BIOSRenamer.exe utility. Just double click that and it will automatically rename the file. For MSI, Gigabyte, and ASRock motherboards, you’ll need to rename the file by yourself. Just look for the BIOS file, which should be the file with the largest file size in the folder.

    Then rename them by following these formats:

    • If you have a Gigabyte motherboard: rename the file to gigabyte.bin
    • If you have an MSI motherboard: rename the file to msi.rom
    • If you have an ASRock motherboard: rename the file to creative.rom

    You’ll get a warning prompt saying that renaming might make the file unstable. Click Yes because this is a normal message prompt after renaming. It doesn’t matter if you use uppercase letters or lowercase letters as Windows reads them the same.

    Format USB Drive as FAT32 and Transfer BIOS File

    Plug the USB flash drive in and open My Computer or My PC (Windows 10/11). Right click on the drive and click Format. Select the FAT32 option and not NTFS.

    If you recently formatted a flash drive but unsure of whether or not it’s FAT32, just right click on it and select Properties.

    Copy the BIOS file (the one that you renamed) into the main directory or root of the USB flash drive.

    Eject USB Drive from the PC You’re Using and Connect Power Supply To Your Motherboard

    Eject your USB flash drive from the PC properly.

    On the motherboard that you’re planning to update the BIOS, connect the power supply. But before you plug it into the wall, make sure that you connect the large 24-pin main motherboard power connector and 8-pin CPU power connector.

    Yes, you’ll need to connect the CPU cable to the power supply even if you don’t have a CPU installed on there. Once all the cables are connected, plug the power supply to the main socket.

    Insert USB Drive and Press Flash BIOS Button

    Flash BIOS Button Update BIOS without CPU

    Remember, for this part, you don’t need any other parts mentioned on your motherboard other than the ones mentioned in the previous paragraph.

    Insert your USB on the special USB port behind the motherboard. This special port is labeled as BIOS or some equivalent.

    IMPORTANT: make sure that the power supply is turned on BEFORE inserting the flash drive. Some people have done the reverse and faced several issues. Manufacturers will also tell you to turn the power on before inserting the flash drive.

    Once the flash drive is inserted, locate the small BIOS flash button somewhere next to the USB port on your motherboard and press it. Some motherboards will have it on the actual board and not behind the motherboard. For Gigabyte motherboards, the button will be labelled as Q-Flash Plus.

    On some motherboards, like ASRock, you’ll need to hold down the button for three seconds. If your motherboard is MSI or Gigabyte, you’ll need to press down the button for three seconds if nothing happens the first time you pressed it.

    If done correctly, the firmware will update itself with the BIOS file installed on the USB drive. This shouldn’t take you long but just make sure that there’s no power interruption as you’re updating.

    When the update is complete, the LED light will stop flashing and the motherboard will either restart or shut itself off.

    You can now remove the USB drive, turn off the power supply, and proceed to install all the remaining parts (i.e. CPU, GPU, and so on).

    The Wrap Up

    Now you know how to update BIOS without a CPU. It’s worth mentioning that there’s no actual need to update your BIOS unless you absolutely have to.