Imagine playing a game of Fortnite, Call of Duty Warzone, or any first-person shooting game. You’re having fun playing with friends, and all of a sudden, you get dropped from a mile away by a headshot. As you’re spectating your body, you see the one who killed you approach and repeatedly made the sitting and standing movement right over your face.
You see this go on and on for a few seconds before you respawn, and then just when you think it’s over. You die again, and two other opponents join in and start to do the “sitting and standing” movement right on top of your face again.
This is a prime example of BM or Bad Manners (bad manner, if you will), and it’s one of the biggest problems in the video game community.
What Does BM Mean In Gaming?
BM stands for Bad Manners or Bad Manner, and is a gaming term or slang referring to any form of toxic, unsportsmanlike conduct, and disrespectful behavior towards other players.
The gaming community, as a whole, is made up of good people. But there are other players out there who make the game unnecessarily a bad experience for their fellow gamers. In other words, it’s being a bad sport before, during, and even after a game.
With the rise of esport’s popularity and becoming more mainstream, popular games are gaining more players who’re just in it to play casually. These are the players who aren’t into gaming that much, but would love to take it up as a new hobby.
What Does The Prevalence of BM Mean For The Gaming Community?
BM is one of those new slang terms that refer to any action that may give the other player a negative experience in any game. For new players just getting into a particular game, BM means a lot of things.
For one thing, a new player being exposed to bad manners early on within that game’s gaming community is a form of gatekeeping. In gaming terms, gatekeeping is when older or veteran players are trying to stop new players from enjoying the game because they don’t like to share the experience. These older players hope that these new players will just give up on the idea of getting into the game.
For example, let’s have World of Warcraft. When new players are flocking towards a new server, older players will take advantage of them by making characters from the opposing faction. In this case, if the server is predominantly Horde, these older players will make Alliance toons. Then they’ll basically try to make these new players’ lives a living hell by taking their kills or ganking them. Any negative behavior that prevents new players from having a normal and decent experience in-game is considered as BM.
What Are The Different Types of Bad Manners?
More often than not, there are different types of bad manners exhibited by different players across different games. This article will categorize these different bad manners into the following:
Verbal
Action-Based
Mind Games
Verbal
Verbal BMs, or bad manners, manifest through trash talk, or making negative statements in a negative way that target the other players’ religion, race, and sexuality among other things.
It’s one thing to have friendly banter with opponents, but it’s already considered BM when the trash talk is already personal or directly attacks the player outside of what he or she has done in game.
What does verbal BM mean in gaming? Well, it’s a gateway to cyberbullying. Apart from putting the player in a bad mood, there is a tendency for the perpetrator to constantly throw out racist, sexist, and other derogatory statements.
Action-Based
What does action-based BM mean in gaming? This category of BM is carried out through various actions, emotions, or tactics within a particular game that will affect the other players’ negatively.
Going back to World of Warcraft as an example for an action-based BM, your opponent will purposefully kill all of the mobs that you need to kill using his or her higher level toons. With this action, you’re unable to move forward with your quest and you’ll end up losing your patience or motivation to continue on with the quest as long as the opponent is still around.
Other examples of action-based BM is tea-bagging, which is a common occurrence in first-person shooting games. When a player gets killed, the opponents stands on top of them and proceeds to repeatedly press the “crouch” and “stand” buttons. Tea-bagging is a disrespectful way to celebrate a victory against an opponent, and is often a bannable offense for some games.
Spamming taunts in an MMORPG is also considered an action-based BM.
Mind Games
Bad manners that fall under this category are very discrete, so much so that you don’t even realize that you’re already a victim of it. We say discrete because this type of BM doesn’t attack a player directly, or even in a disrespectful way.
This type of BM is meant to affect the player’s performance or mindset heading into the game. One common type of mind game is called “Dragging It Out”, and we’ll use Magic the Gathering: Arena and Hearthstone as examples.
An opponent dragging it out is making you wait for a long time unnecessarily. In Magic The Gathering, it’s called Roping. The opponent will literally take their sweet time wasting one turn by consuming the allocated turn-time. If a turn is 30 seconds long, he or she will make one action and proceed to consume that turn or phase until the next reset. As a result, you’ll want to quit the match because you want to move on to the next one.
In Hearthstone, players are often spamming taunts and premade statements from their characters repeatedly to drive you nuts. The point and meaning of spamming taunts and one-liner is to make you lose your focus or concentration for that match, among other things.
What Games Are Most Popular For BM?
Video games that are competitive in nature have a higher occurrence for toxicity, bad manners, and unsportsmanlike conduct. Prime examples of games that are known for being toxic are League of Legends and Dota 2, with players quitting left and right just because of the BM they get from the enemy team.
Bad mannered players will always proliferate different games, and these types of people are just unavoidable at this point.
What Can People Do Against Bad Mannered Players?
Bad mannered players are found in all games, but it doesn’t mean that we can’t do anything about them. A gaming community is only as good as the people that knows what to tolerate.
When it comes to bad mannered players, the logical thing to do is to just ignore them. They’re playing the same game like you are, but the goal of their gaming is far from yours. These BM players aren’t in it to enjoy the game, but they just want to deal as much damage emotionally and mentally to their fellow players in game.
Another thing to do for the worst types of BMs is to report them to the admins. Gaming publishers aren’t exactly lenient to people who like to play the BM card every now and then. Depending on the nature of their actions, bad mannered players get banned or suspended for a period of time. Worst case, their account gets deleted or removed completely.
You’re sitting there, chilling, playing games on your latest PC build, then one moment your screen flickers, and the last thing you see is your reflection on a black screen. You’re utterly confused and surprised at the same time.
You still hear the audio coming in, but there’s no display. It goes on like this for a minute or two, then the screen comes back to life. You then see a message on the screen saying that the display driver was unresponsive. It recovered now and you’re thinking to yourself: what if this is the start of many display issues?
Has this ever happened to you? If it hasn’t, you should know that what has been illustrated isn’t a display issue but more of a driver issue. Don’t rush into thinking that you’re going to need to replace your graphics card soon.
All you really need to do to resolve this issue is to reset your graphics driver. But how to reset graphics driver, you might be wondering. For starters, problems with your GPU is mostly hardware-related most of the time, but there are rare cases when it’s the software or driver itself. In even rarer cases, you might just need to clean your graphics card every now and then to resolve certain display issues.
But if it’s a software problem, chances are you’re dealing with a faulty driver update or something to do with you overclocking your GPU. Your best solution here is to troubleshoot the device before it’s too late.
And the first thing you will always need to do is to restart graphics driver. And we’re going to show how to reset graphics driver, regardless of the manufacturer and how old it is.
How To Reset Graphics Driver the Right Way
A quick way to reset graphics driver is to press four buttons at the same time (Win+Ctrl+Shift+B), regardless of operating system. If you’re not a tech enthusiast, “win” refers to the Windows button on your keyboard.
Your screen will flicker to black and your graphics driver will automatically restart. It will also fix any issues you’ve been having that prompted you to restart in the first place. Doing the Win+Ctrl+Shift+B reset will not close your other programs, so you can instantly remedy instances of freezing issues and other display issues.
If you’re a gamer, chances are you have disabled your Windows key so be sure to enable it first before you use this method.
The Freezing Persists After Win+Ctrl+Shift+B Key Combination. What Do You Do Next?
After you restart graphics driver using the method above and the freezing persists, your display driver might have a more complicated problem. If the freezing persists, you can use one of these three methods:
Update Windows
Update The Graphics Card Driver
Uninstall and Re-install Graphics Card Driver
#1 – Update Windows
When you still have to deal with a frozen screen, updating your Windows might be able to solve your problem.
Press Win+I keys. This will open up the Settings Window. You can also click on the Windows Icon and click on the Gear Icon (if you’re on Windows 10) to go to the Settings Window.
Go to “Update & Security” , then make your way to the right pane and click on the “Check for Updates” link/button.
If there are pending updates, the system should automatically install after they have downloaded.
Manually restart your PC to complete the driver installation
Wait and see if you still have freezing issues. You can do this by playing a game or running a program that’s taxing on your GPU. If the freezing still occurs, proceed to the second step.
#2 – Uninstall And Re-Install Graphics Driver
When updating your windows operating system doesn’t work, you might need to reinstall your graphics driver. You’ll have to uninstall your current graphics driver first to do this. Don’t worry because Windows will automatically find the right graphics drivers for your PC.
To do this, you need:
Use the keyboard shortcut Win+R keys to open the Run dialog box
Type in “Devmgmt.msc” (without quotes) and then press Enter. This will open Device Manager without using the Ctrl+Alt+Delete method.
Click on Display Adapters and right click on your graphics card icon. This will open a short tab underneath. Click on “Uninstall Device”.
Once you successfully uninstalled your graphics driver, Windows will install a new one. You can also browse for the driver itself on the manufacturer’s website.
#3 – Update Graphics Driver To Latest Version
If you don’t want to uninstall your graphics driver, you can update the graphics driver instead. This might also fix the problem. There’s also a chance that your Windows PC might not reinstall your graphics driver after restarting.
Navigate your way to the bottom left corner and right click on the Windows icon
Click on Device Manager from the menu that pops up
A new window will open. Look for Display Adapters and double click on it. This will show you your graphics properties, including the graphics drivers.
Click Update Driver from the new window
Restart your PC
Check for freezing by running a game or a graphically-demanding application.
Another thing to note is that you can use your manufacturer’s software to update your graphics drivers as opposed to right clicking on the start menu. If you’re using an Nvidia graphics card, you can update via Nvidia Control Panel instead.
What If My Display Drivers are Corrupted?
A corrupted driver is an uncommon problem for all hardware components. It usually happens when you’re currently updating and installing a driver but the process is interrupted. When you reset your graphics driver, you’re only trying to restart the graphics card. This will not fix a corrupted driver.
If you’re faced with a corrupted driver, you’re going to want to install a new graphics driver or the latest version.
To reinstall your graphics driver, just do the following:
Open the Run dialog box by click on Start Menu or Windows Icon, or use the keyboard shortcut Win+R. Type in “devmgmt.msc” and hit Enter.
Go to Display Adapters and click on it to expand the menu. Right click on your graphics adapter and click Uninstall.
Restart your PC to complete the process.
This will then force Windows to install a new driver after restarting. Then do step #3 listed above this section.
What Are Some Precautions You Need To Be Aware Of?
If the problems still persists even after you’ve done all the other steps above to restart graphics driver or reinstalling them, chances are you might have a bigger issue than just your graphics drivers.
You don’t want to keep on resetting or refreshing your graphics card driver using the keyboard combination of Win+Ctrl+Shift+B because you might end up bricking the GPU itself. Just use this keyboard shortcut when you have to, or in dire emergencies when you have not saved your work but need to do something about your frozen screen.
If you’re unsure about why you’re still having problems after having done all of the steps above, it’s a lot safer to assume that you might have hardware issues. You’ll want to bring it to a computer technician and see what they can do from there.
How Do You Reset GPU Overclock Configurations?
An uncommon problem to frozen screens or display issues in general is when you overclock a GPU. Now not everyone overlocks but there are a few that do. Overclocking is when you’re trying to boost your GPU’s performance further by increasing its clock speed. Manufacturers will also make it clear that you can overclock their GPUs by adding the letters OC on their boxes.
If you overclocked your GPU, you can reset your configurations using the same software. If you’re using something like MSI Afterburner, you’ll find the reset button at the bottom of the UI.
How Do You Reset GPU Software?
When you install a certain brand of GPU (like Nvidia), you’ll also install a control panel of sorts that will help you manage your GPU. For Nvidia, you’ll have Nvidia Control Panel and Nvidia GeForce Experience. The latter, unfortunately, needs to be downloaded manually because it doesn’t install along with the Control Panel. For AMD, you’ll have AMD Radeon Settings. Both are found on your taskbar and are always turned on when you turn on your PC.
In rare cases, your GPU software might actually be causing some problems. For Nvidia, all you have to do to reset the software is to right click on the icon and open the Panel. Click on 3D Settings, and click Restore Defaults.
If you’re using AMD, right click on the icon to open the panel then click on the Preferences button. Click Factory Settings Default to reset the software. This process will take a few seconds to complete and might remedy your GPU issues if resetting graphics driver did not work for you previously.
There are several reasons for you to ask “what kind of laptop do I have?”, and it’s not exactly a bad question either. It’s important for you to know what your laptop’s device specifications are in order to determine the following:
do you need to upgrade certain parts?
are you planning on installing software or games on your laptop?
is your Windows laptop running as it should be?
is my laptop using hardware resources properly?
All these questions and more can be answered when you know what your laptop’s exact model is.
How Do You Check Your Laptop’s Specs?
If you’re planning on buying a new game, or installing a new software, then it’s not enough to find the model number. Granted, you can still find the model number and input it in Google to find out what laptop model you have, but this may not be a good idea if you have a refurbished laptop. Chances are, some parts might’ve been upgraded or replaced.
How To Find Out What Your CPU or Processor Is
Not all laptops will have a small system summary stuck near their keyboard panel, so this info might not be available at a glance.
This is relatively easy, but there are other methods as well. You just right-click on the Windows icon, which is found on the bottom left part of the screen. You’ll see a list of options after, but click on System. You’ll want to go through the section called “Device Specifications”, which should be halfway down the list.
How To Check Your Motherboard
Go to the search bar and type in “System Information”. Then click on “System Information” when it shows up. You’ll see a lot of information about your laptop model on here.
But what you should be looking for is the field titled “Baseboard Manufacturer”. This is your motherboard, and you’ll know what model you have and what its specs are on your laptop.
Knowing what motherboard you have will let you know what slots are available on that laptop in case you want to add more hardware (like RAM or SSD).
How To Check Your GPU
If you bought a new laptop and you want to find out if it can run the latest games, you can double check for what kind of GPU you have. Note that GPUs on a laptop aren’t exactly similar to a PC GPU. For one thing, you can’t upgrade GPUs on a laptop. Second, the specs may not even be the same to an extent. For example, specs of a GTX 1660 on a PC might be different than a GTX 1660 installed on a laptop. This isn’t exactly detrimental, but you should manage expectations on what you can and can’t do with your laptop graphics card.
To identify what kind of graphics card you have, just go down to the Windows button on the far left corner and click on it. Open Control Panel. Select Device Manager and click on the tab that says “Display Adapters”. You should be able to see both the onboard GPU (the one that’s tied to your and dedicated GPU (if ever there is one).
How Do You Find Your Laptop’s Model Number?
To answer the question “what kind of laptop do I have?”, there’s one important piece of information that you need to have: your laptop’s model number. This singular piece of information can answer some of the questions that you might have. A laptop model number is located at the back or at the bottom of your laptop’s chassis. Not all laptops might have this information readily available, but don’t worry.
Just flip your laptop upside down and you should be able to find the laptop model number immediately. If it’s not found at the bottom of your laptop, jus turn it on and go to Control Panel.
Select System and Security, and then click on System. You should see every hardware detail on the system information window, including your laptop’s model number displayed on the computer screen.
How Do You Determine What Kind Of Laptop You Have?
Okay, now that you know your exact model number, and maybe even the serial number, it’s time for you to learn how to find out other useful details about your laptop.
Finding The Serial Number
If you want to know where you can find your laptop’s serial number, just flip it over and you’ll find it at the bottom cover. Instead of looking for the model number, you’re now looking for the serial number. These pieces of information are bundled up together in one corner of the laptop, but not all laptops will have this readily available.
Serial numbers are unique to each product, brand, and model. This is used for warranty purposes and ownership identification. In case your laptop gets stolen, you can use your laptop’s serial number as a way for people to keep an eye out if it’s getting sold.
When you purchase a laptop, or computer hardware in general, serial number is used as part of the financial transaction. This is listed on the official receipt and warranty card. If you used a credit card to purchase your laptop, that serial number is tied to your credit card information.
On Top Or Below Keyboard Panel
You can also find pieces of information about your laptop posted right below or on top of the keyboard panel. At a glance, you’ll know what operating system you’re running, how much RAM it has (by default), the model name, graphics card, processor, and more through stickers or a small label.
If your laptop is refurbished, there’s a small chance that the previous user might have done upgrades on it before selling it. You can easily verify if there are upgrades previously done by checking the device manager.
This is one of the few ways that laptop manufacturers make it easy for their users to find out what kind of laptop do they have.
Using the Control Panel
In case you don’t know how much RAM you have or what kind of processor you’re running because the laptop you bought doesn’t have the stickers on labels, fret not. You can always find these pieces of information and more through the Control Panel.
Just click on Windows button and click on Control Panel (or the Gear icon if your operating system is Windows 10). You can also use your search bar found on your taskbar too. Just type Control Panel and hit Enter button. You’ll see the System and Security Window open up.
Then click on the System link, and you’ll see all the other details you have on your laptop, including the model number.
Using Windows System Information
In the event you can’t find the information you need using the three steps above, don’t worry. You can always use the System Information App. The process is different for each Windows OS, but we’ll show you how to do that for Windows 7, 8, and 10.
Windows 10
If you’re using Windows 10, just navigate your way to the little search bar on the bottom left part of the screen (if it’s enabled), and from there, type in System Information and Hit Enter. You’ll see a little pop-up window and scroll your way down until you see a field titled “System Model”. You just found the exact model number of your laptop.
Windows 8
Things are different with Windows 8. Start the process by opening the Search option. Type in “msinfo32” and you’ll see a search results window open up. You should see a search results, one of which is titled “Msinfo32”. From there, you’ll see a field titled “Model”. You now know how to check model of the laptop if you’re running on Windows 8.
Windows 7
Click on the Start button at the bottom left part of the screen. Click on the Search Bar and type in “System Information”. You’ll see a list of search results after you hit the Enter button. Click on System Information and you should see the field called “System Model”. This info is your laptop’s exact model.
Closing
There you have it. That’s how you answer the question “what kind of laptop do I have?”. You now have enough information about your laptop to let you determine if you need to upgrade certain parts, know what specs you have so you can list it for selling, or if it’s time to replace your laptop with one that has higher specs.
One of the worst things that could ever happen to any gamer is when their computer’s fans suddenly go awry. You’re probably thinking that you only need to restart the game and the PC to resolve this issue, but it doesn’t. Every time you play a game or open Chrome, the fans go crazy and the next thing you know, your PC starts to overheat unnecessarily, resulting in a sheer drop of performance.
Luckily, there’s a fix for this and you don’t need to replace your fans just yet. This article will cover the best fan control software that controls fans speeds without any difficulty. Some of the software listed will also allow you to monitor your system, overclock CPU and GPU, on top of letting you adjust fan speeds.
Why Are PC Fans Loud?
Gamers will know what it’s like to deal with the constant noises of a PC fan, even when they’re at minimum fan speed setting. Granted, you’re not hearing the sound of a sedan in your room whenever you boot the PC, but the whirring noises may be too much for certain people.
CPU and GPU fans emit noises because both hardware are expending lots of energy to carry out their corresponding processing tasks. In this case, whenever someone is rendering a video, CPU fans will work harder than the GPU fans. But if someone is doing heavy-duty gaming, the GPU fans will work their butts off.
When CPUs and GPUs are operating, they will generate large amounts of heat, which is not good for these sensitive components. And so, to dissipate this heat, fans will keep the system cool by turning up the RPM (revolutions per minute). By reducing heat, your CPU and GPU will continue to operate at their optimal levels. But when CPU and GPU temperature get too high, both hardware will reduce their performance to gradually dissipate heat.
Simply put, you know when your fan’s speed for your CPU or GPU is slowing down when you’re noticing FPS drops while playing a game or your entire system unit slows down. Now, you’re probably thinking: why can’t you just control fan speeds on your own?
Because this feature isn’t exactly available right off the bat when you build your own PC or purchase a prebuilt gaming PC. You would have to download and install a CPU fan controller software that would allow you to do that.
What Are These Software That Provide Manual Fan Control?
There are a good number of fan control software out there that will let you manage and control PC fan speed even if you don’t have the technical know-how. These software are easy to run and operate, so much so that it’s similar to adjusting the speed of your electric fan.
Here’s a short list of our best fan control software, both free and paid. These are not arranged in any particular order and are great for both Windows and Mac users alike.
Fan Control is the best fan control software out there, according to a lot of its users. It’s free and it’s an open course fan control software, so you’re going to get all the upgrades and versions on it without spending money on it.
Fan Control allows you monitor each controllable fan with individual cards, and you’ll data such as their fan speed, sensors, and custom fan curves.
Fan Control also has an assisted setup option which you can access by clicking on the Wrench icon at the upper left portion of the app. This is great for first time users of a fan control software who don’t know what they’re looking at.
Going through this assisted setup will allow users to boot up important data and have it displayed on the Fan Control panel. You’ll be able to see your different temperature sensors and match them with your correct CPU and GPU fans. This will then build the foundation for any future tweaks for PC fan speed.
Corsair iCUE
Corsair iCUE lets you manage all Corsair products installed on your PC. It also allows you to monitor your CPU’s temperature in real time, create lighting effects for when temperatures get too high, and allow you to control computer fans.
You get three modes with iCUE: Quiet, Game, and Movie. What this means is that each profile will allow you to set the GPU and CPU fan speed for when you’re doing something. You want to use the Quiet Mode for work so the CPU fan speed doesn’t get too fast and too noisy (unless your work involves video editing). Game Mode allows you to control CPU cooling fan speed and GPU fan speed to help guarantee optimal performance. Movie Mode is for when you want the computer to put in more work, but don’t want it to be noisy.
All in all, this is a nifty software that lets provides CPU and GPU fan control. It’s straightforward, and a reliable and light program that controls any Corsair CPU fan, and other paraphernalia from the same brand.
Macs Fan Control (For Mac)
Don’t get us wrong, but even Macbook’s fans become too noisy when they overheat. For this problem, you want Macs Fan Control software, which is a free and also the best Mac fan control software that controls fan speeds for Apple computers. This is similar to the PC Fan Control software that we listed right above.
The program is easy to use and allows you to easily optimize your fan speed for efficient cooling. Once you open the app, you’ll see all the fans on one side of the panel and components on the other side. To control your computer fan speed, just go to the Custom tab and adjust the CPU fan speed or intake fan speed using the slider. You can also go to Preference to see other users’ preferred settings.
This Mac fan speed controller software is intuitive and straightforward to use. You’ll be able to monitor all the important data for your computer’s components, such as CPU temperature and adjust fan speed using your own preference or from other users who installed this fan speed controller software on their Macbooks. This is the solution for the unnecessarily high CPU fan noise, and the only Mac fan control software you’ll ever need for your Apple computer.
MSI Afterburner
MSI Afterburner is the fan control software that you want to use if you want to tweak or control your GPU’s fan speeds and settings. The primary purpose of the MSI Afterburner is to let you overclock the GPU without difficulty. You have full control over your memory clock speed along with GPU clock speed, GPU voltage, and power limit. You also have control over your fan speed for when you do want to overclock.
There are two types of fan control provided by MSI Afterburner. First, you have the conventional fixed fan speed, which you can freely access from the program’s main window. You can also set a custom fan curve through the program’s config menu. You’ll be able to draw your preferred fan hysteresis, how often you want fan speeds to be updated, and set preferred fan curves.
This MSI fan control software is considered as one of the best fan control software out there because of its straightforward system that optimizes fan speed for the graphics card. If you want your GPU fans to completely quiet while gaming, this is the fan control software for that.
Take note that MSI Afterburner is only a fan control software for the GPU and does not provide any control for CPU fan speeds.
Argus Monitor
This fan PC fan controller software allows you to control the fan speed for all case fans attached to the motherboard. You can also adjust and create your own fan curve config. Argus Monitor also has its own SMART Sensors, so you can see your current SSD and HDD temperatures along with real time data for GPU and CPU temperatures.
This PC fan control software also has a sidebar widget that shows you pertinent hardware information like temperature, frequency, fan speed, CPU power, and CPU usage. These are all color-coded and visible at the bottom right part of the screen where you see your tray icons.
The downside to this fan speed control software is that you cannot overclock your system.
Speed Fan
Fan Control is great for when you want to control fan speed, but it’s only available to Windows 10 and 11 operating systems. Gamers running on an older right will want to use another PC fan controller software called SpeedFan.
This PC Fan controller software can work for older OS as far back as Windows 95, which is great for those who have retro gaming rigs but still want to control CPU fan speed.
There are two ways for fan speed control. First, there’s the traditional fixed fan speed preference and can be accessed when you boot the program. The fan speed control software will show you the percentage figures for CPU, Sys, and Aux, which indicate your PC fan speed. You can lower and increase these as you see fit.
The second option is an Auto Fan control option, but it’s a lot more complicated than the traditional fixed fan speed option. Auto Fan Control allows you to increase or decrease your fan speed based on current CPU temperature automatically. But you’ll have to set this up using the Configure sub menu and then set the temperatures for each fan speed sensor. These sensors will then speed up or slow down the fans automatically to keep up with your ideal temperatures.
For those running on older operating systems who want a fan control software for their CPU fan, SpeedFan is the go-to program. You can control CPU fan speed even if you’re running on Windows 95 or Windows 98.
Zotac Firestorm
Much like the Corsair iCUE that allows you to control fan speed for Corsair fans and monitor other components, the Zotac Firestorm is the app that gives you full control over Zotac components installed in your PC. On top of managing RGB colors and fan speed control features, you can also use the software to overclock your graphics card.
There are three settings: Auto, Advanced, and Manual. If you want the default setting of the software, choose Auto. Manual allows you increase and decrease fan speed based on your needs. The fan speed is set to run at the set speed regardless of the GPU temperature. Advanced settings will allow you to set computer fans’ curves based on what you need.
This CPU fan control software is a set-it and forget-it type of software, unless you’re running on Advanced settings. However, a huge disadvantage to the Zotac Firestorm is that it can’t control the fan speed of the case fans.
ASUS AI Suite 3
Similar to Zotac and Corsair, the ASUS AI Suite 3 lets you control all ASUS hardware installed on your motherboard. Just like any other fan speed control software, you can see all important data such as voltage, CPU and GPU temperature, and frequency. There’s also added support for Ryzen processors, but you can’t overclock said processors using the ASUS AI Suite 3.
Because it’s a brand specific CPU fan control software, you can only control PC fan speed for ASUS graphics cards and other fans attached to the motherboard. This is made possible with ASUS’ Fan Xpert 4, which allows you expertly manage all case fans. But to access this feature, your motherboard needs to be of ASUS brand.
MSI Dragon Center
The MSI Dragon center is another fan controller software for Windows and allows you to customize all MSI products connected to the motherboard. You have complete control over all stats, including PC fan speed, CPU and GPU temperature, frequency, and voltage. It’s a free application and is preinstalled in MSI gaming laptops.
The Dragon Center comes with three modes: Battery Life, Acoustic, and Performance. If you want to monitor laptop fan speed, you’ll find the Cooler Booster Mode, but note that as the CPU fans and GPU fans go up in speed, the noisier they get.
The MSI Dragon Center is another set-it and forget-it type of PC fan speed control software. You just toggle through different modes to increase and decrease laptop fan speed, or PC fan speed, and the rest is done by the softare.
EasyTune 5
EasyTune5 has other features other than letting you monitor your CPU fans’ speeds This fan speed controller software has a Smart-Fan Control Feature that gives you full control over your computer’s CPU fan speed. It comes with Easy Mode so you just set it and forget it.
This fan speed controller software also allows you to control fan speeds based on CPU temperature, but just don’t set it at a high threshold that you completely restrict the airflow to and from the CPU.
You can also overclock your CPU with the EasyTune5 through its CPU Intelligent Accelerator (CIA) and Memory Intelligent Booster 2 features. Both of which are found in the EasyTune5’s advanced configuration modes.
HWMonitor
Last but definitely not the least, we have the HWMonitor. This fan speed controller software has been around for some time now, and it’s a favorite amongst fan controller software users.
This fan speed controller software can help you monitor your system’s temperatures, voltages, and of course, fan speed monitor. You can also view your drive’s SMART vital stats and even monitor your graphics card. You can also track your PC power usage, motherboard voltage, and CPU voltage.
Just like the other PC fan control software on this list, HWMonitor is a straightforward program and is a decent fan speed controller with other features apart from just controlling computer fan speed.
If you’re not bothered by the clunkly UI, then the HWMonitor should help you monitor all your fans. If you just want something that adjusts fan speed without too much tinkering, HWMonitor is worth considering.
Final Thoughts
There you have it, some of the best fan control software out there for CPU, GPU, or both. It goes without saying that keeping an eye out if your fans are working is important. You want all the fans to function as intended, or you could end up damaging your hardware severely.
Getting any of the Windows-based of Mac fan control software on this list will not only help you control fan speeds, but also let you know when and which fans are not functioning properly.
If your job requires you to consistently multi-task such as doing emails, being on skype business calls, taking notes, and carrying out your day-to-day tasks all at the same time, then you’ve probably come accustomed to yet tired of switching between endless tabs and application windows on your computer.
Believe it or not, whilst you may think you’re excelling at multitasking (kudos to you because you are), the time wasted whilst opening, closing, and trying to find your necessary window or tab can add up at the end of the day and result in you doing slightly less work than you’re capable of.
What if we told you that you can boost your productivity and maintain better focus when doing your tasks by only tweaking a couple of things, well we’re about to tell you how.
Using your laptop as a monitor (or a second monitor) will allow you to have one task open on one screen, whilst carrying out another task on a secondary screen creating a seamless combination of productivity, communication, and creativity.
One way many people facilitate a laptop as a monitor is by taking their meetings or calls on one laptop and then using a desktop computer to take their meeting notes or to create a collaboration of ideas with everyone else on the call.
You may even just want to use your laptop as a monitor to create a dope gaming set-up in your home that will boost your gaming experiences.
So if this sounds like something that would benefit you, then keep on reading to find out the process of how to use a laptop as a monitor.
How to Use Your Laptop as a Monitor (For Two Windows Devices)
If both devices you’re going to be using for your dual monitors are Windows then you’ll need to follow these instructions, however, if the primary device you’re using is a Windows but the laptop you’re going to use is a Mac you’ll want to skip to the next set of instructions.
Ideally, you should have the latest version of Windows on both your devices.
Enabling the Laptop You Want to Use as a Screen
Open the Settings app on the laptop you want to use as a monitor
Select System
Then select Projecting to This PC
Then you’ll be able to pick the options on the window that suits your needs best
Here are what the options mean below:
‘Windows, PCs, and phones can project to this PC when you say it’s ok’ – The setting is on ‘Always Off’ by default but you can change it to ‘Available Everywhere’ or ‘Available Everywhere on Secured Networks’ depending on where you’ll primarily be using the dual monitors from
‘Ask to project this to PC’– Choose between ‘First Time Only’ or ‘Every Time a connection is requested’ based on whether you’d like to be asked every time you’re going to use your laptop as a dual monitor with another desktop
Require PIN for pairing – If you work in a public or office space then we’d recommend creating a PIN that must be entered when a device is trying to project to your laptop screen
This PC can only be discovered for projection when it’s plugged in – This is a good option to select if you’ll be working from home a lot and want to save the battery life of your laptop
TIP: If you’re working in an office or public space, make a note of your PC/device name that is displayed at the bottom of the settings window as you’ll need to choose this name later when connecting your device to your primary monitor.
Connecting Your Primary Monitor to Your Laptop
Now you’ve done the first step of enabling your laptop, it’s time to move on to connecting it to your primary monitor (desktop or laptop).
Go to the desktop/laptop you want to use as your main monitor and press Windows Key+P on your keyboard
Then select how you want the screen to be displayed (Orientation & Resolution)
Select Extend if you would like the laptop to be a second monitor so you have more screen space for your tasks or select Duplicate if you’d like the monitors to display the same thing (good if you’re working in a group)
Your laptop/device’s name should now have come up as an option for you to choose from
Approve the connection of your laptop to your main device and then you can continue to use both screens
You’re now finished. When you’re finished using your laptop as a second monitor, make sure to select Disconnect otherwise it’ll continue sharing the display
TIP: When connecting your main desktop to your laptop for dual monitor use, click ‘Allow Input’ to give access for the laptop to use the touchpad, keyboard, and any touchscreen functionality so you can work with another person simultaneously.
How to Use Your Laptop as a Monitor (Windows & Mac)
If your main desktop/laptop is a Windows but the laptop you’re using is a Mac, then follow our instructions below to use your laptop as a second monitor.
Press the Windows Key+P to open projection display settings
Select Settings
Two screens should come up on your display. Select the off-centered screen and drag it next to the screen in the middle by your main monitor
Then select Yes to enable the new monitor (your laptop)
Check that the ‘Extend my Windows desktop onto this monitor’ option is enabled
Apply changes and get to work
How to Use Your Laptop as a Monitor (For Macs Only)
There are a handful of ways you can connect a Mac laptop to another Mac monitor (desktop or laptop) but we’ll be showing you one of the easiest methods to do so.
You will need the updated versions of Mac OS on both your devices and also a Mini DisplayPort, Thunderbolt, or Thunderbolt 2 or a Thunderbolt 3 (USB-C).
If your Mac is from any time after 2011, then it should have a Thunderbolt port instead of a Mini DisplayPort, however, these two ports are compatible.
If you’re going to be connected an iMac or MacBook that has a Thunderbolt 2 to a newer MacBook that has a Thunderbolt 3 (which comes on the newer MacBook Pros) then you’ll need an adapter that converts Thunderbolt 3 to Thunderbolt 2 which you can buy directly from Apple or Amazon.
Identify what connector/adapter you’ll need to connect your iMac or MacBook with your MacBook laptop
Plug them both in
Open System Preferences and then go to Displays
Click on the Arrangement tab in the open window
Select the Mirror Displays tick box if you want the laptop monitor to show the same content as your original monitor (however you don’t want to mirror the displays as you’ll be using one device as a secondary monitor)
Drag the display boxes to where you want them and drag the white menu bar on the screen to which screen you’d prefer to be dominant (if you’re using your laptop as a second screen then you’ll want the menu bar on the primary monitor)
TIP: If your Mac won’t detect a connected display then try putting both your Mac devices to sleep and then wake them back up to try again.
Controlling Your Desktop From Your Computer
On the other hand, you may be seeking to use your current laptop to control another computer in your home, maybe you prefer using the trackpad and smaller keyboard compared to a big bulky monitor, mouse, and large keyboard of your computer.
So instead of your laptop being used as just a monitor, you’ll have complete control over your PC but just by using your laptop instead.
One of the easiest ways to do this is by downloading a third-party software called TeamViewer which simplifies the process instead of going through a long procedure of trying to do it directly through your computers.
You can download TeamViewer by going to the TeamViewer website on both your laptop and your computer and download it to both devices.
Once it’s all downloaded on both devices, you’ll need to install it and go through the short installation steps (it shouldn’t take too long).
Then follow these steps to begin controlling your desktop from your laptop:
Open the TeamViewer software on both your laptop and desktop
Find the TeamViewer ID for your desktop computer
Type in the ID number of your desktop computer into the Partner ID field
Click Connect
Enter in your computer’s password
To find your TeamViewer ID for your laptop, you’ll need to open up the TeamViewer software and then click Show TeamViewer or Show Status Dialog and then a nine-digit number should come up which is the one you’ll need to enter into your laptop to connect them.
Your computer’s password is not the personal password you use to sign in to your account on your computer, it’ll be the randomized password listed under the TeamViewer ID.
You’ll now have free will to control your desktop computer directly from the comfort of a mobile laptop.
Using Steam In-Home Streaming to Stream Games From Your Desktop to Your Computer
If you’re a true gamer, you’ll know the importance of having a good set-up to be the best of the best.
However, you don’t need to buy additional monitors just to do this, you can make your laptop an additional laptop and make the most of what you already have.
This will also allow you to play games from the comfort of your bed if you don’t want to sit up in your gaming chair at a desk.
You won’t need to have an ultra-fast mega gaming laptop to do this as you’ll be connected to your main desktop but just displaying it on your lightweight laptop.
All you need to do is use Steam’s In-Home Streaming option (if you’re a true gamer, you should already have Steam downloaded on your system).
Here’s how you start up Steam’s In-Home Streaming from your desktop to your laptop:
Open up Steam on your laptop and desktop devices
Log in using the same account and enable in-home streaming on both devices
Instead of clicking Play, click the drop-down menu and choose the option Stream From
As In-Home Streaming is enabled on both devices, it should automatically find your laptop device
Select your laptop device from the home screen
Then press Stream
You should now be able to stream your games from your desktop computer but instead, use the keyboard and mouse on your laptop to control and play the game.
To enable in-home streaming on your devices, you’ll need to go to the top left corner of the and click the Settings option, then click In-Home Streaming in the window and tick the box that says enable streaming.
You can also change the settings for your laptop to go between Fast, Beautiful or Balanced, which will suit your current gaming needs.
If your network connection is slow, then we’d recommend using ‘Fast’ as you won’t experience as much lag in your game, however, if this is your first time playing a new game that has some fantastic graphics, then you may want to play it in Beautiful to get the full effect.
Streaming games is a very heavy task for your computers and the wireless connection may struggle to keep up which may alter your gaming experience.
To get the quickest and fluid gaming experience when streaming from your computer to your laptop, we recommend hardwiring your computers and routers with ethernet cables.
Stress testing is something you may already be familiar with, or it may be something that is new to you, and you are attempting to get to grips with. While it sounds quite complicated and difficult, once you know the basics, it is fairly easy to get your head around.
The most important thing you need to know about stress testing is the different programs you can use, and which one is the most suitable option. As there are different kinds of stress testing you can carry out, you will need to choose the correct option.
In this article we have broken down stress testing into the three options you will want to consider — the CPU, GPU, and RAM. All of these are important to test every so often. In addition to this, we will be talking you through the best options to choose, and why stress testing is important.
What Is Stress Testing?
Before we get into the best tools to use for stress testing, let’s talk about what this is in more detail. Stress testing is a simple concept, and it helps to determine what your PC can and can’t handle.
While it is not overly needed for prebuilt PCs, if you have built your own PC, or if you own an older PC, it is useful. It will help to gain a better understanding of your PC and its component’s limits, and how much the PC can safely be overclocked.
In addition to this, if you are experiencing issues with your PC it can help you to identify what the issue is, and with what component the issue is linked to. From here, you will be able to figure out what needs to be fixed with your PC.
Hardware Monitoring Tools
If you are looking to use stress testing tools, you will want to ensure that you are monitoring your Hardware. This will help to ensure that you are not pushing the PC over its limits.
In addition to this, it will help you to monitor both the load levels and temperatures of the components. All of these Hardware Monitoring Tools can be used alongside the Stress Testing Tools.
1. GPU-Z
One of the most popular Hardware Monitoring Tools is GPU-Z. It is a great choice overall, and will allow you to monitor your GPU in particular. It is a great option when you are doing GPU stress testing.
GPU-Z will help you to keep track of aspects such as the temperatures, load, fan speed, memory, and clock speed. These are the aspects that will be affected with carrying out the stress test. Given this, it is useful to monitor how these will change as the stress test progresses.
2. Core Temp
When you are stress testing your CPU, Core Temp is a fantastic option to consider. In a similar vein to GPU-Z, Core Temp will keep track of your CPU benchmarks. Given that the CPU is the core of the PC, it is important to ensure that the stress testing is carried out safely.
By using Core Temp, you will be able to keep an eye on the temperature the CPU reaches. It is important to make a note of the maximum temperature for the CPU before carrying out the stress test, to ensure that it does not reach above this. Temperatures over the maximum will cause lasting damage to the CPU.
In addition to tracking the temperature, Core Temp will allow you to monitor the load of the CPU as a whole and for each of the cores within the CPU.
3. HWiNF064
If you are looking for a more in-depth monitoring tool, you will want to consider HWiNF064. It allows you to keep an eye on your CPU, GPU, and RAM. If you are looking to stress test all of these components, this is a useful tool to consider. It also allows you to keep an eye on your motherboard too, which is useful.
You can track many things with this hardware, from the temperatures while stress testing, to how well the components are working. You can also monitor aspects such as loads, and fan speeds, which is useful.
While this is more complicated to get your head around, if you are someone that is used to hardware tools, it is a great option to consider.
4. MSI Afterburner
Last, but not least, we have MSI Afterburner. This is another popular choice that is used specifically to track the GPU hardware. It can also be used for utility purposes to an extent too.
It works similarly to GPU-Z, as you can keep an eye on temperate and general benchmarking. You are also able to overclock while using this hardware, and record gameplay too. It’s one of the better options if you have a gaming PC.
GPU
Having a GPU that performs well is essential in a gaming PC. As a result, carrying out GPU stress testing is important. All the options featured below are the most popular and are great ways of testing the GPU limits.
However, you will need to ensure that you only use these tools sparingly. It is not wise to push your GPU to its limits often.
5. 3DMark
3DMark is a favorite for many, and is a great option for not only PCs, but for laptops, and tablets too. As it is the most versatile option, it is easy to see why it is so popular.
When 3DMark is benchmarking, it allows you to keep an eye on aspects such as the load, temperatures, clock speeds, and frame rate. While you can pay for the extended version of this software, the free tool is great too.
If you are stress testing for the first time, this is the option we would recommend. You do not have to pay for it, it is easy to use, and it does not place too much pressure on the GPU as a whole.
6. FurMark
While FurMark is a great GPU stress tool, it is not the most popular choice. This is because of the amount of stress it places on the GPU. While it is great at letting you know the GPU limits, many people believe the amount of stress it places on the GPU is unnecessary.
If you have overclocked your GPU, it could be a great option to use occasionally. However, it is not an option you will want to use often as it could potentially damage the GPU. You will want to use this tool sparingly.
7. Heaven & Valley Benchmarks (Unigine)
When it comes to the best GPU stress tools, many people, gamers in particular, will recommend Heaven & Valley. Overall, it is a fantastic stress tool and can be used for older GPUs and those that have recently been overclocked.
What is great about this stress tool is that it does not put too much unnecessary strain on the GPU in comparison to some other tools. It is a useful option if you are looking to see how the GPU will perform under normal circumstances, in addition to when stress is placed on it.
Heaven & Valley Benchmarks also feature VR options, which is useful, especially given that VR is becoming more popular. It allows you to test how stable your GPU is as a whole. This tool when paired with GPU-Z is a great combination.
CPU
The CPU is essentially the brain of the computer. As a result, it needs to be functioning correctly in order for you to get the most out of your PC. All of these tools will help to determine how well your CPU will function when pushed to its limits.
8. Aida64
Aida64 is one of the more preferred options because it is user-friendly. It is set out easily, and it allows the stress test to act as “normally” as possible. When looking at other tests, they will focus on aspects that are not practical within the CPU.
However, Aida64 places the CPU under stress in a more realistic situation, in the same way that it would be put under stress for everyday use, just in a more extreme way. This is why it is a preferred option for many.
In addition to this, the load it places on the CPU is at 100%, which will push your CPU to its limits.
9. IntelBurn Test
IntelBurn is another fairly popular choice. Just like with Aida64, it ensures that the CPU has been pushed to its limits, and places a high load on it to determine how it copes with this stress.
It is simple to use, and is a good way of testing the stability of the CPU. However, given that it pushes the PU to the max, it is not recommended for regular use. Many people do not like how much stress it inflicts, which is understandable, especially with overclocked CPUs.
10. Prime95
Prime95 is a fairly popular stress testing tool that was created by GIMPS. It is clever in how it operates as it, like the name suggests, focuses on prime numbers by using equations.
By doing this, it tests your CPUs capabilities, focusing specifically on aspects such as operation. It ensures that the cores and threads are working as they should be. It is particularly useful to use if you have recently overclocked your CPU, too.
While this is a useful tool, it is not the most user-friendly in comparison to some other stress tools. As a result, it is often avoided by beginners.
RAM
While testing the RAM isn’t as essentially as checking your CPU and GPU, it is still useful. The RAM is responsible for your PCs memory. Given this, you will want to ensure that it is functioning correctly.
This is useful to check after a PC has been overclocked. The last thing you want to happen is for the RAM to not function, and you lose your memory.
11. MemTest86
MemTest86 is a great way of determining whether your RAM is acting accordingly. It will help to notify you of any problems it encounters.
This is important as you want to avoid RAM issues. If your RAM is working incorrectly, this will cause problems with the system memory, and the saving of programs and games.
It is created by PassMark, and is an option that is popular with many users. It is fairly easy to use on the whole, and the way it is set up is simple.
12. Prime95(Blend Test)
While we have already covered Prime95 in the CPU section, did you know that it can be used to test your RAM too? While it is a tool we would not recommend using often due to how much stress it puts your PC under, it is a useful option.
If you have recently overclocked your PC, it is a useful option. But, it is worth keeping in mind that overusing a stress tool will put unnecessary strain on the PC and the RAM.
If you are planning to use Prime95, you will want to choose the Blend Test option, as this is what will stress test the RAM. However, it does not allow you to check for errors. If you are looking to check for this, we would recommend MemTest86 as an alternative.
Summary
We hope that you have found this article useful. These stress tests and hardware tools are all great options. While some will work better than others, it all depends on what you are looking to test, and the PC build itself.
While it is useful to stress test your PC, especially with an older system, or just after overclocking, this is something you will not want to make a habit out of doing.
Though it helps you to see how your PC and components manage when put under stress, carrying out too many tests, or carrying out a test for too long can have a negative impact on how well your PC operates.
Computer parts like your CPU and RAM are very easy to find out, especially if you know how to check for your system summary in your PC and find all the information you want. You probably need to answer the question “what motherboard do I have?” to find out what computer parts are compatible with it, or if you’re overdue for an upgrade.
Depending on your operating system and motherboard model, there are a few steps to answer the question “what motherboard do I have?”
How To Retrieve Motherboard Information and Motherboard Brand
#1 – Use The Windows Command Prompt
If you know your way around running Windows Command Prompt, this method will work for you.
To open your Command Prompt, do the following:
Type CMD in the Windows Search Bar and press Enter.
In the Command Prompt window, enter the following command “wmic baseboard get product,Manufacturer” without the “”, then press Enter.
You’ll see your motherboard model information along with the name and manufacturer displayed on the Command Prompt window.
#2 – Open your Computer Case and Check What Motherboard You Have
Another way to locate your motherboard manufacturer info or find out what your motherboard model is specifically is to open your computer case.
You’ll see specific information printed on your motherboard, as seen below:
Here’s a complete list of the popular manufacturers for most motherboards to help you locate their name on your board:
Gigabyte
Biostar
EVGA
MSI
ASRock
ASUS (or ASUSTeK)
As soon as you locate the manufacturer’s logo or brand name on your motherboard but you’re unsure about the model name or can’t find this information, check the motherboard’s chipset.
You want to look for a 4-digit code. This code will consist of a letter and three numbers. As seen on the screenshot above, they have a Z370 chipset motherboard. If you can find this particular 4-digit string on your motherboard, you’ll have located your motherboard’s model number.
A quick Google search will let you know what specs you have for your motherboard and give you access to additional motherboard information such as number of RAM slots, compatible graphics cards, and so on.
#3 – Check Motherboard Model with System Information in Windows
You should also be able to find the same information above by using the System Information menu. Here’s how to access it:
Type System Information in the Windows Search Bar, and press Enter
Scroll down till you find the System Summary Tab. This will show up on the left side of the window. Locate “motherboard manufacturer” or “baseboard manufacturer” in the window.
You’ll want to find these texts on the System Summary Tab:
‘Motherboard/BaseBoard Manufacturer’
‘Motherboard/BaseBoard Model’
‘Motherboard/BaseBoard Name’
This method might also be considered as the easiest way to answer the question “what motherboard do I have?”, but it’s sometimes hit or miss. But you should still be able to find the manufacturer information for your motherboard, regardless, as seen below:
#4 – Use Third Party Software Or Motherboard Checkers
If you don’t want to make use of the command prompt to find out what motherboard you have, you can download third-party software such as CPU-Z and Speccy that will let you know what motherboard type you have. For Speccy, you need to pay $19.95 in order for it to show what your computer’s hardware are. CPU-Z will display all the motherboard information for free.
Belarc Advisor is also another free program that can help you locate your motherboard’s model name among other things.
What Do You With These Motherboard Details?
Now that you have your motherboard info, what do you want to do with this information? Well, you’ll be able to find out if you need to upgrade your motherboard, or if one of the components you’re planning on upgrading (like graphics card, RAM, or SSD) are compatible with the motherboard’s model. Who knows, you might even be in the market for a new motherboard model to accommodate future upgrades.
The motherboard is an important component in all computers. Without it, computers won’t be able to run at all. If you’re in the market for a new motherboard, here are a few shopping tips.
Form Factor (Size)
Form factor is a sizing category that most motherboards, if not all, follow. You’ll need to pay attention to the form factor because your computer case takes this into consideration as well. For example, if you have a tower case, you can accommodate an ATX or even an EATX motherboard. But if you have a small case and you want to get an EATX, you’ll need to change your case.
PCI Slots
The PCI slot is a port located on your motherboard. These have been the standard expansion slots for years and will allow you to install expansion cards on your motherboard. If you’re a gamer, you might want to get a motherboard that has a PCI-e x16 slot. You’ll need a motherboard with multiple PCI-e slots if you plan on using more than one video card. Other expansion slots would allow you to install wi-fi adaptors, sound cards, and other connectivity hardware.
Memory Slots
RAM, or Random Access Memory, slots are also another points for consideration when it comes to buying a new motherboard. The motherboard that you want to purchase needs to be able to accommodate the number of RAM you want installed, and its frequencies. If you were to purchase a new motherboard, consider a model that can accommodate at least 16GB even if you don’t plan on using 16GB of RAM. Having these slots will be helpful in the future if you do decide to upgrade your RAM.
The Processor Socket
Another thing to look out for is the processor socket. You’ll find three different processor sockets, namely LGA, BGA, and PGA. Intel processors use LGA while AMD processors use PGA. BGA sockets aren’t as popular because these sockets are permanently attached to the motherboard, so they can’t be replaced, upgraded, or serviced even. If you are particular about the kind of CPU you’re using, then you need to be aware of what sockets your motherboard has.
SATA
If you’re buying a new motherboard, consider the number of SATA ports it has. You’ll need a SATA port for optical drives and storage drives, like an SSD or HDD. Some motherboards will now have NVM.e slots for the newer SSD models, so if you want to upgrade to something like that, you’ll need to make sure your motherboard has NVM.e slots.
To Summarize The Shopping List
You need the right socket for CPU – Your motherboard needs to be able to accommodate either AMD or Intel sockets if you ever need to purchase a new mobo.
You need to find the right size – Remember, the smaller the motherboard model, the less features it has. Unless you have an ITX case, there’s no reason for you to get a MicroATX or Mini-ITX motherboard. You should always stick with the ATX or EATX motherboard models.
Motherboards aren’t that expensive – You can find a decent motherboard with everything that you need for less than $200. If you do plan on overclocking your CPU or GPU, you might need to spend more than $200 for the motherboard.
Being able to monitor the temperature of your PC is really important. If your temp’s get too high you risk damaging your computer, losing performance, or having to deal with crashes and failures.
The damage heat can cause to your sensitive and often expensive components can be significant if left unchecked, which is why it’s really important to make sure you’re able to keep track of them.
This will help you learn how your PC is coping with various different workloads and stresses, as well as how different environmental conditions and cleanliness are affecting your PC’s ability to keep itself cool.
A good CPU monitor uses sensors throughout your system to track how hot various different components get, and while they have a focus on preventing your CPU itself from overheating, they will quite often be able to check other components including your graphics card, storage drives, and even your motherboard and RAM.
The best monitoring tools are often quite small and easy to use programs, but some are easier to use than others and have clearer, more streamlined interfaces.
In this article we’re going to look at some of the best free temperature monitoring tools for Windows computers, evaluating how well they perform, their usability, and compatibility.
This will help give you a much better idea of how many options you have and will allow you to try a few different tools to make sure you’re getting consistent, reliable results which will ensure the longevity and performance of your system.
HWMonitor
HWMonitor is a very detailed tool that was made by the same team who created CPU-Z, a very popular piece of freeware that is also capable of monitoring and profiling systems.
This tool works with Windows and is compatible with both 32-bit and 64-bit systems, meaning it’s very versatile and will enable users to monitor their temperatures even on older systems.
This is actually more important because older systems are more likely to heat up and throttle the performance, so keeping track of this is a way for users on older systems to keep an eye on things and prevent throttling or crashes.
It’s a tool that’s very easy to install and is available both as an installable or non-installable version depending on user preference.
The tool reads a variety of metrics and tracks CPU temperature as well as voltages, fan speeds, and other component temperatures.
The interface is very clear and simple to use in its summary format, but those who want a more in-depth look at these metrics can use the ‘sensor only’ mode to view a longer and more detailed list of information from various different sensors in your system.
This tool is lightweight, reliable, versatile, and easy to use making it one of the best temperature monitoring systems available.
Speccy
Speccy is another free monitoring tool and was developed by the team who produced CCleaner, one of the most popular programs for drive management and removal of waste files.
Their reputation based on the success of CCleaner alone is stellar among tech nerds, and speccy has some telltale signs of its creator’s touch.
It’s a fairly lightweight and fast application, with easy-to-use interfaces and a range of helpful and easy-to-access information about temperatures for almost all your components, including storage drives.
This app can also create detailed reports about your hardware’s performance over a certain period of time. The tool is updated quite often meaning it is constantly being improved and offers a ton of utility for its size, and is also available in a creator bundle for those interested in CCleaner or the other products this team offers.
HWiNFO
HWiNFO is another great free tool that provides a lot of monitoring capabilities including CPU temperature monitoring which is the most crucial of all.
This is a great choice for those who are using older operating systems as it works on all Windows versions as far back as Windows 98, for those individuals who are stuck waaaaay back in the past.
This tool can monitor various components including individual chipsets and it also has the ability for users to customize specific notifications for any component which is being monitored, making it easy for you to keep track of performance while working on other tasks.
It is also compatible with several other third-party applications and extensions.
Open Hardware Monitor
This is a very simple monitoring tool that has a very minimalist and easy-to-navigate interface, making it ideal for use while gaming or performing other high-load tasks.
It can monitor SMART information about your storage drives, and also monitors clock speeds, fan speeds, and of course temperatures for various important components.
It’s compatible with 32-bit and 64-bit versions of Windows and works with everything from Windows XP to Windows 10. It is also compatible with some Linux-based operating systems, which is a neat feature if you change your OS down the line.
It works with most major manufacturers including Intel, AMD, and NVidia, and as an open-source project, there is a high level of trust and community assistance available.
Core Temp
Core Temp is a tool that is very lightweight but also very powerful, allowing you to monitor crucial metrics when performing difficult tasks.
The tool allows you to track the temperature of each individual core in your CPU and see changes occurring in real-time which is incredibly useful for monitoring performance when overclocking or stress testing.
Various processors by Intel and AMD are supported, and it works well on Windows systems.
It is also very easy to use with a simple and clear user interface and clear readings, making it very simple to use even for beginners.
It’s also possible to install extensions that add several neat features such as remote monitoring from separate devices.
Speed Fan
Speed fan is another great tool with many awesome features such as temperature monitoring and altering the fan curve of your system, which allows you to tailor your cooling and manage your temperatures according to your own usage and workloads.
This tool is compatible with all versions of Windows from 95 to Windows 10 and works with x86 and 64-bit processors.
It also has some neat features that allow more experienced users to track additional data, such as hard drive SMART information and storage temperature.
Real Temp
Real Temp is a fairly popular and simple way to keep an eye on your CPU temps without massively adding to your workload, however, there are a few caveats, unfortunately.
This tool only works with Intel processors and doesn’t work at all with AMD or Pentium 4 CPUs, meaning alternative tools are required for users of these systems.
The beauty of this tool is in its simplicity and leanness, it doesn’t come packed with features and versatility. It is simply for temperature monitoring and it is focused on doing that as efficiently as possible.
CPU Thermometer
CPU Thermometer is a tool that works with Intel and AMD processors, and functions with 32-bit or 64-bit systems from Windows Vista to Windows 2008, Windows 7 and Windows 10.
It’s a fairly basic tool and has a very minimal interface which is quite easy to understand and work with.
It allows you to set a max temperature for your CPU, meaning it will display a warning at this temperature, or you can also set it to shut down your system or reboot depending on your preference which is a very simple way of ensuring your system is protected from heat damage.
AIDA64 EXTREME
This monitoring system is a very powerful series of sensors and tools designed for those who want as much information and flexibility as possible from their monitoring software, making it a great choice for overclockers in particular.
There is a 30 day free trial of this tool, but the full version is a paid program. However, the level of detail and assistance this tool provides is excellent. It is compatible with most modern versions of Windows be they 32-bit or 64-bit.
If you just built your own computer, or have been running an old system that you might want to check up on, one of the first things that you need to do is to check on your CPU temperature. You need to know what the normal CPU temp is, and what temp you need to be running at to protect the integrity of your system unit.
But monitoring your average CPU temp won’t do you any good if you don’t know what CPU temperature you should be at for games, office tasks, or even entertainment. In this article, we’ll show you how to check for normal CPU temperature, and tell you how hot your CPU should be running.
Every processor is built to run at different temperature ranges, meaning they’ll have different maximum operating temperatures. The core premise is still the same, regardless. If your CPU is too hot when it shouldn’t be, you end up damaging your PC in the long run.
If you just want a quick answer, or a one-size fits all kind of answer, don’t fret. We also have that information available to you in this article.
Quick Fix – Is Your CPU Temp Too High?
This section may not be an accurate one-size-fits-all answer, but you should have a slight idea on what normal CPU temperature your PC should be hovering at.
When we say “Normal” CPU temps, it usually varies between processors. But generally speaking, your CPU temp limit should hover at about 45-degrees Celsius when idle, or over 95-degrees Celsius when under full load. By full load, we mean you’re doing heavy processing tasks such as gaming, video editing, rendering, and more. If you find your CPU hitting 45-degrees Celsius, or 95-degrees Celsius consistently, then it’s a cause for concern because you might have a problem.
Note that this is a blanket statement and may or may not even affect your CPU in its entirety. What might be high CPU temperatures for one brand might be different for the next. If you really want to know the root cause of high CPU temperatures, continue reading this article.
What’s The Ideal CPU Temperature Range?
When we say ideal CPU temperature range, we mean the optimal temperature that allows your CPU to perform at its best. One might consider a good CPU temp would be somewhere at low temperature limit when under a light load, and then increase from there when certain tasks call for more processing power.
When CPU temperatures get too high, it can damage PC components or slow down the entire system unit. Modern CPUs have built-in thermal protection that prevents the CPU from reaching dangerous temperatures. But as mentioned earlier, different processors on the market have different tolerances or ranges, but you’ll find that there’s an optimal range for temperatures that help maximize CPU usage and performance. The acceptable range for any brand is about 150 to 160 degrees Fahrenheit (about 65 to 70 degrees Celsius) when the CPU is running apps. If you’re gaming or intensive software (3d-rendering or editing, video editing, etc.) temperature limit can go as high as 175 degrees Fahrenheit (which is 80 degrees Celsius).
Laptops are a different story because they’re most prone to high temperatures due to the nature of their build. The acceptable temperature range for laptops running at low load is about 160 to 170 degrees Fahrenheit (71 to 80 degrees C), and as high as 190 degrees Fahrenheit (88 degrees C) for playing games and intensive tasks. Higher-end 120Hz gaming laptops are more capable of handling higher temperatures than non-gaming laptops.
For optimal performance for either laptop or desktop, you should be hitting these ranges for your CPU’s temperature. If it’s higher, then you might have issues.
How Do You Monitor CPU Temperature?
Monitoring your CPU temp should be done as frequently as you’d check your car’s oil, but it’s a lot easier to check for the former. You don’t need to do it daily, but it’s something that you might want to keep an eye out for.
Keeping tabs of your CPU temp will help you identify potential issues that could affect your performance. If you know what your current temperature is for idling, playing games, and office productivity tasks, then you should have no performance issues at all because you know what temps you should be running. You also have an idea on a healthy temperature range for your CPU, and so you avoid thermal throttling.
Thermal throttling happens when you’ve reached maximum temperature for a specific task, i.e. gaming or video editing, and to prevent further damage to your unit, your CPU or GPU will reduce its performance to shed some heat.
Bu how do you check your CPU temp? There are a couple of ways for you to do this.
Via Motherboard’s BIOS
You can check for your CPU temperature via your Motherboard’s BIOS, but you’ll only read your average CPU temp when the unit’s idle. It won’t help you know what temps you’re running when you’re stress testing.
Temperature shown in BIOS may also be a bit higher than what the system is actually idling in Windows because BIOS will boot your processor using higher voltage levels to make sure that it will start up.
If you want a more accurate reading of CPU temperature, you’ll need to work with third-party programs. Most of them are free to download and use, while there are others that require a small fee.
Use Hardware Monitoring Software such as Core Temp
As mentioned above, you check for CPU temperatures using third-party hardware monitoring software. A good example is Core Temp, which is also what I use to monitor my CPU’s temperatures.
My gaming rig runs on an Intel Core i7-8700K processor, which is a 6-core CPU. Core Temp will show you the temperatures are for these six-cores. My average CPU idle temp for all cores sits at 30-degrees C, which is lower than you’d expect from its AMD CPU counterparts.
Now this might not be the case for another Intel CPU, but Core Temp will definitely let you know how hot your CPU is going, regardless of brand and hardware specifications.
Using Prime95 to Stress-Test
To push CPUs to the limit, we use third-party software stress-test tools such as Prime95 to identify potential heating issues and more when GPUs and CPUs are put under heavy load.
What these software actually do is to push both processor and even GPUs past their realistic levels. By realistic levels, we refer to the highest maximum temperature that may or may not affect performance.
Stress testing CPUs and GPUs will allow you to determine how hot your system can go under controlled environments. You’re not exactly forcing them to run on its maximum recorded temperature for too long. Stress-testing only takes a few minutes and even then, you’re not exactly running at max temps all throughout.
What Are Safe CPU Temps Under Load?
Using my CPU as an example, Core Temp puts my average CPU temperature at about 77 degrees C to 80 degrees Celsius at a 100% load.
Now I know what my ideal temps should be for my Intel Core i7 processor, but is it a good range in general? These temps are relatively safe, regardless if it’s an Intel CPU or AMD CPU. But there are a few things to consider here:
You Now Know Your CPU’s Normal Temp When Idle and Under Heavy Load – What’s Next?
Intel and AMD are the biggest hardware manufacturers for CPUs, but they do not provide you with specific numbers on what’s considered normal CPU temperature. There’s not a lot of info anywhere on the web that will give you this info outright.
This is because there are different factors that will determine what temperatures your processor’s cores are running at. If a hardware manufacturer suggested a one-size-fits-all recommended operating temperature, it could make things worse for the end users.
So the only way for you to gauge if your average idle temp and heavy load temp are within ideal range is to compare it with other people who own the same CPU as you. You can check forum posts or watch videos about the processors that they have
You’ll find that a lot of PC enthusiasts are more than happy to provide you with CPU temperature information, mostly for the purpose of third party benchmarking reference or for showing off. The latter is quite an uncommon reason, but people still do it especially when they overclock their processors and run on better cooling solution (i.e. liquid cooling). Liquid cooling allows people to let their CPUs run hotter for extended periods without sustaining thermal damage and reducing blue screen risks.
Different Factors That Affect CPU Temps
It’s normal for CPUs and GPUs to increase in temperature when they’re doing minor or intensive tasks. But apart from idling and heavy load, there are different factors that come into play that will affect your CPU’s temperature.
Optimal CPU Temperatures Depend On What Brand of CPU You Have
My Intel Core i7 processor will be running at different temperature ranges than someone with an AMD CPU counterpart, or an older Intel Core i3 CPU at idle and under heavy load.
Processors run at different temperatures but it doesn’t mean that the discrepancy is large. you’re looking at a couple degrees Celsius, higher or lower. Then there are other factors that come into play that could affect CPU temperatures greatly.
So, the first thing you need to understand is that you shouldn’t compare the temperatures you are getting to the temperatures someone else is getting who has a completely different processor.
Better CPU Cooling Solutions Mean Better CPU Temps
Paired with my i7-8700K is an 360mm AIO cooler, which is a lot better than the stock coolers that typical processors might come with. When I would compare my idle temp with another person who runs the same CPU but with the stock cooler, my temperatures would be relatively lower.
It comes as no surprise that custom system builders who are putting their CPUs under heavy loads constantly run liquid cooling systems to help dissipate heat. These are people who thrive on higher CPU temperatures just so they can have more processing power. And obviously, people with liquid cooling will have CPU temperatures that are lower than mine, even when under heavy load.
The same thing can be said for the thermal paste that you’re using. Stock thermal paste applied on Intel’s CPU stock coolers are not going to give off better heat transfer as compared to a high-end thermal paste or compound. As a result, reapplying thermal paste that’s considered high-end will greatly affect your CPU temperatures. Different PC cases can also affect your cooling solutions.
So this is also something worth considering for managing CPU temperatures.
Better PC Casing With Higher Airflow Equals Better CPU Temps
Think of your computer as a house. Your house wouldn’t be as cool as the next house if you didn’t have any windows or any form of ventilation. Likewise, a good PC casing that provides you with better airflow can greatly affect your CPU temperature and GPU temperature.
You might have the same processor as me, or the next person, but if they have a PC casing that has more fans and more ventilation than yours, they’re going to run on lower temperatures for idle and heavy loads.
Of course, you could also consider that these if you want less heat coming from your PC.
Ambient Room Temperature Must Be Considered Too
Another factor that affects normal CPU temp is your ambient room temp. Let’s say you built a PC with the same processor as me, which is an i7-8700K and you fire it up. Your normal CPU temperature is somewhere at 33-degrees C for idle. You’re probably thinking this is normal and average because you saw someone post a temperature of 30-degrees C with the same CPU on another forum.
Why is your processor is 3 degrees higher than the other person’s CPU? It’s quite possible that your room temperature where you are running your computer is higher than that person’s room temp when he or she was running their computer. It could also mean that your processor was
A fully air-conditioned room will affect the CPU’s temperature differently, both idle and under heavy loads, as opposed to another room that just relies on window ventilation. It might just so happen that the person who was running 3 degrees lower than you had a cooler room or lives in a country that’s colder than yours.
Overclocking Your Processor Means Higher Temperatures
It goes without saying that overclocking your processor will result in higher temperatures. Overclocking happens when you have your CPU running higher clock speeds than its stock settings.
The faster your CPU is running, the hotter it will get. Combine this with liquid cooling system and a software that allows you to manage fan speeds (i.e. MSI Afterburner). If you’re just relying on stock cooling solutions, then overclocking is going to cause your CPU’s integrity to deteriorate faster.
What Is A Normal CPU Temp While Gaming?
Gaming will always put extra stress on your CPU and GPU. This means that when you’re gaming, you’re more or less running at close to high temperatures for both components. Of course, both CPU and GPU will be running at temperatures that they can manage. The CPU won’t get too hot, unless there are underlying problems.
What’s the optimal CPU temperature when it comes to gaming? That’s a common question asked by a lot of people who aren’t familiar with how hot their components should get.
What Is The Optimal CPU Temperature While Gaming?
For this section, it doesn’t really matter if you’re running an AMD or Intel CPU. The temperature threshold for processors may vary greatly, but the discrepancy is very minimal. You’re looking at plus or minus a couple of degrees Celsius between two different processors to determine which has better temperatures.
Optimal CPU temperatures when you’re gaming should not exceed 80 degrees Celsius (176 degrees Fahrenheit), and should hover anywhere between 75 degrees and 80 degrees Celsius. If you have cooling features that allow you to run on less heat, then that’s a different story.
But even if you have a better cooling design, longer gaming sessions will always force you your CPU to reach higher than normal temperatures. This, in turn, will result in thermal throttling. Your gaming performance will deteriorate just so it can shed off some heat.
Now thankfully, modern games are now designed in a way that the majority of their performance is drawn from the GPU’s power, which wasn’t always the case before. Back then, games heavily relied on CPU to meet performance requirements. Today, games are now reliant on drawing more power from GPU to increase frame rates. This resulted in consumers now demanding more power from the GPU manufacturers and better cooling solutions to help balance out performance and heat.
But for the longest time, AMD and Nvidia are two GPU manufacturers which have gone after each other’s throats. The latter just so happens to have dominated the market, but it doesn’t mean that AMD is lackluster in terms of their GPU roster as well.
At most, modern GPUs capped out their max temps at about 95 degrees Celsius. This is done so there’s no further damage done to the GPU when it’s under heavy load. But having said that, it doesn’t mean that you should always be pushing past 85 degrees Celsius at any given time, even if your GPU is meant to go hotter.
Regardless of whatever brand of GPU you have, it’s worth noting that there are different contributing factors that affect your GPU’s temperatures:
Playing heavily GPU-dependent games
GPU’s cooling design
Ambient room temperature
Quality of the case
Available cooling solution (i.e. liquid cooling, high-end CPU coolers, etc)
Quality of airflow (i.e. number of case fans, ventilation options)
Going back to previous discussions about comparing the same CPU but with different parameters, having the same GPU with another person does not mean you’ll be running on the same temps. Whatever affects the overall temperature of your CPU will also affect your GPU.
How Do You Fix High CPU Temps?
We’ve discussed what are the different factors that could affect your CPU’s temperatures, and we’ve also tackled how you can improve your CPU’s temps as well.
If you really want to fix your high CPU temperatures, then consider doing the following:
reinstalling your CPU cooler, or purchasing a better one
Reapplying thermal paste (consider purchasing commercial or high-end compounds)
Buy a better case
Reconfigure your fans (you can do this together with buying a new case)
Clean out your computer with compressed air or some light brushing
Remove the side panel of your PC (if you’re overclocking)
Doing any of these should help you reach optimal temperatures for both CPU and GPU, resulting in optimal performance anytime.
To introduce the article, we thought that the first thing we should do is to introduce what these specs actually are. Computer specs simply mean the specifications of your computer. They include various components but the ones that we are going to be focussing on are CPU, GPU, Motherboard, and RAM.
Depending on your level of computer knowledge, the terms CPU and GPU may well be totally confusing to you, or you may feel like an expert on them. RAM and motherboard are a little more widely known, we guess, but even so, many people might have heard the terms but may not know exactly what they mean.
Here’s a quick rundown:
CPU – This is the central processing unit of a computer. It is like the brain of the computer and is what puts things into action. It is the main data processor of all computers.
GPU – This is the graphics processing unit of a computer that can process data quickly and with ease to provide images. This is essential for gaming, video editing, and more.
RAM – This stands for random access memory which is basically the short-term memory of your computer. Data gets stored as and when your processor needs it.
Motherboard – This is where the magic happens in the sense that this is the backbone that exists to allow all the other components of the computer to work. It needs to be totally functional for your PC to work.
We would also hazard a guess that, even if you know what the terms mean, you may not know how to find out what specific CPU, GPU, RAM, or motherboard your PC has.
You certainly won’t be alone in this, especially if you have had your computer for a long time – you might have totally forgotten its exact specs.
Why do you need to know the specs for your computer?
You may not think it is important to know the specs of your computer (or perhaps you do think it’s important, in which case – you’re right), but when it comes to wanting to upgrade your computer or sell it on, these are vital pieces of information that you will need to know about.
Upgrading your computer will mean you need to improve on the specifications for each of these components. Therefore, you need to know what they are in order to choose better.
When you are selling your computer, buyers will be interested to know what they can expect, and the best way to do this is by looking at the specs.
So, let’s find out how you can check these specs…
Just a note, we will be exploring how to find these components on a Windows 10 computer specifically. However, we will be explaining another method you can use to try to ascertain the specs of another computer.
How to Check Your CPU
One of the most important components of the computer is the CPU. In this section of the article, we are going to be teaching you how to establish what specific CPU you have and how to find it.
It really is just as simple as two clicks! Yep, really! All you have to do is locate the windows start menu icon. This should be located at the bottom left hand corner of your screen.
When you have found that simply right click on there and then find the word ‘System’. Click this and you should get a lot of information pop up.
Look for the word ‘Processor’ and this will tell you the CPU of your computer.
Super easy, isn’t it? We bet you thought it would be waaaaay more difficult than that! OK, now onto the GPU…
How to Check Your GPU
So, now we’re onto GPU. the graphics processing unit. Well, we’re sorry to say that this is going to be a little bit more difficult than finding out the CPU.
There is a specific reason for this and that is that the process involves one extra click! However, will you manage?
For real though, in just three clicks you will be able to find out your GPU. all you have to do is locate that same windows start up menu in the bottom left hand corner and right click on it.
When this opens up you should find the term ‘Device Manager and click on it. When this opens up you should see another menu with one of the terms listed as ‘Display Adaptors’.
Under this, there should be the specifications of your GPU. For example, mine is written as AMD Radeon(™) Vega 8 Graphics.
…and it really is as simple as that!
Keep in mind that depending on your computer, you may well see two options under this, one for your dedicated GPU and one for your integrated GPU. Your dedicated GPU is the one you want to determine and it is typically the second on the list.
How to Check Your Motherboard
Ummm, just give her a call, obviously…
Oh, wait motherBOARD! I see… Well, that’s even easier than checking on your actual mother!
The process of checking your motherboard is a little different from the one used to check your GPU and CPU. one option is to physically open up your computer and look at the motherboard. The manufacturer and model name should be clearly displayed.
However, many people are put off by this (rightly so) for fear that they will damage it. As well as this, it can be quite confusing as often it just looks like a jumble of letters and numbers following the name of the laptop manufacturer (e.g. Lenovo M71Z).
So, the other option is to try to locate it yourself on your laptop or desktop. To do this you can locate the Windows search bar. Into this, type something along the lines of System Information or System Settings.
Click on the System Summary button and you should be ab;e to locate some terms that say BaseBoard Manufacturer or MotherBoard Manufacturer, and the same stating the BaseBoard or MotherBoard model and name. These will give you the exact information you are looking for.
Keep in mind that this may not give you specifics, and the only way to get these may well be to look inside your computer at the motherboard itself
How to Check Your RAM
Finally we want to talk about how you can check your RAM. This is the memory you have in your computer. It is yet another super easy task.
You know how you checked the CPU of your computer? Well, it’s basically the same concept when you want to check your RAM.
All you have to do when you want to check out the RAM component of your computer is to locate that Windows start menu icon that we talked about before and give it a right hand click.
Select the menu that says system and then look on the list until it says ‘RAM’ or ‘Installed RAM’. It will likely give you a figure in gigabytes or even terabytes such as 1 TB or 32 GB.
You will also be able to find out the RAM of your computer by searching for System Information.
Easy as can be!
Other ways of checking specs
As well as these manual methods of checking out your computer specs, we just wanted to draw your attention to the use of third party hardware monitoring applications and tools.
These can be used to help you find out the specific information you need as well as monitoring the performance of your PC. some of the best of these third party apps include:
Core Temp (this is for checking CPU)
Speccy
CPU-Z
…and lastly HWInfo
Try these out today if the manual methods are not your kinda thing!
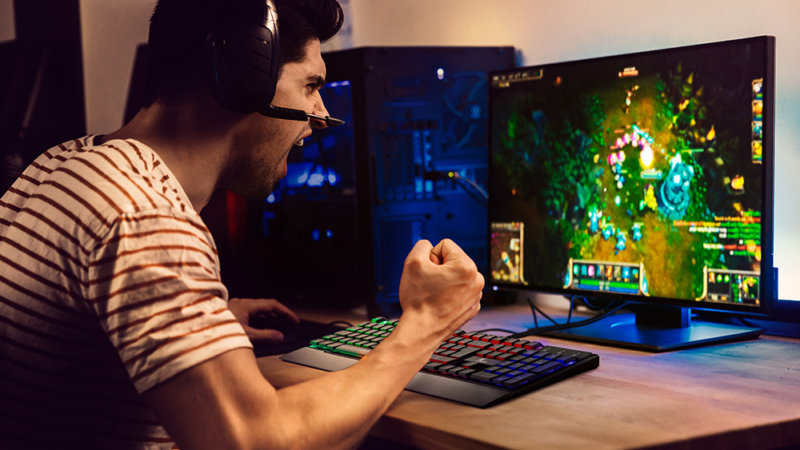


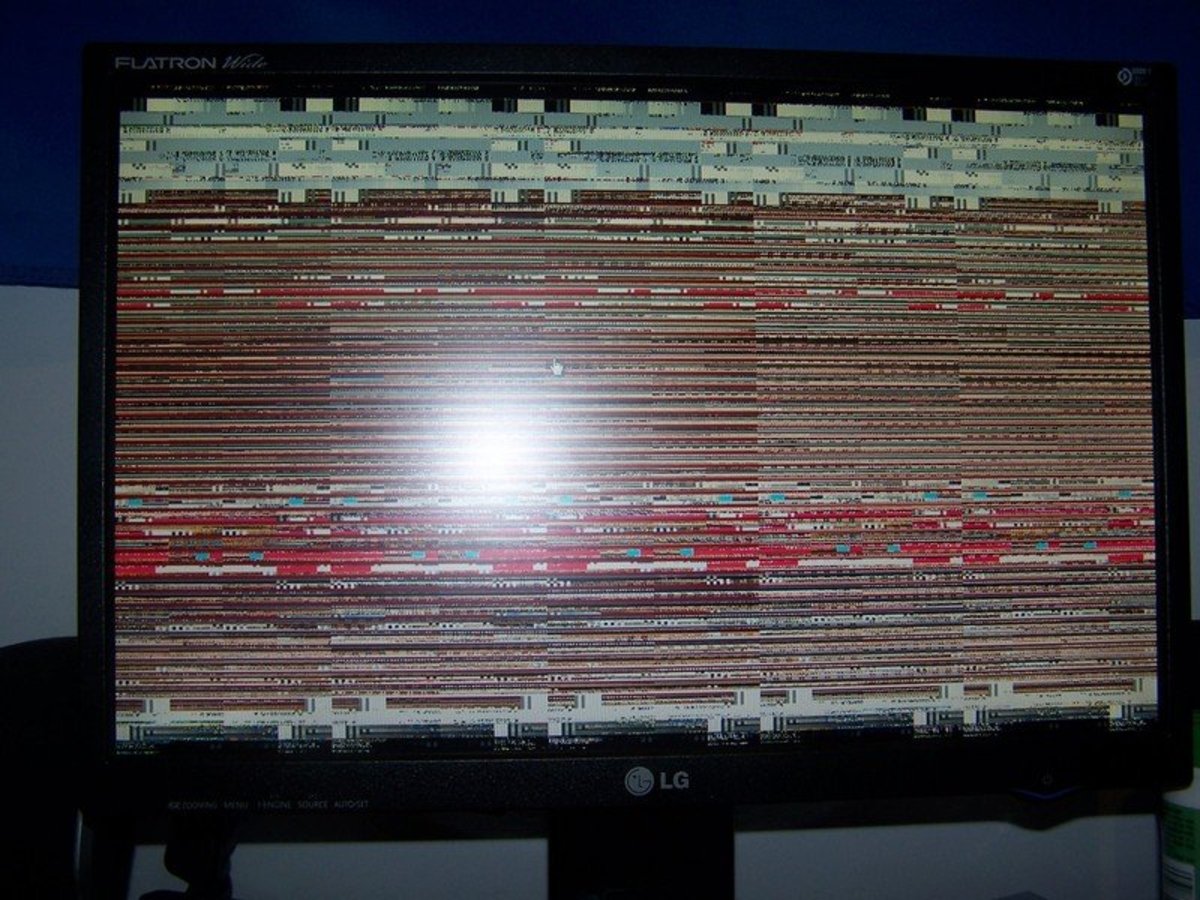





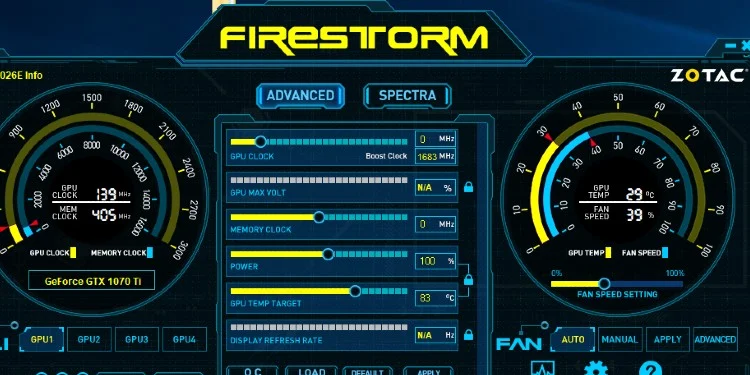
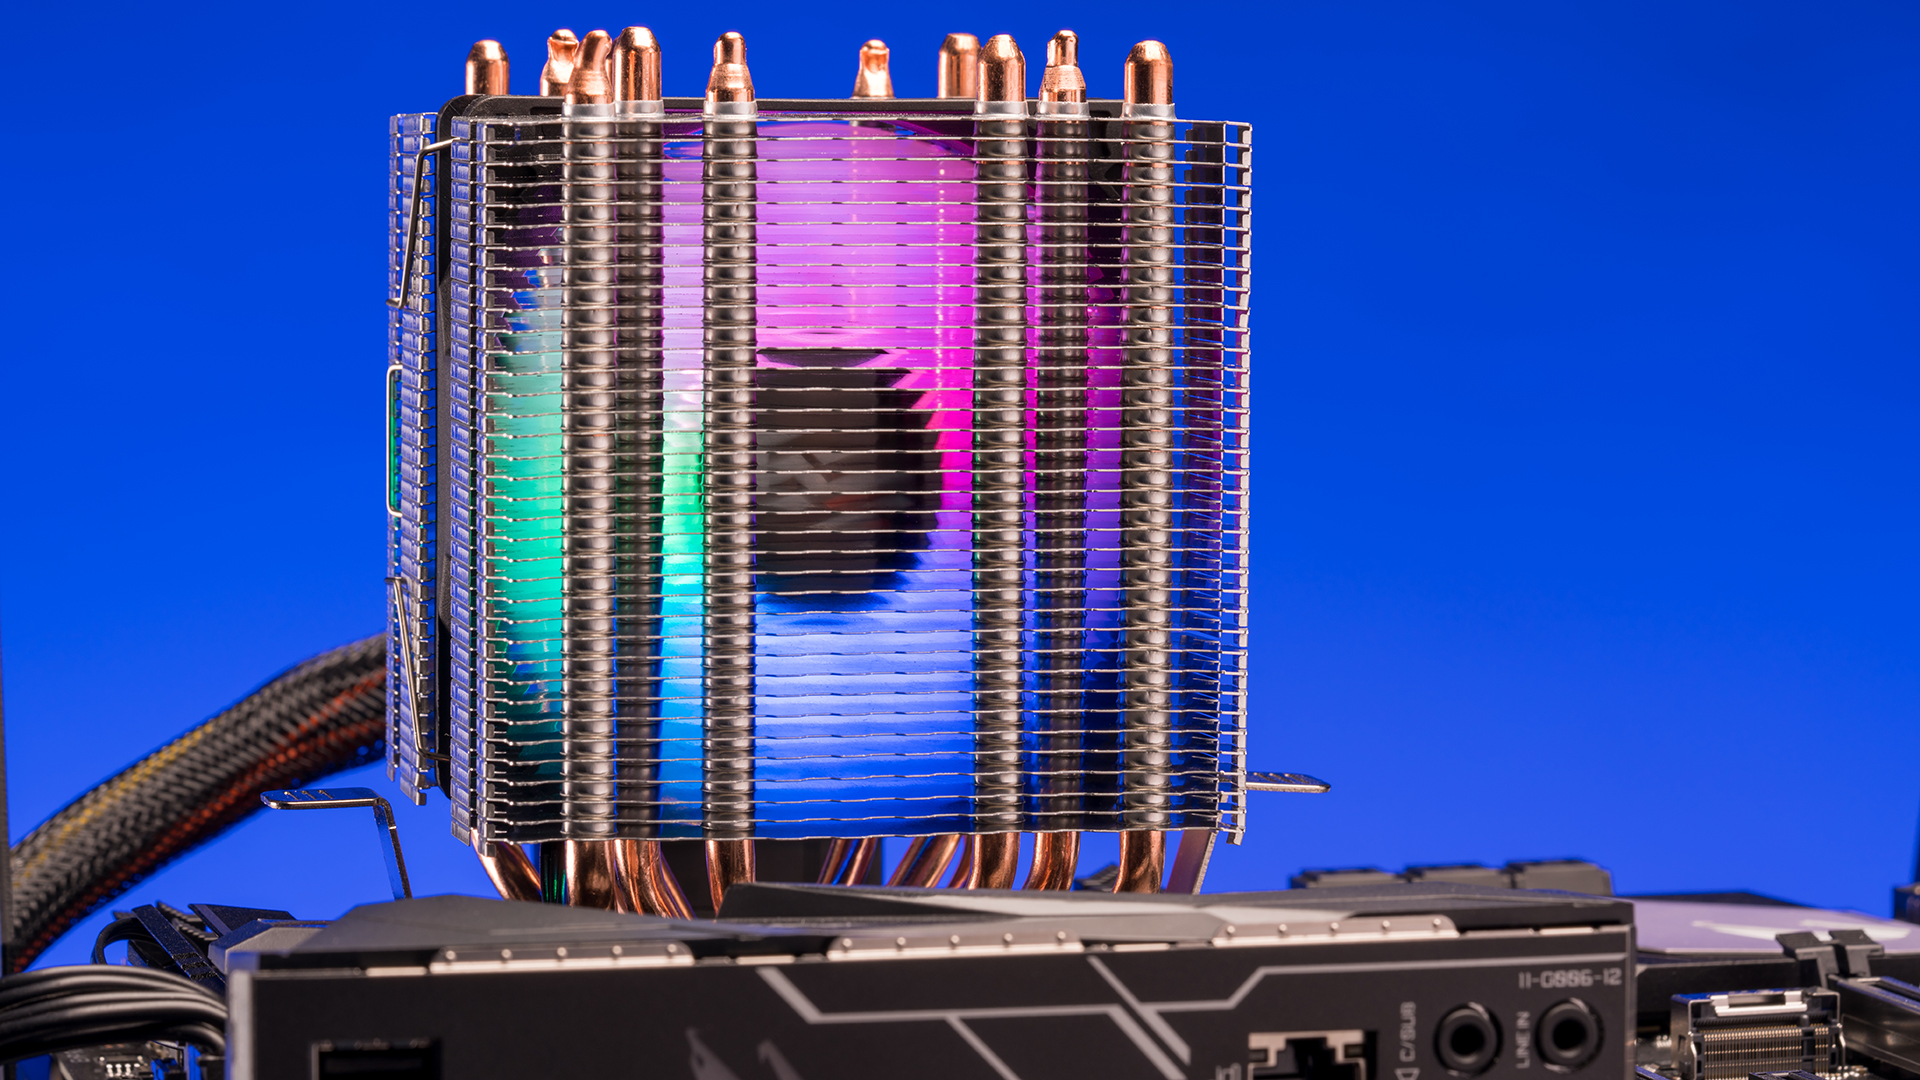





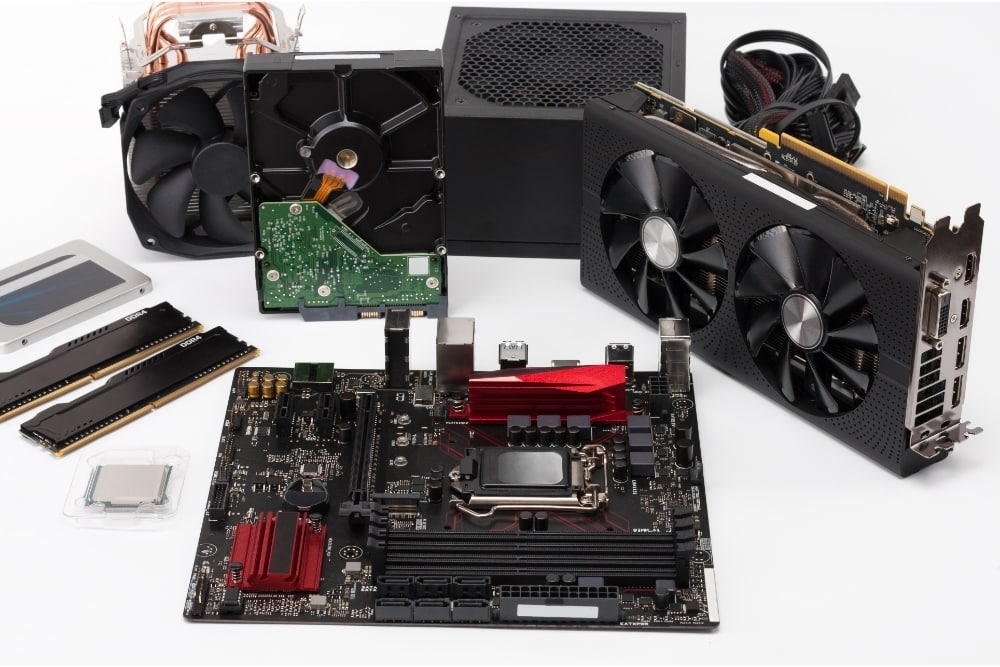

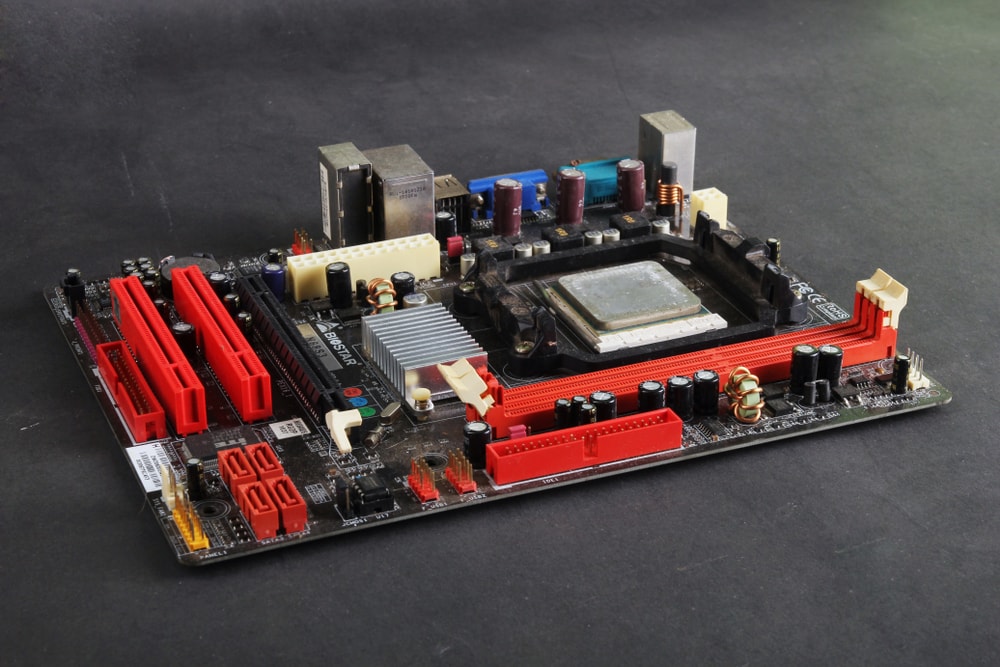


![9 Best CPU Temperature Monitor Tools for Windows [FREE]](https://www.epicwinapp.com/wp-content/uploads/2021/07/9-Best-CPU-Temperature-Monitor-Tools-for-Windows-FREE.jpg)
![9 Best CPU Temperature Monitor Tools for Windows [FREE]](https://ww2.epicwinapp.com/wp-content/uploads/9-Best-CPU-Temperature-Monitor-Tools-for-Windows-FREE.jpg)