Category: Support

  • Blender 3D Interface

    Blender 3D Interface

    Introduction to Blender 3D Interface

    A. What is Blender and its purpose?

    Blender is a powerful and versatile Free and Open Source 3D creation suite used for various purposes, including 3D modeling, animation, rendering, compositing, and more. It caters to artists, designers, and developers looking to create stunning visual content for games, films, architectural visualization, and other creative projects.

    B. Importance of understanding the interface

    Understanding the Blender 3D interface is crucial for newcomers as it provides the foundation for efficient and effective 3D creation. Navigating the interface allows users to access tools, manipulate objects, and configure settings to achieve desired results. A solid grasp of the interface helps users focus on their creative vision without getting bogged down by technical hurdles.

    C. Basic requirements to use Blender

    To utilize Blender effectively, users need a computer that meets its system requirements. These typically include a multi-core CPU, sufficient RAM, and a capable GPU for optimal performance. Additionally, a three-button mouse is recommended for easy navigation within the 3D viewport. Read our article to find out about the best computer for Blender.

    Blender 3D Interface

    Navigating the Blender Interface

    A. Overview of the main interface elements

    The Blender interface consists of several key elements, each serving a specific purpose. The Header houses essential menus and options, while the Sidebar displays context-sensitive tools. The Tool Shelf provides quick access to various modeling and editing tools, and the Properties Editor allows users to modify object properties, materials, and more.

    Blender User Interface: top bar menu

    B. Customizing the workspace and layouts

    Blender offers a high degree of customization, allowing users to create tailored workspaces and layouts that suit their preferences and workflow. Users can arrange and resize panels, save custom layouts, and switch between different screen setups based on their tasks.

    Blender User Interface: Workspaces are located at the Topbar.

    Working with Objects in Blender

    A. Understanding 3D space: X, Y, and Z axes

    In Blender, 3D space is defined by the X, Y, and Z axes. The X-axis represents left/right movement, the Y-axis represents forward/backward movement, and the Z-axis represents up/down movement. Understanding this spatial orientation is essential for precise object manipulation.

    B. Adding and managing objects

    Blender offers various methods to add objects to the scene. Users can create primitive shapes like cubes, spheres, and cylinders, or import external 3D models from different file formats. Properly managing objects involves organizing them in the Outliner and using layers or collections for better organization.

    C. Duplicating and deleting objects

    Duplicating objects is a common workflow for creating complex scenes or similar elements. Blender offers different duplication techniques, such as duplicating linked instances or creating independent copies. Additionally, understanding proper object deletion is essential to avoid unintentional data loss.

    Transforming Objects

    A. Moving, rotating, and scaling objects

    Transformation tools are fundamental for positioning and shaping objects in Blender. Users can translate (move), rotate, and scale objects using various manipulators or numeric input. Accurate transformations are achieved by utilizing the 3D cursor, pivot points, and snapping features.

    B. Snapping and precision modeling techniques

    Blender’s snapping tools enable precise alignment of objects, vertices, and edges to specific positions or surfaces. This feature aids in maintaining accuracy during modeling and allows for the creation of symmetrical structures. Employing precision modeling techniques ensures clean and professional results.

    C. Using pivot points for transformations

    The pivot point determines the location around which an object rotates or scales. Blender offers multiple pivot point options, such as the median point, 3D cursor, individual origins, and more. Understanding and selecting the appropriate pivot point is vital for efficient object manipulation.

    Modifiers and the Object Data Properties

    A. Introduction to modifiers and their benefits

    Modifiers are powerful tools in Blender that can be applied to objects to create complex effects or changes non-destructively. By stacking and configuring modifiers, users can perform operations like subdivision, beveling, mirroring, and more, without permanently altering the original geometry.

    B. Applying and modifying common modifiers

    Once modifiers are applied to an object, users may need to adjust their settings to achieve the desired effect. Understanding the purpose and impact of common modifiers like Subdivision Surface, Mirror, and Array is essential for efficient modeling.

    C. Utilizing the Object Data tab for specific object adjustments

    The Object Data tab, found in the Properties Editor, allows users to modify various properties of an object, such as its shape, materials, vertex groups, and UV maps. Adjusting these settings is crucial for creating customized objects and preparing them for specific tasks, like character rigging or animation.

    Understanding the 3D Viewport

    A. Navigating and controlling the 3D view

    The 3D Viewport is the primary workspace in Blender, displaying the 3D scene from different perspectives. Understanding navigation shortcuts and controls, such as pan, orbit, and zoom, allows users to explore the scene effortlessly and work efficiently.

    B. Working with cameras and perspectives

    In Blender, cameras define the view through which a scene is rendered. Understanding camera settings, such as focal length, depth of field, and composition rules, helps users create compelling shots and visual storytelling.

    C. Using the 3D cursor effectively

    The 3D cursor is a powerful tool used for precise object placement and transformation. Learning to set, snap, and use the 3D cursor efficiently streamlines the workflow and improves accuracy during modeling and scene arrangement.

    Editing Meshes in Edit Mode

    A. Switching between Object and Edit mode

    Blender’s Object mode is used for managing objects as a whole, while Edit mode allows users to manipulate individual mesh components, such as vertices, edges, and faces. Understanding how to switch between these modes is fundamental for mesh editing.

    B. Selecting and manipulating vertices, edges, and faces

    In Edit mode, users can select and manipulate specific mesh components to modify the object’s shape. Blender provides various selection tools and transformation options, such as extrusion and beveling, to refine the mesh efficiently.

    C. Understanding mesh components and their roles

    Comprehending the roles of vertices, edges, and faces is essential for precise modeling in Blender. Vertices define points in 3D space, edges connect vertices, and faces form the surfaces of the object. Manipulating these components effectively shapes the overall mesh geometry.

    Introduction to the Outliner

    A. Organizing and managing objects using the Outliner

    The Outliner provides an organized hierarchical view of all objects in the scene. Understanding how to rename, group, and organize objects in the Outliner improves workflow management and simplifies complex scenes.

    B. Controlling visibility and selectability

    The Outliner offers control over the visibility and selectability of objects, making it easy to isolate specific elements during modeling or animation. Properly managing object visibility helps users focus on specific tasks and enhances the overall user experience.

    Using Snapping and Precision Modeling

    A. Enabling and configuring snapping options

    Blender’s snapping functionality allows users to align objects or vertices to specific reference points, grid locations, or other mesh components. Understanding how to enable and configure snapping options ensures precise object alignment and positioning.

    B. Using snapping to align objects and vertices accurately

    Snapping is an invaluable feature for precision modeling. By snapping vertices, edges, or faces together, users can create symmetrical structures and maintain precise alignments between different elements of the scene.

    Introduction to Hotkeys and Keyboard Shortcuts

    A. Essential hotkeys for navigation and manipulation

    Blender offers a wide range of keyboard shortcuts, known as hotkeys, to speed up navigation and access various tools and functions. Mastering essential hotkeys for common tasks significantly improves workflow efficiency.

    B. Customizing and creating hotkey shortcuts

    To tailor Blender to individual preferences, users can customize existing hotkeys or create new ones. Customized hotkeys save time and enhance productivity by providing quick access to frequently used commands.

    Overview of Menus and Editors

    A. Utilizing context-sensitive menus

    Blender features context-sensitive menus that provide relevant options depending on the user’s current action or selection. Understanding these menus helps users access specific tools and settings efficiently.

    B. Brief introduction to various editors: Image Editor, Node Editor, etc.

    Blender includes multiple editors that serve different purposes. These editors, such as the Image Editor, Node Editor, and Video Sequence Editor, provide specialized functionality for tasks like image manipulation, material creation, and video editing.

    Customizing the Interface

    A. Setting preferences and options

    Blender allows users to configure various preferences and settings to tailor the interface to their specific needs. This includes adjusting display options, saving user preferences, and managing file paths.

    B. Installing and using add-ons for enhanced functionality

    Add-ons are optional packages that extend Blender’s capabilities. Understanding how to install and use add-ons provides users with access to a wealth of additional tools and features to streamline their workflow.

    Conclusion

    A. Recap of important concepts about the Blender 3D Interface

    This section briefly summarizes the key points covered in the article, emphasizing the importance of understanding the Blender 3D interface for efficient 3D creation.

    B. Encouragement to explore and practice using the interface

    Encouraging readers to practice using Blender’s interface and experiment with different tools and features motivates them to improve their skills and creativity.

    C. Suggested resources for further learning

    To continue their Blender journey, users can explore various online tutorials, documentation, and community forums for additional guidance and support in mastering the Blender 3D interface.
  • How To Update Blender

    How To Update Blender

    In the dynamic world of 3D art and modeling, Blender shines as a powerful software that has captured the hearts of countless artists and modelers worldwide. Check here to see if you have the best PC for Blender.

    Why Do Professionals Love Blender?

    The amount of people who download Blender is insane. But why do aspiring 3D artists love it and why does the Blender Foundation continue to provide support for the artists?

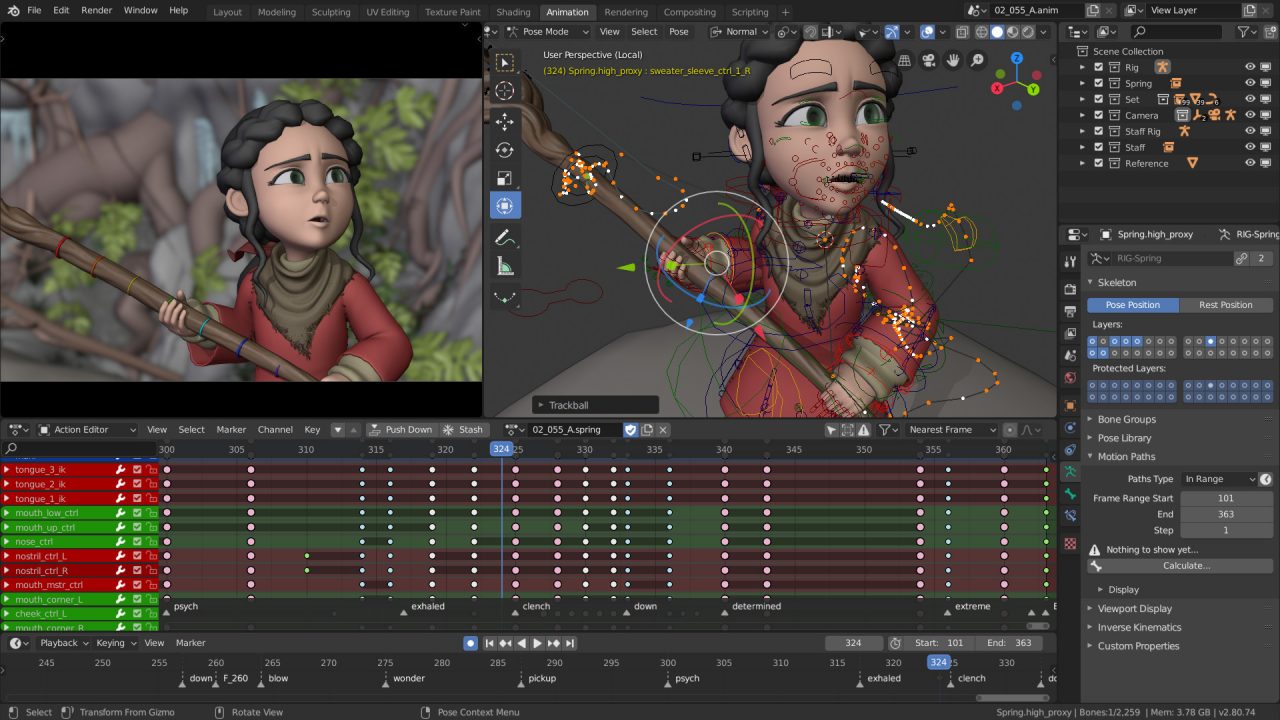
    Blender Interface Work Sample How To Update Blender

    Unleashing Creative Possibilities

    Blender is a free and open-source 3D creation suite encompassing various creative disciplines, including modeling, animation, rendering, compositing, and more.

    Its versatility, user interface, and comprehensive feature set make it a favorite among artists looking to push the boundaries of their creativity.

    This is why you should always update Blender when you can. Being an open-source software, you’re bound to see newer versions pop up on the Blender Foundation website. These new versions help keep the current version installed as stable as possible.

    Modeling Mastery

    One of Blender’s standout features is its robust set of modeling tools. Artists can sculpt, shape, and manipulate 3D objects with precision and ease. Blender offers a variety of techniques, from basic polygonal modeling to advanced sculpting and procedural modeling.

    With the ability to work with modifiers, artists can maintain non-destructive workflows, allowing for greater flexibility during the creative process

    An updated version of Blender will make sure that all your models will look as smooth and nice as possible.

    Animation Excellence

    Blender’s animation capabilities empower artists to breathe life into their creations. Keyframe animation, armatures, and rigging systems give artists precise control over movements, while physics simulations and particle systems allow for realistic motion and dynamic effects.

    Whether character animation, motion graphics, or complex simulations, Blender offers comprehensive tools to bring ideas to life.

    Visual Prowess

    Blender’s rendering capabilities are second to none. The software offers two powerful rendering engines, Cycles and Eevee, each with its strengths. Cycles excel in producing photorealistic renders, utilizing ray tracing and global illumination techniques, while Eevee provides real-time rendering for quick previews and interactive experiences. With advanced lighting and shading options, artists can achieve stunning visual results in their projects.

    Material Magic

    Blender’s material and texture system enables artists to create visually captivating surfaces. With its node-based shader editor, artists have unparalleled control over material properties, allowing for the creation of realistic textures, reflective surfaces, and intricate material effects. Blender’s UV mapping capabilities ensure precise placement of textures, enhancing the level of detail in models.

    Seamless Compositing

    Blender’s built-in compositor adds another layer of creativity to the software. Artists can seamlessly combine rendered passes, adjust colors, apply filters, and add visual effects to achieve their final output’s desired look and feel. The node-based workflow of the compositor allows for flexibility and efficiency, empowering artists to create stunning visuals with ease.

    Collaborative Workflow

    Blender’s compatibility with various file formats ensures smooth integration of new version into existing production pipelines. Artists can seamlessly import and export 3D assets, facilitating collaboration with other software and team members. Blender’s scripting capabilities and extensive library of add-ons further enhance workflow efficiency, allowing artists to customize their experience and automate repetitive tasks.

    Supportive Community

    Blender boasts an enthusiastic and passionate community of artists and modelers. Through online forums, tutorials, and resources, Blender users can engage with fellow creators, exchange knowledge, and find inspiration.

    This vibrant community contributes to Blender’s continuous growth and development, providing a supportive environment for artists to thrive. People in the community are always eager to help, from troubles with Blender installation to the more complicated issues.

    How To Update Blender

    Check for Updates

    Visit the official Blender website or the Blender Foundation’s download page to check for and download the latest stable version here. From there, you can check if your version of Blender matches with the latest Blender version on the official website.

    Review the latest official release and notes to learn about the new features and improvements in the beta versions of the updated version. It’s worth noting that an updated version of Blender doesn’t mean that it offers a lot of new stuff right off the bat. Sometimes, the latest version is just there to help stabilize a couple of features.

    Backup Your Work

    Before updating, it’s crucial to back up your projects and custom settings to ensure you retain valuable work and preferences.

    An uncommon issue here is that the latest version might not be able to accommodate your custom settings. When you launch Blender after updating it, some of your addons or settings might not work.

    You can check the new version notes from the Blender website and see if there are issues with addons or custom settings.

    Download and Install the Latest Version

    Download the installer for the latest version of your operating system.

    Run the installer app and follow the on-screen instructions to install the updated version of Blender.

    Migrating Preferences (Optional)

    If you wish to retain your custom settings, you can migrate your preferences from the previous version to or download the latest updated one.

    Blender provides an option during installation to import preferences from multiple versions.

    Common Troubleshooting Issues:

    Compatibility Issues

    Ensure that your computer meets the system requirements for downloading the updated Blender version.

    In case of compatibility issues, consider updating your operating system or graphics drivers to the latest versions.

    Add-on Compatibility

    Some add-ons may be in different versions from the current version of the updated version of Blender app.

    Check if the add-ons you rely on have been updated to support the latest Blender release. If not, you may need to disable them or find alternative add-ons temporarily.

    File Compatibility

    You may encounter compatibility issues when opening projects created in previous versions of Blender versions.

    Before updating an older version of Blender, make sure to finish and save any ongoing projects. After updating, open older projects and carefully review any warnings or errors. Resolve any compatibility issues by following Blender’s documentation or seeking assistance from the Blender community.

    Performance Issues

    If you experience performance issues after updating, consider adjusting viewport quality, render settings, or GPU acceleration options to optimize performance.

    Additionally, clearing cache files or reducing the complexity of your scenes can improve performance.

    If you are having graphics issues, then you might upgrade your GPU driver to the current stable release before you open Blender.

    Bug Reports and Community Support

    If you encounter any issues or bugs during or after the update, consider reporting them to the Blender development team. Detailed bug reports help developers identify and resolve issues promptly.

    Engage with the Blender community by participating in forums and online discussions or seeking guidance from experienced users. They can provide valuable insights and solutions to troubleshooting issues.

    Wrapping It Up

    Blender is a comprehensive and versatile software offering unparalleled tools for 3D artists and modelers. Blender has become a staple in the creative industry with its powerful modeling capabilities, advanced animation tools, stunning rendering options, and seamless integration.

    Supported by a dedicated community, Blender allows artists to explore their creative boundaries and bring their imaginative visions to life.

    And as always, be sure to check the official Blender page to find out if there are new versions being released.

  • How Hot Is Too Hot For GPU?

    How Hot Is Too Hot For GPU?

    Graphics cards, also known as GPUs (Graphics Processing Units), are an essential component of modern computers. They are graphics processing unit responsible for rendering and displaying images, videos, and other graphical content on your computer screen.

    In this blog post, we’ll discuss why graphics cards are important and how they impact your computer’s performance.

    Why Are Graphics Cards Considered Important Components?

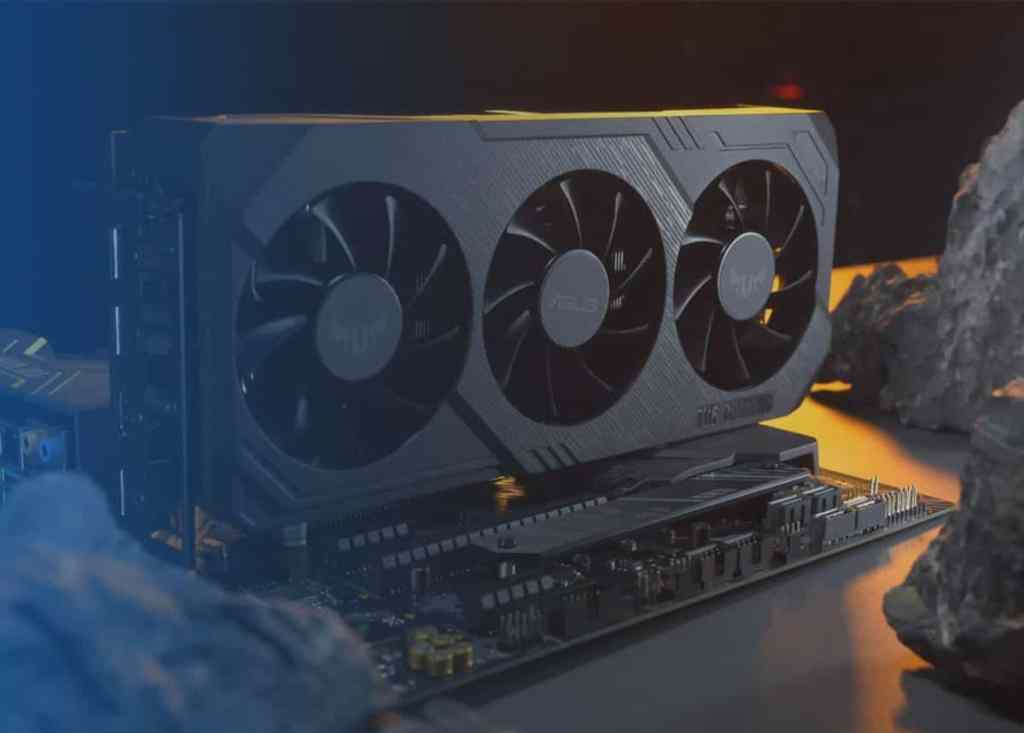
    RTX 4080 How Hot Is Too Hot For GPU

    Improved Gaming Performance

    Graphics cards are important because they can greatly improve gaming performance. A powerful graphics processing unit can render game environments and characters with more detail and higher frame rates, resulting in a smoother and more immersive gaming experience. Many modern games require a dedicated graphics card to run at their highest settings, and without one, you may experience lag, stuttering, and other performance issues.

    Better Video and Photo Editing

    Graphics cards can also improve the performance of video and photo editing software. These applications often require complex calculations and processing of large amounts of data, which can be accelerated by the specialized processing units in a graphics card. With a powerful graphics card, you can render and edit high-resolution video and images more quickly and efficiently, saving you time and improving your productivity.

    More Accurate Scientific Simulations

    In addition to gaming and multimedia applications, graphics cards can also be used for scientific simulations and calculations. Many scientific applications, such as weather forecasting, climate modeling, and molecular dynamics simulations, require large amounts of computational power, which can be provided by GPUs. Graphics cards can perform these calculations much more quickly and accurately than traditional CPUs, allowing researchers to run more complex simulations and make more accurate predictions.

    Virtual and Augmented Reality

    Finally, graphics cards are also essential for virtual and augmented reality applications. These technologies require high-resolution displays and fast refresh rates, which can only be achieved with powerful graphics cards. With a VR-ready graphics card, you can experience immersive virtual environments and interact with digital objects in a more natural and intuitive way.

    How Hot Is Too Hot For GPU Temperature?

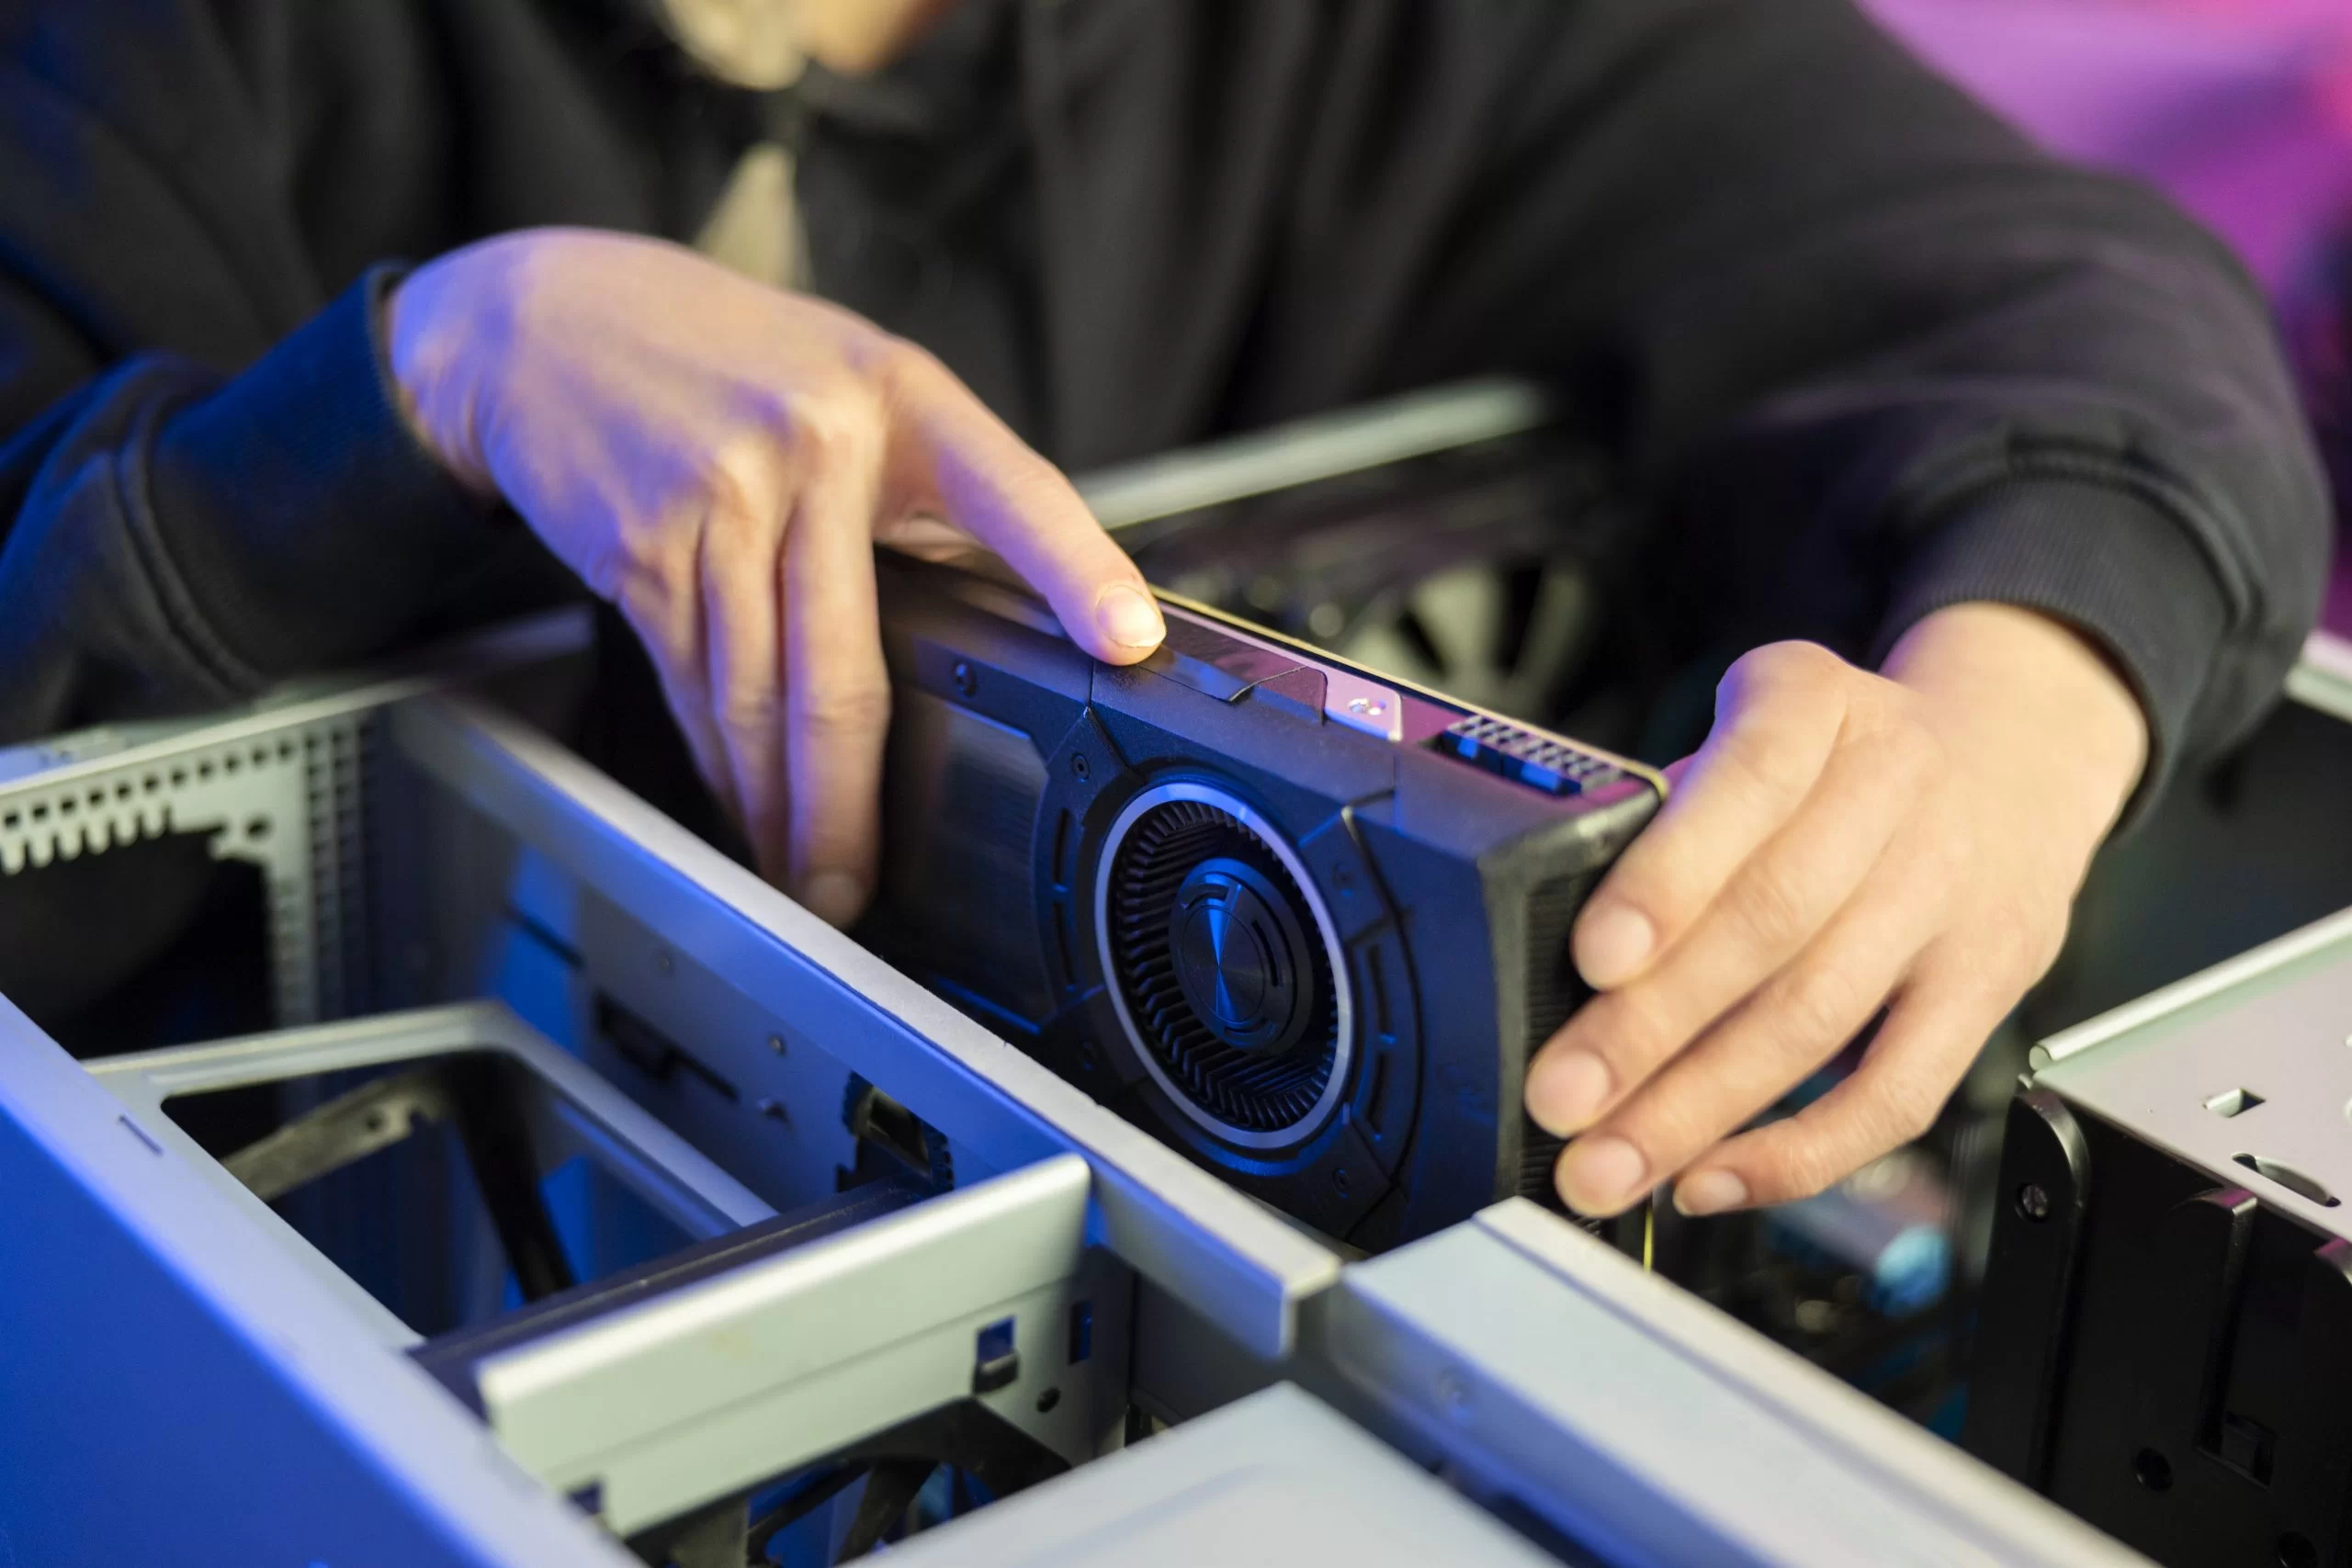
    GPU On Motherboard How Hot Is Too Hot For GPU

    As a rule of thumb, a GPU temperature under heavy load should typically stay below 85-90 degrees Celsius (185-194 degrees Fahrenheit). However, the specific temperature limit for a graphics processing unit can vary depending on the manufacturer and model.

    In general, most modern GPUs are designed to operate safely at temperatures up to 90 degrees Celsius, but running a GPU at that temperature for prolonged periods can increase the risk of damage to the components and decrease the lifespan of the GPU. Therefore, it is recommended to keep the temperature of your GPU below 85 degrees Celsius for optimal performance and longevity.

    To help keep your GPU temperature in check, you can make sure that your computer case has adequate ventilation and cooling, and consider installing additional cooling solutions such as GPU fans or liquid cooling systems. Additionally, you can adjust the fan speed and clock speeds of your GPU using software tools provided by the manufacturer to keep the temperature within safe limits.

    Why Is Overheating Dangerous For your Graphics Card?

    Blue Screen of Death How Hot Is Too Hot For GPU

    Overheating can cause several dangers to a graphics card, including:

    Reduced Performance

    When a graphics card gets too hot, it can start to throttle its performance to prevent damage to the components. This can lead to decreased frame rates, stuttering, and other performance issues. This reduced performance is only temporary. Once average GPU temperatures are reached, then performance should return to normal.

    Component Failure

    A higher than normal GPU temp can result in overheating. When this happens, your GPU’s temperature is abnormally high and your cooling systems can’t cool it down fast enough. Overheating can cause damage to the components on the graphics card, including the GPU, memory chips, and VRMs. This can result in system crashes, artifacts, and other problems. In extreme cases, overheating can cause permanent damage to the graphics card, rendering it unusable. You can make use of system monitoring software to keep track of your GPU temperature during usage and when idling.

    Reduced Lifespan

    Overheating can also reduce the lifespan of a graphics card. Heat can cause the components to degrade over time, leading to premature failure and reduced performance.

    Fire Hazard

    In rare cases, extreme overheating can pose a fire hazard, particularly if there are flammable materials in the vicinity. We’ve seen images on the Internet showing either GPUs or CPUs being on fire. While graphics cards reach high temperatures, it’s not enough to set nearby components on fire. If anything, the generated heat will probably just affect the other components negatively, but nothing too damaging as catching fire.

    What Are Tips To Maintain Average GPU Temperature?

    Graphics cards are an essential component for modern gaming, video editing, and other graphics-intensive tasks. However, these powerful devices can generate a lot of heat, which can lead to performance issues, component failure, and reduced lifespan. In this blog post, we’ll discuss some tips on how to keep your graphics card cool.

    Proper Ventilation and Airflow

    The first and most important step in keeping your graphics card cool is to ensure that your computer case has adequate ventilation and airflow. Make sure that there is enough space around your graphics card for air to circulate, and that the case has enough fans to move hot air out of the case. If your computer case is particularly small or cramped, you may need to consider upgrading to a larger case with better ventilation.

    Your room’s ventilation and airflow also matter. We’re not exactly recommending open air cooling here, but at least the ambient room temperature should be cool enough to keep your system cool. A lower ambient temperature should help keep your system cool.

    Regular Cleaning

    Dust and debris can accumulate inside your computer case over time, clogging up fans and air filters and reducing the effectiveness of your cooling system. A dirty GPU fan could be a cause of an abnormally high GPU temperature.

    Regularly cleaning your computer case with compressed air or a vacuum cleaner can help keep your graphics card and other components cool.

    Adjusting Fan Speeds

    Most graphics cards come with their own built-in fans, which can be controlled using software tools provided by the manufacturer. Increasing the speed of your graphics card fan can help dissipate heat more effectively, but be aware that higher fan speeds can also lead to increased noise levels.

    Fan speeds matter here because the heat transfer from the aluminum heatsink is affected. When heat is absorbed by the heatsink, the GPU fans need to be able to draw out the heat as fast as it can. This is a quick and neverending cycle that keeps your graphics cards cool. But the fan speeds of GPU varies depending on the manufacturer.

    Overclocking carefully

    Overclocking your graphics card can help improve performance, but it can also generate more heat. If you’re going to overclock your graphics card, make sure to do it carefully and incrementally, and monitor the temperature and performance of your GPU closely.

    Upgrading cooling solutions

    If your graphics card is consistently running hot, you may need to consider upgrading your cooling solutions. Aftermarket cooling solutions such as liquid coolers or high-performance fans can help keep your graphics card cool, but they can also be more expensive and difficult to install than stock cooling solutions.

    What Software Should I Use To Maintain Optimal GPU Temperature?

    There are several software tools that you can use to monitor and control the temperature of your graphics card:

    MSI Afterburner

    This is a popular tool that allows you to adjust the clock speeds, fan speeds, and voltage of your graphics card, as well as monitor the temperature, usage, and performance of your GPU.

    EVGA Precision X1

    This is a similar tool to MSI Afterburner, offering features such as GPU overclocking, fan control, and temperature monitoring. Some Nvidia users prefer using this system monitoring software over the MSI Afterburner.

    GPU-Z

    This is a lightweight tool that provides detailed information about your graphics card, including the temperature, clock speeds, memory usage, and other PC components.

    HWMonitor

    This is a system monitoring tool that allows you to check the temperature of your CPU, GPU, and other components, as well as the usage and performance of your system.

    SpeedFan

    This is another system monitoring tool that allows you to control the speed of your fans, which can help keep your graphics card cool.

    The Wrap Up

    It’s quite normal for GPUs to reach a high temperature when they’re in use. Tasks such as video rendering, 3D work, and even gaming can cause GPUs to reach high temperatures, but within a tolerable range.

    But what’s not okay here is when the GPU temperature goes abnormally high for no reason, or when the GPU temperature is not cooling down fast enough.

    Most GPU manufacturers have established tolerable heat thresholds for all of their graphics cards. Both Nvidia and AMD GPUs can go as high as 90 to 100 degrees Celsius, which is normal all things considered. Anything higher than that could cause problems in the long run.

  • How Long Do GPUs Last?

    How Long Do GPUs Last?

    Graphics cards, much like any other piece of electronics, have their lifespan. In fact, almost anything in the world that we use has a lifespan. Your shoes, toothbrush, appliances, cars, clothes, and mobile devices will eventually show signs of wear and tear as the years go by and with sufficient usage. \

    And with electronics, they’ll fail at any given time. One day you’re playing video games and all of a sudden you find out that your GPU is dying. It no longer works as efficiently as before. Your FPS drops for no reason. Your PC is making weird noises when you play games.

    Graphics cards fail most of the time when they go beyond the absolute limits of their average lifespan, but there are other instances where you’re faced with a failing GPU.

    And that’s what we’ll be discussing in this article…

    How Long Do GPUs Last?

    Featured Image How Long Do GPUs Last

    This is a legitimate question asked by a lot of first-time PC owners and builders. Even with prices of certain graphics cards going down, there’s still something that haunts the back of every PC owner’s mind: can my GPU last up until I save enough money to buy a new one?

    So how long does a GPU last?

    An average GPU lifespan is about five to seven years, give or take. But being an electronic device, there’s always a chance that it will die for no reason. But GPU manufacturers have invested much in their GPUs’ quality assurance, so your GPU dying even if it’s a brand new one is highly unlikely. And even when that happens, the manufacturers will replace it with a new GPU as long as it’s under warranty period.

    But with GPU usage, parts will slowly deteriorate. Capacitors go bad, your PCB or circuit board’s solders melt out or eventually erode off, and so on. Your integrated circuits like VRAM chips and voltage regulators go bad, or your GPU’s gold contacts and semiconductors diffuse. It doesn’t matter if you have an old GPU model or a new GPU.

    Don’t worry. Gradual deterioration doesn’t occur within the first few years of the GPU lifespan unless you bought a secondhand unit. You’ll eventually notice that your GPU is dying once you go past the five or seven-year mark of the lifespan of a GPU.

    However…

    There are circumstances where your graphics card will deteriorate faster than it normally should. And within these circumstances is one common denominator: HEAT.

    And you’ll see why…

    Why Do You Have a Dying GPU?

    You’re wondering why your new graphics unit is suddenly malfunctioning after tweaking the graphics settings of modern games to high settings or when you’ve tinkered with graphics features like ray tracing and DLSS.

    Outside of manufacturer defects, these are the biggest reasons why you’re going to have a dead GPU sooner than later.

    Overclocking the GPU

    Overclocking can be defined simply as trying to squeeze as much performance out of your GPU. Modern graphics cards will have two speeds: base clock speed and boost clock speed. Your GPU runs on the base clock speed, obviously. But overclocking will allow you to reach your boosted clock speed.

    Overclocking allows you to get higher FPS and benchmarks, but at a cost. Overclocking produces overheating issues because the graphic cards are working overtime. Now don’t get this statement wrong. Graphics cards are built to withstand high temperature operation by their manufacturers. Running an overclocked GPU to play games at max settings will generate more heat than it normally should. Power consumption will also skyrocket just to get your powerful GPU through the overclocking session.

    What happens here is that heat will negatively affect your graphics card’s components. Over time, solders can melt or your VRAM Chips and parts of the PCB are fried. Again, this doesn’t happen immediately the first time you overclock. There’s no issue here if you overclock sparsely and you don’t run it for longer than you should.

    For example, if you overclock for one hour, your GPU lifespan shouldn’t shorten drastically. It would be the equivalent of normal GPU working conditions, except you’re just running at a higher graphical detail. Your PC components will not get affected by the overclocking either. It’s a different story when you overclock for hours on end and for more than once a month or so.

    So what happens when there’s more heat than your system can generally handle?

    Here’s what we call thermal throttling, or performance throttling. Graphics cards are built to withstand high temperatures. To prevent overheating issues, graphics cards will slow down intentionally in order to lower temperatures. This will cause your system to stutter for a good few seconds or up to a minute or so. This allows the graphics cards or processor to catch up and recover before it can continue to operate.

    Lack of or Poor Airflow

    Your PC’s intake and exhaust fans are responsible for continuous cooling. Intake fans pull cold air into the system and exhaust fans expel hot air out of the case. Both intake and exhaust fans should operate equally on all levels.

    Overheating issues can stem from:

    • Intake fans not pulling in adequate amounts of cool air
    • Exhaust fans not expelling adequate amounts of hot air
    • Both intake fans and exhaust fans are not adequately pulling in or expelling air out respectively

    Good airflow actually prevents these issues, and all it takes for good airflow is to clean the intake and exhaust fans. How much maintenance you’ll need to do is determined by how easily your fans get dirty. Personally speaking, I clean out the fans on my case once every three months.

    Bitcoin Mining or Crypto Mining

    Mining Rig How Long Do GPUs Last

    The cryptocurrency mining process can be cruel on graphic cards, regardless of their brand and model. An Nvidia RTX 3060 Ti used for mining all year round probably has a lifespan of three years, maybe even less.

    How long can a GPU last when it’s used for crypto mining? GPUs last far shorter than they should when they’re used for mining. You see, the process abuses your GPU for a long period of time. The mining rig will run 24 hours a day, 7 days a week, for up to a year or so.

    Let us paint a more relatable picture.

    Imagine turning on your car’s engine and leaving it on for a year. The car parts go through a lifetime’s worth of deterioration within that timeframe. By the time you turn off your car, all the parts will have gone through hell. The same goes for your graphics card on crypto mining.

    Graphics cards are not meant to run 24 hours a day, 7 days a week. Even veteran PC builders are smart enough to set their PCs to sleep mode when they are not using the system even if it’s only for a few hours. You’ll extend your GPU life by doing so, not to mention your other components too.

    Fans Not Working Properly

    Your cooling fans are responsible for maintaining your system’s natural airflow. When you want more performance out of your graphics card, you’ll need to make sure that the fans are working properly.

    Some graphics cards have at least one fan installed in them. The bigger cards will have two or three. These fans only have one thing to do: to make sure that there’s sufficient airflow coming into the heatsink.

    If that doesn’t make sense, here’s how it works:

    • Graphics cards generate heat and is transferred through the heatsink.
    • The GPU fans blow strong enough to cool down the heatsink
    • Heat is expelled from the heatsink and circulated inside the PC case
    • The case’s exhaust fans will then expel all the accumulated heat in the system

    When your GPU fans don’t work, heat is not removed fast enough from the heatsink. This results in overheating which leads to thermal throttling.

    Thermal Paste Issues

    GPUs have thermal paste pre-applied by the manufacturers. Extended usage of your graphics cards will dry up this thermal paste. When the thermal paste is dried up, it’s no longer efficient in transferring heat from the chip to the heatsink.

    Applying thermal paste to old graphic cards isn’t challenging or expensive. Thermal paste is affordable and there are tons of YouTube videos that will show you how to replace your thermal paste on your CPU or GPU.

    Heating Leads To Graphics Card Failure

    We talked about how heat generated from the graphics card can lead to GPU failure, whether it’s heat caused by overclocking, lack of natural airflow, GPU fans being unable to maintain positive airflow or even crypto mining.

    Regardless if you have an old GPU model or a new model, heat will always be an issue. When graphics cards and processors are put under intense workloads, they’ll produce more heat. When more heat is produced, fans will need to work harder to cool these components off.

    When the system is unable to cool down on time, thermal throttling happens. Again, this is a normal response to overheating. When the system’s cooled off properly, you’ll get more performance out of your graphics card, processor, and other parts.

    Your RAM, SSD, and even your power supply generate heat when they’re working and running. All this heat is circulating inside the PC case, which is why the exhaust fan needs to expel hot air as soon as possible to keep every component cooled off.

    Here’s the interesting part…

    All the PC components, from graphic cards to processors to RAM to SSD, are built to withstand varying temperature ranges. For example, graphic cards usually hover a maximum tolerance of 80 degrees Celsius (or 176 degrees Fahrenheit). What this means is that your graphics card will not fail if it reaches this temperature because it’s meant to withstand that certain temperature range. However, going past that mark will lead to some throttling.

    Final Thoughts

    So how long do GPUs last?

    The short and sweet answer is this: it depends on how and how often you use your system.

    Under normal workload, GPUs last anywhere between five to seven years. On a personal note, I’ve had my GeForce 1050Ti for eight years running and it’s just as good.

    However, if you’re running a crypto mining rig, the GPU life span is halved. This is why you don’t really buy secondhand GPUs used for mining.

    But what really kills any graphics card is obsolescence. Every year, manufacturers such as Nvidia and AMD are always releasing newer GPUs with higher VRAM storage, faster clock speeds, and more efficient cooling technologies. Your GPU is dying the moment something new comes up, and we’re not talking about the components’ physical deterioration. It’s just the natural ebb and flow of any electronics device.

  • GDDR5 vs GDDR6 – Which Is Better?

    GDDR5 vs GDDR6 – Which Is Better?

    Out shopping for one of the latest graphics cards? Well, you’ve probably encountered letter-number combinations such as “GDDR5” and “GDDR6”. And if you’re not a tech-savvy person, you’ve probably only concerned yourself with how much graphics memory capacity a video card has.

    Your personal computer or laptop is made up of different components such as the CPU, RAM, storage devices, and graphics card. Between these different components lies one specification that encompasses all of them – MEMORY.

    But not all of them have the same type of MEMORY. For example, RAM or RANDOM ACCESS MEMORY uses memory to store data that allows the computer to run. Storage devices like your HDD and SSD use memory for long-term data storage.

    RAM uses short-term memory because they come and go as needed by the CPU. HDD and SSD use long-term memory.

    Now, graphics card use what they call VRAM or Video RAM. It works a lot like the RAM on your CPU, but instead, it stores short-term data in order for the graphics card to run. The GPU’s VRAM cannot be accessed by the CPU.

    Having said that, more video cards are now using GDRR6 as they slowly transition from the GDDR5 chips. But what does that mean for the end user? What’s the actual difference between these types of video memory?

    We’ll find out in this article as we discuss the subtle differences between GDDR5 vs GDDr6.

    What Does GDDR Even Mean?

    Nvidia RTX 3050 GDDR5 vs GDDR6

    GDDR is short for Graphics Double Data Rate, and is a form of short-term memory used by GPUs to store data. The VRAM is responsible for compiling images received and displays them on your monitor.

    Graphics card manufacturers will always post the type of GDDR the GPU is using. Right now, the current version is GDDR5 for a lot of the semi-recent video cards but we are now getting graphics cards with GDDR6 memory. Soon, GDDR6 will become the industry standard.

    How and Where is GDDR Used?

    GDDR memory is used for everything that has to do with graphics. You use VRAM for gaming, 3D modeling, video editing, and more.

    Data that’s used for image compilation is cached into the VRAM and comes and go as it’s needed. Data stored in VRAM is short-term, which is also it’s downfall. Unlike SSD and other storage devices, data does not stay long in a VRAM. Once the data is used, it’s removed from the VRAM to make room for the next set of data.

    But its short-term memory capacity is also its biggest weakness. If the video card doesn’t receive power or is turned off, you lose all data for that session.

    GDDR5 vs GDDR6 – Which Should You Go For?

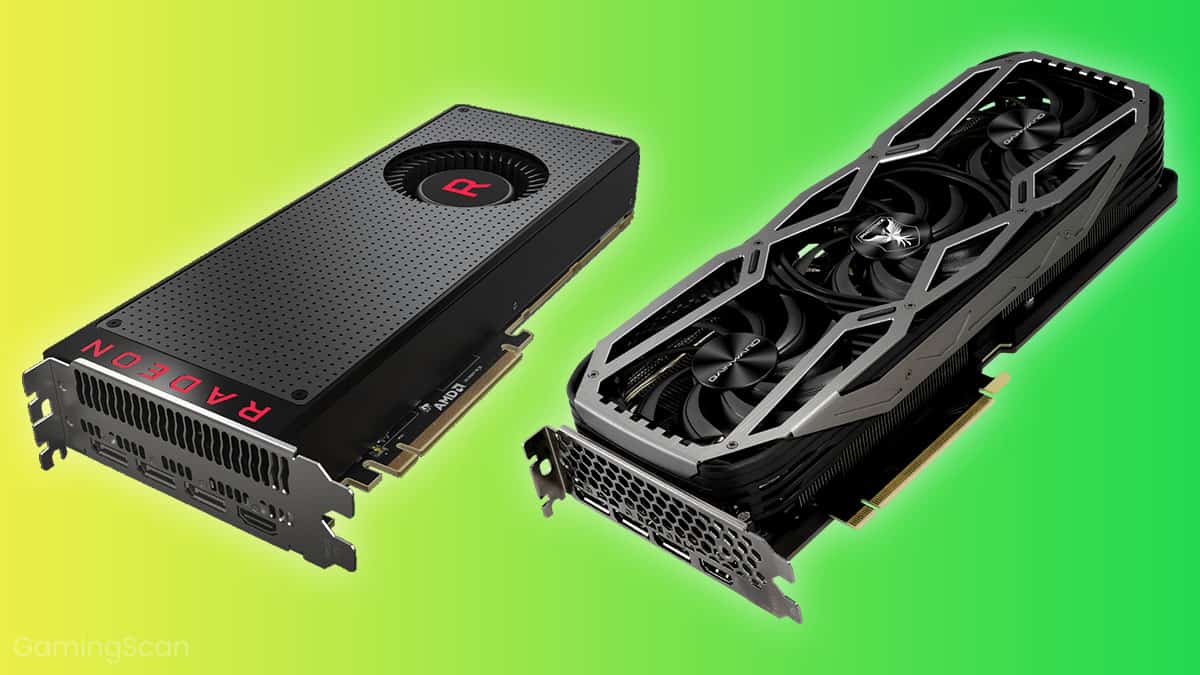
    Two Different GPUs GDDR5 vs GDDR6

    The biggest difference between GDDR5 vs GDDR6 is their transfer speeds. GDDR5 has a transfer rate of 8GB per second and GDDR6 has a transfer speed anywhere between 14gb and 16GB per second. Roughly double the transfer speeds of a GDDR5 graphics card.

    Is this increase in transfer speed noticeable by your average user? The benefits are hard to quantify, mostly because the newer iterations of graphics cards are intended to out-do their old counterparts. Having said that, a new iteration will almost always leave a performance gap between them.

    Another point for consideration is their capacity. GDDR5 graphics cards have different sizes ranging from 512MB to 8GB, whereas your GDDR6 will have higher capacity. Your GDDR6 graphics card will only have two sizes: 8GB and 16GB.

    What About GDDR5X?

    GDDR5X is considered a half-step between the GDDR5 and GDDR6. with a transfer speed between 10GB and 14GB. It has a higher transfer speed than the GDDR5, but is only slightly lower than the GDDR6.

    What Are Some Examples of Graphics Cards with GDDR Memory?

    Graphics Cards with GDDR5 Memory

    NVIDIA

    AMD

    Graphics Cards with GDDR6 Memory

    NVIDIA

    AMD

    Do You Even Need GDDR6?

    By now you’ve already known the difference between GDDr5 vs GDDR6, and you’re probably thinking…

    Do you even need a GDDR6 graphics card? Is there are a way to upgrade the GDDR installed in your graphics card?

    We got good news and bad news.

    First the good news. What you need out of the GDDR6 graphics card will determine whether or not it’s worth getting. Do you need the graphics boost to power through rendering tasks? If so, a GDDR6 graphics card might be a good investment.

    But if you have a GDDR5 GPU and want to upgrade the VRAM only, well that’s where we have the bad news. Unfortunately, VRAMs are soldered directly onto the GPU, so you can’t replace them.

    But overall, a GDDR6 is still considered a direct upgrade over the GDDR5. But even if it’s an upgrade, it doesn’t mean that it’s inherently better. For example, a GDDR5X graphics card liker the GTX 1080Ti has the same performance as an RTX 3060Ti.

    How Faster Is The GDDR6 Over GDDR5?

    The theoretical difference between the two generations of video RAM is one thing, but real-world benchmarking is another. The latter is more realistic since you’re comparing results in real time.

    But is it even possible to do a physical benchmark? Yes!

    One benchmarking done by a forum poster named VideoCardz compared two GDDR generations from one graphics card – the Nvidia GeForce GTX 1650. The GPU has two iterations, namely a GDDR5 variant and GDDR6 variant.

    The GDDR5 variant has a higher base clock speed of 1485MHz compared to the GDDR6’s 1410MHz speed. But the GDDR6 variant has a higher memory speed of 12,000MHz than the GDDR5’s 8000MHz.

    As you can see from the charts below, the GDDR6 variant was slightly better amongst different games. The GDDR6 variant was about 5% to 8% better compared to the GDDR5 variant.

    GTA 5 Benchmarking GDDR5 vs GDDR6
    Gaming Performance GDDR5 vs GDDR6

    Gaming performance averaged at 6% for the benchmarked games such as GTA 5, Overwatch, and Valorant.

    Both GPUs have the same TDP of 75 watts, but the GDDR6 variant used 9% lower power consumption than the GDDR5 variant.

    As you can see, the overall GPU performance gap isn’t that great between the GDDR5 and GDDR6. Sure the latter has a higher performance recorded in the benchmark, but it’s pretty much negligible to say the least.

    And by negligible, we mean that if you’re running a game at 60FPS on ultra settings on the GDDR5 variant, then you should be able to do the same thing on the GDDR6 variant. You won’t notice the difference between the FPS and graphics settings even.

    Is 8 GB GDDR6 Enough?

    If you plan to go into 1080p gaming, then 8GB of GDDR5 or GDDR6 is more than enough. But if you’re doing video editing, 3D modeling and animation, and other professional tasks, then you’ll need something higher than 8GB.

    Is There a GDDR6 Shortage?

    Between 2020 and 2021, there has been a shortage of GDDR6, thereby limiting the production of the RTX 30-series and Radeon RX 6000-series graphics cards.

    A global shortage of semiconductors plagued the industry, further worsened by the COVID-19 Pandemic. Shipping of stocks weren’t done on time because shipping of medical supplies was heavily prioritized.

    The shortage was made worse by cryptocurrency miners who hoarded the GDDR6 graphics cards. Scalpers also hoarded stocks of these graphics cards, thereby driving the price upwards.

    The Wrap Up

    Now you know that GDDR stands for graphics double data rate. It refers to the standard VRAM that a graphics card uses to store short-term data.

    GDDR6 is definitely a solid choice for gaming and other graphically-challenging workloads. However, they’re quite on the expensive side but they’re worth it if you ask me.

    The difference in performance between a GDDR5 vs GDDR6 isn’t that substantial as seen from the benchmarks above, unless you’re comparing low end GPUs to a high-powered one.

  • What Is A 64 Bit Operating System?

    What Is A 64 Bit Operating System?

    When you’re out buying a new operating system, you’ve probably noticed a suffix attached to the OS. This suffix could either be a 32-bit or 64-bit operating system. For example, Windows 10 32-bit operating system or Windows 10 64-bit operating system.

    But what exactly do they mean? What is a 32-bit operating system? What is a 64-bit operating system? Why is the 64-bit operating system more expensive than the 32-bit? Why do a lot of technicians and programmers swear by the 64-bit OS?

    We’ll find out more in this article…

    What Does 64-Bit Mean?

    A 64-bit operating system is designed to work for a PC that processes 64 bits at a time. A lot of personal computers today operate at 64 bits, and a lot of mobile devices are now starting to run at 64 bits. Now, a 64-bit operating system will not work in a PC built for 32-bit, but a 32-bit operating system will work in a system designed for 64-bit. Older hardware will have limited support for 64-bit operating systems, but it doesn’t mean that you’ll have major compatibility issues.

    A 64-bit processor refers to the microprocessor responsible for processing instructions and data in chunks of 64 bits. To put it simply, 64-bit microprocessors can handle larger amounts of calculations per second than their 32-bit counterparts.

    A microprocessor has two key criteria: its memory addresses and the corresponding instruction or data present in each memory address. So your microprocessor will always be tied to memory space where the data and applications are executed along with the corresponding number of bits available on the processor.

    What’s The Actual Difference Between 32-Bit and 64-Bit Processors?

    64-bit processors are capable of handling the following technologies:

    • hyper-threading and faster data exchanges
    • larger internal cache (compared to a 32-bit)
    • advanced instruction sets
    • faster bus speeds and system clock speeds

    But the features are not a result of having 64-bit registers. The actual difference between a 32-bit and 64-bit processor is that the latter has a larger and more increased bus width.

    More About 64-Bit Computing And Compatibility

    If you’re building a new PC, you’re investing in a lot of hardware and software. How much RAM you need, the kind of computer graphics card you want to use, the memory size of the CPU, and most importantly, the kind of operating system you’ll most likely use to avoid compatibility issues.

    However, you’re always going to be plagued by whether or not the new hardware you have now will work with the newer hardware in the future. For example, you have the latest motherboard capable of running the new Nvidia RTX 4000-series GPUs. How confident are you that your motherboard will still be able to accommodate the RTX 5000-series or RTX 6000-series down the line?

    It’s pretty much the same concept when you’re moving from a 32-bit computer architecture to a 64-bit computer architecture. So, here’s what you can expect when you do decide to do that

    Hardware

    64-bit processors will not be compatible with 32-bit processors. Having said that, a motherboard that can only accommodate 32-bit processors can’t run a 64-bit processor. However, you can run a 32-bit processor on a motherboard with a 64-bit processor slot. If you’re going to use a 64-bit processor but you have a 32-bit processor socket on your motherboard, you’ll need to get a new motherboard.

    But it’s not advisable that you run a 32-bit processor on a 64-bit socket because that’s like putting a Toyota engine under a Lamborghini.

    A quick glance over my Device Info will show you what kind of processor and operating system I’m using in the System Type tab. As you can see, I’m using a 64-bit processor together with a 64-bit operating system.

    Device Info What is a 64 Bit Operating System
    Creation responsive internet website for multiple platforms. Building mobile interface on screen of laptop, tablet, smartphone. Layout content on display devices. Conceptual banner of web technology.

    Operating System

    64-bit processors can easily support both 32-bit and 64-bit operating systems. If you have a licensed Microsoft Windows 10 32-bit operating system, you should be able to use that on a 64-bit computer. But you may not be able to maximize the 64-bit functionality and advanced features because you don’t have a 64-bit processor.

    Software Drivers

    Drivers allow the operating systems to recognize hardware devices installed on the motherboard. Almost every piece of hardware will have its corresponding driver, which you’ll find under Device Manager. For example, you’ll see my device driver info for my USB wireless adapter.

    Device Driver What is a 64 Bit Operating System

    Much like operating systems, drivers have their own 32-bit and 64-bit version. If you run a 32-bit operating system, you should be using a 32-bit driver. And the same thing applies for 64-bit operating systems. A 32-bit driver is not compatible with a 64-bit operating system, and vice versa.

    Unlike programs and applications, drivers are always going to have options between 32-bit and 64-bit. There’s no middle ground even if you are using new technology.

    Applications

    Applications and programs will run depending on the operating system. A 64 bit operating system will need to run 64 bit applications and programs, and likewise for 32 bit operating systems. For example, you’ll need a 64-bit word processing program for a 64-bit version of Windows or Mac OS.

    Just like drivers, you’ll have compatibility issues running a 32-bit application on a 64-bit operating system. Note that you might find several programs out there that won’t matter if you install it on a 32-bit or 64-bit version of Windows.

    Advantages and Limitations of 64-Bit Processors

    Using a 64-bit processor has its own advantages.

    More Memory Space

    You have more memory space that gives you more computing power so to speak. With a 64 bit version of Windows or Mac OS, you can maximize programs that rely on heavy processing power such as database management tools, 3D rendering programs, and so on.

    Data Transfer Is Better and Faster

    Running a 64 bit processor with a 64-bit operating system will allow you to move and transfer data. And because you need bits for both addressing and data, you actually have double the capacity with a 64 bit processor compared to a 32 bit processor.

    But with these advantages, you also have some limitations.

    Catch Up Is Still Difficult

    64-bit processors are more common in the market now compared to what it was a couple of decades ago. But even today, 64-bit processors cannot access all of the memory space that it has to offer. With newer operating systems, new technology, and better supporting hardware, you’re still looking at about 48-bits of memory space being used by 64-bit processors. But the industry is getting better when it comes to giving you improved processor performance, so we’re more or less going to see this issue disappear within the next few years.

    Waste of Memory Space

    64-bit is backward compatible with 32-bit computing, but it often results in wasted memory space. To support compatibility, some programs and data sets need to pad their data to address the additional 32 bits. It works, but it’s not going to be as effective as it should be.

    But this issue is often resolved by downloading a new version of a 32-bit legacy software and is replaced by their 64-bit counterparts respectively.

    The Wrap Up

    Using a 64-bit processor on a 64 bit operating system is always going to be the most ideal route, even if it means having to spend a few extra dollars on buying the OS. You have more memory space and higher memory size, improved security, and overall better performance.

  • Does Ram Brand Matter?

    Does Ram Brand Matter?

    Building a new PC will have you going through different brands and manufacturers for each PC component, from the CPU to the GPU to the RAM itself.

    But you’re thinking: why would I even bother going for branded RAM modules? Shouldn’t I just be concerned with the speed and specs?

    Believe it or not, there’s a significant difference between using branded RAM and non-branded one. And we’ll tell you more about it in this article.

    Does RAM Brand Matter?

    Let me answer this question with another question: would you settle for non-branded shoes if you’re more concerned about quality and durability?

    RAM brand matters in the same way that you’d want to go for buying branded electronics or any other item. Quality is always your #1 priority when you want to go for the top-tier RAM brands.

    However…

    Should You Mix Two Different RAM Manufacturers In One PC?

    Does RAM brand matter if you want to mix two different RAM modules of the same specs? That’s another question worth asking. And we’ll have different answers for that.

    1. You could mix different RAM modules from different brands so as long as they share the same specs.
    2. You can’t mix RAM modules with different RAM specifications, even if they come from the same brand. For example, you can’t get a DDR4 RAM to work together with a DDR3 RAM. Your PC will run whatever is the slowest RAM stick installed while downgrading the faster one to match the speed.

    On the first point, there’s nothing incoherently wrong with mixing different brands of RAM so as long as they share the same specifications. But it’s not exactly recommended either. The minute differences in how they were manufactured could make or break their performance altogether.

    If you want to use different RAM brands, you’ll need to make sure that the two different RAMs have the same specifications listed:

    • RAM type or generation
    • Voltage requirements
    • RAM speeds
    • CAS latency
    • Motherboard compatibility

    And more…

    If quality assurance is what you need, then just buy the same RAM sticks coming from the same brand. The RAM market is relatively bigger compared to CPU and GPUs. The latter will have only two brands fighting for supremacy, but RAMs have different manufacturers that are going toe-to-toe at any given time.

    Having said that…

    Can you mix RAM brands? Yes, so as long as they share the same specifications. But if you want to cut the guesswork, then just buy the same brand.

    Will Any Brand of RAM Work With Your PC?

    Does RAM brand matter when you’re building your first PC? Well, the more correct question should be: does RAM brand matter when it comes to matching your motherboard?

    RAM brand doesn’t really play a lot when it comes to compatibility. What you do need to be on the lookout for is the type of RAM you’re using.

    Much like RAM, motherboards have different manufacturers. Your compatibility issue will depend on how recent the motherboard is. For example, older motherboards can handle DDR3 RAM modules, but not DDR4 modules. If you’re upgrading from a DDR3 to a DDR4 but your motherboard can’t handle the latter, you’re going to need to buy a new motherboard.

    Can You Use DDR4 and DDR5 RAM Modules Together?

    Motherboards are designed to handle only one type of RAM altogether. If your motherboard can handle a DDR5, then just install a DDR5 RAM. Chances are, if a motherboard supports the latest RAM generation, then it can support the previous generations. But it’s not recommended.

    Running a DDR4 and DDR5 at the same time is just not possible. They’re both different physically and internally.

    What Are The Best Brands In The RAM Market?

    The RAM market share is divided amongst brands such as Corsair, Kingston, Patriot, and G.Skill. These are the most popular brands of RAM right now, and they’re individually known for their quality, price, speed, and more.

    But let’s go over them one by one…

    Corsair

    Corsair Vengeance RGB Does RAM Brand Matter

    Corsair is a brand name that needs no introduction. They’re known for their high quality peripherals and components, including their RAM. Corsair is one of the best RAM brands out there and is one of a few brands that’s preferred by a lot of PC builders.

    And as you can see from the image above, they appeal mostly to builders and gamers alike. You also get a decent lifetime warranty for their RAM and other components, so you feel safe knowing that you’re getting a high end RAM with the best quality control possible.

    Kingston’s HyperX

    Kingston Fury Does RAM Brand Matter

    Much like Corsair, Kingston is known for their excellent computer components. The quality of their RAM modules, storage devices, headsets, microphones, and other peripherals are excellent. Most users can testify to how great they make their products.

    And on a personal note, I am using a Kingston HyperX Fury RAM and HyperX Quadcast Microphone. It comes with good warranty from the store and manufacturer warranty as well.

    G.Skill

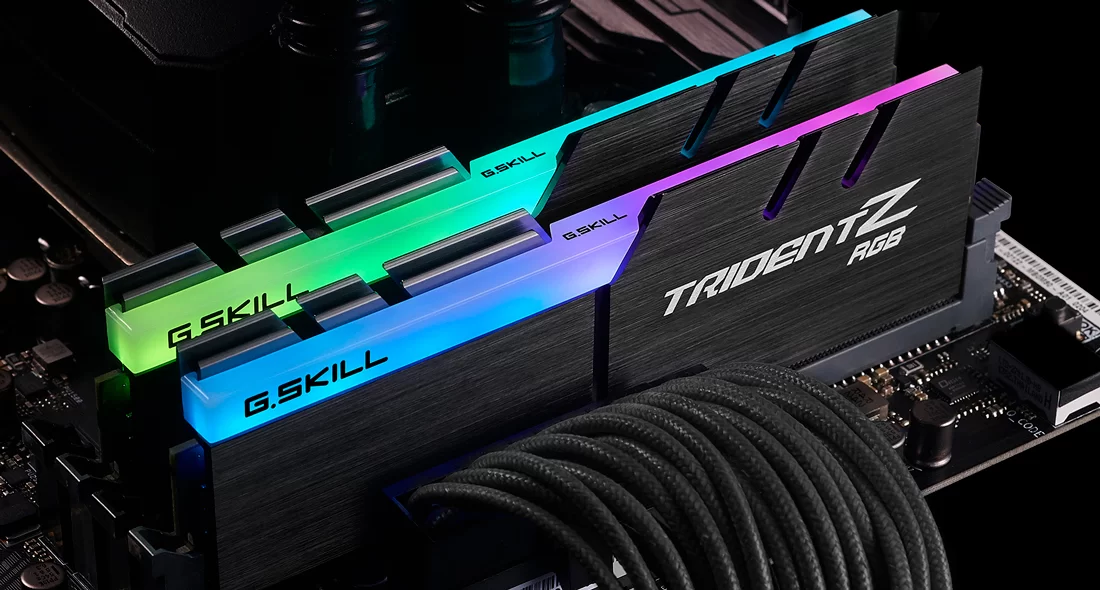
    GSkill Trident RAM Does RAM Brand Matter

    If you want a high end RAM without paying top dollar, then you can always go for G.Skill RAM modules. Much like Corsair, G.Skill is a fan favorite amongst builders, especially those who like to add RGB to their builds.

    It’s one of the top brands on this list solely because they make RAM kits of all sizes and speed, so they’re sure to cater to whatever floats your boat. They’re affordable enough that you don’t have to spend a lot of money without worrying about quality control.

    And speaking of quality control, G.Skill RAMs are covered by limited warranties, and while that’s not a lifetime compared to what Corsair has to offer, they do their best to make sure you get the best RAM stick possible.

    Patriot

    Patriot RAM Does RAM Brand Matter

    Like G.Skill, Patriot is one of the well known brands of RAM with excellent quality and customer servicer. Lifetime warranty is limited, but that’s a non-issue at this point.

    Patriot brings to the market their high-performance, low-cost RAM modules that’s capable of giving the three companies above a run for their money.

    What Are You Looking For When Buying RAM?

    If you’re planning to buy RAM from the companies above or from other brands, you need to know a few things about what to look for. You don’t want to end up with slower RAM sticks, or worse, RAM sticks that are not compatible with your motherboard.

    Remember, you only need to know two important units of measurement: GB or Gigabyte for RAM Size and MHz for RAM Speed.

    Size

    If you’re in the market for new RAM sticks, then size is the first thing you need to keep an eye out for.

    Most people think that it’s difficult to determine how much RAM you need, but it isn’t. The current standard for office PCs is somewhere between 8GB and 16 GB. For gaming, 16GB is the bare minimum and 32GB if you want to push the envelope further.

    People who do video editing and other forms of heavy workload will require at least 32GB to cover some of their applications used.

    Speed

    RAM speed is measured by the number of commands it handles in a second. The unit of measurement is called Megahertz or MHz, or millions of transfers per second (MT/s). The higher the number, the faster the CPU transfers data to and from the RAM per second.

    Higher frequencies are ideal, but only if your motherboard and CPU can handle it. Your CPU can only handle a finite number of commands per second, so there’s no point in buying a RAM that goes past your CPU’s capacity.

  • Everything You Needed To Know About AIO Orientation

    Everything You Needed To Know About AIO Orientation

    Everyone’s doing liquid cooling or AIO (all-in-one) cooling nowadays, and it’s no surprise. Processors are becoming more powerful and the amount of heat they generate is just absurd especially when gaming, editing videos, or rendering 3D models.

    But what most people assume is that AIO liquid cooling is all the same, when in fact, it all depends on the brand and make of the cooling system. To properly install your AIO coolers, you need to know a thing or two about AIO orientation and how it affects the performance of the system.

    And that’s what we’ll be discussing in this article…

    Which Is It? Top, Middle, or Bottom?

    The biggest debate when it comes to the proper orientation is its mounting. More specifically, mounting your radiator and the flow of the tubes.

    You’d think that manufacturers should’ve at least told you where to mount the radiator, but unfortunately, it’s vague. No two manufacturers will have the same set of mounting guide, as seen here from our example. Here, we have the mounting guide for the MSI Coreliquid 240R AiO

    On a more serious note, this is the epicentre of the debate surrounding AiO water cooling mounting. More specifically, the radiator and flow direction of the cooling tubes. Knowing where you should mount your new radiator should be a breeze, and you would think manufacturers have this core piece of information in their literature. The mounting of your water cooling system is – at best – open to interpretation or – worse still – quite vague in most manuals.

    MSI Mag Coreliquid AIO Orientation

    For instance, here’s the mounting guide for the MSI Coreliquid 240R AiO, which has long been a best seller at CCL. 

    MSI Coreliquid Mounting Manual AIO Orientation

    The radiator is mounted at the top of the case, which also happens to be the most preferred orientation by a lot of PC builders. But how come people over at Reddit’s r/PCMasterRace would often scoff at others who mount the radiator top side? How bad, or how well, does a topside orientation affect the performance overall?

    Why Does The Location of the AIO Radiator Matter?

    Before we talk about AIO orientation, we need to first understand your AIO radiator.

    The radiator is basically the heatsink. Your liquid cooler will route the cooling solution through the tubes and passing through the CPU/GPU blocks. The cooling solution absorbs the heat coming from the CPU/GPU and runs it across the pipes until it reaches the radiator. The heat is then expelled through the radiator’s fans. In contrast, your traditional air coolers will run a cycle of pulling cold air into the system and expelling hot air out continuously.

    As you can see, there’s no difference in term of functionality between a water cooling system and an air cooler. It just so happens that water cooling systems are more efficient in heat dissipation than air coolers.

    Having said that, you would think that people who run with an AIO system would think twice about where to place their radiators. But most PC builders will run different configurations for their systems.

    According to Reddit, where you place your radiators will affect your system’s temperatures differently. A front-mounted radiator had lower temperatures by about 10 degrees less than a top-mounted radiator, all while using a standard open-air GPU.

    Does this mean that front-loaded radiators are the way to go? Well, yes and no. Temperatures are within the normal range even if you’re using a top-mounted radiator. The biggest issue with using a top mount radiator is that an open-air GPU will seep in hot air to the radiator. This actually makes the radiator work twice as hard.

    On the other hand, a blower-style GPU will expel heat directly outside of the case, so using a top mounted radiator shouldn’t be an issue since it won’t have to deal with excess heat.

    Tubes Pointing Up or Tubes Down? Does It Even Matter?

    We’re done talking about the radiator. Another big issue that we have to talk about is the orientation of the tubes.

    Now, first time users of an AIO liquid cooler would probably focus more on tube orientation for the sake of aesthetics, or if they simply don’t know any better. Having your tubes pointing to the right direction could mean the difference between efficient heat dissipation and lackluster AIO cooler performance.

    If your tubes are pointing the wrong direction, it will make your AIO work harder than it should. You’re also putting your system at risk for getting excess air into the loop, which could damage the system in the long run.

    The main reason why knowing if your tubes should point up or down from the radiator is that it directly affects your pump’s overall health.

    The pump is usually built into the CPU block, but some models will place the pump right alongside the radiator. The pump ensures that the liquid is circulating properly throughout the system. If your pump isn’t working properly, your AIO liquid cooler isn’t working properly. It’s as simple as that.

    So which is actually better for your AIO pump?

    The sad thing is that there’s no DEFINITIVE ANSWER on which tube orientation is the best. It depends on how you’ve actually mounted your radiator.

    How Should You Mount The Radiator?

    We’re now talking about the radiator again. How you mount the radiator will depend on the case you have. Majority of cases in the market right now will allow you to mount either a 240mm or 280mm radiator for AIO liquid cooling. You’ll see mounts for both the top side and the front side.

    Common orientations for AIO radiators are as follows:

    • Front mount radiator with tubes at the top
    • Front mount radiator with tubes at the bottom
    • Top mount radiator with tubes at the bottom
    • Top mount radiator with tubes at the left
    • Top mount radiator with tubes at the right
    • Bottom mount radiator with tubes on the right
    • Bottom mount radiator with tubes on the left

    Please note that bottom mounted radiators are usually installed in Mini ITX cases, due to the fact that manufacturers have to deal with limited space issues.

    Top Mounted Radiator AIO Orientation

    PCs running open-air graphics card will often go for for a front mounted radiator with tubes pointing down. This kind of configuration would allow your pump to work without any hindrances, but the issue here would be the cable management since you have to route the cables differently.

    Will Radiator Placement Matter For Custom Loop Systems?

    Custom loop systems are the AIO liquid cooler’s most expensive sibling. Both custom loops and AIO coolers work the same way, except that the former is built differently and as the name implies, everything is built from the ground up.

    Simply put, radiator placement will not be an issue for custom loop systems because they’re just built differently. The pumps, radiators, tubes, and liquids are all handpicked, so they’re more durable.

    The only downside is that you have to do a lot more maintenance and you’ll need to spend more money to set things up.

    What If I Went For The Wrong Mounting Orientation?

    What is actually going to happen if you used the wrong AIO orientation? How detrimental is a wrong orientation?

    The biggest issue with using the wrong orientation is the access to excess air. Small quantities of air in excess can end up damaging your system in the long run. This is because air can cause problems for your pump. Remember, when your pump and radiator end up working harder than they should be, you end up shortening the system’s life span.

    On top of that, you also have to deal with the following issues:

    • Noise – A radiator that’s mounted the wrong way can lead to unwanted noises coming from the AIO liquid cooling system. Remember, AIO coolers are marketed to be more silent than your traditional air coolers. Under normal loads, pumps make a certain level for noise. Introducing air bubbles into the system can cause gurgling, whining, and choking noises. The reason why you get these noises is because the pump and radiator are working harder than they should. Air bubbles can also cause rattling sides as they bump across the pump’s sides.
    • Temperatures – CPU temperatures are going to be higher than they should when you mount the radiator improperly. This is because the liquid isn’t moved efficiently, so heat dissipation isn’t optimal due to the unwanted air inside.

    Wrapping It Up

    AIO liquid coolers are great at what they do when it comes to making sure that your CPU and GPU are as cool as possible even under heavy workloads. AIO coolers are also more affordable than custom loops but slightly more expensive than traditional air coolers.

    AIO coolers will have the same parts, from the water block to the radiator to the tubes. But it will depend on the brand and make. That’s why it’s important for you to know how to properly mount the radiator for your AIO.

    If your mounting is done incorrectly, you’ll end up with different issues ranging from higher than normal CPU temperatures to higher noise levels. Worst case scenario, your AIO cooler ends up with a shorter life span. On average, you should be replacing your AIO system when they’re more than five years old. An improperly mounted radiator can force you to replace your system in a few years.

  • What Happens If Power supply Is Not Enough For Graphics Card?

    What Happens If Power supply Is Not Enough For Graphics Card?

    Your GPU or graphics card is an important piece of hardware for your system, be it a PC or a laptop. A graphics card is responsible for providing your system with graphics processing power so your PC can play video games, run graphic design and video editing apps, and house more than just one monitor.

    The GPU is also the most power hungry component in your entire system, so it comes as no surprise that you need a good power supply with the wattage to match the GPU’s power requirements.

    But what happens if power supply is not enough for graphics card? And what kind of power supply unit are you supposed to get for GPUs that need more power?

    We’ll answer those questions and more in this article.

    What Happens If Your GPU Does Not Get Enough Power?

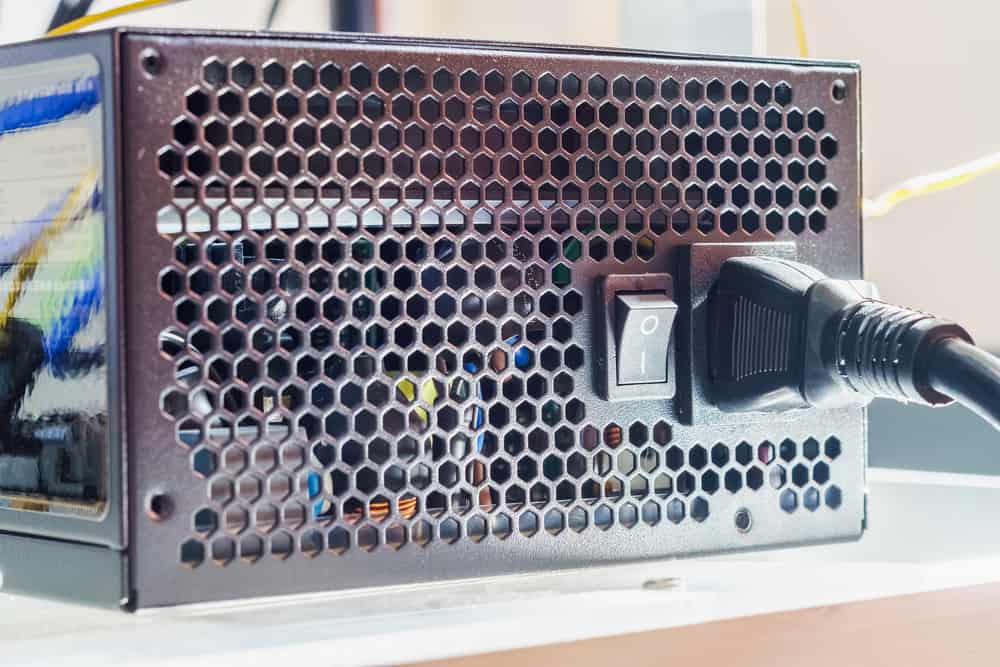
    PSU Sample What Happens If Power Supply is not Enough for Graphics Card

    Your computer’s power supply is responsible for providing power for the different PC hardware in your system. Your motherboard, hard drives, graphics cards, and more are powered by the power supply unit.

    Your GPU will have the highest power consumption amongst the other pieces of hardware, so what happens when the GPU doesn’t get enough power?

    Well, you’ll face one of these many issues:

    1. System instability or the system randomly shuts down or reboots itself
    2. Your FPS on video games will stutter
    3. BSOD or Blue Screen of Death
    4. Damaged Graphics Cards
    5. Fried power cables
    6. Worst case scenario: you system catches on fire.

    When there’s insufficient power to your graphics card, or any of your PC hardware, you won’t have a fully functional unit. You’ll have hardware problems to deal with, and

    How Do You Know If Your Power Supply Is Enough For Your Graphics Card?

    A lot of first-time PC builders make the mistake of just purchasing any type of power supply. They think that all power supply units are one and the same, and that they all do the same job, which is supplying power to the entire system.

    What they don’t know is that their choice of power supply unit relies on what kind of GPU they’re using. If they’re using anything above an Nvidia RTX 3060 or its Radeon counterparts, they’ll need at least a 550w power supply.

    To determine how many watts your graphics card needs, you just go to the manufacturer’s website or the packaging. You’ll be able to see the power requirements of the GPU easily. Power consumption is measured in Watts, so that’s what you’ll be looking for.

    Once you have the information, you’ll be able to determine how much wattage you need from your power supply. What you need to do here is to make sure that the system gets enough power from the PSU. For example, there are reports that users experience PC shut down when they’re using an RTX 3060 graphics card with a 550w PSU. This is probably because at any given time the power spikes to above 500w, the PSU powers down.

    Another thing to consider here is your power cables and its connectors. If your graphics card has a 6-pin or 8-pin connector, then your PSU needs to have the same thing. Some graphics cards are able to connect directly to the motherboard. They don’t need to be plugged in to the PSU to get their power. But the high-end graphics cards like the RTX series will need to connect to the power supply directly.

    Now, you’ll also need to check the PSU’s electric voltage and current. This is the amount of electricity that a PSU can generate, distribute, and regulate. Take note, your PSU needs to provide enough power to all of the hardware in the PC.

    If your PSU can barely provide power, then your GPU won’t be functioning properly. The golden rule is that your power supply should have a higher wattage than what’s written on the graphics cards. If your GPU needs 550w, you’re going to want to go for an 800w PSU.

    How Do You Determine If Your PSU is Fried or Problematic?

    Burnt PSU What Happens If Power Supply is not Enough for Graphics Card

    Assuming that your PSU does not look like the one in the photo above, how do you know that your PSU is problematic or has insufficient power?

    If your power supply unit is fried, then you’ll have symptoms such as the PC randomly freezing or shutting down, a BSOD or blue screen of death, and even damages to the other components. System instability will always be the number one indicator of a problematic power supply. If you recently upgraded everything else but the PSU and your PC does all of these things and more, then you’ll need to upgrade your PSU.

    In worst cases, damaged components caused by a faulty PSU will not start when turned on. That, in itself, is an indicator that there’s something wrong with the system itself and not just the PSU. Driver errors, FPS stuttering, and random system shutdowns will happen when other components are damaged.

    You’ll probably want to replace these damaged components as soon as you can. You don’t want to use these components, even if the damage is minimal.

    How Do You Deal With Insufficient Power Supply?

    Whether you have a semi modular power supply or a full modular one, insufficient power is no joke. If your PSU is becoming more of a hassle and the performance is sub par, then you might want to consider these:

    Upgrade to a New PSU

    If you’ve recently upgraded to a new GPU, you might also want to consider upgrading your PSU. The reason being is that if your PSU is old, it might be efficient enough in powering the GPU and other parts.

    Some people try to upgrade both the GPU and PSU altogether, so they’re guaranteed that the new GPU gets full power when running demanding games and more.

    Underclocking

    Overclocking can increase power consumption and generate more heat in the process. When your GPU has been overclocked and you’re feeling some stuttering here and there, your PSU isn’t capable of powering through that.

    We suggest that you underclock until such time you get yourself a new PSU.

    The Wrap Up

    An efficient PSU will always power your GPU and other components properly. How much power you need from your PSU will depend on what your GPU is. You’ll need to double check with your GPU manufacturers and the model itself to find out what the wattage requirement is for the GPU.

  • Do You Need a GPU For a PC?

    Do You Need a GPU For a PC?

    We know how graphics cards can greatly improve your PC’s performance, both gaming and otherwise. But did you know that just because you have a PC doesn’t mean you need a GPU?

    A decade or so ago, laptops were designed to be miniature and compact versions of personal computers. A laptop’s parts were completely made different compared to a traditional PC part. Before technology became better, laptops were only a fraction of what PCs were capable of back then. Nowadays, laptops still run on integrated graphics but there are models out there that already have their own dedicated graphics cards.

    If laptops back then could run without a dedicated graphics card, why couldn’t PC’s do the same? Do you need a GPU for a PC to begin with?

    We’ll be answering those questions and more in this article.

    What’s The Difference Between a Dedicated Graphics Card and Integrated Graphics Card?

    A graphics processing unit, or GPU, better known in non-technical jargon as a graphics card is responsible for processing data to create and display images on an output device (like a monitor).

    Now there are two types of graphics processing unit that you want to pay attention to: the integrated graphics processing unit and dedicated graphics processing unit.

    The difference between the two of them is night and day, but their functions are one and the same.

    • An integrated graphics card takes processing power from the CPU itself, hence the name. Modern motherboards are also equipped with their integrated graphics so it doesn’t put too much strain on the CPU.
    • A dedicated graphics card is a separate piece of hardware and is installed into the motherboard. This allows the CPU to run at its fullest capacity. The dedicated graphics card will be responsible for processing data necessary for generating images on an output device.

    Why Do You Even Want To Go For Integrated Graphics Card?

    Integrated GPU Do You Need GPU For a PC

    Integrated graphics cards allow you to save up money, for starters. They’re also very power efficient compared to dedicated GPUs. Desktop and laptop computer CPUs are standardized in more ways than one, so there aren’t going to be major issues in terms of compatibility. Using a modern Windows PC, the OS or operating system will take care of everything for you.

    But there is a downside to integrated GPUs, and that’s their performance. They’re not intended for graphically intensive tasks such as video editing and 3D editing, but they can carry their own weight for light games, browsing the web, doing office tasks, and maybe a bit of Netflix.

    In addition, an Integrated GPU will share CPU resources, including your RAM. When you’re taking up too much graphics processing power, you’ll immensely slow your entire system down.

    Why Do You Even Want To Go For a Dedicated Graphics Card?

    RTX Graphics Card Do You Need GPU For Your PC

    An integrated GPU can only do so much, so where does a discrete graphics card come in? A discrete GPU is a standalone graphics card that allows you to process graphics without tapping into the CPU and other resources.

    Integrated graphics processors are gimped in terms of processing power, so you can only do so much. On the other side of the spectrum, a discrete graphics card delivers performance for a price.

    Discrete graphics processing units give you a level of performance that an integrated GPU can’t match. We’re talking about giving you more power for gaming, rendering video or 3d models, and so on. You also get access to added video ports such as HDMI and DVI as part of a few benefits of owning a dedicated GPU.

    But its upside is also its downside. You see, for this level of performance, you end up spending more money to let your motherboard run a dedicated graphics card. In most cases, running a new graphics card on an older desktop PC will force you to make other upgrades such as a new power supply unit. Push comes to shove, you’ll end up spending more money than you need to.

    But hey, that’s the price you pay for being able to play video games, run multiple monitors, and do other tasks.

    Do You Really Need a Dedicated Graphics Card?

    We know that a dedicated graphics card is way more powerful than integrated graphics, but do you really need a graphics card for a lot of things?

    Ideally, you want your personal computer or laptop to have its own dedicated graphics card, even if it’s not one of the high-end ones. The reason is that you want your CPU to be untouched when it comes to doing certain tasks, and by untouched, we mean that the CPU only focuses on what’s important to make the system run.

    On the other hand, you’re probably thinking about upgrading from integrated graphics to a dedicated one. Here are some interesting questions that will help you determine as to whether or not you really need to get one.

    Can Your Current PC or Laptop Handle Games or Other Graphic-Intensive Apps?

    If the answer to this question is a NO, and you want to play games or use graphic design apps, then you’ll need to purchase a dedicated GPU.

    If you are running an old CPU and the graphic card is outdated, you’ll probably want to upgrade to a newer model. Again, if you need a graphics card, it doesn’t have to be a high-end model. There are several budget graphics cards out there that won’t cost you an arm and a leg.

    Are You Planning On Using Multiple Monitors In The Future?

    Multiple Monitors Do You Need a GPU For Your PC

    Today’s integrated graphics cards might be able to support multiple monitors, but chances are you won’t be able to use it to their maximum potential.

    Even with the latest integrated graphics cards, you’re only able to accommodate a handful of HDMI and DVI slots, depending on the motherboard. You’ll also need to reconfigure a BIOS setting that will let you use these ports for display.

    So, if you really need to use multiple monitors without all the hassle of BIOS configuration and all that, then you need a graphics card that will support multiple displays and with multiple display ports.

    When Should You Consider Buying a Graphics Card?

    Not all CPU models are capable of giving you the integrated graphics processing power necessary for some light gaming and a bit of professional editing on the side. The CPUs that are powerful enough to get you this kind of processing power isn’t exactly affordable either, but they’re not that expensive, to say the least.

    If we’re talking about purchasing Intel CPUs, somewhere along the lines of an i7 or an i9, then you should be able to run web browsing, common desktop tasks, some photo editing apps, and some light video games. An AMD CPU, like a Ryzen 5 or Ryzen 7, can give you the integrated graphics processing power that you need.

    But it’s still a different story when you have a dedicated video card as a separate component so your CPU won’t be too taxed when it comes to processing data. Even with a low-end or a mid range GPU, the performance of your entire system will improve a hundredfold. And we’re not even exaggerating at this point.

    Without a GPU, you’ll have to rely on your CPU to provide you with graphics processing. Even with a mid range dedicated RAM and other components (like an SSD), the system performance won’t come close to another system unit that has its own GPU.

    If you are planning on buying a GPU, whether it’s a powerful GPU or not, here are a few points for consideration for non-gamers:

    • A dedicated GPU mght not be the most important component but we’re talking about giving your PC some extra power and speed when it comes to doing tasks and games.
    • Dedicated GPUs can last you for a few years and can give you added benefits such as running extra monitors and playing high-resolution video games when possible.
    • Most motherboards should be able to support the newer models of graphics cards, so there’s no need to do massive upgrades unless you’re getting the high end video cards.