When purchasing a new video card, one of the things that you’re on the look out for is its VRAM or Video Random Access Memory. But what exactly is this VRAM and why is VRAM usage one of the most important factors for shopping around?
We’ll talk about the basics of video memory, how graphics cards work with video RAM, and much more in this article.
What Is VRAM And What Is Its Use?
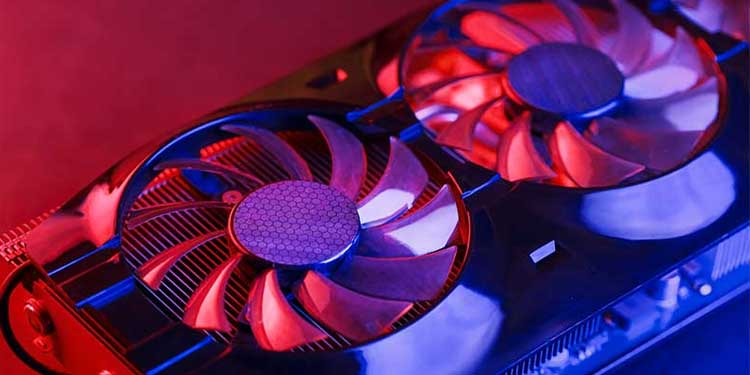
VRAM, or Video RAM, or Video Random Access Memory, works a lot like your system RAM. But the Video RAM stores graphics data so the graphics processor can access it and displays it accordingly on the screen.
Simply put, it’s RAM but intended for the usage of graphics cards only. Your system will not be tapping into the VRAM unless it has something to do with graphics. Graphics cards, by default, will have different VRAM sizes. Your system memory will be handling everything else to make sure that your computer is running smoothly. Both the System RAM and graphics card VRAM are completely different and totally independent from one another if we’re talking about data processing.
VRAM used to be referred to as DDR SGRAM and transitioned into GRDDR2 RAM. Nowadays, we’re running video cards with GDDR6 RAM with memory clock speeds going higher than 1125MHz and transfer rates of more than 144GB/s.
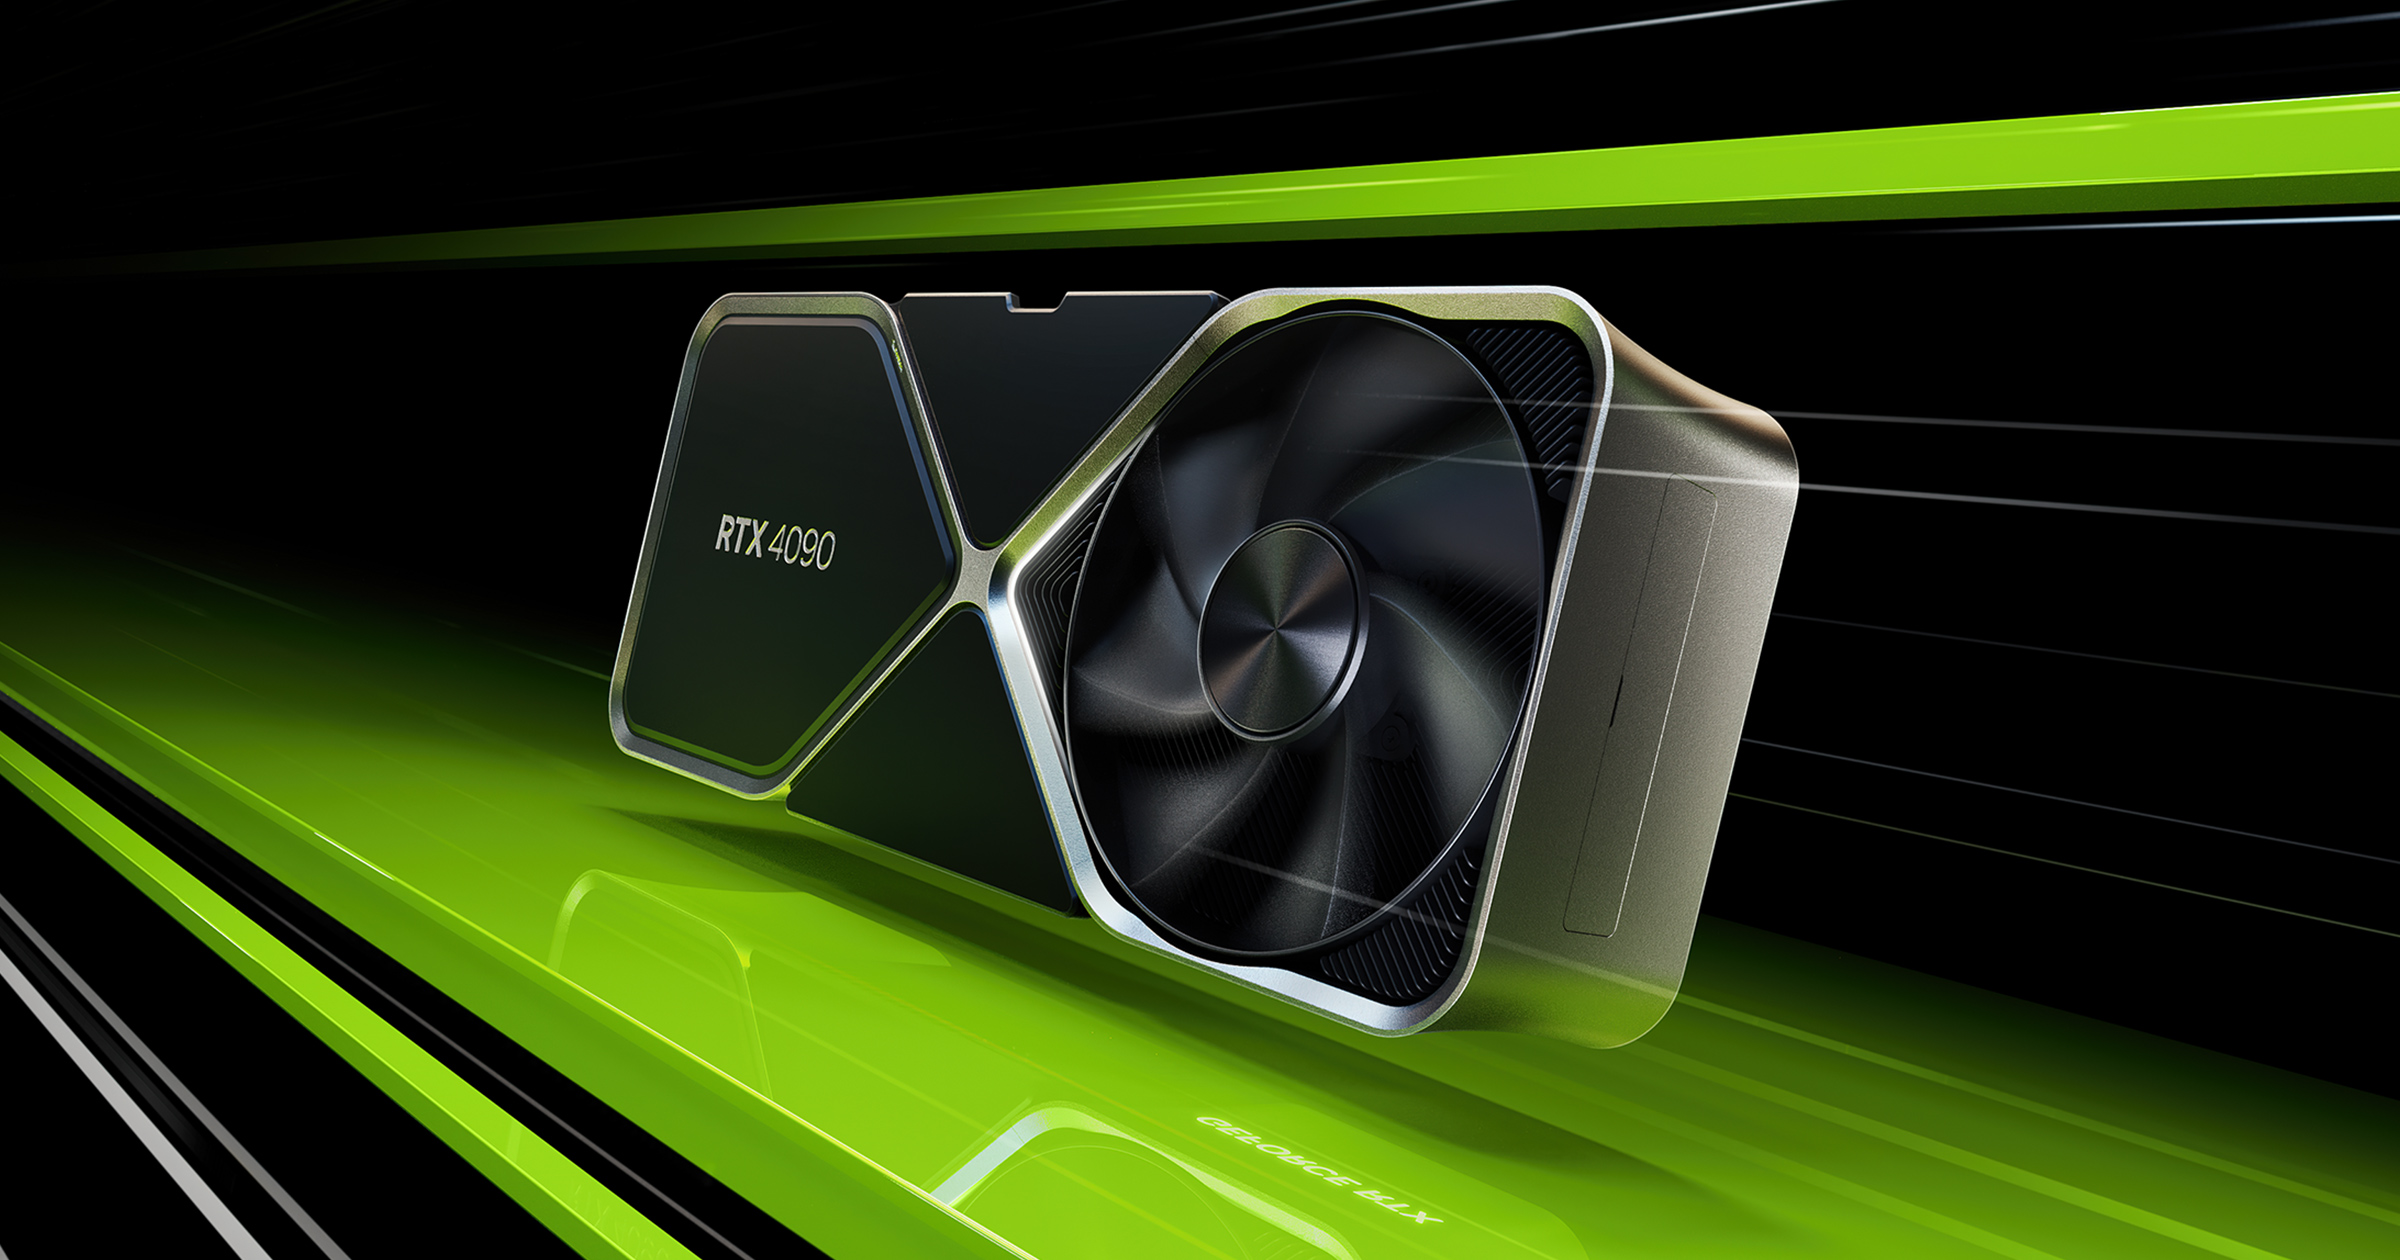
A good example of this video card is the NVidia GeForce RTX 3080Ti, which was 12GB GDDR6X RAM and a memory clock speed of 1800MHz.
The more GB of VRAM a video card has, the higher the graphics settings you could go for in a video game and the higher the GPU’s processing power.
How Much VRAM Do I Need For Gaming and Apps?
How much VRAM you need will depend on what you’re using the PC for to begin with. If we’re talking about video games, then you’ll need a bare minimum of about 2GB VRAM. Most modern games aren’t that demanding when it comes to VRAM usage.
VRAM can affect gaming performance and is usually where dedicated GPU memory comes into play. A lot of modern games can run 1080p resolution with a 6GB video card (at least a GDDR5 or higher). But 4K gaming will have you running more than that.
What you should also consider is that more VRAM doesn’t mean better gaming performance. If you’re on an 800×600 monitor, then you won’t need anything higher than 4GB of VRAM. But then again, who’s gaming on an 800×600 monitor nowadays, right?
However, VRAM requirements for graphics design, 3D modeling and animation, and video editing will be a lot higher than for playing video games. You’ll need a dedicated VRAM of at least 4GB to 6GB GDDR5 if you want to do these graphically-intensive tasks.
A lot of industry professionals would recommend at least anywhere between 6GB to 8GB GDRR6 VRAM if you want to tackle the largest and most complex projects. A decent-sized card would be the Nvidia RTX 2060, which has 6GB of VRAM.
What Else Can Affect VRAM?
Playing games and using graphically-intensive applications are just half of what affects how much VRAM you’ll need for your PC.
The Type of Video Game Affects VRAM Usage
We’ve talked about the quality settings of video games affecting your VRAM usage, but it really boils down to the type of video game you’re playing. Playing an older video game like Dishonored at Ultra Settings is going to be completely different than playing Elden Ring or Microsoft Flight Simulator at similar settings. This is because both of the modern games mentioned require a ton of graphics processing power to display landscapes and other details properly.
Ultimately, playing video games at the highest possible settings capped at the desired frame rates will dictate how much VRAM capacity is perfect for you. And by perfect, we mean you have enough VRAM to power through those games or graphically-intensive apps without making your graphics card work too hard.
With that being said, you’ll need to invest in a future proof graphics card and about 6GB of VRAM at the bare minimum. You’ll have enough dedicated memory to power through video games and apps without breaking a sweat. But if you have more money to spend, 8GB of VRAM is up for consideration.
And you don’t even need to be tech-savvy to understand the details on the graphics cards’ packaging. The VRAM capacity is easily read and accessed on the box. Any other detail like clock speed are slightly inconsequential unless you’re planning on overclocking.
Your Screen Resolution Matters Too
Let’s talk about your gaming PC or laptop’s display. If your display has a large resolution, then you’ll need more VRAM. Processing 1 frame will utilize your VRAM and the more pixels there are in a frame, the more VRAM is required.
Between a 1080p monitor and 1440p monitor, you’ll end up using less VRAM for the former. A 4K monitor sitting at 3840×2160 resolution will consume more VRAM than another monitor with 2560x1440p resolution.
Your In-Game Settings Will Affect Your VRAM Usage
As gamers, we always want to go for the highest settings possible. There’s nothing more beautiful to look at than high resolution textures paired with uncapped frame rates.
A lot of the modern games like Elden Ring will require more memory compared to games like League of Legends and Valorant. But even with these types of games, pushing to higher settings will still need more VRAM than necessary.
Any PC game running on an old GPU will need to compromise between consistent frame rates and higher texture quality. Settling for the latter might lower frame rates, while settling for frame rates will result in lower texture quality.
And believe us when we say that texture quality doesn’t completely affect gaming experience. If you have an older GPU want to run something like Elden Ring, you’ll probably need to scale down on the in-game settings.
Building a computer for the first time can be a daunting task, mostly because you’re always on the lookout for the best hardware components possible. If we want the best gaming performance money can buy, we’re more or less going for a powerful combination of CPU and GPU. Other components like the RAM and SSD affect performance but not as much as the first two components.
Unbeknownst to many first-time builders, the motherboard can affect gaming performance, but not in the same way as a GPU affects raw gaming performance.
And that’s exactly what we’ll be discussing in this article. Does motherboard affect performance, and how would PC performance be if the motherboard isn’t the latest model?
What’s a Motherboard?
Before we talk about how motherboard affect gaming performance, we need to understand what a motherboard is first.
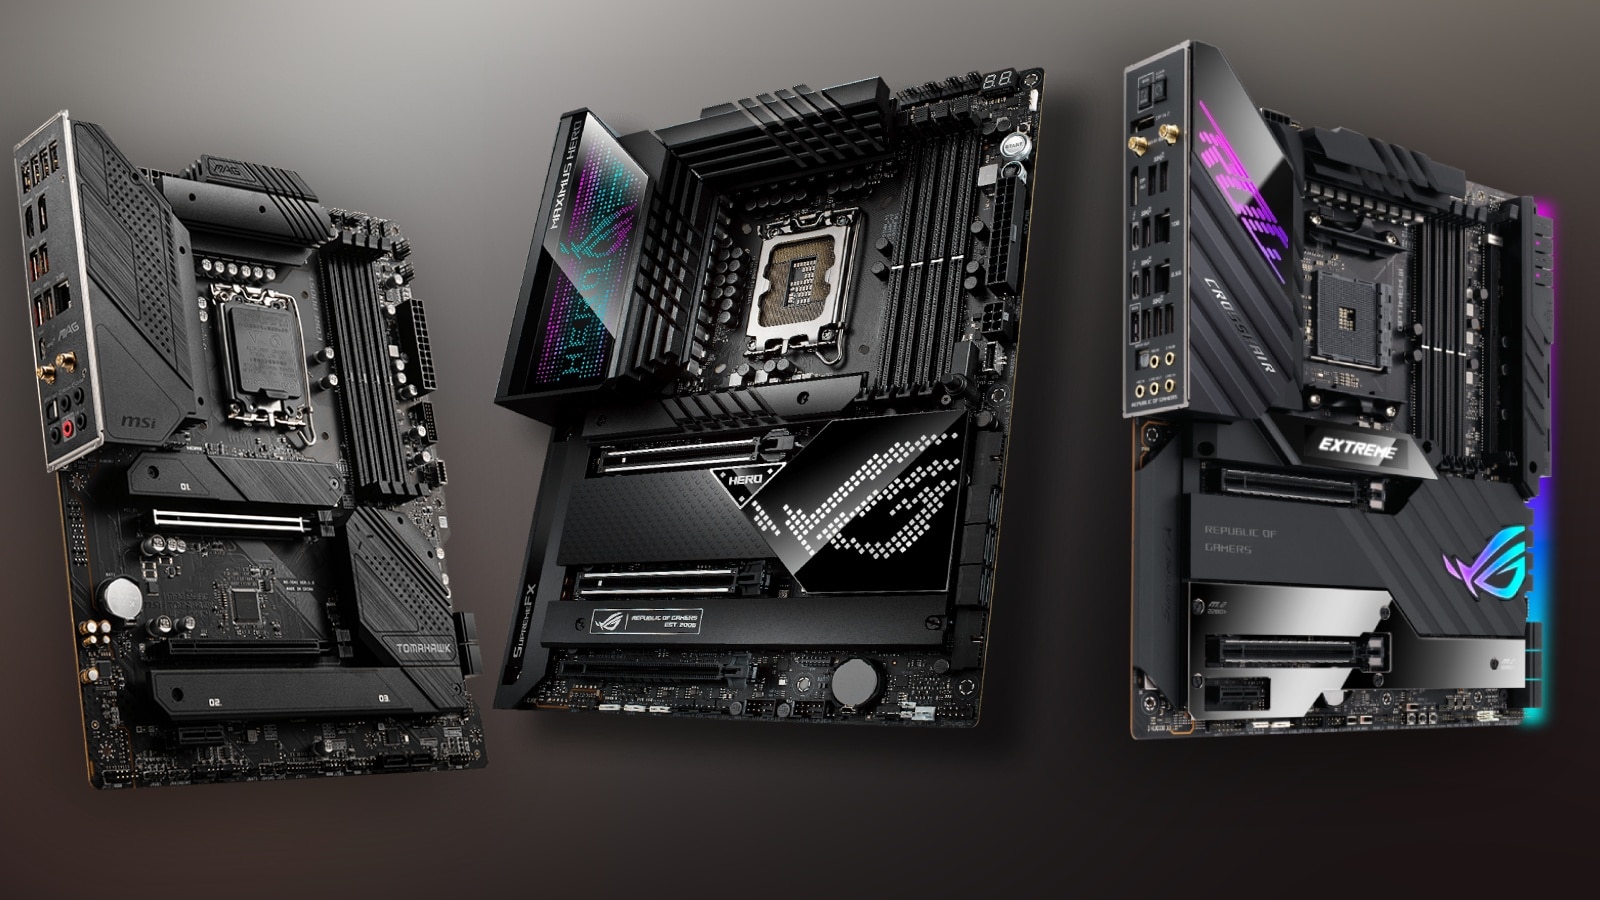
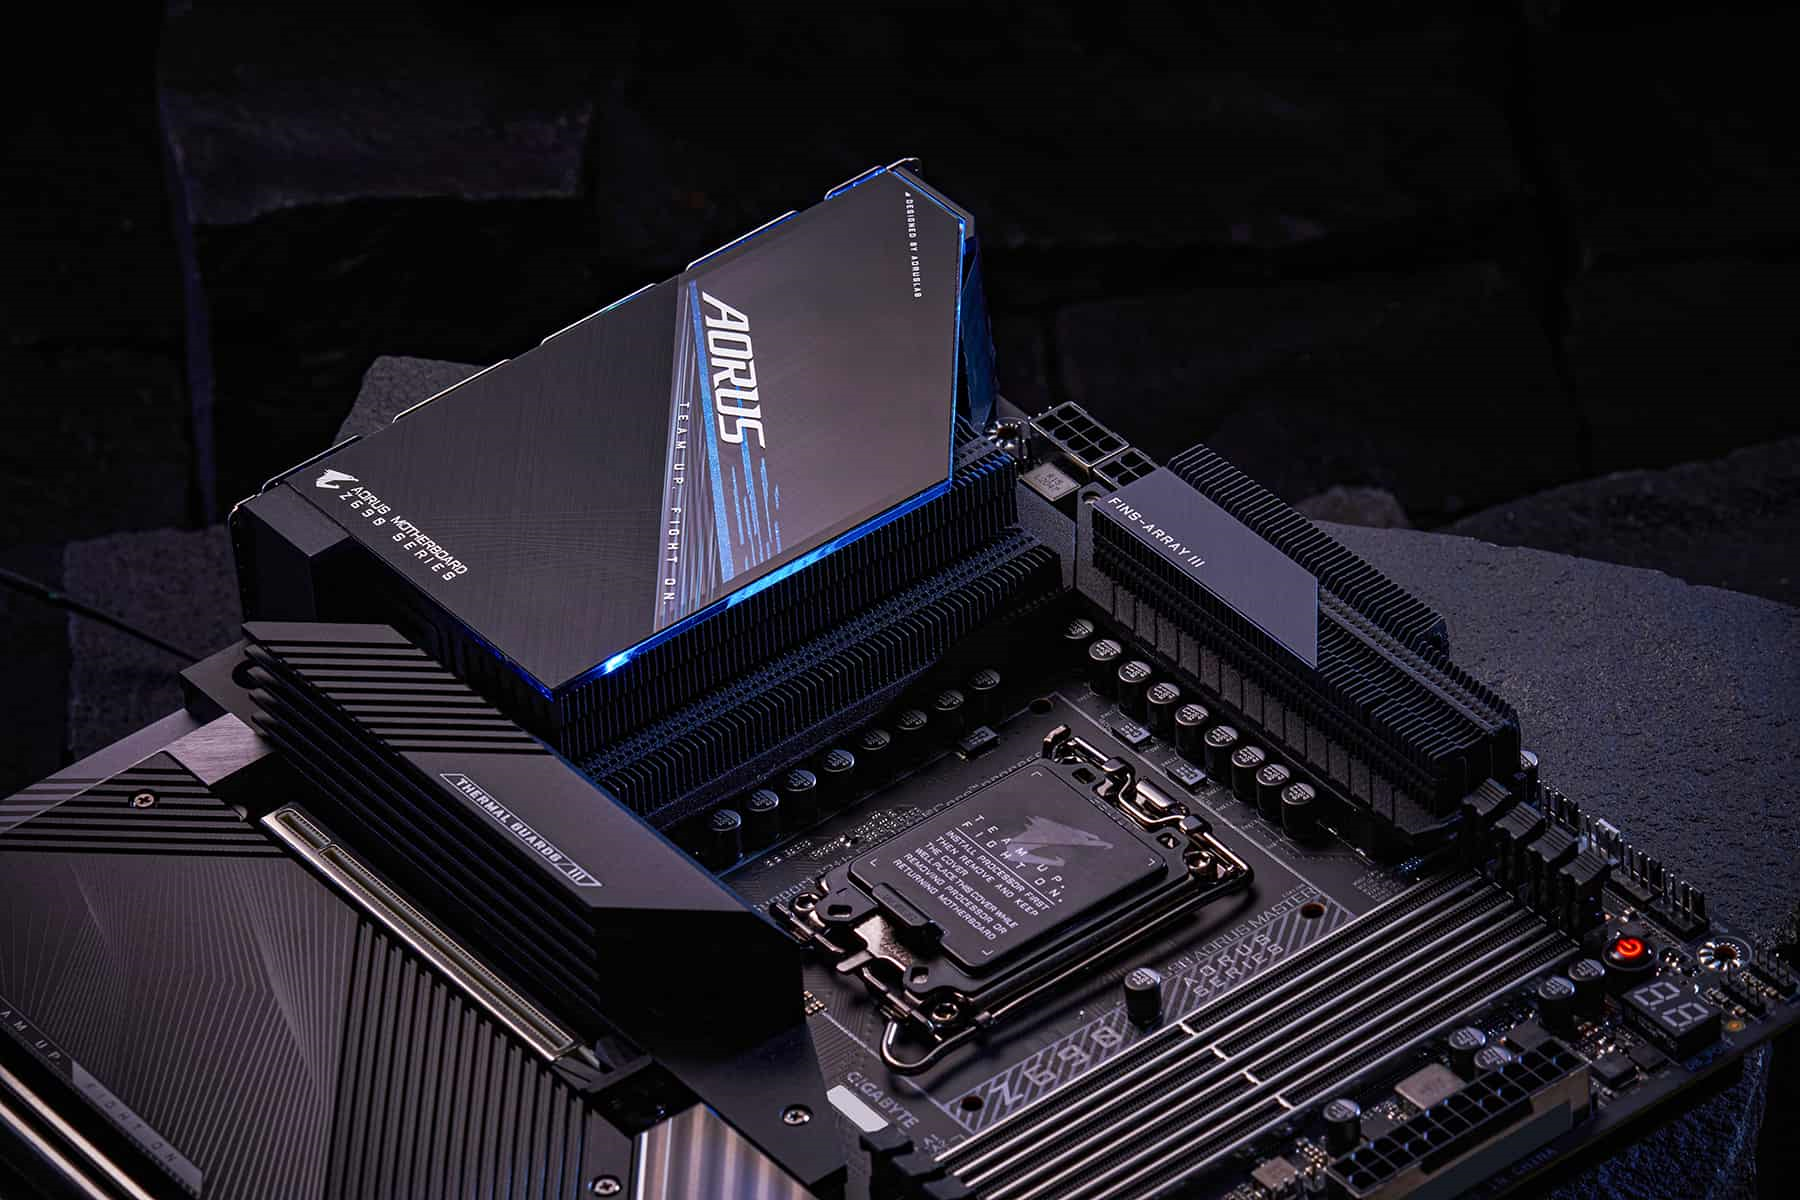
A motherboard, or the mainboard, houses all the components and allows them to communicate with one another to get you a fully functioning computer. The motherboard is also responsible for power distribution across these computer parts.
If the CPU or processor is the brain of the computer, then the motherboard is the heart, so to speak. A computer can run without a processor for a short while, but a computer will not exist without a motherboard.
But how does the motherboard affect performance? Well, it doesn’t directly affect computer performance, but it can determine maximum performance.
You see, your motherboard does not have actual specs that would directly affect performance, unlike how a GPU or CPU might dictate your PC’s performance when it comes to gaming. However, a motherboard will play a huge role in overclocking capabilities of gaming PCs, which would greatly improve performance.
To sum it up, a motherboard does not directly affect performance, but rather it indirectly affects performance.
What Is Overclocking?
Overclocking is a term that’s liberally thrown about in the gaming PC world, but what exactly is it and why are people so gung-ho about it?
Think of it this way, a CPU or GPU will come with a base clock speed. Newer models and high-end models will have another set of numbers called boost clock speed. By default, your CPU or GPU will run at its base clock speed. Overclocking will push both of these components to its maximum speed, or boost speed.
This allows you to get more power out of your CPU and GPU, significantly improving performance at a cost. Even at the base clock speeds, both CPUs and GPUs generate heat when they’re working. But the heat generated by overclocked GPUs and CPUs is higher. Without proper cooling, a motherboard and the other components will become damaged by the heat.
A new motherboard supports overclocking, but low end motherboards might not be able to. Higher-end motherboards will almost always have to overclock support too, especially when you have modern CPUs like the Intel Core i9 and the AMD Ryzen 9 3900X.
Where does the motherboard come into play in determining your capability to push your CPU or GPU to maximum speed?
Since a motherboard connects all parts, it’s also responsible for distributing power to these parts. A motherboard will need to regulate the voltage well to make sure that the other components don’t get fried when you’re trying to overclock a CPU or GPU.
A motherboard will not dictate whether or not you can overclock, but rather, it’s more along the lines of how well it can protect the other components. New motherboards, especially the high-end models, will come with stable clocks, allowing you to have better stability when overclocking.
Sadly, not everyone can overclock their computers because not all processors were made to be overclocked. Some of the new AMD and Intel CPUs may be powerful, but they just can’t be overclocked (and for a good reason, we think).
Can Motherboard Affect Your FPS?
Now that we’ve discussed about how motherboards can affect your overclocking capabilities, you’re probably thinking about whether or not budget motherboards can affect your FPS.
We know that most motherboards recently released into the market can support overclocking to give you that extra performance. Newer motherboards have better performance than older motherboard because the former can equip the latest CPUs and GPUs.
The simple answer is this. Different motherboards may still have the same slots for CPUs, GPUs, RAMs, and so on. The rule of thumb is that the newer the motherboard, the higher the chances of being able to use the latest hardware.
However, a motherboard cannot directly affect your FPS. Your motherboard will only let you know what kind of GPU you can run. Your FPS will still be dictated by the more important components like the CPU and GPU. An SSD storage may guarantee your entire system’s best performance more than your motherboard.
A budget motherboard may not be able to run the latest graphics cards, so performance gains might not be as much as opposed to a motherboard running an RTX GPU. Will your motherboard have the RAM slots for DDR5 RAM sticks? Will your motherboard have PCIe slots to house your graphics card and more? Will your motherboard’s chipset limit your options in terms of upgrades?
These are just some of the bigger questions that you need to ask when it comes to how motherboards can affect the overall performance of your entire system when gaming.
Does A Motherboard Affect GPU Performance?
We know that the motherboard plays a role in housing and protecting your entire system, as well as determining how much power goes into individual components.
But as we talked in the previous section, a motherboard will never affect the performance of the entire system or the individual components directly. A graphics card is only as capable as the motherboard that’s housing it.
Your graphics card will never be impacted directly by your motherboard. Your computer’s performance will still rely on how powerful your CPU and GPU is, further complemented by your RAM and SSD storage.
Your motherboard will only let you know what kind of graphics card you can equip, if you can overclock the graphics card, and if you can upgrade various components.
Will A Good Motherboard Matter In The End?
So what makes a motherboard good? And what kind of motherboard is the best for gaming PCs?
Motherboard affect FPS indirectly simply because it restricts you from what kind of GPU and CPU you can run. General rule of thumb is if you want your computer’s performance to be top notch, then you’ll need to build around your motherboard’s chipset. This will set you up for what kind of motherboard to use. From there, you’ll know what kind of graphics card, RAM, and SSD to run with. Everything else will become secondary.
A good motherboard will cost you somewhere about $200 to $300, more if you’re planning to run an Intel Core i9 or an AMD Threadripper.
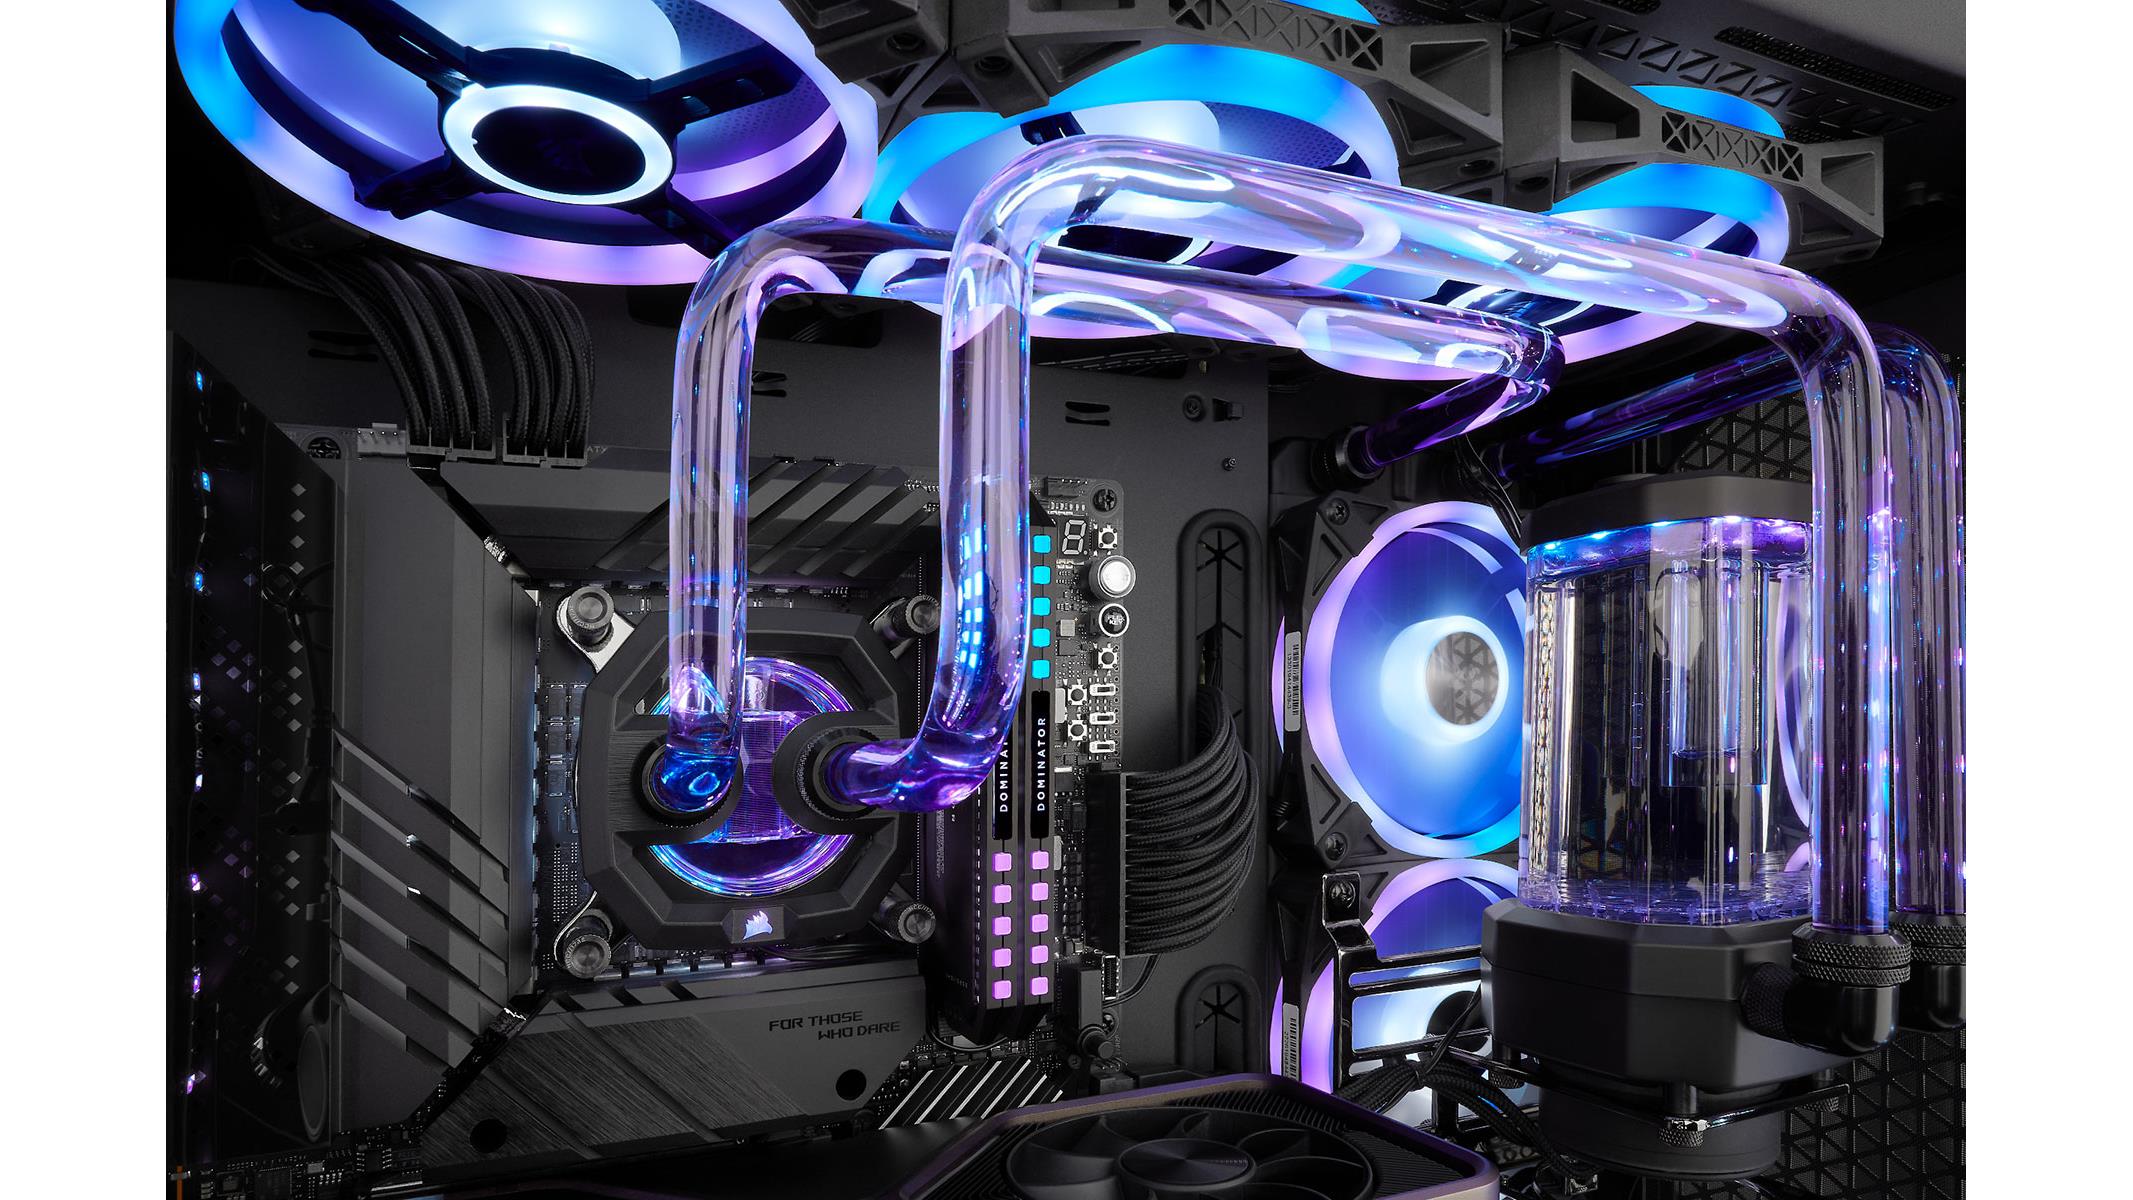
Liquid cooling, or water cooling, is as cool and as functional as it looks. It’s probably the most efficient, albeit expensive, way to keep your system cool while gaming or doing heavy-duty rendering.
The aesthetics of a liquid cooling system is also too hard not to notice, which is probably why first-time PC builders or buyers are drawn to choosing this option over using traditional cooling systems.
But what first-time builders and liquid cooling users don’t know is that behind the lights and dazzle is the amount of regular maintenance that needs to be done.
And in this article, we’ll talk more about how water cooling systems work and how they’re regularly maintained.
How Does Liquid Cooling or Water Cooling Work?
Liquid cooling is exactly what it implies. Liquid cooling systems use water, which is often the most preferred type of liquid, to help keep certain hardware like CPUs and GPUs cool. Water is primarily used because of its high heat capacity and its non-toxic properties.
Water is circulated throughout the systems it is installed in (i.e. CPU and/or GPU). Excess heat is transferred as the water passes through these parts, which is expelled through the radiators.
What Are The Different Types of Liquid Cooling Solutions?
All In One (AIO) Liquid Cooling
AIO or All In One systems are commercially available and are considered plug-and-play versions of liquid cooling systems. An AIO liquid cooler comes with everything you need without the hassle, from the tubes to the fans to the aesthetics.
It’s also relatively easier to install AIO coolers than air coolers, according to many builders. The downside to using an AIO system is that you can’t upgrade it. If you’re running a custom-built PC, chances are an AIO might not work for you.
Custom Water Coolers (Also Known as Custom Loop or Custom Cooling Loop)
Unlike AIO coolers, custom liquid cooling is built from the ground up. Much like your custom PC, custom cooling systems have handpicked parts according to what you need.
One added advantage to using custom liquid cooling is that you can easily upgrade individual parts without changing any hardware in your PC. But the downside is that this system is really expensive and requires more maintenance than AIO cooling.
An Overview of the Different Parts of a Liquid Cooling System
Both AIO and custom water cooling systems aren’t exactly zero maintenance. If it’s your first time to use either, then you need to know what the different parts are and how they work.
Water Pump: This is responsible for pumping distilled water or coolant inside the system.
Radiator: The radiator expels heat coming from the circulating water into the air, keeping the water cool as it cycles back through the CPU/GPU.
Fan: Fans are responsible for maintaining airflow inside the system by bringing in fresh air.
Pipes/Tubes: Pretty self-explanatory. Pipes or tubes carry the coolant or water throughout the PC and flow constantly during PC usage.
Reservoir: The reservoir stores extra water or coolant in a container. This ensures that there’s always water coming through the pipes, so you don’t have to worry about running out.
The basic premise of any liquid cooling system is this:
Water is pumped through the pipes.
Heat is transferred from the CPU or GPU into the running water.
The water that’s carrying the heat travels to the radiator.
The radiator takes away the heat and blows it out of the system.
The water, which is now cool, travels back to the CPU or GPU to transfer heat.
The fans help keep the insides of your system cool by bringing in fresh air.
And this goes on and on.
Does Liquid Cooling Require Maintenance?
Like air cooling systems, liquid cooling requires maintenance and attention because of the different moving parts. When one part malfunctions, it’s safe to say that the liquid cooling system is compromised.
Maintaining custom water cooling systems will have you checking and filling in the water reservoir, or it will stop working. You’ll also need to check for leaks as you do your maintenance because we all know that water, or any other liquid, is dangerous for your PC hardware.
Water cooling systems also have parts that are not readily available in hardware stores, so that’s something to consider as well.
But the bulk of maintaining custom water cooling is making sure that the coolant level or water level is sufficient. Avoid using tap water and instead, run distilled water as the latter is free from sediments and minerals that could compromise the integrity of the cooling system.
Do AIO Coolers Need Maintenance?
On the other hand, AIO cooling systems are easier to maintain than custom cooling systems. But the biggest downside is that if there’s a part that needs to be replaced, you need to replace the entire system.
For AIO coolers, you just need to make sure that the fans and radiators are as clean as possible. Over time, dust will accumulate on both of these parts. The weight of the dust accumulation will eventually be heavy enough to slow down the fans and radiator’s speed, so they’re no longer as efficient.
Will AIO Coolers Leak?
AIOs, much like any other cooling system, will eventually fail as the years go by. They’re not meant to run longer than they should, and time will come when you’ll eventually have to replace the unit.
With that being said, AIO coolers won’t have issues with leaks but they will have issues with their pumps, which is the biggest cause of failure.
If AIO leaked as often, you’d probably hear about it over the Internet and people would probably tell you to just get an air cooler.
But in case your AIO system does leak, you’ll need to report it to the manufacturer and the warranty will take care of everything.
What Do You Need For Maintaining Your Liquid Cooling System?
On the off chance that you are running custom water cooling, then you’ll actually do some heavy lifting when it comes to maintaining the entire system.
For custom solutions, the idea of something going terribly wrong at any given time persistently haunts them. One day you’re doing some video editing or gaming, and the next thing you know, coolant sprays all over your motherboard and your PC dies. You’re now left with the daunting task of buying a new PC.
Do A Coolant Flush
To properly maintain your liquid cooling system, you’ll need to do what’s called a system flush or a coolant flush. Coolant refers to the liquid that’s running through the tubes that’s keeping your PC cool while running heavy loads.
Every year, you’ll need to drain the entire reservoir and pump and replace it with a fresh batch. The reason being is that heavy usage of the liquid cooling system will lead to the production of air bubbles as a result of evaporation. This results in coolant pollution and negatively affects your system’s performance and overall efficiency.
Ideally, you want to run distilled water to prevent or minimize corrosion to the different PC parts and parts of the cooling systems. But you’ll also find pre-mixed coolants that are commercially made and intended for liquid cooling your PC. These coolants come in different shades and hues, so customization is really high.
Once the coolant is replaced, you’ll then need to check the integrity of the other components like tubing, the O ring, and the clamps to make sure that there are no issues once the system starts running.
The Wrap Up
Whether you’re using a liquid cooling loop (AIO cooler) or a custom liquid cooled system, you now know what it takes to keep both of these systems properly maintained. Liquid cooling maintenance is a daunting task by itself, but there’s no reason not to do it.
If you feel like you don’t trust yourself enough to maintain a water cooled system, then you can always hire a professional to do it for you.
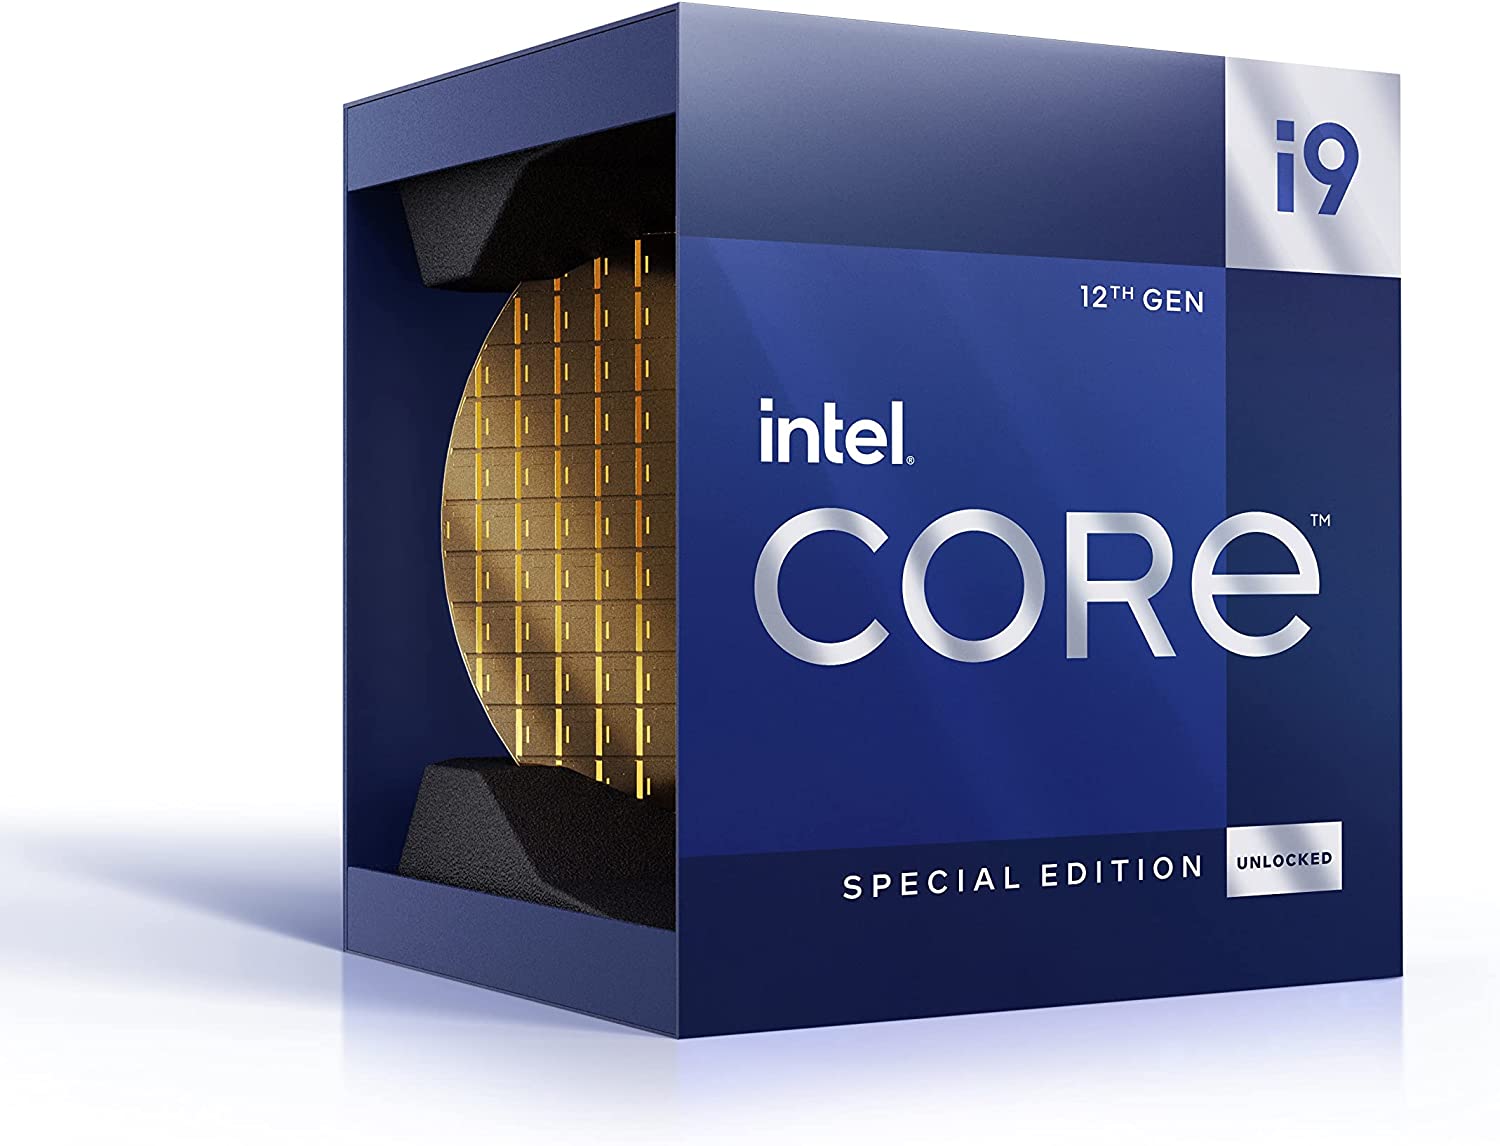
Every time a new processor from AMD or Intel comes out, we can’t help but feel left out. Newer processors from both manufacturers are running multiple CPU cores, so much so that performance will never be an issue.
Not too long ago, we were so hyped about seeing a dual core processor in the market, but in the blink of an eye, the quad core processor took over. Since then, core count was one of the most important features that a lot of PC builders, especially gamers, are more concerned with.
When you’re doing video editing or even 3D animation, you’d need multiple cores as well. But the real question you’d probably be asking is this: how many CPU cores do I need for gaming and all the other heavy processing stuff?
That’s what we’re going to talk about in this article, but first…
What Are CPU Cores?
How many CPU cores do I need for gaming or video editing? That’s probably a question that you’ll be asking first if you’re planning on buying a new CPU. You want to know how many CPU cores is enough so you don’t blow your budget, but at the same time, you don’t want to overpay for something.
We all know that the CPU or central processing unit or processor is the brains of the system unit. Your PC may function without a GPU, but it will not function without a CPU.
Back then, processors were only executing program instructions such as the adding or removing or moving of data. The first version of CPUs was only able to process one instruction at a time. Since then, operating systems, programs and even video games now process a lot of data, so the processor needs to be able to keep up. This is why we now have multiple processing units, or referred to as CPU cores, in one processor.
For better performance, CPU cores are split into threads, or what you’d commercially recognize as multithreading, or hyperthreading if it’s an Intel processor or simultaneous multithreading (SMT) for AMD processors. The operating system creates virtual cores to help utilize the CPU’s physical cores better.
What Are The Modern CPU Standards and Requirements?
How many CPU cores do you need? Well, it’s a challenge to find the exact number of cores but it’s a lot easier to spot a model that may be within range of the number of CPU cores that you need.
Simply put, if you think you need 5 CPU cores, you’re going to want to secure a 6-core (hexacore) processor. CPU cores only come in pair, so you have 2,4,6,8, and so on. If there were CPU cores with an odd core count, then that’d be a weird sell for both Intel and AMD.
For majority of CPUs, thread count is almost always double the core count (so a hexacore or 6 core processor would have 12 threads, theoretically). The only exception to this is the 12th generation Intel’s Alder Lake processors.
To make your shopping for CPUs easier, we’ve created a short guide on common core/thread combinations and how they can affect your needs.
Single-Core Processors
While you won’t be finding any SINGLE CORE CPUs nowadays, it pays to know how it all began. You might chance upon a single core CPU in Intel’s Pentium Library, but there’s hardly any stock.
The reason why you won’t find any single core processor today is that operating systems and programs now run on multiple cores or threads, or at least they run smoothly because of the CPU’s multiple processing units.
If you think you’re going to be able to run any modern program on a single core processor, think again. It’ll probably be the most infuriating experience you’ll ever go through. Single core performance is just terrible in this day and age.
Dual-Core Processors
While not as rare as single core CPU, dual core processors are just as uncommon. But you will find that Intel and AMD will still have them for new generation Pentiums and Athlon APUs respectively.
Today, dual core processors have four threads because of multithreading and if your CPU cores are fast, you’d be able to run productivity programs (like Microsoft Office) and some basic video games like League of Legends.
If you’re in the market for a dual core processor, then you might want to check these out:
Intel Pentium Gold G6405 – Powerful enough for basic productivity tasks, almost comparable to an Intel i3.
AMD Athlon 3000GE – Solid choice if you don’t have a dedicated GPU. The integrated GPU on the AMD Athlon is more powerful than Intel UHD.
Quad-Core Processors
Quad core processors are more common than dual core or single core processors, and good examples are the Intel i3 series. Intel i3 usually run with 4 cores and 8 threads, and they were all locked to 4 threads until AMD pushed for multithreading on their quad cores.
Quad core processors, or any CPU with higher core counts, will have at least 8 threads, and their performance is just a league of its own compared to single core and dual core processors.
Video editing/rendering and gaming is faster, but you get more performance and speed from higher core counts. Ideally, an eight core CPU would be more than enough for your video editing or gaming needs.
For gaming, a CPU with quad cores is decent enough for gaming. You should be able to use Intel i7-7700k, albeit they’re outdated compared to the more recent processors. Still, they’re powerful enough.
Aside from the Intel i7-7700k, we also put these processors up for your consideration:
Intel i3-10300 – Cheaper than the Intel i7-7700k with the same core and thread count. There’s a six core version as well, which we recommend checking out first.
Ryzen 5300G – Relatively faster than the two quad core processors mentioned above. But these are only found in OEM systems, so locating this particular quad core processor might be a challenge.
Hexa-Core Processors
Hexacore or hexa-core refers to the six core CPUs, which are midrange processors by today’s standards. Processors such as AMD Ryzen 5 3600 and the Intel i5-10400K are good examples of hexacore processors with great performance at budget pricing. For less than $200, you’re getting the best processors around for gaming and it’s a deal that you just can’t refuse.
A lot of gamers, streamers, content creators, and video editors are already satisfied with a six core processor’s power. Most modern games are doing well and to be honest, you don’t really see a massive FPS jump when you go up to 8 cores or higher. Running multiple programs at one time isn’t a hurdle with much CPU resources.
If you’re in the market for a six core processor, here’s our recommendation:
Intel i5-11600K – Slower than the Ryzen 5600X, but not that much. It’s cheaper by about $40, so it’s a solid choice if you’re on a tight budget.
Ryzen 3600/X – Considered as the best value purchase on the market as you’d find this processor for about $180 or less. The non-X version will cost less than the X version too, which isn’t a bad purchase.
Ryzen 5600X – The fastest hexacore processor in the market right now but it’s worth the price tag (currently about $300 or so).
Octa-Core Processors
Eight core CPUs are relatively more expensive compared to the hexacore counterparts, but with Intel and AMD constantly at each other’s throats, we’ll hopefully see these prices go down.
As mentioned earlier, gaming doesn’t really see a lot of improvement when you transition to an octacore processor from a hexa core processor. You don’t really see the need to increase your physical CPU core past six unless you need more processing power for 3D animation or rendering.
If you do want to go for 8 CPU core count, then here is our short list:
Intel i7-10700K/11700K – Identical in performance, so getting either isn’t a bad choice. They’re the best bang for your buck, so go for the one that’s more accessible (budget-wise and stock-wise).
AMD Ryzen 5800X – More expensive than the 11700K, but it is the fastest CPU in the market right now.
AMD Ryzen 3700X – Another affordable octacore CPU and relatively cheaper by about $100 compared to the two other octacores.
The Wrap Up
If you want a TL:DR (too long, did not read) version of the article, here’s a short guide on how many cores you need:
Single core processors are obsolete and hard to find. You don’t want to use them.
Dual core processors are more than enough for basic tasks, word processing, and some light gaming.
Quad core processors are good enough for gaming and productivity tasks, but you’ll need more.
Hexacore processors are what you really want for gaming, and they’re also powerful enough for video rendering and heavy processing tasks.
Octacore processors are the pinnacle of processing power, at least from a practical point-of-view. You don’t need more cores, honestly.
But if you want ten or more cores, you’ll pay more for them, but these are just intended for 3D animation or heavier-than-normal processing power.
A not-so-often discussed topic when it comes to graphics cards is GPU usage or GPU utilization. On the surface level, we know enough that a GPU will run hotter than normal when it’s put under heavy load like gaming, rendering, video editing, and graphics design to name a few.
Regardless of how much memory your GPU has, your GPU performance will still diminish once it’s past certain limits on how it’s operating. When your graphics card overheats, it will immediately throttle its performance to give itself room to cool down. So if you’re into a heavy gaming session and the frame rate drops from 60 to 30 real quick, then that’s an indicator that the card is overheating.
However, it’s a different story when GPU utilization spikes for no reason at all. This would result in overheating and then throttling, and then sooner or later, your GPU’s durability and performance will be compromised.
In this article we’ll discuss the common reasons why your GPU utilization spikes for no reason and how to prevent this from happening.
What Are The Common Reasons For Spikes in GPU Usage?
Why does GPU usage spike for no reason? Well, it may be caused by one of these factors:
Malware
Malware, or malicious software, can spike GPU usage for no reason. Malware often affect CPU usage more than GPU usage, but it doesn’t mean that it won’t affect other components.
Some malware would hide in GPU memory which go undetected by anti-virus software, and that would probably be too late already by then. Malware like rootkits, trojans, and keyloggers will tend to hide in GPU memory, and cause severe damage.
In your performance tab, you’ll see unrecognized tasks running and eating up a lot of your GPU memory. This will cause the physical GPU to overheat and throttle, and then repeats the process all over again.
When your malware is infecting your GPU instead of the CPU, it becomes difficult to detect, but thankfully Windows has a feature to help you. Your Windows operating system will come with a pre-installed Virus and Threat Protection feature, which should help you detect and eliminate the malware GPU.
If you detect malicious apps or processes taking up GPU resources in the performance tab on Windows Task Manager. You should be able to stop these processes in the performance tab, but it’ll be tedious.
Background Apps Slowing Down GPU
Sometimes, it’s your legitimate or regular software that end up taking a chunk out of valuable GPU resources for no reason.
If you purchase a brand-new laptop with a pre-installed Windows OS, it’ll come with some bulkware. Bulkware is considered harmless and are usually software from the laptop manufacturer to help your laptop “run smoothly”, when in fact, it doesn’t.
Normally, only applications that require graphics processing will run on the GPU, like gaming, graphics design, or video editing. But when normal apps take up dedicated GPU resources, that’s when it becomes a problem.
If you’re running Nvidia GPUs, then you can use the Nvidia Control Panel to make sure that the only apps to use the GPU are the apps that need a GPU.
Problematic or Outdated Drivers
Believe it or not, your graphics card driver might cause high GPU utilization. A driver is software that helps computer hardware, like GPU, to work with software. And drivers need to be updated as constantly as you’d update software.
When a GPU driver is outdated, then it might cause some problems albeit not so serious ones. Your GPU may not run optimally at this point, so it’ll end up using more GPU resources than it should.
Sometimes, we’ll update our GPU drivers, but more often than not, we don’t. For Nvidia GPUs, updating a driver is made easy with either Nvidia Control Panel or Nvidia GeForce Experience. The latter is a lot easier to use because every time you open it, it prompts up the latest version of the driver for your Nvidia GPU.
When it does prompt, you just click on the button to start the updated driver installation and you’re done. You just need to open the Nvidia GeForce Experience app every now and then to check if there are new driver versions.
Games Running At Higher FPS Than They Should
GPU engines are meant to run video games at certain resolutions. An older GPU running a newer video game will result in higher GPU utilization than a newer GPU running an older video game.
Now video games don’t necessarily require a lot of graphics processing power, but you’ll find that AAA games like Witcher 3 are one of those that’ll push your computer graphics card to the limit when you go for higher frame rates.
As long as your GPU can handle higher frame rates and higher texture quality, there shouldn’t be an issue tied to overheating caused by excessive GPU utilization. But running a game that’s way past your hardware specifications might cause issues, specifically with GPU utilization.
Graphics Intensive Software
GPU utilization for running software intended for graphics design, video editing, 3D rendering, and game development will always be at its highest because these programs need the GPU’s processing power.
When a GPU maxes out its resources on these applications, it means it’s doing its job and that the application is performing as it should. How much memory your graphics card has will determine how high the temperatures will go up. GPU temperatures shouldn’t go higher than 185°F (85°C).
If you find that your GPU is overheating when using graphics-intensive software, then you might need to purchase a decent cooling system.
Software Updates Running In The Background
If you’re running Windows 10 or 11, then you’ll know that one of the most annoying things that it does is when it updates in the background without prompting you. Sometimes, it’ll also be your anti-virus software doing this too.
When they update their software without prompting you, that means they’re running their updates in the background. Usually, you’d download the update and then install it when it’s finished.
But since this update did not prompt you, it meant that it was consuming resources, resulting in a spike in GPU usage. As long as the GPU does not overheat when there’s an update running in the background, then there shouldn’t be any issue.
However if there are instances of overheating, you might want to invest in a cooling system.
Web Browser Activity Might Cause GPU Usage Issues
Web browsers can also cause GPU usage issues, specifically those with hardware acceleration. When this feature is enabled in browsers, the GPU is used to speed up the browser performance.
Disabling this feature won’t hinder you from using your browser to its full potential, but it does get a huge workload off the graphics card.
But take note. Even without hardware acceleration, browsers might still use GPU, especially when it’s doing something that requires graphics processing. But the GPU usage will be relatively lower.
High-Performance Power Plan
While a common feature in laptops, most of the newer gaming PCs are equipped with Power Plans to help you balance power output and performance.
GPU utilization is at its highest when you go for High Performance settings, meaning it will allow you to run both CPU and GPU to its highest capacity without disregard for power consumption.
You’ll also have power modes that are economical, so CPU and GPU performance are intended to be lower than intended to help with power consumption.
GPU utilization might be affected by both high performance options or economical power options. Just go to System and then go to Power & Battery to change your settings. If the presets don’t work for you, you can create your own.
How High Should GPU Utilization Be For Gaming?
GPU usage will depend on a lot of factors, but for this section, we’ll assume that you want maximum GPU utilization for best performance possible.
If your game is running at a capped frame rate or refresh rate, then you’ll probably don’t need to worry about max GPU usage.
But…
It’s another story when the game itself is graphically intensive. Running a game capped at 60FPS won’t really do much in terms of reducing GPU usage because the graphics card is already struggling to power through that game.
For example, running The Witcher 3 at ultra settings on an Nvidia GeForce 1050Ti might cause some issues. Your frame rate might drop immensely, so much so that it’ll probably be unplayable.
Thankfully, Nvidia and AMD have provided us with their software that allows us to run games at optimal performance. You can use the Nvidia GeForce Experience to automatically set the graphics for any game that should make it run optimally.
The Wrap Up
GPU utilization only ever becomes noticed when things start to heat up, literally. GPUs are meant to handle excess heat, but it doesn’t mean that you should be pushing for that limit all the time.
Your GPU memory can only go as far as tell you how far you’d be able to push this limit. Modern graphics cards like the Nvidia GeForce RTX 30-series might handle temperatures higher than 85-degrees Celsius without compromising its durability.
Once you understand how one GPU differs from another in terms of GPU usage, then you’ll never look at graphics cards the same way ever again.
There’s a common debate in the world of PC building: is it cheaper to build a pc or to buy a prebuilt one?
And the arguments for either side are equally valid, so much so that you’d be convinced that there’s nothing wrong with either choice.
But sadly, times change. Building your own budget gaming PC has become somewhat more expensive now than a prebuilt PC. The COVID-19 pandemic, combined with the global shortage of components, have made it difficult for anyone to build their own PC.
A prebuilt gaming PC became the cheaper choice, but even then, supplies at a local computer store or PC hardware store were still minimal or close to none.
But now that prices have stabilized and supply chain is returning to normal, is now the best time to build your own PC? Let’s find out in this article.
What Does An Average Gaming PC Need?
The average PC build will need the following components:
Processor
Motherboard
Graphics Card
RAM
Storage
Power Supply Unit
Fans, Case, and other Components
A new gaming PC would probably have you focusing your budget on two parts: processors and graphics cards.
Processors will cost you anywhere between $100 and $500, more so if you’re going for an AMD Threadripper or Intel Core i9 processor. Graphics cards will probably $300 to $2,000, depending on the kind of games you want to play. Then your motherboard needs to be able to accommodate these parts and more, so that will also be as expensive as the first two components.
Right off the bat, you’re already running almost a thousand dollars, or close to a couple thousand, just for these three components inside.
Then you’ll need hardware to complement this level of processing and graphics power such as RAM, power supply, and storage. Thankfully, you don’t need to spend as much. A 16GB RAM kit will cost you anywhere between $60 to $100, while a robust power supply unit fell under the same price range. For storage, a 1TB SSD with a 2TB HDD would only be $200 to $300 for both of them.
Once that’s all said and done, you’re going to spend money on a PC case, some fans, and other peripherals, which would be another $100 to $300 out of your wallet.
To build your own PC that’s capable of gaming, video editing, and other heavy tasks, you’re more or less spending at least $1,500, maybe more.
Caveat here is that you’re buying brand new parts from PC manufacturers. Of course, you could save money on buying secondhand parts, or just buying a used custom built PC, but we kind of discourage this unless you really know the person you’re buying the PC from
Should You Go Ahead and Build A Gaming PC?
At least one point in your gaming life, you should have built your own PC. There’s a different feeling of satisfaction in building your own computer that can’t be provided by a prebuilt PC.
But hold on to your horses. There are advantages and disadvantages that you should be aware of if you want to build your own PC.
What Are The Advantages?
It’s Cheaper Long Term
The argument when it comes to building your own PC is that a custom gaming PC might be more expensive if it’s built from scratch as opposed to just buying prebuilt ones.
Gaming PCs and their components eventually lower in price as newer models come in, so there’s never a reason to not buy certain parts at their current price. If you have to compute the total amount spent on your PC build, you’re almost always going to be a few hundred bucks higher than a prebuilt PC.
But it’s actually cheaper in the long run. The parts’ quality is guaranteed because you’ve done the research and you’ve picked out the best PC manufacturers for all your components. Prebuilt PCs don’t come with this luxury because the parts inside are compatible with one another. Prebuilt PCs follow a template, much like how manufacturers would build a car. In terms of compatibility issues, you’re more likely to encounter them when you build your own PC but that’s another story in itself.
Easier to Fix
Speaking of compatibility issues, a mid range PC or a decent gaming PC wouldn’t have a lot of it as long as the research was done properly before building a PC.
When a prebuilt PC component needs to be replaced, chances are you need to buy the same component or its equivalent. For example, if you need to replace a true-rated power supply unit, then your replacement will need to be one of those true-rated power supplies.
If your PC is custom built, you could easily fix or replace parts when you need to. Personal preference plays a huge factor in your ability to save money on replacement, and that’s something you enjoy the most when you’re building your own PC.
Better Quality Build
A pre built machine is great and all, but a custom built PC has better quality. You’ve handpicked the parts yourself and ironed out the compatibility issues long before you purchased them. Saving money down the line is no longer a problem because you’re guaranteed that the PC you built is going to last you for a few years before you need to replace a single component.
What Are The Disadvantages Of Building a PC?
Unfortunately, there are some disadvantages to building your own PC, so you might want to think it through first. Note that while there’s just a couple of them, it might affect your entire decision in building a PC.
Expensive Upfront Costs
Prices of PC parts are going down, but not as fast as we’d like them to go. If you’re going for a budget build, your biggest issue would be to find stocks for your new computer. But on the opposite side of the spectrum, high performance parts may be an issue.
For starters, the most reliable route right now, albeit a disappointing one, to securing certain parts is paying scalper prices.
High performance graphics cards like the Nvidia RTX series are a whole lot cheaper when you buy them from reliable stores such as Amazon but stocks are an issue. This is why some builders resort to buying from hoarders, who’re selling these parts at more than MSRP.
You’d end up spending a few hundred dollars more than your given budget for building a PC as opposed to buying a PC that’s prebuilt already.
Susceptibility to User Error
Building your first PC is a challenge, but there are tons of YouTube videos out there that make it easy for you to understand how the process is carried out.
But that doesn’t exactly guarantee that you’re going to do just fine. Building your PC comes with a huge risk of user error. One wrong move during the build could destroy the whole PC.
If you’re not confident with your ability to build a PC, either you pay someone else to do it (like a technician from a local PC store) or you buy a prebuilt PC.
Should You Resort To Buying a Prebuilt PC?
Now if you don’t want to build a PC, you’re probably thinking of just buying a prebuilt one. It’s the quickest way to have a PC all set up and running at no extra cost or time wasted.
But just like building a PC, there are advantages and disadvantages to buying prebuilt PCs.
What Are The Advantages?
Plug and Play
Buying a PC is relatively easier than assembling it from scratch. You don’t need to lift a single finger in putting all the parts together, doing cable management, and all the other mundane tasks associated with building a PC.
A prebuilt PC is plug-and-play as you only need to plug in the monitor, some peripherals, and you’re good to go.
Cost-Effective
Prebuilt mid range PCs are cost-effective as you’re already getting it for a price lower than what it would cost you to build your own pc. You’re already guaranteed a good processor, operating system, and other components with decent specs. You’ll also get some that are packaged with decent monitors and other peripherals, so be on the lookout for those.
What Are The Disadvantages?
Difficult To Repair
The final cost of buying a PC accounts for more than just the PC. There are brands out there that use bulk ordered components or cheap components to maintain their margins for prebuilt PCs.
On the off chance that individual components need to be fixed, or replaced, then you need to find new parts with similar specs. If a graphics card or one of the other core components suffer severe damage, then replacing them might be more tedious and expensive.
Thankfully, there are decent brands out there that have all the components easy to replace in case of damage. Some brands also allow for purchasing components individually if you want to upgrade the entire PC.
Build Quality Might Be Mediocre
Unless you’re getting branded pre built computers (like Alienware or Skytech), you’re probably going to end up with cheap components, like an off-the-shelf graphics card or a processor with lower than normal clock speed.
The new computer you get might be good at first, but you might still end up with buying upgrades to replace the cheaper parts.
The Wrap Up
So which is better, building a PC or buying pre built computers? The answer is it depends on what you need from the PC and how accessible the parts are if you build a PC.
If logistics are an issue for acquiring parts, then you’re better off with pre built machines. Otherwise, it’s still cheaper to build a PC down the line.
Blender is a popular 3D modeling program because it’s free and it’s an open-source software. It has a ton of features that support simulation, compositing, rendering, motion tracking, modeling, and animation. Game production and video editing are also possible with Blender, so it’s no surprise that it’s the most widely used software for 3D artists all over the world. View our list of the best computers for Blender.
But with its ecosystem comes its downfall as Blender doesn’t really provide you with a powerful rendering solution. Thankfully, it can make use of a third-party rendering engine.
In this article, we’ll show you the best render engines for Blender and why they’re the best right now.
What’s a Rendering Engine?
A 3D rendering engine, or render engine, is software that converts your 3D scene into an actual model or animation. Rendering is the final stage of the animation or modeling process as animators and modelers add in the finishing touches such as shading and texturing process, motion blur, and other forms of visual effects.
There are three rendering methods used by 3d artists:
Wireframe – This is a production of an object’s structural frame. It has no surfaces to cover it. Rather, it’s made up of lines and points that shape to the object’s contour.
Solid – The quickest way to render 3D models and makes use of geometrical shapes to form the object.
Surface – This is where the object’s surfaces and edges are defined.
What’s The Best Rendering Engine For Blender?
Listed below are the most popular rendering software used in conjunction with Blender. This list is not arranged in any particular order.
Cycles
How Much Does Cycles Cost?
Free to use
What Are Its Features?
Cycles is one of the more popular choices of rendering engine for Blender because of its features and production capabilities.
Cycles is a path tracer render engine, or path tracing engine if you will, so it’s good at simulating complicated movements coming from light bouncing off of surfaces and its many reactions.
It also has powerful PBR shading nodes, vector displacement, realistic subsurface scattering, volume scattering and absorption, caustics, and more. Cycles is also constantly updated by its publisher so you can expect it to always have the newest and latest features.
Cycles also supports Multi-GPU rendering from both Nvidia and AMD graphics cards, and also hybrid GPU rendering and CPU rendering (GPU+CPU rendering).
What Can’t It Do?
Cycles currently lacks in caustics, so other rendering software might outperform Cycles. There’a no light linking available in Cycles, which is popular amongst its competitors.
Redshift is considered to be a powerful 3D render engine used by the people behind American Gods, and is coming to Blender for use. Redshift license holders are free to try out their beta version for the Blender extension.
Because of its biased rendering and architecture, Redshift’s GPU rendering is super fast, albeit sacrificing computation accuracy. Users get full control and customization so they get the visual fidelity they need.
Other features of Redshift include hair rendering, displacement and tesselation, volumetric rendering, and more.
What Can’t It Do?
Some functions may not be available from the present version of the addon. These functions include light-linking and motion blur, but development will still continue until the Blender plugin has the same features as the actual Redshift software.
Chaos V-Ray
How Much Does Chaos V-Ray Cost?
Monthly subscription costs you $70 a month, or you can go for an annual subscription that costs you $420.
What Are Its Features?
Like Redshift, Chaos V-Ray is a rendering engine used by a lot of commercials, film, and even for feature length animation. The rendering power is solid and readily available for many appliations, including Blender.
The Blender V-Ray Plugin is free and open-source, which you can download from GitHub. It’s another story if you want to use both V-Ray and Blender altogether.
What Can’t It Do?
You’ll need to purchase a Render Node License if you want to interface with the V-Ray Standalone Application.
Eevee is free to use, and no, we’re not talking about the Pokemon.
What Are Its Features?
One of Blender’s real-time rasterization rendering engine is Eevee. Eevee now comes with Blender 2.80, replacing the software’s internal rendering feature.
Several of Eevee’s features include subsurface scattering, volume rendering, hair support, and a solid Shader-to-RGB node for NPR shading.
But what really makes Eevee great to use is that it focuses on filling in the gaps in the feature sets, providing a viable production rendering solution.
What Can’t It Do?
Eevee does not have genuine path tracing, making it difficult to create a realistic rendering.
Workbench
How Much Does Workbench Cost?
Workbench is free and is included with Blender
What Are Its Features?
The Workbench Engine is th standard engine that powers Blender’s viewport. It’s responsible for guaranteeing smooth performance for tasks performed prior to rendering, texture mapping, lighting, and shading.
What users like about Workbench is that its features make it easy to handle different tasks at the same time. Tasks such as cavity rendering, outlines, and X-ray options are a breeze for Wokrbench.
What Can’t It Do?
Some Blender users are actually attempting to use Workbench for final rendering, but it’s a lot easier said than done.
LuxCoreRender
How Much Does LuxCoreRender Cost?
LuxCoreRender is free to use.
What Are Its Features?
LuxCoreRender, formerly known as LuxRender, is one of the most powerful physically correct render engines in the market right now, and yes, it’s open-source.
LuxCoreRender allows you to create physically correct models with ease, thereby outperforming some of the commercial software developed (including Cycles).
Rendering scenes with heavy refractions is what separates LuxCoreRender from the rest of the 3D render engines in the market. It also has light grouping, something that Cycles (a free rendering software) does not have at this time.
At time of writing, LuxCoreRender is a favorite among Blender users.
What Can’t It Do?
Rendering took a long time with LuxCoreRender, but several improvements were made to shorten rendering time. These improvements focused on performance and GPU rendering.
Malt/Beer
How Much Does Malt/Beer Cost?
Malt/Beer is free to use.
What Are Its Features?
The Beer 3D render engine is free and open-source real-time Non-PhotoRealistic render engine for Blender and built using the Malt backend. Malt/Beer was also crowdfunded by the Blender NPR community.
This 3D render engine might be new to the rendering scene, but it flawlessly integrates into Blender because it was made specifically for Blender. The program’s goal was to improve upon Blender’s Stylized rendering features through the reorganization of shaders.
Rendering NPR scenes with Beer is easy as you’ll find the features such as rim light and soft edge toon ready for blend.
What Can’t It Do?
Like other free rendering software, Beer is still in the early stages of development but you can choose to support the development through crowdfunding. Some features might not be available compared to other render engines in the market.
OctaneRender (or Octane Render)
How Much Does OctaneRender Cost?
OctaneRender has various subscription packages, depending on GPU limit. OctaneRender Enterprise is the most expensive package, costing you 39,95€ (or US$ 40+) per month on an annual subscription.
What Are Its Features?
OctaneRender is one of the first GPU render engines to be released and is popular for its rapid rendering features.
OctaneRender has a spectrally correct and impartial render engine that takes advantage of the RTX graphics cards to create accurate images at rates faster than other rendering engines in the market right now.
What Can’t It Do?
The Octane Render plugin is actually Blender with the OctaneRender engine built in (as opposed to having something like Eevee or Cycles). If you use OctaneRender, you may not be able to use shader nodes and editors from Cycles or Eevee.
How Do You Choose a 3D Render Engine for Blender or any Other Software?
Out of all the rendering engines for Blender we listed, or for any other 3D software, how do you determine which one’s right for you?
These are the factors that will affect your decision in choosing the right rendering software or render engines.
Is It Right For Your Industry?
The biggest factor that’ll determine what rendering software you’ll use is what industry you belong to. Render engines aren’t exactly multi-purpose.
For example, if you’re an architect, you’re going to want to go for a rendering software intended for architectural visualization. You’re more or less using something like Rhino or Autodesk Revit, so you’ll need a rendering software that’s compatible with these software. If you’re doing animation or visual effectss, then you’re probably using Maya, Houdini, or Cinema4D. You’d need render engines that will work with these programs.
The downside here is that some rendering engines are only available to specific applications. Some applications are limited in terms of what they can do, so you’ll need to find render engines that will complement it.
How Flexible Is The Render Engine?
As mentioned earlier, 3D artists will have different needs depending on their industry, so the rendering software must be capable of doing everything (or at least close to everything). And by everything, we mean it should be capable of helping you achieve your rendering goals.
For example, architectural visualization requires billions of polygons to display buildings and interiors as detailed as possible, so you should go for 3D render engines that gives you that.
How Reliable Is It?
Render engines gather all the details that they need from your file in order to produce a single image or a frame of animation. When a software is rendering, it needs to carry out the rendering processes without a hitch. Otherwise, you’d end up with a corrupt output.
Whether you’re rendering a 10-story building with immense foliage or doing visual effects for a short film, the rendering engines you want to work with will need to be consistent and reliable.
When we say consistent, you’d need a very good engine capable of guaranteeing render quality no matter what the project.
What Level of Realism Does It Provide?
On the off chance that you’re a 3D artist that requires photorealistic rendering, then you’d need a rendering engine to give you that. A quick definition of photorealism is how close the 3D subject looks like to its real world counterpart. This could be as a simple as dew mounted on a blade of grass, or an entire workup for a fancy sports car.
Your rendering software must be able to compute for real-world lighting so your light bounces, refractions, and reflections are accurate. The material you’re rendering need sto obey real-world physics too. If you want to render the swaying of hair against the wind, the movements of the photorealistic rendering should be similar to how hair moves against the wind in real life.
How Easy Is It to Use?
Rendering software are not made equal, so the learning curve on how to use some of them will be as different to one another as their real time rendering speed.
How great is this 3D rendering software in turning your sketch into a masterpiece? And how easy will it be for you to create a such masterpiece? 3D artists want to be creative all the time, not spend hours navigating the learning curve of 3D rendering software.
What’s the Cost?
Getting the best rendering tools or engine is one thing, but managing the price is another. Remember when your parents told you about the phrase “not everything in life is free”? Well, it’s the same thing for rendering engines.
Blender has access to free rendering software like Cycles and Eevee, but they can only do so much and might not be able to meet your demands. If you want a powerful rendering engine, then you’d need to accept the fact that you’ll need to pay top dollar for it, whether it’s a monthly subscription or a one-time fee for a perpetual license.
How Fast Is The Rendering Speed?
Real time rendering needs to be fast, period. You don’t want to spend more than a couple of minutes waiting for the rendering to finish. Your rendering engine needs to be able to manage your CPU and GPU power efficiently so you can get it done as quickly as possible.
Other render engines might not be as capable of combining CPU and GPU rendering, so that might slow you down.
One of the most unfortunate things to happen after building your PC is your motherboard not booting. If this happens, you’ll need to update the BIOS. But how exactly do you update BIOS without CPU?
Isn’t the point of turning on your PC the first time is to make sure that everything’s working? Well, don’t worry. In this article, we’ll show you how to update BIOS without CPU and other tricks you’ll need in the future.
What Exactly Is a BIOS Flashback?
BIOS flashback is a common feature found in motherboards that allows you to update your PC’s BIOS without installing memory, GPU, or even a CPU.
Depending on the brand of motherboard, flashback is referred to as the following:
Gigabyte motherboards call it Q-Flash Plus (not the same as Q-Flash, which is the software used to update the firmware from within the BIOS).
MSI motherboards call it Flash BIOS Button (not the same as M-Flash, MSI’s update utility).
ASRock motherboards call it BIOS Flashback Button.
ASUS motherboards call it USB BIOS Flashback
If you want to know if a motherboard has a BIOS flashback, you’ll need to check the manufacturer’s sheet or the website itself. On the spec sheet, it will appear as the name as it’s listed on here.
What If Your Motherboard Does Not Have BIOS Flashback Feature?
On the off chance that your motherboard does not have a flashback feature, don’t worry. There’s still something that you can do. First, you need to acquire a fresh and formatted FAT32 USB flash drive.
What Do You Need a FAT32 USB Flash Drive For?
A FAT32 USB flash drive is what you need to boot up your motherboard’s BIOS without a CPU. Now, users flocked to Reddit citing that new USB 3.0 drives have certain issues when it comes to doing BIOS flashback updates. This is not guaranteed for everyone, but to be on the safe side, just use a USB 2.0 flash drive when possible.
BIOS software and updates are relatively small, so you’d only need a USB flash drive that’s about 16GB or smaller. But the main reason why you shouldn’t use larger flash drives is that older motherboards may have problems detecting them.
How Do You Update BIOS Without CPU or Do BIOS Flashback?
Check your Motherboard’s Official Website
Download the BIOS update file from the motherboard’s manufacturer website using another laptop or desktop. Never download any BIOS files outside of official manufacturer websites.
Do a quick search for your motherboard model on Google and it should take you to the official manufacturer’s page for that model.
Download the BIOS Update
Once you’re on the motherboard’s official page, click on Support tab (or its equivalent), then go to the BIOS section. This is usually found under Drive and Utilities.
You should see different BIOS versions alongside their release dates, but the more recent updates are located at the top of the list. Always download the latest BIOS version when you have to.
However, if the latest BIOS version has something with “BETA” affixed to it, don’t download that version if it’s only less than a week old. If not, then just download that version still.
Extract Download and Rename BIOS File
After downloading the file, extract the file first and then rename the BIOS file.
If you have an ASUS motherboard, it should come with a BIOSRenamer.exe utility. Just double click that and it will automatically rename the file. For MSI, Gigabyte, and ASRock motherboards, you’ll need to rename the file by yourself. Just look for the BIOS file, which should be the file with the largest file size in the folder.
Then rename them by following these formats:
If you have a Gigabyte motherboard: rename the file to gigabyte.bin
If you have an MSI motherboard: rename the file to msi.rom
If you have an ASRock motherboard: rename the file to creative.rom
You’ll get a warning prompt saying that renaming might make the file unstable. Click Yes because this is a normal message prompt after renaming. It doesn’t matter if you use uppercase letters or lowercase letters as Windows reads them the same.
Format USB Drive as FAT32 and Transfer BIOS File
Plug the USB flash drive in and open My Computer or My PC (Windows 10/11). Right click on the drive and click Format. Select the FAT32 option and not NTFS.
If you recently formatted a flash drive but unsure of whether or not it’s FAT32, just right click on it and select Properties.
Copy the BIOS file (the one that you renamed) into the main directory or root of the USB flash drive.
Eject USB Drive from the PC You’re Using and Connect Power Supply To Your Motherboard
Eject your USB flash drive from the PC properly.
On the motherboard that you’re planning to update the BIOS, connect the power supply. But before you plug it into the wall, make sure that you connect the large 24-pin main motherboard power connector and 8-pin CPU power connector.
Yes, you’ll need to connect the CPU cable to the power supply even if you don’t have a CPU installed on there. Once all the cables are connected, plug the power supply to the main socket.
Insert USB Drive and Press Flash BIOS Button
Remember, for this part, you don’t need any other parts mentioned on your motherboard other than the ones mentioned in the previous paragraph.
Insert your USB on the special USB port behind the motherboard. This special port is labeled as BIOS or some equivalent.
IMPORTANT: make sure that the power supply is turned on BEFORE inserting the flash drive. Some people have done the reverse and faced several issues. Manufacturers will also tell you to turn the power on before inserting the flash drive.
Once the flash drive is inserted, locate the small BIOS flash button somewhere next to the USB port on your motherboard and press it. Some motherboards will have it on the actual board and not behind the motherboard. For Gigabyte motherboards, the button will be labelled as Q-Flash Plus.
On some motherboards, like ASRock, you’ll need to hold down the button for three seconds. If your motherboard is MSI or Gigabyte, you’ll need to press down the button for three seconds if nothing happens the first time you pressed it.
If done correctly, the firmware will update itself with the BIOS file installed on the USB drive. This shouldn’t take you long but just make sure that there’s no power interruption as you’re updating.
When the update is complete, the LED light will stop flashing and the motherboard will either restart or shut itself off.
You can now remove the USB drive, turn off the power supply, and proceed to install all the remaining parts (i.e. CPU, GPU, and so on).
The Wrap Up
Now you know how to update BIOS without a CPU. It’s worth mentioning that there’s no actual need to update your BIOS unless you absolutely have to.
RAM, or Random Access Memory, is a crucial part of any computer. A RAM module is responsible for the PC’s short-term memory, which allows helps the PC carry out its numerous processes.
In this article, we’ll be discussing a topic that’s sometimes overlooked by most novice PC builders: RAM compatibility.
How Do You Know Which RAM is Compatible With Your Current Motherboard?
There are several factors in determining RAM compatibility with motherboards. Some are easy to figure out, while there are a few that might require you to do some added work.
These four are the most important specifications to look out for when determining compatibility:
DDR Generation – RAM modules come in different types, or generations. You have DDr1, DDR2, DDR3, DDR4, and DDR5. DDR5 is the newest generation of RAM modules, but DDR4 is the most widely used generation to date. If you’re building a new computer, you’re looking at using either a DDR4 or DDR5. If you’re using an old motherboard, chances are you’ll need a DDR3.
Storage Capacity – Storage capacity determines your PC’s ability to multitask. Storage capacity is measured in Gigabytes (GB), so the higher the storage capcity, the better your PC will run resource-intensive games or apps.
Speed – Your RAM speed is measured in MHz, or megahertz. Much like storage capacity, the higher the MHz, the faster the RAM will carry out the processes. RAM also has backward compatibility with motherboards. Your RAM will still run on a motherboard that’s slower, but we’ll talk more about this later on.
Form Factor – RAM modules come in two forms: dual in-line module or DIMM and small outline dual in-line memory module (SO-DIMM or SODIMM). DIMMs are bigger than SODIMMs and take up a lot of space, so they’re reserved for desktop computers. In contrast, SODIMMs are used for laptops.
Does Your Motherboard Need SODIMM or DIMM?
As mentioned, SODIMM ram sticks are for laptops, and DIMM RAM sticks are for desktops. However, there is an exception. Desktops with a small form factor motherboard use SO DIMM RAM sticks instead of DIMMs.
DIMM slots also look different compared to SODIMM slots. The former’s longer than the latter, so even just by looking at your motherboard’s RAM slot, you’ll know what compatible memory sticks to use.
How Do You Know Which DDR Generation You Need?
There are three ways how to determine what generation of RAM your motherboard is currently using, or compatible with.
First, you can check with the motherboard manufacturer.
Second, you can use a system-checking tool.
Third, manually inspect the RAM sockets inside the motherboard.
For the last one, different DDR generations will have sockets that more or less look the same. The difference lies in the number of pins and notches present. These minor nuances will prevent you from using the wrong kind of memory modules.
For modern motherboards, you’re probably looking at DDR4 RAM sticks. DDR5 RAM sticks are new and there are only a handful of motherboards out there that can accommodate DDR 5.
If you want to know how to tell the difference between DDR generations just by looking at the slot, this is the cheat sheet:
DDR will have 184 pins and a notch near the center
DDR2 will have 244 pins and a notch near the center
DDR3 will have 240 pins with a notch offset to one side
DDR4 will have 288 pins with a notch near the center
Computer memory modules will almost always have their specs listed on their packaging, so there’s no need for you to double-check unless you’re buying secondhand RAM.
What’s the Maximum RAM Can A Motherboard Support?
Part of knowing and understanding RAM specifications is motherboard compatibility to the max amount of storage capacity. You can’t expect an old motherboard to be able to handle RAM beyond its memory specifications.
Your DIMM slots will usually tell you how many sticks of RAM your motherboard can accommodate. The number of slots will range from 2 to 8 slots. Exactly what kind of RAM these slots can accommodate is another question in itself.
The easiest way to determine compatibility in terms of memory capacity is to check with your motherboard’s manufacturer. For example, a gaming motherboard like the ASUS ROG Strix B550-F Gaming has 4 DIMM slots that accommodate up to 128GB of DDR4 4400MHz RAM.
Now, how much RAM and the type of RAM you need will depend on your expected tasks. If you’re just going to do productivity tasks, like encoding, then 8GB of RAM will suffice. If you want better performance for gaming, video editing, and 3D modeling, you might want to go for the maximum amount of RAM that your motherboard can handle. If your motherboard can accommodate up to 32GB of RAM, then you could go for either 16GB or 32GB.
Is Any Type of RAM Compatible with All Motherboards?
If you want to know what compatible upgrades are suited for your motherboard, you’ll need to use a third party software that gives you a summary of your entire system. A good example would be CPUID.
But to answer the question, the type of RAM you’ll use may or may not be compatible with all motherboards. Here are certain scenarios:
For example, pretend you have a desktop PC and a motherboard that can accommodate only 8GB of RAM. You upgrade with more RAM by purchasing a 16GB RAM stick. Your new RAM won’t run at its max capacity, might not even be properly read by the motherboard.
How many slots your current motherboard has might determine compatibility. Just because you have two RAM slots doesn’t mean you can install 2 sticks of 64GB right off the bat, unless it’s actually specified by the manufacturer that the maximum amount of RAM for said motherboard is 128GB.
A motherboard that uses DDR3 RAM only might have issues running DDR4 RAM because they use different clocking technologies. If a motherboard specifies DDR3, then you should only be using a DDR3 RAM. Anything else wouldn’t work, no matter new the RAM is.
Do You Want More RAM or More Speed?
RAM speed is crucial because it will guarantee better performance on your computer, but it’s mostly a secondary specification as you’re focused more on capacity.
RAM and motherboard compatibility, however, will be dictated in terms of much MHz it’s capable of. Motherboards have different speeds, and yes, there’s backward compatibility too. If you have a motherboard that only supports up to 2133Mhz but you upgraded with 3000MHz RAM, the RAM will still work as intended. However, it will slow down to 2133MHz to match the motherboard’s speed.
You can use a third-party software like CPUID to get your computers’ system information.
Does Your RAM Need To Match Its Capacity and Speed With The Motherboard?
The answer is YES and NO. Again, due to backward compatibility, a faster RAM could make do with a slower motherboard. But if you’re building a new PC, the best practice is to match the motherboard’s speed with the RAM speed so you’re getting the best possible performance.
There are cases when higher clock speeds for RAMs that beat the motherboard’s supported clock speed have no issues whatsoever other than not running at the desired clock speed.
And in line with your RAM being compatible with the motherboard, capacity is also as important for consideration. A motherboard that supports a lower RAM capacity than your RAM upgrade might not be able to utilize the RAM’s full power. Simply put, if you have a motherboard that can only support up to 16GB RAM and you got a 32GB RAM stick, you’re not getting 32GB.
The Wrap Up
RAM compatibility is definitely something to consider when it comes to your PC build. How much RAM your motherboard supports will determine the kind of RAM upgrade you’re going to need.
If money is not an option, try to get a motherboard that supports DDR4 or DDR5 RAM. This way, you won’t have trouble finding what kind of RAM is compatible with your system.
One of the most interesting things that your PC does is take half of the available RAM and turn it into shared GPU memory. But does this improve your system performance, or does it negatively affect performance?
In this article, we’ll find out what is shared GPU memory and what you can do to boost your system’s performance.
What Is Shared GPU Memory?
Shared GPU memory is a form of virtual memory that your GPU or graphics card uses when it runs out of dedicated VRAM or video memory. How much your shared memory is allocated is dependent on half of the amount of RAM you have. If your PC is running on 32GB RAM, then your shared memory is going to be 16GB, at least.
Operating systems will use RAM as a source of shared graphics memory because it’s faster than SSD or HDD. But RAM is still slower than VRAM, which modern graphics cards have. After all, a discrete graphics card could be running a GDDR6 VRAM and while RAM could still be behind with DDR4 or DDR5.
But your operating system or OS won’t use shared memory until your graphics card is out of VRAM, and even if this does happen, there’s no degradation in performance even if your video game or app is tapping into this shared memory on a filled GPU memory.
In fact, using shared GPU memory will allow a game or program to run because excess data that couldn’t be stored in VRAM will be stored on RAM. If your PC didn’t have a shared memory, your game or app would crash as soon as the graphics memory is full.
When RAM is used for shared GPU memory, it doesn’t mean that the shared memory is only for graphics card’s use. The OS will still use the shared memory to run other apps when it needs to, so you don’t have to worry about half of your sytem RAM being utilized as a back up for your dedicated graphics card.
But this is not the case for integrated GPU. Shared GPU memory refers to the maximum amount of memory that your GPU can use. Integrated GPUs don’t have dedicated memory that they can use to run apps or games. To make this possible, integrated graphics cards will use system RAM or system memory. For integrated GPUs from Intel and AMD, their shared GPU memory is half of the RAM size.
What’s The Main Difference Between Shared GPU Memory and Dedicated Memory?
Dedicated GPU memory refers to physical memory installed on a discrete graphics card. These are the high-speed memory modules, such as GDDR or HBM, and are placed near the GPU’s chip. Dedicated GPU memory is used for games, rendering, and other graphics-related tasks.
On the other hand, shared GPU memory is sourced or taken from your RAM. Unlike dedicated GPU memory, shared GPU memory is virtual and not physical. This is only an allocation of memory on your PC’s RAM.
If your system has an integrated GPU, meaning it has no discrete or third-party graphics card, then it won’t have its own dedicated memory. Integrated GPUs will take instead from system RAM.
Should Shared GPU Memory Be Increased or Decreased?
If you have a dedicated graphics card or a discrete graphics card, you don’t have to worry about how much shared memory you have. Shared GPU memory will only take up half of your system’s total RAM. If you have 8GB of RAM, 4GB will be allocated for shared GPU. Increasing or decreasing your shared GPU memory won’t really have an effect on performance but it doesn’t mean you should do either too.
For integrated GPUs, people were probably told to increase the amount of “reserved” or “dedicated” iGPU memory through BIOS and tweaks in registry settings, but this does nothing. In fact, performance may degrade at this point. This is because Intel chipsets and AMD chipsets have BIOS settings where system RAM is allocated exclusively for GPU usage. If you increase your graphics memory, you’re actually decreasing the amount of system RAM on your PC.
Games and apps might warn you about low memory size when you’re using iGPU but you can just ignore those messages. Your OS will still use RAM for video memory if you do run out of VRAM. But note that at this point, you’ll have weird visuals on games such as missing textures or slow-loading graphics.
Some games might not even run if you have an iGPU memory that’s already pre-allocated, so this might be the only time when increasing it via BIOS settings is ideal. Just remember to set them back to default once you’re done.
Wrapping It Up
Shared GPU memory is sort of a backup VRAM for when you’re about to get tapped out on your discrete GPU’s VRAM buffer. But with the modern graphics cards that we’re seeing right now, playing games, doing graphic design, or even video editing doesn’t even take up a lot of memory.
However, laptops might have a different issue. Unless it’s a gaming laptop, the GPU runs on half of the system’s total memory. Most laptops run on integrated GPUs, so the issue is the system’s RAM will be half occupied already. The big difference between an iGPU and a discrete GPU is that the latter will always have more VRAM and can handle more demanding tasks.