Category: PC Hardware

  • A Quick Guide To How A SATA Cable Works And More

    A Quick Guide To How A SATA Cable Works And More

    As a future PC builder or enthusiast, it’s important to familiarize yourself with different components outside of the usual pieces. An overlooked component is the SATA cable, but don’t worry.

    Today, we’re going to look at what SATA cables are, how they work, and what they can do for your system.

    What Are SATA Cables?

    SATA is short for Serial ATA or Serial Advanced Technology Attachment. SATA is an IDE standard that was released back in 2001. This cable allowed you to connect storage devices and optical drives to the motherboards.

    Serial ATA replaces Parallel ATA or PATA as the IDE standard for connecting storage and optical devices to a system unit as they can transmit data to and from the rest of the system unit faster than the PATA devices.

    PATA cables are only 18 inches at max length while SATA cables can go as long as 1 meter or 3.3 feet, which allows you more freedom for mounting devices. The only thing that a PATA device has over SATA is that the former can attach two devices at once while SATA only allows for one.

    There are also OS that doesn’t accept SATA cables such as Windows 95 and 98 but don’t worry as these OS’s are rarely used nowadays.

    SATA hard disk drives also need a special driver that needs to be installed before a computer can read or write data to it.

    You might think that the PATA cables will have the upper hand because of the SATA cable’s limitations, but the data transfer rate and flexibility of the latter will always give it

    What Are The Different Generations of SATA Cables?

    There are currently three versions, or generations, available for SATA cables. Each generation has its corresponding specification and speed:

    SATA I

    The first generation interface is the SATA 1. It operated at 1.5Gb/s with a max bandwidth of 150MB/s.

    SATA II

    SATA II is the second-generation interface that operated at 3Gb/s with a max bandwidth of 300Mb/s.

    SATA III

    SATA III is the third-generation interface. It has a max transfer rate of 6Gb/s with a max bandwidth throughput of 600Mb/s.

    The SATA III is compatible with other generations via backward compatibility.

    What Are The Different SATA Connectors?

    SATA connectors are available in male and female formats with three varieties, namely:

    • Power only (SATA power cables)
    • Data only (SATA data cables)
    • Data plus power

    SATA connectors look a lot like wafers, with pins arranged in single row. They’re wider so they’re able to couple with smaller devices like SSDs.

    SATA Data Cables

    SATA data connectors only have 7 horizontal pins, with 3 pins for grounding and 4 pins arranged in pairs for data.

    You’ll also find a smaller version known as a mini-SATA or mSATA connector, which is mostly used for tablets and laptops.

    SATA Power Cables

    SATA power connectors have more pins than SATA data cables. A SATA power connector has 15 pins and supplies +3.3V DC, +5V DC and +12V DC. These cables are partnered with a 4-pin Molex LP4 connector that attaches to the computer’s power supply unit (PSU).

    Then you’ll have SATA cables that can both provide power and data at the same time.

    How Are SATA Cables Mainly Used?

    SATA HDD Cables

    Your typical computer build will use SATA cables to connect the HDD to the motherboard. A hard disk drive usually features inlet ports, and one of them will be compatible with SATA cables.

    The SATA cable also provides power to the HDD so you don’t have to attach another cable. This is an example of a DATA PLUS POWER connection. SATA cables for HDDs can also be used to connect external HDDs to the PC via e-SATA.

    SATA Cables for Laptops

    Laptops are built differently from a standard PC. Unlike PCs, laptops connect their storage devices directly to the motherboard, which removes the necessity for SATA cables. However, the breakout boards and motherboards are connected to these storage devices with a thin and flat SATA cable.

    What Are The Other Types of SATA Cables?

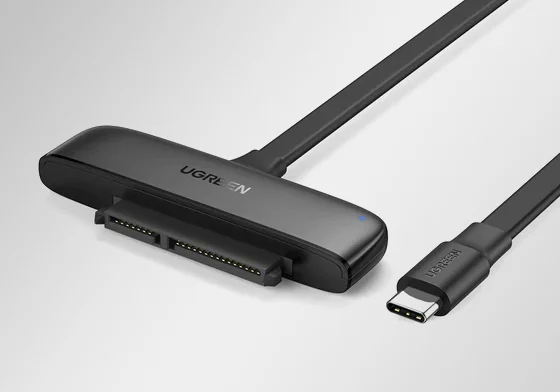
    SATA to USB

    USB-C-SATA-3 SATA Cable

    You can connect external SSD drives to a computer via a SATA to USB cable. A SATA to USB cable is used to plug in storage devices that don’t have external closures.

    This allows you to attach an SSD to the system unit without installing it to the motherboard. This is a good way to back up files from an SSD into a PC or laptop.

    e-SATA

    An e-SATA or external SATA is another form of SATA Cable that allows you to connect external hard drives into a computer via the e-SATA connector port.

    Micro SATA

    Micro SATA, or mSATA, is one of the smaller SATA cables used for connecting SSDs with an mSATA connector to the motherboard.

    Low Profile SATA

    A low-profile SATA cable is typically used for PCs with bulky GPUs that end up blocking the SATA ports. A low-profile SATA cable will go underneath any GPU and into the motherboard without bending.

    What Are SATA Converter Cables?

    SATA converter cables are a form of adapter that you can use to convert any old cable type into SATA, or convert one SATA cable into another connection type.

    If you plan on using your SATA hard drive via USB connection without needing to boot it on the system, you can use a SATA to USB adapter.

    You can also find Molex converters in case your PSU doesn’t have a 15-pin cable connection to provide power to an internal SATA hard drive.

    How Do You Install a SATA Cable?

    Installing SATA cables isn’t that complicated, but even so, you should still know how to install them properly.

    How you install SATA cables will depend on what their purpose is. If you’re just replacing an HDD’s old SATA cable, then you might want to disconnect the old one from the motherboard first before installing the new one.

    However, it’s a different story when you’re installing a new hard drive, then you need to follow these steps:

    • Place the new hard disk drive into an empty bay. Make sure it’s securely located and that airflow is optimal.
    • Connect the SATA cable to the hard disk drive and then connect the other side of the SATA cable to the motherboard.
    • Make sure that the new SATA cable is not hindering the existing SATA connection from your old HDD.
    • Your primary drive, or the hard disk drive you’ll be using most of the time, should connect to your motherboard’s lowest SATA port, which would be SATA 0 or SATA 1.
    • Close the PC casing and power up the system once it’s safe.

    Frequently Asked Questions About SATA Cables

    How do you know you’re using a third-generation SATA cable, or SATA III?

    You can tell that you’re using a SATA III by its latch or locking mechanism. You’ll find a latch on either one side, or both sides of the cable. If there’s a latch on your cable, then that’s a SATA III cable.

    Is SATA III faster than the SATA I and SATA II?

    Yes. You’ll find that the other two generations have a data transfer rate of up to 1.5 Gb/s and 3.0Gb/s. The SATA III has max bandwidth throughput of 6.0Gb/s.

    All SATA generations have backward compatibility too.

    What’s SATA Express For?

    SATA Express is a bus interface used for connecting your computer’s motherboard to a storage device. The SATA Express supports PCI Express or PCIe and Serial ATA protocols at the same time.

    How do you connect an external hard drive to a computer if there’s no eSATA port?

    PC’s don’t usually have an eSATA port but you can purchase a SATA to eSATA converter cable. You will then use your external device to this eSATA port using an eSATA cable.

    Why does a SATA power cable have many pins?

    A SATA power cable or power connector has so many pins because it replaced the 4-pin Molex connector. The higher pin count is for supporting three voltages, providing additional ground pins for hot swapping, and access to other advanced features like a mechanical drive’s delayed spin-up.

    What’s the most common SATA cable being used today?

    The most common SATA generation used today is the SATA III cable. Then you’ll have three different SATA cables under this generation, namely 3.1, 3.2, and 3.3.

    Wrap Up

    So there you have it, everything you needed to know about SATA cables and how they work. Knowing how a SATA cable works and what the different functions are will let you build a stronger and faster CPU.

    Knowing the different SATA cable types and their functions will also help alleviate some headaches associated with data backup for optical drives and storage drives.
  • What’s The Best Smallest ATX Case In The Market?

    What’s The Best Smallest ATX Case In The Market?

    If we told you 10 or 15 years ago that building a compact computer that doesn’t take up a lot of desktop space was possible, you probably wouldn’t have believed us. You probably would have looked at us funny and told us we were off our medications.

    But believe it or not, this is now possible thanks to the advent of compact cases that’s capable of housing gaming hardware. For a lot of PC builders, a tower case exudes power. These are the type of people who want to let other people know that there’s serious gaming and computing power hidden behind this tall metal case with liquid cooling running inside.

    But on the other hand, you also have other builders out there who prefer to keep it on the downlow. We’re talking about using the smallest ATX case possible with an ATX motherboard and equipped with the latest gaming hardware.

    It makes sense to actually go for mini or small ATX cases because PC parts are becoming smaller. Yes, small ATX cases might be restrictive in terms of hardware, but they are able to house hardware that could give you 4K or VR gaming.

    If you are planning to build a compact computer using ATX cases but you don’t want to sacrifice your full-sized motherboard form factor, then this list should help you. We’ll go over the best and smallest ATX cases in the market right now.

    Corsair Carbide Air 540

    Best Overall Compact Case

    Corsair Carbide Air 540 Smallest ATX Case

    Corsair is one of the best manufacturers for cases out there, and their Carbide Air 540 is one of the best ATX cases in the market right now.

    Right off the bat, you’re getting a cubed design case with dual-chamber. The case houses the drives and PSU at the back chamber while the CPU, GPU, and motherboard are housed on the main chamber.

    This design allows you to have streamlined airflow that’s hitting the main chamber components and the back chamber components. As a result of this design, PC owners can also overclock their CPU and GPU without worry.

    Key Features

    • Supports E-ATX, mATX, ATX, and Mini ITX motherboards
    • Can accommodate 6 x 120mm or 5 x 140mm fans
    • With 4 x 2.5″, 2 x 3.5″m, and 2 x 5.25″ drive bays
    • Pre installed with 140-mm Corsair Air Series intake and exhaust fans
    • Maximum GPU length of 320mm and CPU cooler height of 170mm.
    • Standard ATX PSU length of 250mm
    • Includes frost dust filter
    • 8 PCIe Expansion Slots

    Cooler Master Q500L

    Best ATX Cases With The Highest Airflow

    Cooler Master Q500L Smallest ATX Case

    A successor to the previous year’s Q300L, the Cooler Master Q500L is one of the best micro ATX cases out there. Albeit slightly bigger than the Q300L, the Q500L is a massive upgrade given that it can accommodate the ATX motherboard form factor. How awesome is that?

    On top of that, you have front and top panels designed for maximum airflow, along with a side panel window and fan mounts.

    Needless to say, we’re recommending the Cooler Master Q500L is on top of our shopping lists.

    Key features

    • Supports Micro ATX, Mini ITX, and ATX motherboards
    • Maximum GPU length of 334 mm and CPU cooler height up to 180mm
    • Max PSU length of up to 180mm
    • Accommodates up to 4 200mm fans at the top, 120mm rear fan, and up to 2 x 120mm fans in the front panel
    • 7 PCIe slots
    • Pre installed with two XtraFlo fans in the front panel
    • Supports up to 240mm radiator

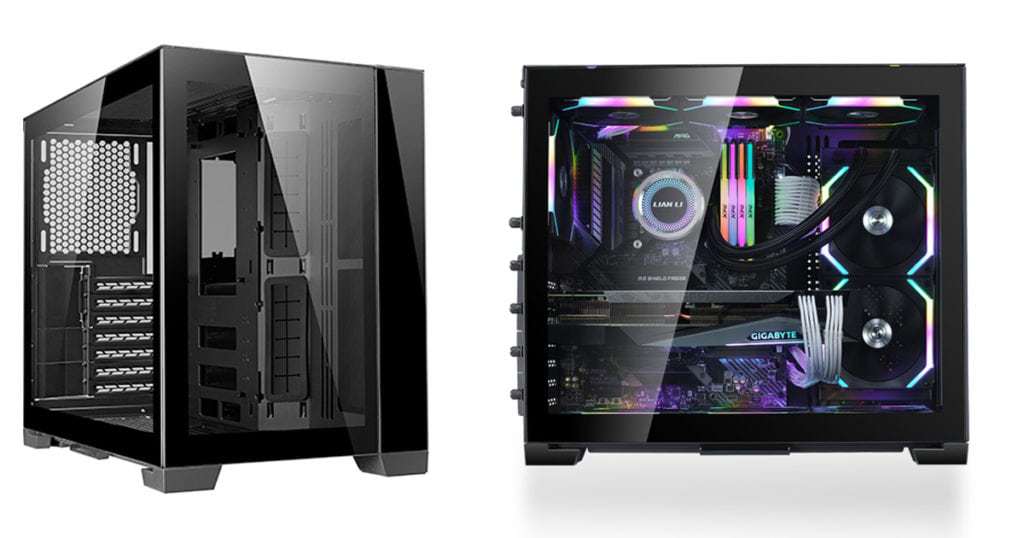
    Lian Li O11-Dynamic-Mini

    The Latest ATX Case from Lian Li

    Lian Li O11-Dynamic-Mini Smallest ATX Case

    One of the most recognized names in the PC builder universe is Lian Li, and on this list, we have the Lian Li O11 Dynamic Mini. This is quite possibly one of the most beautiful mini ATX cases we’ve ever gazed our eyes on.

    The Lian Li O11 Dynamic Mini, or Lian Li in general, does not shy away from making sure that the case looks absolutely stunning. They don’t cut corners when it comes to design, size, and functionality. As a result, you’re getting a case with high airflow and thermal regulation capacities and room for cable management.

    Unfortunately, there’s a downside. The Lian Li O11 Dynamic Mini does not support ATX PSU, which makes sense given the SFF of the chassis. However, it does support SFX and SFX-L PSUs.

    Key Features

    • Supports ATX, mATX, Mini ITX, and E-ATX (280mm or smaller)
    • Max GPU length of 395mm
    • Max CPU cooler height of 172mm
    • SFX or SFX-L PSU
    • Equipped with 4 dust filters: 1 at the top, bottom, and 2 on each side
    • Up to 7 PCIe horizontal expansions
    • Can accommodate 3 x 120mm fans or 2 x 140mm case fans at the top panel, 2 x 120mm or 2 x 140mm case fans at the side panels, 1 x 120mm fan in the rear panel, and either 3 x 120mm or 2 x 140mm case fans at the bottom panel

    Cooler Master HAF XB EVO

    A Must-Have For Lan Parties

    Cooler Master HAF XB EVO Smallest ATX Case

    This is another one of those ATX cases with great thermal regulation and optimal airflow design. And as its name implies, the Cooler Master HAF XB EVO is a master at cooling (pardon the pun).

    The Cooler Master HAF XB EVO comes with plenty of support for fans, a slot for a 240mm radiator in front and 120mm radiator in the rear, and preinstalled 120mm XtraFlo fans. The side panels are easily removed if you want more ventilation.

    The Cooler Master HAF XB EVO has four dust panels that can help prevent dust accumulation, so maintenance is relatively easy on this baby.

    But what we really like about the Cooler Master HAF XB EVO that a lot of the cases on here don’t have is its removable motherboard tray. The hard drive trays are easily removed too, giving the Cooler Master HAF XB EVO a lot of room and flexibility.

    All in all, the Cooler Master HAF XB EVO is a compact ATX case that’s flexible and sturdy at the same time.

    Key Features

    • Supports mATX, Mini-ITX, and ATX motherboards
    • Preinstalled with 2 x 120mm XtraFlo fans in the front panel
    • Equipped with 4 x 2.5″ or 3.5″, and 2 x 5.25″ bays
    • Maximum GPU length of 334mm
    • Maximum CPU cooler height of 180mm
    • Standard ATX PSU length (180mm)
    • 7 PCI expansion slots
    • Can accommodate 1 x 200mm case fan on the top panel, 2 x 120mm or 2 x 140mm case fans on the front panel, and 1 x 120mm or 2 x 80mm case fans on the rear panel

    NZXT H510

    A Compact ATX Case For Easy Builds

    NZXT H510 Smallest ATX Case

    The NZXT H510 is the successor to the previous model’s NZXT H500 case, and like its predecessor, the NZXT H510’s build is incredible with lots of room for cable management.

    The matte white color palette is a minimalist’s dream. Other color variations include matte black and matte black with red stripe. If you want some RGB lighting, you can get the NZXT H510-i model.

    Key Features

    • Supports Mini ITX, Micro ATX, and ATX motherboards
    • Max GPU length up to 381 mm
    • Max CPU cooler height up to 165mm
    • Preinstalled with 2 x 120mm fans for exhaust and intake
    • Slots for 2 x 120/140mm fans on the front panel, 1 x 120mm/140mm fan on the top panel, and 1 x 120mm fan on the rear panel
    • Tempered glass side panel
    • Standard ATX PSU support
    • RGB Lighting available with the -i model

    RaijinTek Thetis Window

    A Compact ATX Case That Looks Like A Tower

    RaijinTek Thetis Window Smallest ATX Case

    This is possibly the biggest of the smallest ATX case we have on this list. The RaijinTek Thetis Window is a brand that’s unfamiliar to some of you, but in the PC building enthusiast universe, it’s one of the best brands of the ATX cases. The RaijinTek Thetis Window stands out from this list for its compact frame and size, but at a price.

    The RaijinTek Thetis Window can only support inverted motherboard layout, which means your motherboard is upside down and the GPU is placed at the top panel. Nothing inherently wrong with the way the motherboard is placed, but to the newbie builder who lands the RaijinTek Thetis Window, it might come off as a shock to them.

    Unlike most of the cases here, the RaijinTek Thetis Window comes preinstalled with just one case fan, so you’re going to have to buy another one to improve the case’s airflow. That’s not going to be an issue given that the RaijinTek Thetis Window has about 4 slots for case fans.

    The RaijinTek Thetis Window comes in the black and silver color palette, as well as a non-windowed version (called the Thetis Classic).

    Key Features

    • upports Micro ATX, Mini ITX, and ATX motherboard
    • Max GPU length of 320mm
    • Max CPU cooler height of 170mm
    • Supports 240mm radiator (top panel)
    • 7 PCI expansion slot
    • 2 x 3.5″ drive bay and 2 x 2.5″ drive bay
    • Four fan mounts: 2 x 120mm on the top panel, 1 x 120mm on the rear panel, and 1 x 120mm on the bottom panel

    ThermalTake Core G3

    Slim And Compact ATX Case

    ThermalTake Core G3 Smallest ATX Case

    The Thermaltake Core G3 is a compact and slim ATX case, measuring about 5.5-inch in width. A mainstream case as slim as the Thermaltake Core G3 is difficult to find.

    But with the slim aesthetics, sacrifices were made. The Thermaltake Core G3 can only accommodate a compact SFX PSU rather than a standard ATX PSU. This isn’t a big problem, considering that SFX PSUs are relatively easy to find and within a reasonable price range.

    Another compromise is the GPU mount on the Thermaltake Core G3. GPUs are mounted vertically right against the side panel, which could cause higher GPU temperatures. There’s not enough room for cable management in the Thermaltake Core G3, which could further hinder cooling and airflow.

    Some PC builders using the Thermaltake Core G3 have reported reaching up to 86 degrees Celsius on the GPU, which is not 100% ideal.

    If these aren’t a problem for you, the Thermaltake Core G3 is still an impressive compact PC case. Considered as a mini ITX case, you can mount the system vertically or horizontally.

    Key Features

    • Support for Micro ATX, Mini ITX, and ATX motherboards
    • SFX PSU support
    • Maximum GPU length of 170mm
    • Maximum CPU Cooler height of up to 109mm
    • Two PCI expansion slots
    • Front radiator support up to 240mm
    • 2 x 3.5″ or 2.5″ drive bays

    Corsair iCUE 220T RGB Airflow

    Premium Mini ATX Case

    Corsair iCUE 220T RGB Airflow Smallest ATX Case

    Visually pleasing to look at, the Corsair iCUE 220T proves that size does not matter when it comes to aesthetics. The Corsair iCUE 220T has angular perforations on the front panel, but these aren’t for show. These are designed to help with airflow, along with the preinstalled Corsair SP120 intake fans.

    You also have access to the Corsair Lighting Node Core for the RGB lighting control on the fans. To our dismay, this is a Node Core, so you can’t add any RGB Led strips. If you want to add RGB strips, you’ll need to buy a Node Pro and install it on the case. This isn’t a dealbreaker and does not affect the performance of your hardware once installed on the Corsair iCUE 220T.

    Builders recommend swapping out the preinstalled fans on the Corsair iCUE 220T with better RGB fans on the market if you really want to maximize the case’s airflow potential.

    Key Features

    • Supports ATX, Micro ATX, and Mini ITX motherboards
    • ATX PSU support
    • Maximum GPU length of 299mm
    • Maximum CPU cooler height of 160mm
    • 7 PCI expansion slots
    • Room for up to six additional case fans
      • 1 x 120mm fan on the rear panel
      • 2 x 120mm or 2 x 140mm fans on the top panel
      • 3 x 120mm or 2 x 140mm fans on the front panel
    • Radiator support for up to:
      • 240mm on the top panel
      • 120mm on the rear panel
      • 280mm or 360mm on the front panel
    • 2 x 3.5″ and 2 x 2.5″ drive bays

    Helpful Buying Case For Buying The Smallest ATX Case

    Buying compact cases may not be as easy as buying a standard sized case or tower. There are a few things to keep in mind when you want to purchase the smallest ATX case on this list:

    1. Quality Matters – Don’t get carried away with the aesthetics. You want to go for aluminum or all-steel chassis if you want durability.
    2. Expansion Slots – You also need to consider how much room you want for expansion in the future. You want compact ATX cases that have more drive bays or PCIe slots.
    3. Air Flow and Ventilation – If you want to make the smallest ATX case work with overclocking hardware, then you want to secure one with the most ventilation and airflow. A lot of compact ATX cases don’t have good spots for fans or radiator installations, so you need to make sure that your case can handle the extra heat without relying too much on fans.
    4. Your Components – Remember to measure the GPU, CPU, and PSU length of the case that you want to buy and make sure that your current hardware (or hardware on your to-buy list) will fit the compact PC case.
  • Can You Mix RAM Brands?

    Can You Mix RAM Brands?

    One of the most important parts of a computer is the RAM, or random access memory. RAM modules are also considered to be one of the easiest parts to upgrade in a system unit. But more often than not, people make one simple mistake: mixing different RAM brands.

    RAM modules are responsible for doing computations for a specific amount of time so that the processor does not redo them each time. In theory, mixing RAM modules of different brands can be done, but not without some problems.

    In this article, we’ll be discussing what happens when you mix RAM modules of different brands and how big of a problem it can be to mix them.

    A Quick Basic Guide To Reading RAM Specifications

     Before we answer the question “can you mix RAM brands?”, first we must understand what it is we’re actually mixing. If you already know how to read RAM Modules’ specifications, you can skip this section.

    Form Factor

    There are two form factors to consider for RAM modules. You have your Dual In-Line Memory Module or DIMM, and Smal Outline DIMM or SO-DIMM.

    1. DIMM is a common form factor that’s used by desktop computers.
    2. SODIMM RAM modules are used by compact PCs and laptops. They’re roughly half the size of DIMMs.

    Memory Type

    RAM modules have gained a lot of features and functionalities over the years. Memory type or generation will determine how new the RAM currently is. You can tell how old a RAM module is by their generation, which is listed below:

    • 2000 release: DDR1 SDRAM
    • 2003 release: DDR2 SDRAM
    • 2007 release: DDR3 SDRAM
    • 2014 release: DDR4 SDRAM
    • 2020 release: DDR5 SDRAM

    Unfortunately, RAM modules don’t have forward or backward compatibilities if we’re talking about generations because each generation uses a different number of pins.

    Memory Speed

    RAM speed is determined by its frequency. The higher the frequency, the more cycles a RAM module can perform per second.

    Frequency is measured in MHz or megahertz, or million cycles per second. A 3600MHz RAM translates to 3.6 billion cycles per second. This means that a RAM can transfer this much data in a second.

    Memory Sizes

    RAM sizes will let you know how much information it can store per stick. You can get anywhere between 2GB to 32GB. For office tasks, a bare minimum would have to be 4GB of memory but ideally, you want 8GB. If you’re gaming or doing some heavy-duty rendering/editing, then you want 16GB or higher.

    Memory Latency

    Memory latency measures the time it takes for a module to call to or respond to a command in a system. In RAM modules, you’ll find the latency labelled as CL. A CL16 RAM stick will take about 16 cycles before it can respond.

    Unlike frequency, you want the CL to be lower.

    Memory Voltage

    Voltage refers to the power that the RAM stick consumes. You’ll find different ranges for voltages, starting from 1 V all the way to 1.4V. You can manually adjust the voltages of your RAM according to the performance and stability you want.

    Memory Brand

    Lastly, memory brands are not equal. There are different assemblers or manufacturers for RAM modules, so it can be difficult to identify which one’s the best. You’ll find two RAM modules sharing the same size, frequency, speed, voltage, and latency, but the controller chips and memory may be different.

    Why Is It A Problem To Mix RAM Brands?

    As mentioned in the previous paragraph, there are different manufacturers and brands of RAM modules. While they share the same specifications, the memory and circuits will be different. When you mix RAM modules of different brands, you might end up with your system crashing or your system not booting.

    When there are different RAM modules used in a single motherboard, you’ll use more Dual-In-Line memory modules or DIMM slots, which creates a lot of possibilities for conflicts.

    What Would Cause These Problems To Begin With?

    If you’re planning on installing RAM modules that are different from your current one, you’ll need to know that this combination might have a negative effect on your computer.

    Some of the causes of the problems associated with mixing different RAM brands are as follows:

    Voltage

    Mixing different RAM modules will result in mixing different voltages. The RAM with lesser voltage may not operate to its full capacity because it’s receiving less power.

    Single vs Dual Channel Memory

    There are two types of memory – single channel mode and dual channel mode. These work differently and will not always be noticeable to users. If you use a single channel RAM and a dual channel RAM, then you’ll end up with the latter running on a single channel.

    Now, browsing or doing office tasks might not be a problem, but when you’re gaming, video editing, or doing 3D rendering, that’s where you’ll notice the difference in performance.

    Storage Capacity

    Using different sizes might also affect your system’s memory configuration. If you pair a large RAM module with a small one, you’ll have an asynchronous operation. This is what you would often refer to as FLEX MODE.

    Smaller RAM modules will only pair with half of the larger RAM modules to get dual channel mode. The remaining storage capacity will only work in single channel mode.

    You may know this as Flex Mode. What happens here is that the smaller RAM will pair with half of the bigger RAM module, so the remaining module will only work in single channel mode. How heavy the workload is will determine how noticeable the mismatch is.

    Speed

    Mixing RAM modules with different speeds can greatly affect the RAM modules’ performance. While it’s possible to set your fastest RAM to run at the speed of the slowest RAM, you’ll still have issues.

    Frequency and latency will both affect your memory speed. RAM sticks with different frequencies will need to have the same latency in order for them to work together.

    The Big Question: Is It Okay To Mix Different RAM Modules or RAM Types?

    The straight answer is NO.

    You shouldn’t mix different RAM types or modules. Motherboards are designed to only accommodate one generation of RAMs, so if you have a motherboard that can accommodate DDR5 RAMs, then those are the only RAM modules you should be getting.

    And also, you can’t combine one DDR2 and one DDR3 RAM into a motherboard just because you think you’ll get a total of DDR5. That’s not how it works.

    If you want to know what kind of RAM type your motherboard is capable of accommodating, go to Task Manager and go to the Performance tab. Choose the Memory option and you’ll see what DDR type your motherboard has.

    You can also use software that retrieves your PC information for you, like CPU-Z.

    Is It Okay To Mix Different RAM Sizes?

    It’s possible to use different RAM sizes but there are disadvantages. For example, let’s say you have an 8GB and 4GB of RAM sticks for your desktop PC.

    If the RAM brands, frequency, latency, and other specs are similar, you shouldn’t be having major issues,

    But…

    Pairing a large capacity RAM stick with a smaller RAM stick will affect your system’s performance. The RAM stick with the lower capcity will only pair with half of the larger capacity’s storage.

    With the scenario above, instead of having 12GB of RAM, you’ll only have a total of 8GB RAM in dual channel mode for the best performance possible. The remaining 4GB RAM will run on single channel mode.

    Depending on the workload, you will notice a dip in performance. If you’re just doing office tasks and non-demanding work, then you won’t notice your system slowing down. On the other hand, you’ll feel a dip of about 20% in performance when gaming or doing some video editing. This is why manufacturers only mix RAM sticks of the same sizes (i.e. 2 pieces of 8GB to make up a 16GB RAM kit).

    Is It Okay To Mix RAM Voltages?

    If you have different RAM sticks with different voltages, there’s nothing really stopping you from mixing them. Just know that you’re not exactly guaranteed optimal performance from either RAM.

    Different brands of RAM with different voltages will force your motherboard to run with the RAM with the lowest voltage and the RAM with the highest voltage won’t get enough power by default.

    This won’t stop the RAM with the highest voltage from operating mind you, but again, you won’t be getting optimal performance.

    Is It Okay To Mix RAM Speeds?

    Combining RAM sticks with different frequencies will cause your motherboard to underclock the fastest RAM.

    Using the scenario above, you have 8GB and 4GB RAM of the same brand with the same latency. Combining these two RAM sticks will result in the 8GB running according to the speed of the slowest RAM. So your 8GB RAM will only be 4GB.

    You could overclock your 4GB RAM to match the 8GB stick, but that would result in overheating and frequent crashing.

    As mentioned earlier, this is why RAM kits are always paired with the same speed and specs. If you are purchasing a 32GB RAM kit, you’re getting 2 pieces of 16GB RAM sticks.

    Is It Better To Buy A Single RAM Kit?

    The answer here is YES.

    RAM kits are two RAM sticks of the same brand and specifications. These are specifically combined and tested by the manufacturers to work together flawlessly, but not with other kits.

    If you want to get 64GB of RAM, you’ll want to mix RAM kits comprised of 16GB modules from the same brand. If you’re getting a BRAND X RAM kit with two pieces of 16GB modules, your second ram kit of 16GB modules should also be BRAND X.

  • Everything You Wanted To Know About SSDs

    Everything You Wanted To Know About SSDs

    One of the best things that ever happened to laptops and personal computers was the invention of SSD, or solid state drives. Picture your traditional HDD having superpowers and you’d have painted a pretty picture of what SSD technology is capable of.

    But not all SSDs or solid state drives, or even SSD connection types, are the same. While SSDs are the evolution of your traditional SATA hard drives, compatibility is a big concern especially when you’re working with older motherboards.

    Don’t worry because this article will tell you everything there is to know about SSDs, the different SSD types, and more.

    First, What Exactly Is A Solid State Drive?

    SSD or Solid State Drive is a new type of hard drive that utilizes a new way of storing and delivering information. Traditional HDDs rely on electrical signals being carried through a passageway made of vacuum tubes. But with SSDs, electrical signals are carried between transistors using solid materials.

    Unlike a traditional HDD, SSDs is a static devices with no moving parts. It comes with its own integrated circuits that allow you to store information inside the drive. Because there are no moving parts, storing and transferring information is done at a faster rate. The SSD has non-volatile memory chips which have a unique controller, thereby removing all mechanical and moving parts. You end up with a device that’s more energy efficient because you don’t need motors and a power supply to make it work. In simpler terms, everything stored in an SSD like your OS and programs would load faster.

    SSDs come in different sizes and shapes, as well as components, but their functions are one and the same.

    What Makes an SSD Different From Traditional SATA Hard Drives?

    Read or Write Data

    An HDD uses a mechanical arm to write or read data and magnetic systems similar to how CDs and DVDs store or write data.

    An SSD has a semiconductor IC or Integrated Circuit that’s responsible for storing information. It also has flash memory, similar to the technology found in USB sticks and memory cards. The IC is also responsible for other tasks such as cleaning, caching, and restoring data.

    Build

    SSDs don’t have mechanical or moving parts, so it’s already vibration-proof or shock-proof, while an HDD uses a magnetic discs that’s set to run for a specific amount of time. A traditional hard disk drive is more likely to slow down in performance over time because of wear and tear.

    Heat Resistance

    HDDs have a tendency to overheat more than SSDs. In fact, SSDs are known to be more heat-resistant because of the absence of mechanical parts even at high workloads.

    Processing Speed

    SSDs carry data through electricity, and with no moving parts to rely on, they’re reliably faster than an HDD. Solid state drives’ processing speed can go as high as 3500 Mbps, while HDDs can only go as high as 160Mbps.

    Weight

    Because of the SSD’s build, they’re lighter and more compact than the HDD.

    What Are The 5 Types of SSDs?

    We know what an SSD is and how it works at a glance, but did you know there are different types?

    In this section, we’ll go over the different SSDs, their interfaces, connectors, and other functionalities (if ever).

    SATA SSD

    SATA or Serial Advanced Technology Attachment SSD is the most popular type of SSD and is the first SSD model released in the market.

    A typical SATA SSD is about the same size as a SATA HDD and also has the same connector type

    SATA SSD SSD Types

    The SATA SSD uses Serial ATA to transfer data and is compatible with any desktop or laptop, even if the unit is about 10 years old or more. All you need is a 2.5-inch drive bay and a SATA cable.

    SATA SSDs are also used by older computers that don’t have the new SSD connector and can only accommodate SATA cables. This makes it a great choice for upgrading an old laptop or PC’s HDD and giving it a brand new lease on life.

    There are three versions of the SATA SSD, namely SATA I, SATA II, and SATA III. Here are the transfer rates for each version:

    • SATA 1.0: 5 Gb/s, 150 MB/s
    • SATA 2.0: 3 Gb/s, 300 MB/s
    • SATA 3.0: 6 Gb/s, 600 MB/s

    M.2 SATA SSD

    The M.2 SSD is a newer type of SATA SSD and is smaller and lighter than the SATA SSD. The M.2 SSD has a rectangular shape and looks like a smaller version of RAM.

    M2 SATA SSD Types

    An M.2’s dimensions are 22mm x 80mm (width by height) and come with NAND chips on both sides. They’re more convenient and can be installed into a motherboard that has an M.2 slot. If your laptop or PC has an M.2 slot, then you can definitely run with an M.2 SSD.

    M.2 SSDs also come in different sizes, but here are the common dimensions:

    • M.2 22110 : 110 x 22 mm
    • M.2 2280 : 80 x 22 mm
    • M.2 2260 : 60 x 22 mm
    • M.2 2242 : 42 x 22 mm

    The M.2 2280 is the most common type of M.2 SSD.

    Note that the M.2 slot on a desktop’s or laptop’s motherboards can accommodate either a PCI-E bus or a SATA Bus, and can only have either an M.2 SATA slot or an M.2 PCI-E slot. That’s why you need to match your motherboard’s M.2 slots with the M.2 SSD you’re planning on buying.

    mSATA SSD

    mSATA SSD SSD Types

    The mSATA SSD is a smaller version of the SATA SSD and is commonly installed in compact computers, mobile devices, or tablets that have an mSATA slot, or laptops.

    The newest mSATA SSDs have a storage capacity of up to 1TB with a 6Gbps read/write speed. This SSD also boasts lower power consumption, making it more economical than the traditional SATA SSD.

    Experts would still recommend going for a SATA SSD as long as your motherboard can equip it. Your device needs to have an mSATA connector if you want to install an mSATA SSD.

    M.2 PCI-E SSD

    M.2 PCI-E SSD SSD Types

    The M.2 PCI-E SSD is the first SSD to ever use a PCIe connector type and allowed servers to increase their storage capacities and speeds. An M.2 PCI-E SSD can fit right into your motherboard’s PCIe ports, similar to how you’d install a PCIe network card or sound card. Right now, an NVMe SSD using a PCIe connection interface possesses the fastest computational speed at read/write bandwidth of 2000 Mbps up to 32Gbps.

    You’ll need PCIe M.2 slots on your motherboard if you want to use an M.2 PCI-E SSD, and you also need to match the M.2 slot keys of both the motherboard and the SSD as well as its size.

    M.2 NVMe SSD

    M.2 NVMe SSD SSD Types

    NVMe stands for Non-Volatile Memory Express and is five times faster than SATA SSDs. These are relatively new and have only been out for a couple of years. The M.2 NVMe SSDs use a PCIe interface and connector type.

    With that said, the M.2 NVMe SSD is more expensive and consumes a lot more power than SATA SSDs. A typical M.2 NVMe SSD would usually have an interface rate of 32 GB/s with 3.9 GB/s throughput, which roughly translates to having more speed for high-resolution gaming or video editing.

    But as fast and as expensive as the NVMe’s are, this type of SSD has some disadvantages:

    • Some BIOS still don’t support booting OS from the NVMe SSD. That means you would need a new motherboard that has BIOS that supports this if you want to load up your OS on the NVMe PCIe SSD.
    • Some laptops can accommodate an NVMe SSD as long as they have a spare PCIe slot. If your laptop does not have a PCIe slot (or a spare one at that), then you might need to purchase a new laptop with an NVMe SSD already built in. However, these laptops are pricier.

    Is There A Difference Between Cheap and Expensive SSD?

    Choosing between SSD types is one thing, but another thing to consider when shopping for SSD is their price. Are you willing to go out and buy an expensive brand, or are you willing to work with a cheaper brand?

    Is there an actual difference between SSD types if they’re expensive or cheap?

    Let’s take a look at some important factors:

    1. Age is something you want to consider, so if you want to have a longer-lasting SSD, then you’ll want to go for a more expensive brand as they last for about 20 years or more, while a cheap brand could conk out after 5 years or so.
    2. Expensive SSDs have faster load times, so this makes it one of their better selling points. Even if you bought a mid-range brand, it will still perform better than the cheap brands.

    What Are Some Factors In Choosing SSDs and SSD Types?

    There are only about three things you need to consider when it comes to choosing what type of Solid State Drives you’re using:

    • Your budget
    • What your using it for
    • Motherboard compatibility

    Motherboard compatibility ultimately makes or breaks your decision into choosing what SSD type you’re ending up with.

    Older motherboards will most likely accommodate SATA solid state drives, even with or without the 2.5 inch bay. Modern motherboards allow for more flexibility as they have slots that support M.2 SSDs and 2.5 inch SATA SSDs. You can even install one M.2 SSD on your motherboard to host your OS and applications while you use the 2.5 inch SATA SSDs to host your files.

    There are some old motherboards that can accommodate M.2 drives and if your motherboard has PCIe 3.0 slots, then you can use PCIe add-in adapter cards to let you use an M.2 SSD.

    If you are lucky enough to have a motherboard that can support an NVMe SSD, you’re more or less going for it all the way. The budget shouldn’t be a concern at this point because you just want to have the highest storage capacity possible for an NVMe SSD.

    Which One Should You Use?

    Gamers are more likely to use the NVMe SSD, or any PCIe SSD because of the faster load time. Games start up and load faster than they should, even on a SATA SSD. Content creators that edit videos or audios will also be using these SSD types to process and render through large amounts of data with ease.

    On the other hand, if you want something faster than your old HDD for everyday use, then SATA SSDs are more than enough.

    For everyday performance that does not require high-intensity data speed transfer, you can get a SATA SSD. If you want more storage space without having to spend a lot more money, you can use your SATA SSD to host your OS and applications while storing all your data in your traditional HDD.

    The Wrap Up

    It goes without saying that the price of SSDs will continue to go down as more types of SSDs become available to the market. At this time of writing, you can probably score a 2TB NVMe SSD (Samsung) for less than $200, which is a far cry from what these NVMe PCIe SSDs were priced at when they first graced the market.

    If you want more storage space and faster load times, then consider upgrading to any of the types of SSDs mentioned above.

  • A Complete List of ALL CPU Parts To Build A Gaming PC

    A Complete List of ALL CPU Parts To Build A Gaming PC

    So you’re ready to build your gaming PC from scratch. You have your money lined up to purchase all CPU parts necessary, but you have doubts if your shopping list is complete. We can’t blame you.

    Custom PC All CPU Parts

    Building a PC from scratch is intimidating the first time you do it because you don’t have the confidence just yet. You’ve seen those videos on TikTok where someone built a PC and all of a sudden, the GPU catches fire.

    Now we’re not saying that this is what will happen to your computer components after assembly. Your nerves are probably getting the best of you because this is your own gaming PC and you don’t want all the other components to just go up in flames.

    Don’t fret because this article will go over what you need to do and what parts you need to build your first gaming PC.

    We’ve decided to break it down into four steps:

    1. Identify What You Want To Build
    2. Get All Your Tools Ready
    3. List Down All Computer Components
    4. Read These Guidelines First Before You Start

    Identify What You Want To Build

    No two gaming PCs are made equal, and we say this with confidence because the build of your own computer will depend on what kind of machine you want and how big your budget is.

    If you’re a content creator who edits and uploads gaming content on YouTube or if you stream on Twitch, then you need something more robust and powerful than your average gaming PC. You’ll need top of the line processors, a high-end graphics card, and a storage device with higher capacity.

    Once you’ve identified what you need out of your gaming PC, your next consideration will be your budget. Depending on what your budget will allow you to purchase, you’ll want to adjust the specs as you start to finalize the build.

    Then there’s the issue of available stocks for your PC parts, which greatly affects your ability to build a PC and your budget. Graphic cards aren’t exactly accessible to a lot of people at this time of writing. The Covid-19 Pandemic plus the hoarding of GPUs by cryptocurrency miners caused a shortage of GPUs worldwide. But with cryptocurrency mining slowing down, it might take a while before you’ll see graphics cards returning to their MSRP.

    Get All Your Tools Ready!

    All right. Now that you have an idea on what you want to build, you’ll want to secure the tools as the next step.

    First, you need a large workspace that allows you to work without any hindrance. You need to make sure that this workspace isn’t on any carpeted surface because static discharge can damage components. You can also secure your workspace with an anti-static mat.

    Then you’ll need two screwdrivers, specifically a Phillips #2 screwdriver for all the parts and a Phillips #0 for installing an M.2 device. You can make use of magnetic screwdrivers so you don’t accidentally drop screws in different crevices.

    The magnet from a magnetic screwdriver is weak so you shouldn’t worry about damaging your components with it.

    You’ll also need scissors and cable ties for the cable management aspect of building a PC.

    List Down All The Computer Components

    PC Components All CPU Parts

    Okay, now let’s get down to business. It’s time to gather all the parts that you need to build your gaming PC from scratch.

    Here’s a list of what you need:

    • Computer Case or PC Casing
    • CPU
    • Motherboard
    • Random Access Memory (RAM)
    • Graphics Processing Unit (GPU)
    • Storage device
    • Power Supply Unit (PSU)
    • Cooling System (CPU cooling and GPU cooling)
    • Input Devices
    • Operating System (OS)

    Let’s look at the individual components and what they do:

    Computer Case

    The computer case or PC case acts as your component’s housing. Computer cases help secure motherboards, power cables, fans and cooling systems, and some parts.

    There are different PC case sizes, each of them with their own features and advantages. The kind of casing you’ll need will depend on your motherboard, desktop space, and aesthetic preference. Usually, people will just determine what kind of case they want to use based on their motherboard and available desktop space. Most motherboards would fit inside mid tower cases, but you might opt for a bigger computer case if you are planning to accommodate more case fans, liquid cooling, or possibly a bigger graphics card (we’re looking at you, Nvidia GeForce RTX 3080!).

    CPU

    The CPU, or central processing unit, or commonly known as a processor, comprises the first half of your PC’s central nervous system. Considered as the brain of modern computers, a CPU is the part responsible for handling and calculating information and instructions that it receives from the other components’ software.

    Desktop computers will never be able to run without a processor, so that’s how important they are.

    Motherboard

    The motherboard, or mainboard to some, is considered as the second part of your your PC’s nervous system. You’ll find your primary circuit board, slots to attach your components to, and a central hub that manages these different parts.

    Your optical drives or storage drives, CPU, graphics cards, RAM, and fans are installed into the motherboard. The motherboard will combine your components’ unique functionalities to give you a cohesive functioning PC.

    What kind of motherboard you’ll choose will limit the PC parts you’ll be using, from RAM modules you’ll need to use to the available CPU socket, and other nuances. Motherboards also somewhat dictate the kind of PC case you’ll need to use, so there’s that to consider as well.

    RAM

    RAM, or Random Access Memory, is responsible for determining how fast your PC is able to execute certain processes. A higher RAM capacity means that your PC will be able to handle more processes at a faster rate.

    RAM can affect how many browser tabs and how many programs you can open, to put it simply. If you want to switch between a browser and a video game without lagging, you’ll need a RAM capacity of at least 8GB.

    Graphics Processing Unit (GPU)

    The Graphics Processing Unit, or graphics card, is responsible for displaying images on your monitor. The chip on the GPU performs computations that will allow the PC to render and display images, which is why people usually refer to it as a video card.

    There are two types of GPUs: Discrete Graphics Processing Unit and Integrated Graphics Processing Unit.

    1. A Discrete GPU is a separate GPU that’s installed into a PC that will allow you to handle heavy tasks involved with gaming, video editing, and rendering.
    2. An Integrated GPU is prebuilt into the PC and takes a portion of its computing power from the processor. However, iGPUs are limited in terms of performance so you won’t be able to do gaming, rendering, or video editing.

    Storage Device

    When it comes to gaming, you’ll need to know about three types of storage devices: HDD, SSD, and NVMe SSD. All three have the same function of storing data, but the difference lies in their speed. HDD stands for Hard Disk Drives and SSD stands for Solid State Drives.

    HDD storage devices are the slowest with a rate of 100MB/s for reading and saving data. Solid State Drives or SSDs have about 500MB/S and NVMe SSDs have up to 7000 MB/s.

    An HDD and SSD utilizes SATA cables through a motherboard and gets power from the PSU. An NVMe SSD is an individual component in itself and attached directly into the motherboard. The NVMe SSD doesn’t draw any power from the PSU.

    NVMe SSD can be installed on a standard PCIe slot (Peripheral Component Interconnect Express), so as long as your motherboard has available PCIe slots, you can install NVme SSDs.

    If you want faster load times for your games and transferring data, an SSD or NVMe SSD is the ideal storage device for you.

    Power Supply Unit (PSU)

    Contrast to their name, a PSU does not supply power to the entire system, but rather, they convert power. A Power Supply Unit or PSU is responsible for converting high voltage current or AC into direct current or DC. The PSU is also responsible for regulating DC output according to the power tolerances of modern computer parts.

    Cooling System

    When your CPU draws in power, it generates heat. You’ll need a CPU cooling system or CPU cooler to help manage the heat. This is necessary if you want your CPU to operate smoothly.

    When a CPU gets too hot, it will automatically reduce the number of cores operating to dissipate heat. When this happens, performance becomes severely affected.

    But it’s not only the CPU that needs cooling. Other parts such as the GPU will need help to dissipate heat from the motherboard. This is made possible by installing computer fans that blow in cool air and expels hot air to the back of the case.

    Apart from fans, there are also other cooling options available such as liquid cooling (but this is a bit more expensive and not exactly meant for first time builders).

    Input Devices

    Part and parcel of building a PC is to get input devices, ranging from mice, keyboards, to monitors. These devices are plug and play, so you don’t have to worry about compatibility.

    Personal preference is the biggest factor when it comes to choosing what kind of mice or keyboard or monitor you want to use.

    Other PC parts that fall under this category are tablets, cameras, and microphones. You might need additional software to make sure that these devices function properly.

    Operating System (OS)

    Windows 10 is one of the best operating systems that you can use on your PC. You can purchase a physical copy of the OS or you can download it from the Internet.  

    There’s also the option of Windows 11, which comes from upgrading your Windows 10 operating system.

    Read This Section Before You Build a PC or Shop For Computer Components

    This section is important because we’ll tell you what else you need to do before you build a gaming PC or shop for parts.

    This guideline is meant to point you to the right direction especially if it’s your first time building.

    Watch Tutorials

    A video tutorial on building a PC is a lot better than reading a comprehensive guide. You actually get to see what’s being done when assembling a PC.

    A tutorial video will give you a better understanding of the basics of PC building and its nuances. For example, you’ll probably see a video that talks about what kind of GPU is best for a particular processor.

    Some tutorial videos will also go into more details in terms of PC components and their functionality. For example, a video might talk about maximizing clock speed or how to optimize storage devices so they store data efficiently.

    Invest In a Processor and Graphics Card

    The CPU and GPU are two of the most important parts of a gaming PC. You might try to cut corners if you’re on a tight budget, but trust us when we say it’s better to invest in both CPU and GPU.

    Just because you’re saving money doesn’t mean that you’re getting a good gaming PC.

    High-end CPUs and GPUs need sufficient power, so a cheap PSU might become troublesome in the long run. You also shouldn’t get a PSU that’s too powerful for both CPU and GPU because you’ll simply waste unused power.

    Using a high-end GPU with a mid-range CPU might cause bottlenecking, meaning your GPU might not reach its full potential because the CPU can only render so much.

    Avoid Static Discharge

    Static discharge can damage computer components, and a lot of the video tutorials will constantly remind you about this.

    An anti-static bracelet or wrist wrap is recommended to use for first time builders, but experienced builders won’t need one. Though they’ll probably still use it for best practices.

    One of the best tricks to avoiding static discharge to not touch any metallic surface while touching a computer part. You also shouldn’t be working on carpeted surfaces.

    Ask the Experts

    Before you shop for PC components, it’s best to ask around and get recommendations from experts. We’re not talking about experts such as Linus Tech Tips, mind you. But rather, we want you to ask around experts in your area about PC components.

    There’s probably a small community of PC builders in your area that will help you with your PC build. They might even recommend PC parts that match your budget and needs.

    The Wrap Up!

    And there you have it. Everything you need to know and do before you build a PC. If you are still feeling doubtful about your abilities to build a PC even after reading this article, then you might be better off with a prebuilt gaming PC.

    Sure, you end up spending a bit more than having a custom PC build, but you do get that peace of mind.

    However, if you are up to the challenge and feel that it’s time for you to take up your mantle as one of the more serious gamers, then build a gaming PC. Having your own computer is one thing, but building it is a completely different experience.

  • How Long Does Thermal Paste Last And Other Questions Answered

    How Long Does Thermal Paste Last And Other Questions Answered

    If you own a gaming PC, one of the most important things that you need to know is computer maintenance and cleaning. We’d like to think that our gaming PC’s are invincible because they’re made from high-end parts, but sometimes, things can go so wrong at one point and you’ll need to do maintenance sooner than later.

    In this article, we’ll be discussing one of the most important components of computer maintenance: thermal paste. We’ll know what this item is about, how long does thermal paste last, and when you should be replacing it.

    What Is Thermal Paste?

    Thermal paste, or thermal compound or thermal grease to some, is a substance that’s applied between the heat sink and processor. These are available in small tubes at electronic stores, along with a small shovel-like tool to help you apply the paste.

    A tube of new thermal paste is what you initially need when you’re building a PC the first time. Most of the time, the CPU heat sink already has a pre-applied thermal paste so you can just install immediately. But the hardcore PC builders will manually reapply thermal paste because they already have a brand preference.

    Thermal pastes do one thing and that’s to help keep the CPU cool by transferring heat into the heat sink. The heat sink is then responsible for expelling heat away from the CPU, allowing your CPU to stay cool at all times (when possible).

    How Does Thermal Paste Work?

    CPUs generate a lot of heat when they’re working on heavy tasks, such as rendering or gaming. Your case fans or PC fans may keep other parts of your system cool, but not for the CPU. You see, air is a bad heat conductor. You want to minimize the distribution of air between CPU and heat sink.

    The heat sink is pressed tightly into the CPU, which prevents air from getting into the CPU but this isn’t a complete seal. To really prevent air from getting into the processor, you need to seal the tiny gaps between the CPU and heat sink.

    The thermal paste will allow you to completely seal the surface of the CPU and the heat sink’s contact point. The paste will cover the hardware’s surface grooves and small gaps, allowing for a complete seal and improving heat transfer rate.

    Thermal pastes don’t last forever, unfortunately, so you’ll need to replace them over time. A dried out thermal paste has reduced effectiveness, so your CPU may become hotter than normal. When this happens, you’ll need to replace thermal paste before you damage the CPU.

    How Is Thermal Paste Applied?

    The debate on how to use thermal paste is intense, specifically on how to apply thermal paste. You’ll find a lot of videos, articles, and theories on the right way to apply thermal paste. It’s just difficult to pinpoint which one’s the right one.

    But the simplest way to apply thermal paste is as follows:

    Pea Sized Amount How Long Does Thermal Paste Last
    1. Apply a pea-sized drop in the middle of the CPU.
    2. Attach the heat sink into the processor.
    3. Apply pressure on all four corners of the heat sink, ensuring that the thermal paste is distributed across the surface evenly. If your thermal paste has an applicator, you can use this to distribute the paste evenly before you clamp down the heat sink.
    Spreading Thermal Paste How Long Does Thermal Paste Last

    Now there are different ways to apply thermal pastes on CPUs, so regardless of what method you pick, you have to make sure that there are no gaps or bubbles on the CPU and heat sink’s surface. Otherwise, heat transfer and distribution will be affected.

    Where Should People Store Thermal Pastes?

    Thermal pastes are best stored in cool areas. People would suggest storing it in a freezer but this is a bad idea. There is a risk that the thermal paste might damage your CPU after you freeze it.

    If you have leftover thermal paste, you can store it inside any airtight container, like a Ziploc bag. You’ll want to avoid placing this container under direct sunlight or heat.

    For people in tropical countries, you’ll have a higher than normal room temperature. The best way to store thermal paste is to store it in a drawer in an air-conditioned room to prevent it from drying too fast.

    But from experience, thermal paste is super affordable so you can just throw the old thermal paste as soon as you’re done with it. If you want to replace thermal paste, it’s often best to purchase a new one than to reuse old thermal paste.

    How Long Does Thermal Paste Last?

    Most experts don’t recommend reusing leftover thermal paste. Old thermal pastes can dry out a bit even if stored properly. If a thermal paste is a bit dried out, it may end up damaging your CPU or heat sink.

    There’s also the mixture of certain thermal pastes that need to be considered when storing or reusing them. Some brands might last longer because their paste’s formula are unique. Thermal pastes also have different measurements, one of which is the Watts per meter-Kelvin or w/mK. This is how the rate of heat transfer in a homogenous material is transferred. The higher the w/mK, the better thermal conductivity.

    Thermal conductivity determines how fast heat transfer is, either from receiving it from a hot material or dissipating heat towards a colder material.

    So, how long does thermal paste last? It varies depending on the brand, but the general average is a couple of years.

    When Is Thermal Paste Replaced?

    There are certain situations that will determine when you should replace thermal paste.

    Replacing Thermal Paste How Long Does Thermal Paste Last

    First, when you remove the heat sink from the CPU. If you see some of the thermal paste is on the heat sink and some on the CPU, this is a sign that you should replace the thermal paste. Replacing the heat sink back into the CPU will leave you with air bubbles and gaps, significantly affecting temperature regulation.

    In this situation, you should clean both the surfaces of the CPU and heat sink with alcohol before applying a new one. You also need to get rid of old thermal pastes as you don’t want to mix a new tube with an old one.

    Another situation that calls for replacing thermal paste is routine maintenance, which is once every two or three years. Not all thermal pastes have the same level of efficacy though. Thermal paste degrades over time, which affects the performance of your system unit.

    If you recently bought a PC, the best time to replace the thermal paste is two years after. It’s best to assume that the longevity of the stock thermal paste used is about two years. Then once you go for a newer thermal paste, go for the brand that offers a longer life span, usually about three years onwards.

    Is It Possible To Use Too Much Thermal Paste?

    The answer is Yes. Ideally, you only want to use a pea-sized amount on the CPU before distributing it evenly.

    Too Much Thermal Paste How Long Does Thermal Paste Last

    You’ll know you used too much thermal paste when the paste oozes over the CPU and heat sink’s corners. You know how peanut butter or jelly would flow into the corners when you squeeze both sides of the bread together? It’s a similar situation for thermal pastes.

    When you use too much thermal compound, you might end up damaging your components. At the very least, the thermal compound won’t do a good job when it comes to insulating heat.

    Wrap Up

    Thermal paste helps with managing and dissipating heat away from the CPU, on top of using a CPU cooler. This liquid metal compound prevents your CPU from becoming extremely hot. When a CPU becomes too hot, system performance is affected. So the number of cores it runs on is reduced up until the temperature is regulated.

    Thermal paste does affect temperature regulation as it transfers heat away from the CPU and into the heat sink, which expels the heat away from the system.

    How long does thermal paste last? Thermal paste lasts for about a couple of years on a newly installed CPU. The longevity of thermal pastes vary depending on the brand, ingredients, and measurements. When you’re replacing a new thermal paste, go for different manufacturers that have longer life spans, usually three years and above.

    Leftover and used thermal paste tubes should just be disposed of because there’s no point in reusing old stock. Thermal pastes are affordable and easy to find, so you don’t have to worry about saving up an old tube.

  • Everything You Need To Know About Managing GPU Temp

    Everything You Need To Know About Managing GPU Temp

    You’re in the middle of an intense gaming session when your graphics are suddenly stuttering. You suddenly hear your graphics card’s fans go into overdrive as they struggle to keep your frame rates up. You run your hand at the back and sides of your computer and find out that it’s blowing a lot of hot air out.

    You decide to turn off your video game and a few minutes later, everything’s going back to normal. The fans are slowing down to a gentle buzz and there’s no more stuttering. You run your hand at the back of the PC one more time and the air being expelled is no longer as hot as it was before.

    What exactly did just happen, you find yourself wondering. Well, what happened there was your GPU temperature hit an all-time high. Gaming for hours in a non-airconditioned room apparently took its toll on your system, so your CPU and GPU temperatures were abnormally hotter than usual.

    Turning off your game and letting the system cool off was the right thing to do, but is there something that you could do to prevent that from happening again? In this article, we’ll discuss about managing your GPU temperatures, from finding out normal ranges to preventing overheating GPUs and more.

    The Big Question: How Hot Is Too Hot?

    How high should GPU temperatures go before it’s considered as “TOO HOT”? We ask this question first because ideally, you want your GPU temperatures to hover around a certain range.

    When you’re doing non-gaming tasks, your GPU’s temperature is within normal range because it’s not putting in a lot of work. On the other hand, when you’re gaming or doing some GPU-intensive work, then your GPU temp might go higher than normal.

    So how hot is too hot? It depends on the graphics card. Ideally, you don’t want to surpass the 90-degrees Celsius (194-degrees Fahrenheit), but there are GPUs that can withstand that temperature. For example, the AMD RX Vega series of graphics cards can handle temperatures above 80-degrees Celsius (176-degrees Fahrenheit) for typical gaming.

    But the modern GPUs, like the RTX 30-series and RX 6000 series normally don’t hit above 80-degrees Celsius while gaming. Note that an RTX 3060/3070/3080 with GDDR6X memory can withstand GPU temperatures as high as 110-degrees Celsius (230-degrees Fahrenheit) and still operate within spec. But anything higher than 110-degrees Celsius will throttle your graphics card’s performance. Sometimes, you’ll get throttling past the 106-degrees Celsius mark.

    If you’re wondering as to whether your temperatures are within normal range, there’s something that you can do to monitor your GPU temperature.

    First, download a software like GPU Temp. This is a software that helps you monitor your GPU temperature. After installing, you’ll find the app in your system stray and is updated in real time.

    Sample Temperature GPU Temp

    Then open a spreadsheet and log your gaming session for an hour at an interval of 15 minutes each. Record temperature, clock speeds, and other data in this spreadsheet. You can then look up the official specs of your graphics card and compare the data with the manufacturer’s official clock speeds.

    If the graphic card is running at lower clock speeds than the specified clock speed, or below the listed value, then your GPU temperature went too high and started throttling. Now, at the start of a gaming session, a spike in GPU clocks isn’t abnormal, but if it drops a lot overtime, your GPU is probably overheating.  

    And believe us when we say that an overheating GPU is never a good thing.

    What Causes GPU Temperatures To Go Abnormally High?

    Graphics cards have varied GPU temperature limit, meaning some cards are meant to withstand higher GPU temperatures and others aren’t.

    But an overheating GPU is a common problem no matter what brand of graphics card you have. But what exactly causes GPU temps to spike or go abnormally high? What causes graphics card temperature to go from normal to hot like the sun?

    Here are some factors that contribute to a higher than normal GPU temperature and what you should be looking out for:

    Dust

    One of the biggest causes of overheating GPU is dust. Heavy accumulation of dust can burden your fans and will force them to run slower than usual. As a result, the graphic card’s cooling capacity is affected.

    Dust particles around your case can also accumulate naturally up to a point where the amount of dust is already affecting airflow within the case. Internal cooling is affected, so not only is your GPU temperature affected but your CPU temperatures as well.

    Aerosol Dusters GPU Temp

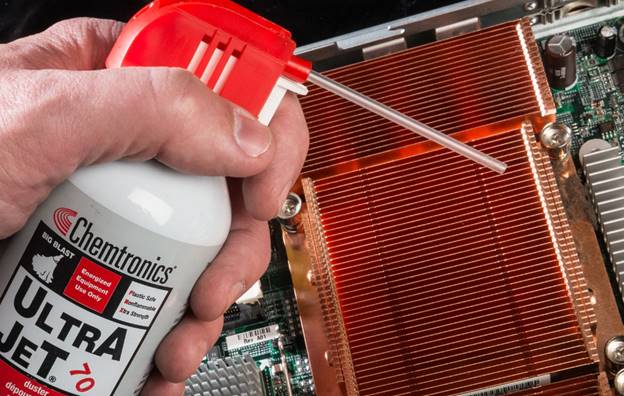
    Thankfully, this problem is easily solved with a can of compressed air or aerosol dusters. You can use a fine brush or hoover to get a lot of the dust out of the case’s fans and GPU fans. After getting rid of the main dust, it’s time to go after the finer dust particles (the ones that are lingering on the surfaces) by blowing them away with compressed air.

    Once everything’s cleaned up, monitor your GPU temperature with the method above and if there are still unusual spikes, then dust wasn’t probably the reason why the GPU overheats.

    Lack of Fans and Poor Airflow

    Sometimes, it’s not exactly the GPU’s fault that it’s overheating. Sometimes, the lack of fans and airflow can severely affect GPU temperatures.

    If you cleaned out the dust from the fans and vents and you find out that the fans are still turning very slow, then you might need to turn up the fan speed up a notch. Certain programs like MSI Afterburner can help you manage fan speed, which allows you to cool your system off properly.

    If your case can accommodate more cooling fans, then you can also decide to purchase new ones. Some PC builders are going for the bigger fans, both for drawing in cool air and for expelling hot air out. The fan speeds of the larger fans are significantly higher than the smaller fans.

    Poor Cable Management

    If airflow is a concern, then you might want to check for cables that are unnecessarily blocking certain vents. Improper cable management, or lack of it, is another overlooked cause for GPU overheating. When cable management is not done properly, it can lead to blocking parts of the CPU that contribute to your case’s open-air cooling capacity.

    Again, this can be easily remedied by simply rearranging the cables and organizing them in a way that they don’t block certain outlets. If you’re not confident about your cable management, you can ask help from technicians or you can look up a YouTube video.

    Higher Ambient Temperature

    Believe it or not, ambient temperature can also cause GPU temperatures to go higher than usual. People living in tropical countries often find themselves dealing with high GPU temperature more than people living in cooler climates.

    Unlike the three other factors above, this is far beyond your scope of control as you simply can’t control the weather. Thankfully, you can invest in air-conditioning units or electric fans with higher fan speeds to keep the room as cool as possible. You can also open up windows to get all the hot air out.

    If you have the budget, you could also invest in water-cooled AIO (all-in-one), or liquid cooling.

    Replace Thermal Paste

    A dried out thermal paste can also affect GPU temperatures, especially if you haven’t replaced yours yet after a couple of years.

    Overclocking

    Overclocking is mostly done by the more technically-inclined PC builders. Modern graphics cards have an overclocking feature and is relatively easy to do, not like before where you have to go through the BIOS to do it.

    But what exactly is overclocking? Let’s paint you a picture first. Imagine having a nice car with a V8 Engine. It’s got 500 HP, but even after you floor the pedal, you’re wondering why you’re not getting the power that you deserve.

    Come to find out that the original owner of the car decided to place a wooden block under the accelerator. The car is fast and powerful, so why didn’t the original owner want you to experience both?

    Once you remove the block, you’re now able to experience the car’s full potential.

    Going back to your GPU, removing the wooden block from the accelerator is the equivalent of overclocking. You see, CPU and GPU chips are shipped out at a “stock” state, meaning their clock speed, memory speed, and core speed have functional ranges. If your GPU was the car in the story above, a stock state means that the car you bought has a wooden block behind its accelerator.

    Now there’s nothing wrong being done here by graphics card manufacturers. They just want to make sure that you actually know what you’re doing if you do decide to remove this wooden block.

    When a GPU is overclocked, you’re increasing its clock speed, core speed, and memory speed. You’re giving it more power but you’re also making it work harder. When you overclock the GPU, you should also overclock the CPU.

    But why would you want to overclock both computer hardware? Well, you probably want more power for rendering or gaming. You get higher FPS and better graphics, but at a cost.

    Hardware temps for both CPU and GPU will go far above what they’re supposed to be operating at, so overclocking should be done with care. You also run the risk of crashing your GPU. When that happens, just reboot the system. Modern overclocking software will never allow both GPU and CPU to operate at damaging levels.

    What’s The Optimal or Normal GPU Temperature?

    When it comes to gaming, your graphic card is doing more than usual. So what’s a safe GPU temperature when you’re gaming?

    It depends on the manufacturer, but ideally you shouldn’t be hitting higher than 85-degrees Celsius (185-degrees Fahrenheit), even if some GPUs are meant to withstand higher temsp.

    Modern AMD GPUs and Nvidia GPUs can handle GPU temperatures above 90-degrees but it shouldn’t mean you should constantly hit that. If your fans are working as they should and with proper airflow and ventilation, your current GPU temperature should be within an acceptable range.

    Tips To Help You Lower Your GPU Temperature

    GPU temp can go up and down, depending on your usage. If you’re gaming and you constantly find yourself dealing with higher GPU temperature, then these tips should help you go back to an optimal GPU temperature.

    Clean your Graphics Card, Case, and Fans

    As we mentioned earlier, dust can cause GPU temps to increase unnecessarily. That’s because fans are burdened by the amount of dust around them, not to mention that thick slabs of dust can block vents and thereby reducing airflow.

    Every couple of months, take your PC out on a dry area and clean the fans, graphics card, and the vents with a brush and canned air. Not only are you keeping your GPU temperature within an optimal limit, but you’re also doing your CPU a favor. CPU temperature on a dust-free PC should be as low as the GPU (when gaming and not gaming).

    Increase Airflow to your PC

    Keeping dust out of your PC is a surefire way of increasing airflow, but another way to increase airflow is to make sure that the vents are free from debris and other hindrances.

    Cables can often block exhaust ports when cable management is done wrong, so be sure to check if your cables are kept together properly.

    Make Sure That All Fans Are Running Properly

    When all fans are running as they should, you should be able to reach optimal GPU temperature for gaming and non-gaming tasks.

    But remember that just because your fans are on doesn’t mean they’re running properly. Your fan speed might be running slower than usual, so it’s not able to keep the internal components as cool as it should.

    Download a hardware monitoring software for fan speed if you feel like your fans are not working properly. If you’re manually turning up the fan speeds and don’t feel like they’ve changed that much, maybe your fans are the problem and will need to be replaced.

    Keep Ambient Temperature As Low As Possible

    We can’t control the weather, so ambient temperature limit is going to be a constant battle. If you live in a tropical country, your PC might be hotter than usual especially during the summer.

    Investing in an electric fan, air-conditioning unit, or a water-cooled AIO should be within your best interest as these can help you lower GPU temperature while compensating for the hot climate.

    Wrapping It Up!

    There you have it. You now know how to make sure that your current GPU temperature is within its optimal level. Higher temps would throttle performance on a GPU, so you’re not getting the most out of the unit while it’s cooling down.

    You also want to avoid going above your GPU’s temperature limit or maximum temperature tolerance because you’ll end up damaging it and thereby shortening its lifespan.

    We’ve already provided you with different cooling solutions in this article, but if you feel that your GPU’s temperature are still higher than they should even after doing all of the troubleshooting, there might be something wrong with the GPU.

  • 6 Best Capture Cards For Streaming As Of Jul 2026 – Upgrade Your Twitch Game!

    6 Best Capture Cards For Streaming As Of Jul 2026 – Upgrade Your Twitch Game!

    If you’re an aspiring streamer looking to create gaming console content, or you just want to share your amazing gameplay when you play games, then you need a capture card. There are capture cards meant for PC gaming, while there are capture cards meant for consoles. Apart from helping you stream footage, you can use some capture cards to build your overall stream overlay. You can link your stream capture software, audio mixer software (if you have any), high-end webcam or DSLR, and a stream deck to a capture card to stream or capture HDR footage without compromising video quality.

    The best gaming capture cards in the market today have impressive features. The high end cards allow for recording gameplay at 4K/60Hz and HD recording. Now, to take advantage of a capture card’s power, your streaming computer needs to be just as powerful. The newest Nvidia and AMD graphics cards can get you all the power you need to capture epic gaming moments at the highest resolution and frame rate possible.

    What’s a Capture Card?

    But first, what is a capture card? A capture card is a piece of hardware used together with a third party software to capture on-screen content and encode it for playback through livestream or high-quality recording.

    Capture cards are compatible with PC and consoles as long as they have an HDMI cable. You can also find portable capture cards that you can bring along when you travel. PC gamers and console gamers both enjoy the use of a capture card for streaming or for capturing gameplay.

    How Do You Use a Capture Card?

    How do you capture gameplay footage using a capture card? Well, you need to know what systems are compatible with a capture card first.

    Most capture cards are compatible with the following devices:

    1. Current generation consoles: Nintendo Switch (or Switch OLED), Playstation 5, Xbox One
    2. Personal Computers
    3. Macbooks (check for capture cards’ hardware requirements first)
    4. DSLR Cameras, or any digital camera, with HDMI output

    To use a capture card, you need the following:

    1. HDMI output with HDMI cable
    2. TV or monitor
    3. Personal computer (gaming hardware recommended) for storing or recording footage
    4. Capture software (i.e. Streamlabs OBS, Bandicam, etc.)

    Top 3 Best Capture Cards For Streaming

    Now that we know what a capture card is and how you can use it to record gameplay, it’s time to reveal the top 3 capture cards for streaming and recording gameplay footage.

    Best External Capture Card: Elgato HD60 X

    Elgato HD60 X Best Capture Cards for Streaming

    A brand that needs no introduction. Elgato is one of the leading manufacturers for all recording and streaming hardware. From microphones to stream decks to capture cards, it comes as no surprise that Elgato is on this list.

    The best capture card in the market right now is the Elgato HD60 X. What’s really impressive about this capture card is the 4K passthrough and makes use of G-Sync or FreeSync technologies. The latter was made possible with the latest updates on the Elgato HD60 X.

    This capture card will cost you about $200, and comes with three key capture resolutions:

    • 4k at 30FPS
    • 1440p at 60FPS
    • 1080p at 60FPS

    Resolution and frame rate capabilities in a capture card such as Elgato HD60 X is just remarkable and makes it the best value capture card for streaming or recording. To help you save bandwidth, the encoding is set at 4:2:0 by default. You can set it to 4:2:2 via non-default codecs and will work at 1080p/60FPS or 1440p/30FPS recording, but don’t expect that feature out of the box.

    You get 4:4:4 passthrough functionality, or in this case, you get uncompressed recording. This kind of capture device allows you to record high quality videos without losing a lot of that information.

    All in all, this is an external capture card that’s worth investing on if you’re a serious video game content creator or streamer. I use the Elgato Game Capture HD60 S myself and my console captures have never been as crisp and clear. If you’re due for an upgrade, get the HD60 S or the HD 60 X when budget permits.

    Best Budget Capture Card (External) – EVGA XR1 Lite

    EVGA XR1 Lite Best Capture Cards for Streaming

    Those looking for a capture card but on a tight budget should go for the EVGA XR1 Lite. Do not underestimate this beast just because it’s affordable.

    The EVGA XR1 Lite provides you with 4K/60FPS pass-through, which makes it perfect for the next-gen consoles (PS5 or Xbox One). You can record gameplay at 1080p/60FPS without lag or compression as well. This capture device is also simple to use. All you need is HDMI ports and cables to connect to PC or console and a USB Type C cable. You can also connect it to a DSLR camera for the best quality webcam footage.

    The EVGA XR1 Lite is housed in a sleek yet durable plastic chassis. You also get lighting indicators that lets you know if the card is idle, active, updating, or not working. It’s also certified to use with OBS software, and makes it one of the best plug-and-play capture cards in the market right now. If you have a gaming PC with decent specs, then the EVGA XR1 might be a solid pick amongst the other cards.

    Best High-End Capture Card – Elgato Game Capture 4K60 S+

    Elgato Game Capture 4K60 S+ Best Capture Cards for Streaming

    Second to the HD60, the Elgato Game Capture 4K60 S+ makes it to the top three best capture cards for streaming for a number of reasons. This is also a personal review of sorts given that this is the capture card that I am currently using right now.

    While most capture cards need to be linked to a gaming PC or console to record in-game footage, you only need an SD card for the Elgato Game Capture 4K60 S+ so you can record footage and store it on the card itself. Plug the capture card in, press Record, and you’re all set! All you really need to do from there is to keep on purchasing another SD card when the previous one is filled.

    This is one of the few capture cards in the market right now with their own separate storage to capture game footage. It’s also versatile because you’re recording gameplay footage at 4K/60FPS and in HDR at the same time. Truly one of the best capture cards in the market, and if you can’t get the HD60 X, the Elgato Game Capture 4K60 S+ is a decent second choice.

    Honorable Mentions For Best Capture Cards For Streaming

    The next list will contain what we think are honorable mentions for the best capture cards in the market right now. Most of them are external capture cards, but there are a couple on here that are internal capture cards.

    The list below is not arranged in a particular order, so feel free to check out which one is the best capture card for you.

    Genki Shadowcast (Wireless)

    GENKI ShadowCast Best Capture Cards for Streaming

    If you want to run a streaming software that doesn’t have you installing an external or internal capture card, you might want to consider an wireless capture card. And the best capture card in that category is the Genki Shadowcast.

    The Genki Shadowcast plugs in directly to your streaming video source via an HDMI cable without requiring an extra HDMI cable. You can simply plug it into a free HDMI slot on your consoles (Playstation 5 or Xbox series) or PC to receive the video feed.

    Once the Genki Shadowcast is tied to a source device, you connect to it using a single USB-C cable on your laptop or PC that you’ll use as the capturing device. For those with minimal desk space or those who want to run a compact setup for recording gameplay, or streaming gameplay, then you’ll want to consider the Genki Shadowcast.

    For about $50, this makes the Genki Shadowcast the most affordable capture card for streaming without compromising video quality.

    Asus TUF CU4K30 (External USB-C)

    Asus TUF CU4K30 Best Capture Cards for Streaming

    The Asus TUF CU4K30 is the best capture card for those who don’t have an available PCIe slot or USB-A port but have a USB-C port instead. In simpler terms, if you’re using a third party software for streaming on a thin gaming laptop, chances are you won’t have those two mentioned slots/ports.

    But the Asus TUF CU4K30 comes to the rescue for that one PC gamer who just games on a thin laptop. The Asus TUF CU4K30 supports a 4K/30FPS recording, or you can drop it to 2K resolution at 60FPS, or even better at 1080p/120FPS streaming/capture. The card can also pass video signals from your game system or gaming hardware through your TV or monitor at 4K/60Hz with HDR or 2K at 144Hz or 1080p at 240Hz. The Asus TUF CU4K30 comes in a sleek aluminum chassis with RGB lighting that serves as status indicators.

    AVerMedia Live Gamer Duo (Internal)

    AVerMedia Live Gamer Duo Best Capture Cards for Streaming

    Avermedia’s Live Gamer Duo is probably one of the best internal capture cards out here. As the name implies, you can juggle two video capture tasks simultaneously. Avermedia Live Gamer Duo is equipped with two HDMI inputs (ports) which will let you handle both consoles (Playstation, Nintendo Switch, or Xbox Series) or gaming PC capture and hooking up an HDMI video feed using a DSLR or digital camera.

    Not only is your desktop PC recording and streaming at 1080p/60FPS, but you’re also showing on-screen appearance at the same video quality.

    This internal card captures 1080p/60FPS video game content using its own software, while handling two different video input sources. You’re streaming and recording (lag free pass through) at 4k at 60Hz with Full HD, 1080p at 240Hz, or 1440p at 144Hz video quality. This is the best capture card if you’re serious about creating video game content.

    AVerMedia Live Gamer 4K (Internal)

    AVerMedia Live Gamer 4K Best Capture Cards for Streaming

    AVerMedia Live Gamer 4K is the cheapest internal capture card in the market right now that allows for capturing gameplay at 4K/60FPS footage in HD resolution. Unfortunately, you can’t broadcast at that quality, even with third party software. If that’s not a big letdown for you, the AVerMedia Live Gamer 4K has more to offer.

    AVerMedia Live Gamer 4K lets you record footage at 1080p at 240FPS, which is huge! If you’re the type of PC gamer who likes RGB lighting, then you might enjoy the RGB lighting from the AVerMedia Live Gamer 4K, as it can add more flair to inside your PC.

    Elgato Game Capture HD60 Pro (Internal)

    Elgato Game Capture HD60 Pro Best Capture Cards for Streaming

    4K videos take up a lot of bandwidth when you upload them, and uploading them to your YouTube channel might reduce the quality a bit but not as what you’d anticipate. Your viewers will still have to sit through a few more seconds of buffering longer than what they’re accustomed to.

    If you want to dump your external capture card for an internal one, look no further. The Elgato Game Capture HD60 Pro should be on your radar. This is also probably the only budget capture card from Elgato, so that’s another bonus for bagging the Elgato Game Capture HD60 Pro.

    This internal capture card captures game footage at 60FPS and Full HD. It’ll take up half the PCIe slots that its 4K counterpart consumes and costs you $100 less too. Apart from broadcasting in full HD, you can also record and store footage to your hard drive at 1080p at 60FPS in H.264 codec at a max of 60Mbps bitrate. This internal card also provides you complete support for streaming on your YouTube channel and Twitch.

    With the help of Game Capture HD, OBS Studio, or XSplit, broadcasting at 1080p is flawless even for something as budget-friendly as this capture card.

    Elgato Game Capture 4K60 Pro Mk. 2 (Internal)

    Elgato Game Capture HD60 Pro Best Capture Cards for Streaming

    Probably one of the priciest capture cards on this list, the Elgato Game Capture 4K60 Pro Mk. 2 is a PCIe internal capture card that allows you to capture 4K resolution footage at a max of 140Mbps bitrate without sweating. This kind of video capture power shouldn’t even be made possible, but here we are with the Elgato Game Capture 4K60 Pro Mk. 2.

    The Elgato Game Capture 4K60 Pro Mk. 2 comes with Multi App Access, which lets you network multiple streaming and recording apps to access your capture card simultaneously. You’re able to stream, broadcast, and record gameplay footage at 4K HDR at standard dynamic range.

    AVerMedia Live Gamer Bolt (External)

    AVerMedia Live Gamer Bolt Best Capture Cards for Streaming

    If you’re a PC gamer looking for the best capture card for streaming, but can’t afford the Elgato brand, the AVerMedia Live Gamer Bolt is your next best option. Out of all the capture cards we’ve seen and tested, the AVerMedia Live Gamer Bolt delivers the lowest latency of added latency. This makes it the perfect partner for recording games that require fast reflexes.

    The AVerMedia Live Gamer Bolt delivers 4K/60FPS HD Recording or 1080p/240FPS resolution. The only downside here is that you need a Thunderbolt 3 Port, which you can only find in certain motherboards or gaming laptops.

    Frequently Asked Questions About Capture Cards

    Why Do You Need a Capture Card If You Can Record Using Third Party Software?

    OBS and other third-party broadcasting software are great and all, but they have certain limitations. These limitations include the capture quality from your gaming PC or console.

    For example, let’s say you have an Xbox series console and you want to run an HDMI camera instead of your typical USB web camera. The easiest way for you to get both of these to work on your PC is to hook them up to a capture card.

    OBS and other third-party software are reliant on your system’s resources. Your CPU and GPU will affect capture quality greatly, so you can imagine the strain it will put on low-end hardware. Modern CPUs have gotten quite better at handling multitasking for recording and streaming, but a capture card reduces a lot of that load on your system.

    If you have a console and a gaming PC, a capture card allows you to record gameplay footage or broadcast gameplay from your console using the stream outlay that you use for PC game footage.

    Will Capture Cards Reduce Video Quality and Flashback Recording Quality?

    A good dedicated capture card allows you to increase the quality of your stream or video game recording. As mentioned above, the card reduces CPU and GPU strain from recording and streaming.

    Simply put, you can run on a midrange gaming PC while capturing high resolution and framerate footages from consoles or PC using a capture card.

    This is made possible with something called Chroma Subsampling. This reduces bandwidth requirements, which affect the quality of the final output. Bear in mind that when you upload your content to sites such as YouTube, then the quality might drop even further. But you reduce the quality drop greatly when you use a capture card.

    Do I Need To Use A Built In Audio Mixer To Record Audio?

    You don’t need a separate or built in audio mixer to capture in-game audio. Your capture card will be recording or broadcasting audio as crisp as it records or broadcasts videos.

    With the help of OBS, or any streaming software for that matter, you can use the software’s built in audio mixer to help you generate the best audio quality for recording and broadcasting.

    Of course, you can’t edit your audio when you’re broadcasting but you can always enhance audio for your recordings during post-production.

    Will Price Matter?

    Elgato and AVermedia brands are two of the most expensive brands for capture cards in the market right now, but it doesn’t mean they’re making it less accessible to the public. They have budget-friendly options for gamers who’re getting into streaming or recording but don’t want to invest a lot of money just yet.

    Granted, you can’t expect the same kind of features for their budget-friendly counterparts that you’ll find on the ones that are on this list. As for the other brands, you’ll probably be able to find capture cards that have the same specs as the ones on this list but at a lesser price tag.

    To put it simply, you’re getting what you’re paying for.

    What’s Our Verdict?

    Regardless of your streaming setup, here’s our own verdict for the best capture card (both internal and external):

    External Capture Card: Elgato HD60 X

    There’s no question here that the best external capture card is the HD60 X. It’s got everything you need to record and broadcast gameplay footage, regardless of the capture device. Imagine recording video game content from a game console that matches the video quality of a high-end gaming PC.

    Streaming software is negligible at this point because you can make use of Elgato’s own app to help you improve video input quality and audio quality. But if you can’t afford the Elgato HD60 X, the HD 60 S+ is the second best option for you if you want external capture card.

    Internal Capture Card: Avermedia Live Gamer Duo

    We’re torn between the Avermedia Live Gamer Duo and Elgato Game Capture 4K60 Pro Mk. 2 for this category, simply because you can’t go wrong with choosing either.

    Internal capture cards are meant for people who don’t want to deal with hardware that occupies desk space beside their desktop computer. Unfortunately, current generation game console such as an Xbox series or Playstation 5 can’t install an internal capture card so they’ll have to make do with a wireless card or an external capture card.

  • Best Mini-ITX Cases for Any Budget (Jul 2026)

    Best Mini-ITX Cases for Any Budget (Jul 2026)

    The Mini ITX case is proof that size does not matter at all for PC gamers. In fact, we’ve seen a lot of custom PC builds making use of the mini ITX together with a mini ITX motherboard. No one’s making multi-GPU SLIs or Crossfire gaming rigs anymore. Most of the PC components such as audio cards, Wi-Fi, and Ethernet that we’ve relied on for years are now embedded on to the motherboard. M.2 SSDs are roughly the size of a finger and cloud services are taking care of mass data storage. No one really needs all that bulk from full tower PC cases.

    With all that being said, we’re going to talk about the best mini ITX cases in the market right now and why you shouldn’t be ignoring them. Chances are, you’re reading this because you no longer need to rely on bigger PC cases to build a decent gaming PC.

    What Are Mini ITX PC Cases?

    A mini ITX, or ITX Case, is different from all the other PC cases in the market because it’s compact and smaller. They allow for more desktop space while still handling powerful PC components without being limited by compatibility. Majority of mini ITX cases right now are no bigger than the size of a laptop, which is a great choice for people adopting a minimalistic approach to workstation management or those who’re conscious about available table space.

    What you are lacking in size doesn’t necessarily mean you’re going to be lacking in the performance department. Mini ITX builds are just as powerful and efficient as a full tower PC, albeit you only have to deal with minimal compatibility issues.

    The Top 10 Best Mini ITX Cases In The Market

    We’ve curated the best mini ITX PC cases for you to choose from. We’ve done hours of research to come up with this top 10 list, along with an Honorable Mentions list right below. Note that the list is not arranged in any particular order.

    Cooler Master NR200

    Best Mini-ITX Case In The Market

    Cooler Master NR200 Best Mini ITX Case

    When it comes to building a mini ITX PC, your biggest concern is the case’s ability to handle powerful components, which end up being bigger than most mini ITX cases. But with the Cooler Master NR200, you don’t have to worry about that. It can accommodate a graphics card up to 330mm in length, or to put it simply, can fit an Nvidia GeForce RTX 3090. There are two racks for 2.5 inch and 3.5 inch drives with enough room for NVM.e SSD. It can also accommodate a either a 240mm liquid or CPU cooler.

    The fact that it can handle a 30XX series GPU and liquid cooling makes the Cooler Master NR200 the best mini ITX case in the market right now.

    Razer Tomahawk

    Best Mini ITX PC Case For RGB Enthusiasts

    Razer Tomahawk Best Mini ITX Case

    If you’re looking for a stylish mini ITX, the Razer Tomahawk will get you sorted out with all the RGB swag you need. The Razer Tomahawk can accommodate 240mm liquid cooling radiators with 3 slots for 2.5 inch drives, along with three more expansion slots.

    The front panel of the Razer Tomahawk gives you access to different ports along with the Razer Chroma Lighting Effects found at the bottom of the case. The stylish underglow definitely makes the Razer Tomahawk a premium Mini ITX case in the market.

    Lian Li Q58

    High End Mini ITX Case

    Lian Li Q58 Best Mini ITX Case

    Second to the Cooler Master brand, we have Lian Li as one of the top brands who make the best mini ITX cases in the market. And on this list, we have the Lian Li Q58, a premium mini ITX case with a hefty price tag. The PC case is made from a mixture of steel, tempered glass, and aluminum, making the Lian Li Q58 a durable and versatile case. The Lian Li Q58 comes with a PCIe 4 Riser cable which allows you to install a RTX 3000 or RX 6000 series graphics card.

    As for the thermal issues, Lian Li Q58 has a lot of mesh panels along with a mesh GPU intake. There’s a total of 3 fan supports to help keep your PC components cool even when running demanding games. You can even install a large 280mm radiator at the top of the chassis, beating out the Cooler Master NR200 and Razer Tomahawk above.

    Thermaltake Tower 100

    Mini ITX Case With More Compact Design

    Thermaltake Tower 100 Best Mini ITX Case

    If you ever wanted to know what a vertically inclined console would look like, it would be a gaming PC built with a Thermaltake Tower 100. Make no mistake about this compact tower because it has enough room for both CPU coolers and full-sized graphic cards, albeit you’d be looking at somewhat of an odd motherboard I/O setup.

    The Thermaltake Tower 100 comes with pre-installed routing channels that have cables coming out the back, but if you don’t use them, cables exit out the top behind the top filter. There are two USB 3.0 slots with a USB 3.2 Gen 2 Type C port in the front panel along with your headphone and microphone jacks.

    The Thermaltake Tower 100 can also accommodate a standard ATX power supply, so you won’t have to spend extra on purchasing an SFX II power supply. Air flow won’t be an issue here since air is pulled from two directions (back and underside of the case) and exits at the top. You also get transparent side and front panels that let you showcase your RGB components and cable management swag.

    BitFenix Prodigy M2 2022

    Best Mini ITX Case with Cube Aesthetics

    BitFenix Prodigy M2 2022 Best Mini ITX Case

    If cube is your aesthetics, then the BitFenix Prodigy M2 2022 model is the PC case for you. The design is sleek and first impressions are almost always positively guaranteed. This mini ITX PC case measures at about 250x310x340mm and comes with two easy-to-grab handles so you can easily lug this around.

    The side panels comes with two USB 3.0 ports with HD audio jacks. The case supports GPUs up to 310mm long (as long as you remove the HDD cage). If you have a modular power supply design, the cage might come in handy too. As for storage, the BitFenix Prodigy M2 2022 can equip up to five 2.5″ SSDs or 3.5″ HDDs. Your choice.

    Heating is not an issue here. There are vents located underneath and on the side, along with two 1000RPM/120mm fans that’s built in within the case. It can also accommodate a 240mm radiator for those who want to do some liquid cooling instead.

    At a glance, you might think that this is a large ATX tower and makes a great choice for those who want a compact mini ITX PC case without losing customization and expandability.

    Lian Li TU150

    A Portable Mini ITX Case For The Minimalist

    Lian Li TU150 Best Mini ITX Case

    There’s so much to talk about with the Lian Li TU150 mini ITX PC case. It has enough space for a triple-slot GPU, SFX power supply, four fans, and not to mention areas to route cables located at the back of the motherboard tray and roof. It may not be the most portable case on this list simply because of what it can accommodate, even though it’s a tad bigger than some of the cases on this list.

    Fractal Design Node 202

    A Console-Style Mini ITX Case

    Fractal Design Node 202 Best Mini ITX Case

    If you want a mini ITX case that looks like a console, the Fractal Design Node 202 is the case for you. The Fractal Design Node 202 dons the classic rectangular Xbox vibes and looks just as sleek as the console itself.

    There are two versions: one with power supply and one without. You get up to 10L of storage space, but you need smaller components for cooling. You’ll need at least two low profile 120mm fans, and that’s the best possible choice of fans you can have. You can pick up a liquid cooler for the CPU as well, but even with this tight of a space, heating is never going to be an issue. There are ventilation slots located right around the CPU and GPU mounts.

    Thermaltake Core V1

    Overall Best Budget Mini ITX Case

    Thermaltake Core V1 Best Mini ITX Case

    Whoever said Thermaltake mini ITX PC cases are expensive might be lying because there is one entry from Thermaltake here that lets you take the budget route. Introducing the Thermaltake Core V1.

    The Thermaltake Core V1 accommodates up to 285mm graphics card with room for standard ATX PSU and CPU coolers for up to 140mm. All of which are extremely affordable PC components, by the way. When it comes to budget compact cases, the Thermaltake Core V1 is the KING!

    The front of the Thermaltake Core V1 case allows you to mount 200mm fan with room for two 80mm fans at the back, so the case actually has direct airflow through it. The motherboard is horizontally inclined, which means your graphics card and other components are vertically aligned.

    Phanteks Eclipse P200A

    Impressive Mini ITX Tower Case

    Phanteks Eclipse P200A Best Mini ITX Case

    The Phanteks Eclipse P200A may be a mini ITX, but it doesn’t adhere to mini ITX builds. At most, the Phanteks Eclipse P200A will resemble closer to that of a standard ATX build due to the fact that it looks like a full tower case.

    It’s larger than most mini ITX cases, so it can accommodate standard PC hardware. You’re looking at 3-slotted graphic cards up to 355mm long and ATX power supply installed into the Phanteks Eclipse P200A. You have enough clearance for 165mm CPU coolers as well as clearance for multiple 240mm radiators if you’re just into liquid cooling. You can expand further into one 280mm cooler through the front slot. The Phanteks Eclipse P200A comes with an integrated front dust filter and extra fan mounts so you get plenty of air flow through the case.

    Lian Li PC-O11D Mini

    A Larger Than Usual Mini ITX Case

    Lian Li PC-O11D Mini Best Mini ITX Case

    We’re not playing favorites here. It just so happens there are three entries from Lian Li on this list because they’re just so good at what they do. The third mini ITX case from Lian Li is the PC-011D Mini.

    If you want something that’s a mix of a standard case and a really small mini ITX PCs, then the Lian Li PC-O11D Mini is the one for you. The Lian Li PC-O11D Mini requires a SFX L Power Supply or SFX, which might be more expensive than standard ATX PSUS, but hey, the good news here is that the PSU is individually mounted and has its own section. You get enough room for your other components.

    The Lian Li PC-O11D Mini accommodates both mini ITX boards and ATX motherboards, which gives you a lot of freedom for your build. You have enough room for four HDDs, with two of them being 3.5″ removable racks.

    Honorable Mentions

    We got our top 10 out of the way, and we’re moving on to our honorable mentions. These are just as good as the other mini ITX cases mentioned above.

    Phanteks Evolv Shift 2

    Best Slim Design Mini ITX

    Phanteks Evolv Shift 2 Best Mini ITX Case

    If you want a slim mini ITX case, the Phanteks Evolv Shift 2 is worth considering. It’s on this list for several reasons, on top of its incredible slim aesthetics.

    The Phanteks Evolv Shift 2 accommodates a full-sized graphics card up to 335mm long, which is basically any other graphics card out there. Because of the slim case, you’re going to end up using a SFX power supply, but don’t even fret because everything about the Phanteks Evolv Shift 2 is worth it.

    You get CPU coolers for up to 85mm tall, so either a low profile CPU cooler or a 140mm to 120mm AIO cooler should do the trick. You also get two color options for Phanteks Evolv Shift 2: black and grey. You get dual side tempered glass panels and the case can accommodate a single 3.5″ HDD or up to three 2.5″ drives.

    Thermaltake Suppressor F1

    Cube Aesthetics Mini ITX PC Case

    Thermaltake Suppressor F1 Best Mini ITX Case

    Looking like something out of a sci-fi film, the Thermaltake SUPPRESSOR F1 is a budget-friendly mini ITX case with minimalism at its core. The core comes with dual 2.5″ and 3.5″ drive bays, so you can set up four storage devices using the modular device racks, which is a great feature for the price you’re paying. You also get dual expansion slot that can accommodate cards up to 285mm.

    As you can see from the image alone, the Thermaltake SUPPRESSOR F1 was built with ventilation in mind. It comes with a 200mm intake fan preinstalled in front with two 80mm fans in the rear, so you get direct air flow through the case. You also get enough space for liquid cooling for radiators up to 140mm.

    Cooler Master Elite 110

    Cooler Master Brand On a Budget

    Cooler Master Elite 110 Best Mini ITX Case

    If you’ve been told that you can get a Cooler Master case at an affordable price tag, they were probably referring to the Cooler Master Elite 110. Don’t be fooled by the $50 price tag because there’s a reason why the Cooler Master Elite 110 is on this list, and it’s not the price tag.

    The Cooler Master Elite 110 comes with mesh front panel design that allows for front and back air flow, while accommodating a 120mm radiator. It weighs about 6lbs or less so it’s lightweight and portable.

    You can use GPUs up to 210mm long and CPU cooler up to 76mm tall. The Cooler Master Elite 110 can accommodate multiple storage devices with four 2.5″ device bays and three 3.5 inch device bays. Of course, to adhere to its budget-friendliness, the Cooler Master Elite 110 accommodates a standard ATX PSU up to 180mm long.

    NZXT H210i

    Best Performing Overall Mini ITX Case

    NZXT H210i Best Mini ITX Case

    One of the best overall mini ITX case out there is the NZXT H210i, and it comes with a premium price tag too.

    The NZXT H210i offers more clearance than any other mini ITX chassis listed on here, so it’s no surprise that the case is dubbed as one of the top mini ITX cases for custom PC builders.

    NZXT H210i can accommodate graphics cards up to 325mm long and CPU coolers up to 165mm tall. Sure, there are other mini ITX systems on here that can house longer GPUs but the reality is that you don’t need anything longer than 325mm. An RTX 3090 is under 325mm long, so the NZXT H210i would be the perfect mini ITX chassis for such a GPU.

    If you want to build a high-end gaming mini ITX system, the NZXT H210i should be your only choice.

    Thermaltake Core P1

    Best Open Air Mini ITX Chassis

    Thermaltake Core P1 Best Mini ITX Case

    We talked about the Core V1, but now let’s talk about the Thermaltake Core P1. And yes, that’s exactly how it looks like. It’s an open air mini ITX case with a sleek tempered glass design. It comes with two 2.5″ external drive bays with one 3.5″ and one 2.5″ internal drive bay. It also comes with five expansion slots.

    As for clearance, the Thermaltake Core P1 can accommodate CPU cooler height up to 170mm with GPU length up to 380mm with 240mm AIO clearance on the left side. Did we mention that this is a budget friendly case and comes in at a price tag of less than $100?

    Is Mini-ITX Bad For Gaming?

    Regardless of the best mini ITX case you’ve chosen from the list and the mini ITX form factor, the biggest concern for any mini ITX case is its dust management and cooling features. Insufficient cooling might put more strain on your gaming rig, whether you have a full tower or the best mini ITX case. Dust filtration and prevention can also kill your system faster than you can say “HARDCORE”.

    But when it comes to components, some of the best mini ITX cases we’ve listed here can house even the most powerful of GPUs (e.g. RTX 3090) and cooling won’t be an issue for some because they have enough clearance for liquid cooling systems and added internal fans.

    What Are Some Limitations Of A Mini ITX PC?

    Space is the biggest limitation from any mini ITX case because it’s a compact case all throughout, and this is also common among small form factor builds and micro ATX builds. But there are other limitations as well:

    Expansion Might Be A Challenge

    Mini ITX motherboards might give you a challenge for expansion, especially when it comes to RAM. You’ll probably be limited to 16GB or 32GB dual channel RAMs with limited frequency too. You’ll only get one PCIe slot, but then again, no one’s building multiple SLI GPUs or Crossfire builds anymore.

    For expansion slots, you’ll find that most of the ones we listed here have two expansion slots while there are a few with three expansion slots. Other than that, expansion is only a primary concern for PC builders who want to make the most out of their mini ITX motherboards and the case itself.

    Larger GPUs Might Not Fit All Mini ITX PC Cases

    Not all large GPUs will fit inside mini ITX cases, but as we mentioned earlier, the RTX 3000 series don’t exactly take up much space either. Manufacturers of GPUs will provide the necessary details so you’ll be able to determine whether or not a GPU will fit inside your compact case.

    Overheating Might Be A Problem

    One of the biggest worries for using mini ITX cases is overheating due to the compact nature of the space. But more often than not, this is a minor misconception. From what we’ve listed on here, the best mini ITX case can accommodate liquid cooler and CPU cooler systems without any difficulty. Some cases even have better air flow than mid tower cases.

    Unless you’re planning on overclocking your components, then there’s no real issue for overheating here.

    What Do You Want From A Mini ITX?

    The compact design of the best mini ITX PC might is one of the biggest aesthetic features that draw in a lot of PC builders to use the case. When you’re building a powerhouse of a workstation, you might consider a mid tower case or a full tower case, but there are builders out there that will use a mini ITX chassis.

    Limitations aside, your options for a mini ITX case are endless. This article alone gave out 15 of the best mini ITX cases in the market right now. All you have to do is secure the other components and you’re on your way to building a high-end gaming rig that’s compact and doesn’t take up a lot of desk space.

  • Single Channel vs. Dual Channel vs. Quad Channel Memory

    Single Channel vs. Dual Channel vs. Quad Channel Memory

    When it comes to building your PC for the first time, you need to decide whether you are opting for a single stick of RAM or two sticks of RAM with the same capacity as one stick.

    It’s a choice that leaves many first-time builders and gamers scratching their heads, unsure what they should do and which is the better option. 

    And there’s much debate about this. Most users will say two sticks of RAM is best, allowing you to utilize the benefits of dual channel memory, but are they right? And how does it relate to gaming? Are you going to notice a big difference in performance? And what on earth is quad channel configurations?

    Are these just some of the questions that keep you up at night, wondering how you should approach your PC build?

    Well, you aren’t alone! And we know just how hard these questions can be to answer, which is why we are here today to lend a helping hand! 

    We took to the games, ran some tests, and here with results that can help you make your decision! Keep reading to find out all you need to know about single and dual channel memory to help make your decision today!

    What does Single, Dual, and Quad Channel Mean?

    For those new to the PC world or just a little unsure, let’s have a quick recap! If your PC has one stick of RAM, then it’s a single channel configuration.

    Two stocks of RAM are dual-channel configurations, allowing you to double your RAM in some cases or split the capacity over two spaces.

    Four sticks of memory is a quad channel configuration, depending on if your CPU and motherboard can support quad channel memory (you can check the product specification of your CPU and motherboard for this information). 

    You can also run three sticks of memory, but it’s hard to come by a motherboard with a triple channel configuration.

    In most cases, installing three RAM sticks allows you to utilize two of the sticks as a dual channel and the remaining stick as a single channel configuration. 

    So what should you choose? Running two or four lower capacity memory sticks as dual or quad channel configurations (if your computer build supports this) offers the same capacity as a larger stick of RAM but doubles or quadruples the amount of memory bandwidth available. 

    Adding a second or fourth stick of RAM provides you with a parallel channel that can be accessed simultaneously as the first stick of RAM.

    Commonly, people think adding this and increasing the available memory bandwidth; your system will perform better. 

    But is that true? Let’s find out! 

    Single Channel vs. Dual Channel Memory 

    To find out which configuration offered the best performance, we took two kits of DDR4 3200MHz RAM and tested them on a range of common memory configurations available.

    One kit was a 4x4GB kit and the other 4x8GB, which we were able to test in the following configurations: 

    1. 8GB Single Channel configuration
    2. 8GB Dual Channel configuration
    3. 16GB Dual Channel (two sticks) 
    4. 16GB Dual Channel (four sticks)

    We ran some of the most popular games, such as Grand Theft Auto V, Dirt 4, Middle Earth: Shadow of War, and Battlefront II. We used an i7 processor, a GTX 1060, and a 1920 x1200 monitor to run our tests too. Check out our results below! 

    It’s worth noting that the i7 processor we used does not support quad-channel memory; instead, it only allows for dual channel configurations.

    The slight error we made here means our results aren’t entirely accurate when comparing dual channel and quad channel memory. We know, we are just as annoyed as you are! 

    But that doesn’t mean our results aren’t helpful. Instead, use them to look at single channel vs. dual channels performance and the differences between running four sticks of RAM as dual channel and two sticks of the same capacity as dual channel. 

    The Test Results and Analysis 

    So, what did we find? Well, across all games tested, there was no significant difference between single and dual channel memory and how they performed.

    As we mentioned earlier, we made a slight boo-boo, meaning that the 16GB quad and 16GB dual results should make no difference.

    There didn’t appear to be a performance boost when running four sticks of 4GB RAM compared to two sticks of 8GB of RAM. 

    We saw that single channel memory configuration had a far higher CPU usage than dual channel configurations. In some tests, it was between 10-25% higher than dual channel configurations! Why does this happen?

    We concluded that the extra memory bus available in dual and quad channel configurations takes some of the workloads and pressure from the CPU.

    We might not be right, but from our results and assessing our PC, it’s the conclusion that we have come to. 

    So if there is a little difference in performance, what does it mean for the budget-friendly PCs? There could be a noticeable performance drop when running a single channel compared to dual or quad channel configurations.

    But we assume that the performance difference would be minimal, especially for first-time builders and gamers. 

    What can we take from these results, then? It’s clear that there is little difference between single channel and dual channel configurations in terms of gaming performance.

    There was a difference in CPU usage, which could put your PC under some pressure if you were to run high-performance games frequently.

    When your CPU is under this kind of pressure, and its usage is upped, you might notice more noise or heat, and you should consider your cooling system and upgrading this where necessary to combat it. 

    However, we would say that’s only essential for high-performance games or noticing that your PC is running louder and hotter than normal.

    While there is slightly more performance from the dual channel and quad channel setups, it’s not entirely necessary; from our results and what others seem to say online, there’s little gaming performance difference between these RAM configurations. 

    Should I stick with Single Channel Memory?

    After those results, you might be wondering, should I not just stick with single channel memory? After all, if there is little performance difference, will you feel the benefits of dual or quad channel memory?

    Well, in terms of gaming, you don’t necessarily need a dual or quad channel configuration. You can use a single stick of RAM and enjoy your games without any noticeable performance difference. 

    But that doesn’t mean you should rule out dual channel configurations! There are some instances where it makes sense to opt for a dual channel configuration. Let’s look at some of those cases now to help you decide if a dual channel configuration is the best option for you. 

    Dual kits can be cheaper. 

    Sometimes, especially when shopping in the sales. Dual kits of RAM can be cheaper than a single stick! In these cases, it’s best to save yourself some money and have the dual kit of RAM!

    It’s not often that we see dual kits cheaper than single kits, but when there are so many sales that run across the year, you never know when you are going to pick up a bargain. If you’re on a tight budget and still want to acquire monitors under $100, then go for dual kits.

    It’s best to keep your eye out for any sales or offers and check them frequently to see if there’s an offer that interests you, especially if you are building your first PC or updating one.

    When looking for RAM (or any PC component), always consider your budget, and remember to stick to it as best as possible. Different PC cases can also affect your decision on how big your RAM kits can be.

    Along with your budget, consider how many slots your motherboard has to accommodate the RAM. You should also consider the size of the RAM when looking at your budget.

    If you can only afford 8GB of RAM, for example, and your motherboard only has two memory slots, it might be best to opt for a single 8GB stick of RAm compared to two 4GB sticks of RAM.

    Why? Well, when the time comes for you to upgrade your system to 16GB of RAM, all you need to do is grab another 8GB stick of RAM.

    Had you opted for two 4GB sticks, then you would need to buy an entirely new set of RAM, costing you more money later down the line!

    If you’re going to choose 4 sticks of RAM vs 2 sticks, then be ready to shell out a lot of money to upgrade.

    What about aesthetic purposes? 

    If the aesthetics and appearance of your PC are important to you, then you might want to grab a dual or quad kit instead of a single stick of RAM. A single stick of RAM on a motherboard with four DIMM slots won’t look as clean as two or four sticks of RAM. 

    How your PC looks isn’t important to everyone, but if you can see your ports or have a PC case with a glass panel, then you might want a cleaner and more appealing look than you currently have. In these cases, if the price is right, a dual or quad kit could be a good option to consider. 

    If the price is right or the difference between kits is minimal and offers the same capacity of RAM, then filling up your DIMM slots with RAM could be a good idea.

    Remember, not everyone considers the appearance of their PC to be of importance, so don’t feel like you need to do this if it doesn’t matter to you. 

    What about in professional settings? 

    While we didn’t run those tests today, they are certain factors that should be considered! Other tests we have seen show a larger performance difference between single channel and dual channel memory when used in professional applications.

    Design, editing, and tasks that use a great deal of CPU power will benefit from more RAM or dual channel configurations where possible. 

    If your gaming PC is also using similar programs, you might want to consider a multi-channel memory configuration. It should give you the boost in performance that you need, without causing too much trouble for your CPU and its performance! 

    Final Thoughts 

    And just like that, we have come to the end of our memory journey today! As you can see, there is little difference between single channel and dual channel RAM configurations.

    While a dual channel configuration can boost your performance, the slight boost doesn’t always mean that it’s worth the higher cost or taking up additional slots on your PC. 

    If your PC is just for gaming, then you are unlikely to notice a difference between a single and dual channel configuration, and we recommend that you go for the one that’s best for your budget.

    Remember that your CPU usage might be a little higher, and you should consider any implications of this before making your decision. 

    There are, of course, other reasons to choose dual or quad channel RAM, as we mentioned earlier, and it’s worth considering these too before making your final decision.

    Weigh up all your options and the factors we have mentioned today before making your final decision. 

    Remember to set your budget and stick to it where possible to find the best RAM configuration for you! Before you go today, be sure to check our FAQ section out below to get any remaining questions answered! 

    Frequently Asked Questions 

    Get your last-minute queries answered here!

    Are there more memory channels than 4? 

    Yes! You can have six or eight memory channels available, depending on the PC build, offering you plenty of space to add as much RAM as you need!

    However, these setups aren’t very common.You usually can’t just purchase them, and they need to be specifically ordered for use. In most cases, you won’t need the extra memory channels unless you need a lot of RAM to run certain programs. 

    It’s best to strongly consider all your options before specially ordering these extra memory channels, as they can be expensive! 

    What does RAM do? 

    RAM refers to memory and the amount of data that can be quickly accessed when your PC is being used. It’s different from the storage space on your computer, where files, photos, and programs are stored. So what’s the difference? 

    Your RAM’s job is to take care of data that needs to be accessed quickly. Think about playing an online game like World of Warcraft.

    There’s a rapid interchange of data when you play between your computer and the game’s server. Your RAM takes care of this, storing the data that needs to be accessed quickly and allows you to play the game with no hiccups. 

    RAM also aids your computer outside of gaming too. It helps keep several programs running at the same time and multiple applications!

    A bigger RAM will allow you to do this with ease, making your PC run smoothly and should prevent any lagging or crashes.

    If your PC is struggling to run multiple programs, or you find that it crashes a lot, you might not have enough RAM to support your PC and its needs. 

    How much RAM do I need?

    The short answer is: it depends. In most cases, 8GB of RAM will suffice and offer plenty of space and power for gaming.

    However, light gamers or first-time PC builders might be able to get away with 4GB of RAM. You might find that 4GB is more than enough initially, especially if you are on a budget and it’s all you can afford. 

    Remember that RAM isn’t responsible for everything, and the power of your CPU and motherboard will also determine the performance of your PC.

    For more serious gamers or those looking to run more powerful programs and applications, you might want to consider 16GB of RAM. This doesn’t need to be done initially if your budget doesn’t allow it. 

    We recommend starting with a single stick of 8GB of RAM, leaving you with space to double your RAM easily if need be, or your budget allows for an upgrade!